Tag: troubleshooting

  • Water Heater Not Working A Troubleshooting Guide

    Water Heater Not Working A Troubleshooting Guide

    Water Heater Not Working? This comprehensive guide dives deep into the common causes, safety precautions, and repair strategies for your malfunctioning water heater. From understanding the differences between electric and gas heaters to performing basic maintenance, we’ll walk you through every step to get your hot water flowing again.

    We’ll cover everything from simple troubleshooting to more complex repairs, making sure you feel confident and equipped to tackle the problem yourself or know when to call in a professional. Let’s get started!

    Troubleshooting the Problem

    Fixing a malfunctioning water heater can be a frustrating experience, but understanding the potential causes can significantly speed up the repair process. This guide provides a comprehensive breakdown of common issues and troubleshooting steps, helping you pinpoint the problem and potentially save yourself a costly call to a professional.Identifying the root cause of a malfunctioning water heater is crucial for effective troubleshooting.

    A methodical approach, combining visual inspections with understanding the nuances of different water heater types, is key to a successful resolution. This process often involves a combination of observation, testing, and analysis.

    Common Reasons for Water Heater Malfunctions

    Water heaters can malfunction due to a variety of reasons, ranging from simple issues like low water pressure to more complex problems like faulty components. A thorough understanding of these potential causes is the first step in effective troubleshooting. Sediment buildup, a common culprit, can restrict water flow and impede heat transfer, leading to inconsistent or no hot water.

    Electrical issues, like a tripped circuit breaker or a malfunctioning heating element, can also prevent the heater from operating correctly. Gas leaks or supply issues are also potential causes, especially in gas-powered water heaters, requiring immediate attention.

    Step-by-Step Troubleshooting Process

    A systematic approach is crucial when troubleshooting a water heater malfunction. Start by checking the obvious—the water pressure. If the water pressure is low, the problem might not be the heater itself. Then, visually inspect the water heater for any signs of damage, leaks, or unusual noises. Next, examine the water heater’s components, such as the heating element, thermostat, and gas valve (if applicable), to determine if any are malfunctioning.

    Thoroughly read the water heater’s manual for specific troubleshooting steps and warnings.

    Water Heater Types and Typical Failure Points

    Different water heater types have varying potential failure points. Electric water heaters, for example, are prone to issues with the heating element, thermostat, or electrical connections. Gas water heaters, on the other hand, can encounter problems with the gas valve, igniter, or pilot light. Tankless water heaters, while often more efficient, can experience issues with the heat exchanger or water flow control mechanisms.

    Visual Inspection for Damage or Leaks

    Regular visual inspections of your water heater can help detect potential problems early on. Look for signs of corrosion, rust, or leaks around the tank or connections. Check the area surrounding the water heater for any signs of water pooling or dampness. Inspect the pipes and connections for any visible damage.

    Comparison of Water Heater Problems and Potential Causes

    Problem Possible Causes
    No Hot Water Low water pressure, faulty heating element, faulty thermostat, tripped circuit breaker, gas supply issues, sediment buildup.
    Intermittent Hot Water Faulty thermostat, gas supply issues, sediment buildup, loose connections, problems with the temperature control system.
    Loud Noises Sediment buildup, loose parts (e.g., internal components), faulty pressure relief valve, issues with the heating element.

    Safety Precautions

    Working on a water heater, whether it’s a gas or electric model, requires careful attention to safety. Ignoring safety precautions can lead to serious injuries or property damage. Understanding the potential hazards and implementing appropriate safety measures is crucial for a safe and successful repair process.Proper safety procedures minimize risks associated with gas leaks, electrical shocks, and burns.

    These measures are essential not just for the technician performing the repairs but also for anyone in the vicinity of the water heater during the process. Failure to adhere to these precautions could result in significant and potentially life-threatening incidents.

    Importance of Safety Measures

    Safety measures are paramount when working on water heaters. Neglecting these precautions can lead to severe consequences, ranging from minor burns and injuries to potentially fatal incidents. Proper safety procedures mitigate risks associated with gas leaks, electrical shocks, and burns. Following these guidelines protects both the technician and those around the water heater during repair work.

    Safety Precautions Before Starting Repairs

    Before starting any repairs, it is essential to take several safety precautions to prevent accidents. These precautions are designed to protect you from potential hazards associated with the water heater.

    • Turn off the power supply to the water heater. This is crucial for electric water heaters to prevent electric shocks. This step significantly reduces the risk of electrocution.
    • Shut off the gas supply to the water heater. This precaution is critical for gas water heaters to prevent gas leaks and explosions. Turning off the gas supply is a fundamental safety measure.
    • Allow the water heater to cool down completely. This prevents burns and ensures the safety of anyone working on the water heater. A cooling-down period is essential for avoiding thermal injuries.
    • Inspect the area around the water heater for any potential hazards. Look for loose wires, damaged pipes, or other safety concerns. Identifying potential hazards beforehand minimizes risks.
    • Wear appropriate protective gear, such as gloves, safety glasses, and long sleeves. Protective gear safeguards against burns and other potential injuries. Using the right safety gear is crucial to avoid injuries.

    Risks Associated with Improper Handling

    Improper handling of gas or electric water heaters can lead to various risks. Gas water heaters, if not handled correctly, can cause gas leaks, which can be dangerous and even explosive. Electric water heaters pose a risk of electric shock if the power supply isn’t disconnected. These risks are easily avoidable with proper safety measures.

    Shutting Off the Gas Supply

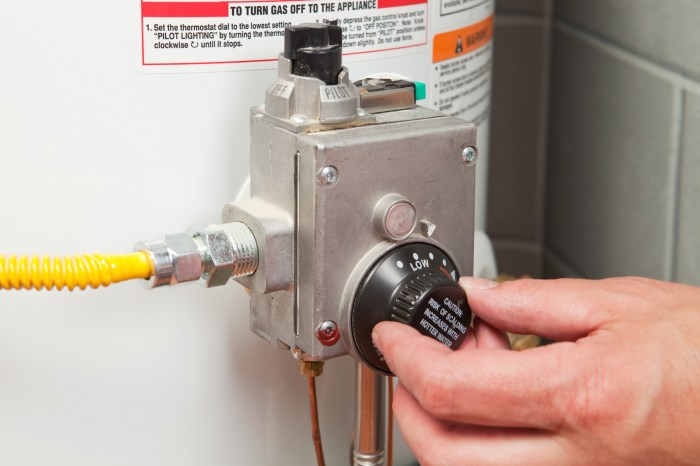
    Shutting off the gas supply to the water heater is a critical safety step. This procedure prevents gas leaks and associated hazards. Consult your water heater’s manual for specific instructions on how to turn off the gas supply, as procedures vary between models.

    Properly shutting off the gas supply prevents dangerous gas leaks.

    Potential Hazards and Safety Measures

    The following table Artikels potential hazards associated with water heater repairs and the corresponding safety measures to mitigate those risks:

    Hazard Safety Measure
    Electric Shock Turn off the power supply to the water heater at the circuit breaker before performing any work.
    Gas Leaks Check for gas leaks using a soapy water solution before lighting or working on the gas-powered water heater. Use caution when lighting the pilot light.
    Burns Wear appropriate protective gear, such as heat-resistant gloves and long sleeves, and ensure the water heater has cooled down completely before working on it.

    Repair and Maintenance: Water Heater Not Working

    Keeping your water heater in top condition is crucial for both its longevity and your household’s comfort. Regular maintenance can prevent costly repairs down the road and ensure a consistent supply of hot water. This section will guide you through essential maintenance tasks, from basic checks to more involved replacements.Proper maintenance extends the life of your water heater and prevents potential issues.

    By performing regular checks and addressing minor problems promptly, you can avoid costly repairs and ensure a reliable source of hot water.

    Basic Water Heater Maintenance

    Regular checks and simple tasks are key to maintaining your water heater’s performance. These preventative measures can save you money and time in the long run.

    • Checking Water Pressure: Adequate water pressure is essential for efficient operation. Use a pressure gauge to ensure the pressure is within the recommended range for your water heater model. Low pressure can indicate a problem with the water supply lines or the water heater itself. High pressure, while less common, can also cause issues.
    • Draining Sediment: Sediment buildup in the tank can reduce efficiency and potentially damage the heating elements. Regular sediment draining, typically every few years, can significantly extend the life of your water heater. The frequency depends on water hardness and usage.
    • Checking the Temperature: Maintain a consistent temperature setting to optimize efficiency and avoid potential safety hazards. Regularly check and adjust the thermostat according to your needs.

    Replacing a Faulty Heating Element

    A faulty heating element is a common water heater problem. Replacing it yourself can save you money and frustration, especially if you are comfortable with basic plumbing tasks.

    1. Safety First: Turn off the water supply to the water heater and shut off the gas supply if applicable.
    2. Drain the Water Heater: Use a drain valve or a garden hose to carefully drain the tank. Properly manage the drained water. Always keep safety in mind and use caution when working with hot water and potential leaks.
    3. Locate the Heating Element: Identify the faulty heating element. Consult your water heater’s manual for the exact location and connections.
    4. Disconnect Electrical Connections: Disconnect any electrical connections associated with the heating element. Carefully follow the electrical safety guidelines.
    5. Remove the Heating Element: Using appropriate tools, carefully remove the old heating element. Be cautious to avoid damaging the tank or other components.
    6. Install the New Element: Connect the new heating element to the appropriate terminals, ensuring proper alignment and connections. Refer to the manufacturer’s instructions and the water heater’s manual.
    7. Reconnect Water Supply: Carefully turn the water supply back on. Check for leaks.
    8. Test the Water Heater: Run the water heater to ensure the new heating element is functioning correctly.

    Draining Water Heaters

    Various methods exist for draining water heaters. Choosing the right method depends on your comfort level and the specific water heater model.

    My water heater’s on the fritz, and frankly, it’s a real downer. It’s making me feel as cold as a recently released “blouse pale spectre the wake cover” ( blouse pale spectre the wake cover ) and I’m starting to wonder if I need a whole new system. Hopefully, a simple fix will get me back to hot showers soon, though.

    Method Description Advantages Disadvantages
    Using a Drain Valve Most water heaters have a built-in drain valve. Follow the instructions in your water heater’s manual. Simple and straightforward, often the easiest method. May require some effort to completely drain the tank.
    Using a Garden Hose Directly connect a garden hose to the drain valve to drain the water into a container or drain. Allows for complete draining and efficient disposal of water. Requires more space and careful handling of the hose.

    Replacing a Gas Valve on a Gas Water Heater

    Replacing a gas valve on a gas water heater requires careful attention to safety and proper procedure. This is a task best left to a qualified technician if you are not experienced with gas lines.

    My water heater’s on the fritz, and honestly, it’s a bit of a bummer. Thankfully, it seems like my chilly shower woes might be overshadowed by something far more thrilling – The Weeknd has announced some After Hours-inspired haunted houses, which are apparently going to be seriously spooky! the weeknd announces after hours inspired haunted houses.

    Hopefully, the thrill of those haunted houses will distract me from the freezing water situation long enough for me to get a new water heater installed! Fingers crossed!

    1. Safety First: Turn off the gas supply to the water heater at the main valve.
    2. Disconnect Electrical Connections: Disconnect all electrical connections to the water heater.
    3. Drain the Water Heater: Completely drain the water heater tank to avoid water damage during the gas valve replacement.
    4. Identify the Gas Valve: Locate the gas valve on the water heater.
    5. Disconnect the Gas Supply Lines: Disconnect the gas supply lines from the gas valve, following the manufacturer’s instructions.
    6. Remove the Old Gas Valve: Carefully remove the old gas valve, ensuring you do not damage the water heater’s components.
    7. Install the New Gas Valve: Connect the new gas valve to the gas supply lines, ensuring proper alignment and connections.
    8. Reconnect the Gas Supply Lines: Reconnect the gas supply lines to the gas valve.
    9. Test the Gas Valve: Carefully check for leaks around the connections. Turn on the gas supply at the main valve.
    10. Reconnect Electrical Connections: Reconnect all electrical connections.
    11. Turn Water Supply Back On: Slowly turn the water supply back on. Check for leaks.

    Professional Help
    Water Heater Not Working

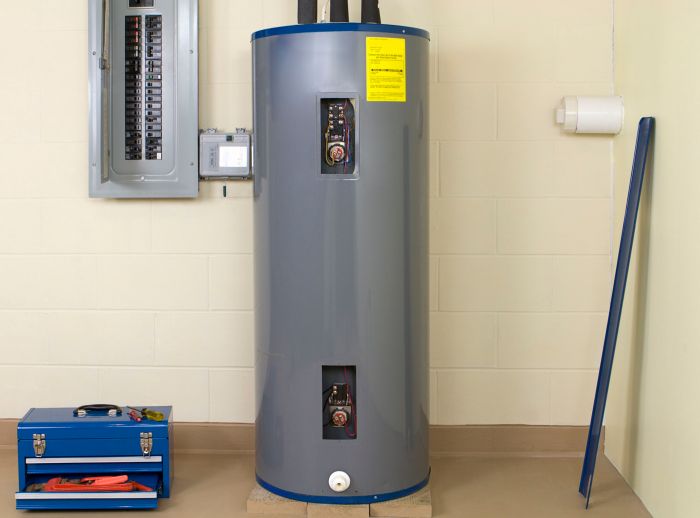
    When your water heater stops working, tackling the problem yourself might seem appealing. However, there are situations where a qualified technician’s expertise is crucial for a safe and effective repair. Ignoring these signs can lead to further complications and potential safety hazards. Understanding when to call a professional is essential for ensuring a smooth and problem-free solution.

    My water heater’s on the fritz, which is a real bummer. Trying to figure out what’s wrong, but in the meantime, I’m looking for some fun distractions. Luckily, Pi Day is coming up, and I’m checking out some cool pop culture pies like the one from celebrate pi day favorite pop culture pies. Hopefully, once I get my water heater back online, I can enjoy a warm shower without a pie in hand!

    When to Call a Technician, Water Heater Not Working

    Sometimes, a seemingly minor issue can mask a more serious problem within your water heater system. It’s important to recognize the signs that indicate professional intervention is needed. These include:

    • Leaks or significant water damage: A persistent leak around the water heater or significant water damage in the surrounding area signifies a potential structural or plumbing problem that a plumber should handle.
    • Unusual noises or vibrations: Loud banging, hissing, or unusual vibrations coming from the water heater could signal a malfunctioning component or a dangerous build-up of pressure. A qualified technician can pinpoint the source and prevent potential explosions.
    • Strange smells: A burning smell or unusual odor coming from the water heater warrants immediate attention. This could indicate overheating, a gas leak, or other internal issues, all of which necessitate professional assessment.
    • Electrical issues: If the water heater shows signs of electrical problems, such as sparking, buzzing noises, or flickering lights, avoid any attempts to repair it yourself. Electrical work requires specialized knowledge and tools, and a faulty electrical connection can be extremely dangerous.
    • Multiple attempts at repair have failed: If you’ve already tried troubleshooting the problem but haven’t found a solution, it’s best to consult a qualified technician. They have the expertise and tools to diagnose the underlying issue.

    Importance of Hiring a Licensed Technician

    Hiring a licensed plumber or HVAC technician is essential for several reasons. First, they possess the necessary knowledge and skills to diagnose and fix complex water heater problems safely and efficiently. Second, they have the proper training and certification to handle the unique challenges of working with water heaters, ensuring the repair complies with safety standards and codes.

    Licensed technicians also have the knowledge of warranties and are capable of working with them correctly. Finally, they are insured and bonded, protecting you from any potential liability issues arising from the repair process.

    Scheduling a Repair Appointment

    Scheduling a repair appointment with a qualified technician is straightforward. Contact several local plumbers or HVAC technicians and request a consultation or a repair appointment. Be prepared to provide details about your water heater model, the nature of the problem, and any relevant information that might assist the technician in diagnosing the issue. Be sure to ask about their availability and their typical turnaround time.

    Questions to Ask a Technician

    It’s crucial to ask the right questions to ensure you hire a qualified and reliable technician. Thorough preparation can help you make an informed decision.

    Question
    What is the estimated cost of the repair? This includes labor, parts, and any additional fees. Be sure to ask for a breakdown of the estimated costs.
    What is your experience level with water heaters? Ask about the technician’s experience working with various water heater models and types, including your specific model. Consider the technician’s familiarity with different brands.
    What are the potential causes of the problem? A good technician will provide a clear explanation of the possible causes of the water heater malfunction. They should be able to explain the likelihood of each potential issue.

    Water Heater Types

    Choosing the right water heater depends heavily on your household’s needs, energy costs, and available space. Understanding the different types available—electric, gas, and tankless—is crucial for making an informed decision. Each type offers unique advantages and disadvantages, influencing the cost of installation, maintenance, and running expenses.

    Overview of Different Water Heater Types

    Water heaters come in various designs, each employing a different method to heat water. Electric water heaters use electricity to heat water within a tank. Gas water heaters utilize natural gas or propane to achieve the same outcome. Tankless water heaters, on the other hand, heat water directly as needed, eliminating the need for a storage tank.

    Comparison of Water Heater Types

    The following table provides a comparative analysis of electric, gas, and tankless water heaters, highlighting their strengths, weaknesses, maintenance requirements, and typical lifespans.

    Type Energy Source Pros Cons Maintenance
    Electric Electricity Relatively low maintenance, simple installation, readily available in various sizes. Often a good option for areas with reliable electricity grids. Can be expensive to run, especially during peak demand periods. May require a dedicated circuit for optimal performance. Heating water may take longer compared to other types. Annual inspection of heating elements and thermostat. Check for leaks or corrosion regularly.
    Gas Natural Gas Generally more energy-efficient and cost-effective to run than electric models, especially in areas with affordable natural gas rates. Faster heating cycles. Potential safety hazards associated with gas lines and appliances. Installation may be more complex than electric models, requiring professional assessment. Can be affected by fluctuating gas prices. Annual inspection of gas valves, burner, and pilot light (if applicable). Regular leak checks are crucial.
    Tankless Electricity/Gas Provides on-demand hot water, eliminating the need to heat a large volume of water at once. More efficient and saves space. Can offer significant water savings compared to tank-type heaters. Higher initial installation cost. May not provide enough hot water for multiple simultaneous users. Potential for cold water flow issues in older pipes or if not properly installed. Annual inspection of the heating element, check for leaks and proper water pressure.

    Maintenance Requirements for Each Type

    Proper maintenance is essential to ensure optimal performance and longevity of your water heater. Electric heaters typically require less maintenance than gas heaters, but regular checks are crucial for all types.

    Typical Lifespan of Each Water Heater Type

    The lifespan of a water heater varies depending on the type, installation quality, and maintenance practices. Electric water heaters generally last 8-12 years, while gas water heaters can last 10-15 years. Tankless water heaters, with proper care, can last 15-20 years or more. These are estimates, and actual lifespan can vary.

    Troubleshooting Illustrations

    Troubleshooting a malfunctioning water heater can be challenging, but visualizing potential problems can significantly streamline the process. Understanding the internal components and recognizing common issues through illustrations empowers you to identify the source of the problem and potentially resolve it yourself or, at least, be better prepared to describe the issue to a professional.Visual aids, like diagrams and illustrations, provide a clear representation of water heater components and potential issues, making the troubleshooting process more efficient and effective.

    This section details several common water heater problems and accompanying illustrations, helping you interpret visual cues for quicker and more accurate diagnoses.

    Sediment Buildup

    Sediment buildup is a prevalent issue in water heaters, often causing reduced efficiency and potential damage. This buildup occurs as minerals in hard water accumulate over time. Visualizing this issue is crucial in identifying its severity and location. Sediment Buildup in Water Heater TankSediment Buildup Illustration: This illustration depicts a water heater tank with a substantial layer of sediment at the bottom. The sediment is a yellowish-tan substance.

    This build-up reduces the efficiency of the heating element, increasing energy consumption and potentially causing premature failure. The illustration clearly shows the thickness of the sediment, indicating a potential problem. A significant amount of sediment could lead to reduced water temperature, and the accumulation can cause a blockage in the water flow. The illustration also provides context, like showing the heating element and water lines.

    Loose Connections

    Loose connections within a water heater can lead to leaks, electrical hazards, and reduced efficiency. Identifying these issues early is vital to preventing potential damage and water waste. Loose Connections in Water HeaterLoose Connections Illustration: This illustration shows a water heater with loose connections at the gas line, electrical wiring, and water supply pipes. The connections are highlighted with arrows and are visibly loose, indicating a potential problem.

    The illustration shows the connections and the potential risk of leaks, fire hazards, and other safety concerns. The diagram also points out the areas requiring tightening, aiding in preventative measures.

    Internal Component Diagram

    Understanding the internal workings of a water heater is crucial for accurate diagnosis. This diagram helps you identify the location of various components and potential failure points. Internal Components of Water HeaterInternal Components Illustration: This diagram provides a detailed view of the internal components of a water heater, including the tank, heating element, pressure relief valve, and thermostat. Each component is labeled, making it easy to identify potential problem areas.

    The illustration also includes pipes and electrical connections, helping visualize the water flow and electrical pathways. This diagram aids in pinpointing the location of a leak or the source of a malfunction.

    Interpreting Visual Cues

    Analyzing the visuals of sediment buildup, loose connections, and internal components can help you pinpoint potential issues. Sediment buildup, as illustrated, indicates a need for cleaning or maintenance. Loose connections signify a potential for leaks, electrical hazards, or inefficient operation, requiring immediate attention. Visualizing the internal components allows you to locate the source of a problem.

    • Sediment buildup: Visualize the sediment layer’s thickness. A substantial layer suggests a need for cleaning.
    • Loose connections: Identify the areas where connections are loose. This visual clue signals potential leaks and other safety hazards.
    • Internal component diagram: Study the diagram to locate the source of the problem, such as a malfunctioning heating element or a leak in the water lines.

    Last Point
    Water Heater Not Working

    Hopefully, this guide has provided a clear and concise overview of dealing with a malfunctioning water heater. From identifying potential problems to ensuring safety, we’ve covered all the bases. Remember, safety first! If you’re unsure about any steps, it’s always best to consult a qualified technician. Armed with this knowledge, you can confidently navigate the process of getting your water heater back up and running smoothly.

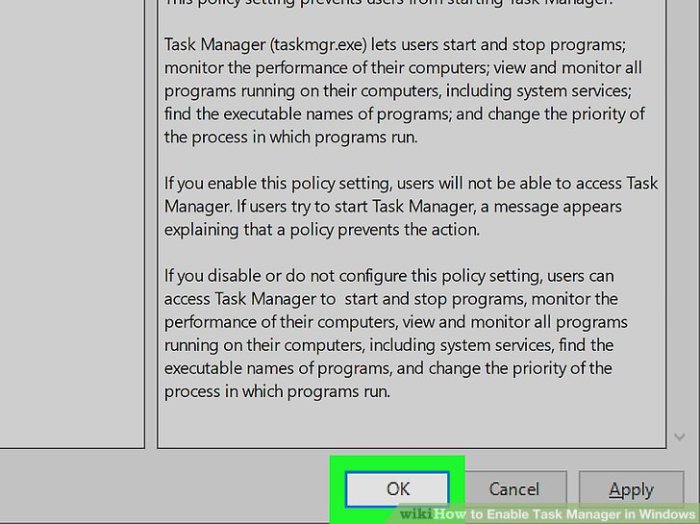
  • Enable Task Manager in Windows A Comprehensive Guide

    Enable Task Manager in Windows A Comprehensive Guide

    Enable Task Manager in Windows sets the stage for a deep dive into this crucial system tool. Understanding how to access and utilize Task Manager is essential for troubleshooting performance issues, managing processes, and monitoring system resources. This guide will walk you through the process, from basic access methods to advanced features and security considerations.

    This in-depth exploration of Task Manager covers various aspects, including its fundamental purpose, different access methods, and scenarios where it proves invaluable. We’ll also examine specific Windows versions, user account considerations, and troubleshoot potential enabling issues.

    Introduction to Task Manager

    Task Manager is a crucial utility in Windows operating systems, providing a comprehensive view of running processes, applications, and system resources. It’s an indispensable tool for monitoring and managing system performance, identifying resource-intensive processes, and resolving potential issues. This overview will detail its purpose, accessibility, and practical applications.Understanding Task Manager’s capabilities is vital for troubleshooting system slowdowns, optimizing resource usage, and ensuring the smooth operation of your computer.

    It offers a straightforward interface to gain insight into what’s consuming system resources, allowing users to take appropriate action.

    Defining Task Manager

    Task Manager in Windows is a built-in system tool that displays a real-time snapshot of active processes and resources on your computer. It provides a detailed overview of running programs, their resource consumption, and overall system performance. It acts as a central hub for managing applications and processes, facilitating control over what’s running on your system.

    Fundamental Purpose and Function

    Task Manager’s fundamental purpose is to monitor and manage system resources. This includes overseeing the CPU, memory, disk usage, network activity, and other critical components. It allows users to see which applications or processes are consuming the most resources, facilitating efficient resource allocation and troubleshooting performance issues. This insight is vital for preventing system slowdowns and maintaining optimal performance.

    Accessing Task Manager

    Task Manager can be accessed in several ways, offering flexibility for users:

    • From the taskbar: Right-click the taskbar, then select “Task Manager”. This is the most common and straightforward method.
    • Using the keyboard shortcut: Press Ctrl + Shift + Esc simultaneously to quickly open Task Manager.
    • From the Start menu: Search for “Task Manager” in the Start menu to launch it.

    These methods provide various ways to access Task Manager, accommodating different user preferences and workstyles.

    Scenarios Where Task Manager is Useful

    Task Manager proves invaluable in a wide range of situations, offering solutions to various system issues. It serves as a critical tool for diagnosing and resolving problems.

    • Identifying resource-intensive processes: If your computer is running slowly, Task Manager helps identify which applications or processes are consuming excessive CPU, memory, or disk resources. This allows you to close unnecessary programs or end problematic processes, improving performance.
    • Monitoring system performance: By tracking CPU, memory, disk, and network usage, Task Manager provides insights into the overall health and performance of your system. This allows for proactive identification and resolution of potential issues before they significantly impact performance.
    • Troubleshooting application issues: If an application is malfunctioning or unresponsive, Task Manager can be used to investigate its behavior, identify resource conflicts, or terminate the process if necessary. This proactive approach can prevent more severe problems.
    • Managing startup programs: Task Manager allows you to view and manage programs that start automatically when Windows boots. This control is essential for optimizing system startup times and preventing unnecessary applications from loading.
    • Ending unresponsive processes: If a program freezes or becomes unresponsive, Task Manager enables you to forcefully close the program, preventing system instability and allowing the system to recover.

    These scenarios demonstrate the broad range of applications for Task Manager, highlighting its value as a diagnostic and problem-solving tool.

    Enabling Task Manager (General)

    Task Manager is a crucial tool in Windows for monitoring and managing running processes. It provides a snapshot of system resources, enabling users to identify and address potential performance issues. While often implicitly enabled, understanding its activation and implications is important for efficient system usage.Enabling Task Manager, in its core sense, refers to the process of making the Task Manager application accessible and usable.

    This isn’t a feature that needs to be specifically activated, but rather a default part of the operating system’s functionality. However, users can modify the behavior of Task Manager depending on their specific needs and system configurations.

    Figuring out how to enable Task Manager in Windows can be a bit of a pain, but it’s worth it! Once you’ve got it running smoothly, you can easily monitor your system’s performance. Speaking of smooth, you’ve gotta check out this new song, listen to isaiah rashad sza and 6lacks new song score , it’s got a really cool vibe that’s perfect for background listening while you’re troubleshooting your computer.

    Knowing how to enable Task Manager will be a helpful tool for managing processes and keeping your system running efficiently.

    Common Reasons for Using Task Manager

    Task Manager is essential for various reasons, going beyond simply viewing active processes. Understanding resource consumption, identifying problematic applications, and troubleshooting system performance are key benefits. For instance, if a program is unexpectedly slowing down the system, Task Manager can quickly pinpoint the source of the issue.

    Enabling Task Manager for Different User Types

    The process of accessing Task Manager is generally the same for all user types. There’s no separate process for enabling it for administrators or standard users.

    • Standard Users: Standard users can access Task Manager by searching for “Task Manager” in the Windows search bar or by pressing Ctrl+Shift+Esc. They have limited control over system resources, but can monitor processes and applications, thus assisting in diagnosing potential issues.
    • Administrators: Administrators have access to all system resources and processes. They can use Task Manager to manage processes, stop applications, and end tasks, which might be necessary for troubleshooting complex system issues or resolving problems that other users might not be able to identify.

    Implications of Enabling Task Manager

    Enabling Task Manager, in the sense of accessing it, has no direct negative implications. It’s a core part of the Windows operating system. However, actions takenwithin* Task Manager can have significant consequences, especially for administrators. Carefully terminating processes or services can lead to system instability if not done correctly.

    Enabling Task Manager (Specific Scenarios)

    Enabling Task Manager is crucial for system monitoring and troubleshooting. This section dives deeper into enabling Task Manager for various user accounts and specific Windows versions. Understanding these scenarios ensures you can effectively manage your system resources.This section provides practical steps to enable Task Manager, catering to diverse user needs and system configurations. We will explore enabling Task Manager for individual accounts, managing it across multiple users, and tailoring the process for different Windows versions.

    Enabling Task Manager for a User Account

    Enabling Task Manager for a specific user account is often necessary in multi-user environments. This ensures that only authorized users can access system monitoring tools.To enable Task Manager for a particular user account:

    • Open the User Accounts settings. This can be accessed through the Control Panel or the Settings app, depending on your Windows version.
    • Locate the user account for which you want to enable Task Manager.
    • Check the appropriate permissions related to Task Manager access. This will likely involve adjusting the user’s administrative privileges.
    • If the user account does not have the necessary permissions, you’ll need to modify them. The exact method for granting these permissions varies slightly depending on the Windows version.

    Enabling Task Manager for a Specific User Account on a Multi-User System

    In multi-user systems, ensuring that Task Manager is accessible only to authorized users is essential. This prevents unauthorized access and maintains system security.To enable Task Manager for a specific user on a multi-user system:

    • Identify the user account for which you want to enable Task Manager access.
    • Open the Local Users and Groups settings in the Control Panel.
    • Navigate to the user’s account within the Local Users and Groups window.
    • Verify the user’s group memberships. The user needs to be assigned to a group that has the necessary permissions for accessing Task Manager.
    • Modify the user’s group memberships, adding or removing groups as needed to grant or revoke Task Manager access.

    Enabling Task Manager in a Specific Windows Version

    The process of enabling Task Manager may vary slightly across different Windows versions. Understanding these nuances is crucial for proper implementation.

    Windows Version Steps to Enable Task Manager
    Windows 10
    1. Access the User Accounts settings.
    2. Locate the user account and review the user’s privileges related to Task Manager.
    3. Adjust permissions if necessary to enable or disable Task Manager access.
    Windows 11
    1. Open the Settings app.
    2. Navigate to Accounts.
    3. Locate the specific user account and adjust permissions for Task Manager access.

    Comparison of Enabling Processes Across Different Windows Versions

    The following table highlights the key differences in enabling Task Manager across various Windows versions.

    Windows Version Primary Access Point Permission Adjustment
    Windows 10 Control Panel or Settings app Adjusting user account privileges
    Windows 11 Settings app Adjusting user account privileges

    Troubleshooting Task Manager Enabling Issues: Enable Task Manager In Windows

    Enabling Task Manager, while usually straightforward, can sometimes encounter hiccups. Understanding the potential problems and their solutions is crucial for a smooth user experience. This section dives into common issues, their causes, and effective troubleshooting steps.Troubleshooting enabling issues often requires a systematic approach. Identifying the specific problem is the first step, followed by isolating the cause and implementing appropriate solutions.

    This process can vary depending on the nature of the issue.

    Common Enabling Issues

    This section details frequently encountered problems during Task Manager enabling. Understanding these common issues will help in quickly identifying the problem and efficiently finding a solution.

    • Task Manager is not appearing in the Start Menu or Programs list: This issue often stems from incorrect system settings or corrupted program files. A thorough check of the system files and registry settings can resolve the problem. For example, a recent system update or a third-party program might have interfered with the Task Manager installation or its path.
    • Task Manager opens but is empty or displays incorrect information: This might be due to conflicts with other applications or services, or problems with the system’s performance. Issues with the system’s processes or drivers could also be the culprit. A clean boot of the system can often identify and resolve the conflict.
    • Task Manager crashes or displays error messages: This indicates a deeper issue within the system. The error messages themselves can provide valuable clues about the root cause, such as corrupted files, conflicting hardware, or incompatible software. Running system file checker tool or updating drivers can often fix this problem.

    Possible Causes of Enabling Issues, Enable Task Manager in Windows

    This section examines the potential reasons behind the various problems encountered when enabling Task Manager.

    • Corrupted System Files: Damaged or missing system files can lead to Task Manager not functioning correctly. This is often the result of a previous system update or software installation failure.
    • Conflicting Applications or Services: Certain programs or services might interfere with Task Manager’s functionality. This is a common cause, particularly with custom-built software or older applications. A clean boot can help identify these conflicts.
    • Registry Issues: Errors in the system registry, which stores configuration data for Windows, can disrupt the Task Manager’s operation. This could result from improper software installation or manual registry edits.

    Solutions to Troubleshooting Enabling Issues

    This section presents actionable steps to address the identified problems.

    1. Check for Corrupted System Files: Run the System File Checker (SFC) utility to scan and repair any damaged system files. This utility is built into Windows and can often fix issues that lead to Task Manager not functioning properly.
    2. Perform a Clean Boot: A clean boot isolates the operating system from third-party applications, revealing if any are conflicting with Task Manager. This helps diagnose and resolve conflicts with other programs or services.
    3. Update Drivers and Software: Outdated drivers or software can cause various problems, including Task Manager malfunctions. Ensuring that all drivers are up-to-date can resolve conflicts.
    4. Run Virus and Malware Scans: Malicious software can damage or interfere with system files, including those related to Task Manager. Regular scans can identify and remove any malicious software.
    5. Repair or Reinstall Task Manager: In some cases, repairing or reinstalling Task Manager might be necessary to resolve conflicts with other programs or fix corrupted files. This should be a last resort, as it can be more time-consuming than other troubleshooting steps.

    Common Errors Related to Task Manager Enabling

    This section provides a list of common error messages that might appear during the Task Manager enabling process. Understanding these error messages can help in identifying the root cause and applying the appropriate solution.

    • Error Code 0x80070002: This often indicates a problem with access permissions or file integrity.
    • Error Code 0x80070005: This error can arise from issues with the system registry.
    • Error “Task Manager not found”: This points to a missing or corrupted Task Manager installation.

    Diagnosing and Resolving Conflicts with Other Applications or Services

    This section Artikels the process for identifying and resolving conflicts with other programs when enabling Task Manager.

    • Perform a Clean Boot: Start Windows in a minimal configuration to isolate third-party software that might be causing the conflict.
    • Identify Conflicting Programs: If the Task Manager works during a clean boot, gradually re-enable applications to determine the specific program that is causing the conflict.
    • Update or Reinstall Conflicting Software: If a specific program is identified as the conflict source, updating or reinstalling it may resolve the issue.

    Alternatives to Task Manager (Optional)

    Task Manager is a valuable tool for monitoring and managing processes on your Windows system. However, there might be situations where you prefer alternative tools for specific tasks. This section explores some alternatives, highlighting their strengths and weaknesses compared to Task Manager.These alternative tools can provide different perspectives and functionalities, catering to specific needs. Some focus on detailed resource usage, while others are designed for specific types of processes.

    Understanding their capabilities allows for a more informed decision when choosing the right tool for the job.

    Process Monitoring Tools

    Process monitoring tools offer a more granular view of system resource utilization than Task Manager. They often include detailed information on CPU, memory, disk, and network usage for each running process.

    • Process Explorer (from Sysinternals): This powerful tool provides a wealth of information about processes, including their parent-child relationships, file handles, and network connections. It’s highly configurable, allowing users to customize the displayed data. Process Explorer’s depth of information is unmatched, making it ideal for diagnosing complex system issues. However, its detailed nature might overwhelm less experienced users.

    • Resource Monitor: Built into Windows, Resource Monitor provides a comprehensive view of system resource usage. It shows CPU, memory, disk, and network activity in real-time, allowing users to identify performance bottlenecks. Resource Monitor is a valuable tool for troubleshooting and performance analysis, offering an easily understandable interface. While its capabilities are robust, they might not be as detailed as specialized tools like Process Explorer.

    Specialized Process Management Tools

    Some tools focus on specific types of processes, such as those related to network traffic or system services.

    Figuring out how to enable Task Manager in Windows can be a bit of a pain sometimes, but it’s a crucial tool for troubleshooting. While you’re digging into system performance, have you ever wondered if a certain neko case actually does the Squidbillies theme song? Well, a recent online discussion sparked a debate about whether the adorable feline-themed case neko case does the Squidbillies theme song actually has vocal talents.

    Regardless of the answer, getting Task Manager up and running is still a useful skill for any Windows user.

    • NetWorx: This tool focuses on network performance and resource utilization. It provides insights into network traffic, identifying potential bottlenecks and issues. It is excellent for network administrators and users needing a detailed view of network-related processes. However, it might not offer the breadth of system information available in Task Manager or other process monitoring tools.
    • Process Hacker: This tool provides advanced process management capabilities, including the ability to modify process priorities and terminate processes. It’s a more powerful alternative to Task Manager for users who need granular control over processes. However, it requires a deeper understanding of system processes, and improper use could lead to system instability.

    Comparing Task Manager and Alternatives

    | Feature | Task Manager | Process Explorer | Resource Monitor | NetWorx | Process Hacker ||—|—|—|—|—|—|| Ease of Use | High | Medium | High | Medium | Low || Detail Level | Basic | High | Medium | High (network) | High || Focus | General system overview | Detailed process information | System resource usage | Network performance | Advanced process control || Customization | Limited | High | Limited | Medium | High |This table highlights the key differences between Task Manager and its alternatives.

    Figuring out how to enable Task Manager in Windows can be surprisingly straightforward, but sometimes a bit of a pain. It’s a useful tool for troubleshooting, just like learning to use almost any 35mm film camera Use Almost Any 35mm Film Camera requires a bit of patience and practice. Ultimately, both are rewarding experiences that can help you better understand your systems, whether digital or analog.

    The choice of tool depends on the specific need and level of expertise. For routine monitoring, Task Manager suffices. However, for in-depth analysis or specific tasks, specialized tools offer more capabilities.

    Security Considerations

    Enable Task Manager in Windows

    Enabling Task Manager, while a valuable tool for system monitoring and troubleshooting, introduces potential security risks if not handled with care. Understanding these risks and implementing appropriate mitigations is crucial for maintaining system integrity. This section explores the security implications, potential vulnerabilities, and recommended best practices for secure Task Manager usage.Enabling Task Manager allows users to view and interact with running processes, potentially exposing sensitive information or enabling malicious actors to exploit vulnerabilities.

    It’s important to be aware of the potential risks associated with this functionality and take precautions to protect your system.

    Potential Security Risks

    Enabling Task Manager, while beneficial for troubleshooting, presents potential risks if not properly managed. Malicious software can use Task Manager to hide its activity, monitor user behavior, or gain unauthorized access to system resources. Unauthorized access to process information could lead to data breaches or system compromise. Additionally, misconfigurations or user errors can expose critical system processes to unwanted interference.

    Mitigating Risks

    Several strategies can minimize the risks associated with enabling Task Manager. User awareness and training on secure practices are essential. Restricting access to Task Manager based on user roles and permissions is a crucial security measure. Strong passwords and multi-factor authentication can also help prevent unauthorized access to system information.

    User Permissions and Security Policies

    User permissions and security policies directly impact Task Manager’s functionality and security. Appropriate permissions prevent unauthorized users from accessing sensitive process information or interfering with critical system processes. Security policies should define who can use Task Manager, what actions they can perform, and the level of access they are granted. Implementing these controls helps ensure only authorized personnel can view and interact with system processes.

    Security Measures Table

    This table Artikels security measures to take when enabling Task Manager. Implementing these measures can help reduce the risk of security breaches and system compromise.

    Security Measure Description Impact
    Strong Passwords and Multi-Factor Authentication Use complex passwords and enable multi-factor authentication for user accounts with Task Manager access. Reduces risk of unauthorized access to system processes.
    Access Control Policies Implement policies restricting Task Manager access based on user roles and permissions. Prevents unauthorized users from viewing or manipulating sensitive processes.
    Regular Security Audits Periodically review and update security policies and access controls to address evolving threats. Ensures policies remain effective against emerging vulnerabilities.
    Firewall Configuration Configure the firewall to restrict unauthorized access to Task Manager and related services. Protects system processes from external threats.
    Antivirus and Anti-malware Software Maintain up-to-date antivirus and anti-malware protection to detect and prevent malicious activity. Helps detect and mitigate potential threats.
    User Awareness Training Provide training to users on secure Task Manager practices and potential security risks. Empowers users to make informed decisions and avoid potential vulnerabilities.

    Task Manager Usage Examples

    Task Manager is more than just a way to see what programs are running; it’s a powerful tool for understanding system resource utilization and identifying performance bottlenecks. Learning how to effectively use its various features can dramatically improve your troubleshooting skills and ensure your system runs smoothly. This section provides practical examples demonstrating its utility.Understanding Task Manager’s displays and how to interpret the data is key to its effective use.

    The information displayed varies depending on the selected view, but generally includes CPU usage, memory consumption, disk activity, and network traffic. By examining these metrics, you can pinpoint which processes or applications are consuming the most resources.

    Common Task Management Tasks

    This section details common tasks and how to use Task Manager to accomplish them. Properly understanding the displayed data is essential for interpreting the findings.

    Task Steps Information Displayed Interpretation
    Monitoring CPU Usage 1. Open Task Manager (Ctrl+Shift+Esc).
    2. Switch to the “Processes” tab.
    3. Look for the “CPU” column.
    Percentage of CPU used by each process. Real-time updates. High CPU usage by a specific process might indicate a problematic application or a potential issue. A consistent high CPU usage across multiple processes could point to a system-wide problem, like a virus or malware.
    Identifying Memory Leaks 1. Open Task Manager.
    2. Switch to the “Processes” tab.
    3. Look for the “Memory” column.
    Amount of memory used by each process. A process that continuously consumes more and more memory without a clear reason may indicate a memory leak. Monitoring memory usage over time, particularly when running resource-intensive applications, can help identify this.
    Monitoring Disk Activity 1. Open Task Manager.
    2. Switch to the “Performance” tab.
    3. Observe the “Disk” graph.
    Read and write operations on the hard drive. High disk activity, especially if coupled with poor performance, might signify issues with hard drive speed, fragmented files, or problems with a particular application accessing the disk.
    Analyzing Network Usage 1. Open Task Manager.
    2. Switch to the “Performance” tab.
    3. Observe the “Network” graph.
    Network traffic (incoming and outgoing). High network usage can indicate active downloads, uploads, or a network-intensive application running. If unexpected or excessive, it could signal a malware infection or a network connection issue.

    Troubleshooting Performance Issues with Task Manager

    A common use case for Task Manager is diagnosing performance issues. By observing the resources used by each process, you can pinpoint the source of the problem.For example, imagine your system is running slowly. You can use Task Manager to isolate the culprit.

    1. Open Task Manager and switch to the “Processes” tab.
    2. Identify processes with high CPU usage.
    3. Right-click on the problematic process and select “Go to details.”
    4. Look for any processes consuming a large amount of CPU time.
    5. Check for applications using excessive disk I/O.
    6. If possible, close the suspect processes or applications, then monitor the system’s performance to see if the problem resolves.

    By systematically analyzing the resources used by each process, you can often identify the specific application or process causing the performance issue. This targeted approach allows you to address the root cause rather than resorting to general solutions.

    Advanced Task Manager Features (Optional)

    Task Manager, while a fundamental tool for monitoring system performance, offers hidden depths. Beyond the basic view of running processes, Task Manager reveals advanced features that can provide valuable insights into resource usage and system health. These features are often underutilized but can be critical for troubleshooting performance issues or identifying resource-intensive applications.The advanced features within Task Manager allow for a deeper dive into system activity.

    This goes beyond the simple list of running programs, enabling users to examine detailed information about resource consumption, network activity, and more. Understanding these advanced features empowers users to proactively manage system performance and identify potential bottlenecks.

    Performance Tab

    The Performance tab is a crucial component of Task Manager’s advanced features, providing a real-time overview of system resources. It’s invaluable for diagnosing performance bottlenecks.

    • CPU Usage: Displays the percentage of CPU time allocated to each process. This allows users to pinpoint applications or processes consuming excessive CPU resources, aiding in identifying performance bottlenecks. High CPU usage often indicates that a program is not optimized or is using too many system resources.
    • Memory Usage: Shows the amount of RAM used by each process. Understanding memory usage is critical for preventing system slowdowns caused by memory leaks or excessive memory consumption. Identifying processes hogging memory is key to optimizing performance and preventing the system from swapping data to the hard drive.
    • Disk Usage: Monitors disk activity, including read and write speeds. High disk usage can indicate slowdowns due to disk I/O contention. Analyzing disk usage helps users identify whether disk bottlenecks are impacting overall performance.
    • Network Usage: Displays network activity for each process, highlighting applications using a significant amount of bandwidth. Monitoring network usage is essential for identifying applications that might be causing network congestion, and for troubleshooting network-related issues. This is especially helpful for troubleshooting slow internet connections or network-intensive applications.

    Processes Tab

    The Processes tab in Task Manager goes beyond simply listing running applications. It provides detailed information about each process, enabling users to understand resource consumption in more depth.

    • Detailed Information: Provides a comprehensive view of each process’s resource usage, including CPU, memory, disk, and network utilization. This detailed information helps users understand the impact of each process on system resources.
    • Identifying Resource Hogs: Allows users to identify processes consuming significant resources, enabling proactive steps to optimize performance or resolve issues. This feature is crucial for identifying resource-intensive applications that may be impacting system responsiveness.
    • Background Processes: Shows background processes running in the system. This is important for users to understand which processes are running in the background and how they might be affecting overall system performance.

    Startup Tab

    The Startup tab provides control over applications that launch automatically when Windows starts. This is valuable for optimizing system boot times and preventing unnecessary programs from loading.

    • Manage Startup Programs: Users can disable or enable applications that run during system startup. This feature is valuable for reducing boot times and preventing unwanted applications from launching automatically.
    • Optimizing Startup: Managing startup programs allows users to tailor the system’s startup process, leading to faster boot times and a smoother user experience. Removing unnecessary startup programs can significantly improve system performance.

    Users Tab

    The Users tab in Task Manager allows monitoring of user activity. This can be useful in understanding the impact of different user accounts on system resources.

    • User Activity Monitoring: Provides insights into current user activity, including running processes and resource consumption. This is important for monitoring the activity of different users on the system.

    Summary

    Enable Task Manager in Windows

    In conclusion, enabling Task Manager in Windows empowers users to gain a comprehensive understanding of their system’s performance and resource utilization. By navigating through the different enabling methods, troubleshooting common issues, and exploring advanced features, users can effectively optimize their computer experience. This guide provides a comprehensive overview, equipping you with the knowledge to confidently manage your Windows system.

  • PS5 HDMI Not Working – Troubleshooting Guide

    PS5 HDMI Not Working – Troubleshooting Guide

    PS5 HDMI Not Working – If your PlayStation 5 isn’t displaying on your TV via HDMI, you’re not alone. This comprehensive guide delves into the various causes and offers a step-by-step troubleshooting process to get your PS5 picture back on the screen. We’ll cover everything from basic cable checks to advanced hardware diagnostics.

    From simple connection issues to more complex software problems, we’ll walk you through a range of solutions. This guide ensures you can pinpoint the problem and resolve it quickly, getting you back to gaming in no time.

    Troubleshooting Steps for PS5 HDMI Issues

    Getting a black screen or no video output from your PS5 when connected via HDMI can be frustrating. This guide provides a comprehensive approach to troubleshooting common HDMI connection problems. Properly diagnosing and resolving these issues ensures a smooth gaming experience.This detailed guide will help you pinpoint the source of the problem and restore your PS5’s HDMI functionality. It Artikels systematic checks, from simple cable inspections to more complex device settings, to resolve various HDMI connection problems.

    Checking the PS5’s HDMI Connection

    A solid HDMI connection is fundamental to video output. This involves confirming the cable’s integrity, the port’s functionality on both the PS5 and the TV, and ensuring proper device settings. Here’s a step-by-step procedure:

    1. Verify the HDMI Cable: Inspect the HDMI cable for any visible damage, such as frayed wires or bent pins. A damaged cable can lead to signal loss or corruption, resulting in no video output. Try a different HDMI cable if you suspect the current one is faulty. Using a known good cable is a quick way to determine if the cable is the problem.

    2. Check the HDMI Ports: Ensure the HDMI ports on both the PS5 and the TV are free of obstructions or debris. A loose or damaged port can also prevent a proper connection. Inspect the ports for any signs of damage like bent pins or cracks. Clean the ports with a soft, dry cloth if necessary.
    3. Test the Connection: Reconnect the HDMI cable securely to both the PS5 and the TV’s HDMI input. Double-check that the connection is firmly seated.

    Common HDMI Cable Issues

    HDMI cables can be susceptible to various problems. Recognizing these issues can help you diagnose the source of the problem more effectively.

    • Loose Connection: A loose connection is one of the most frequent causes of HDMI issues. Double-check that the HDMI cable is firmly seated in both the PS5 and the TV’s ports. A slight shift can disrupt the signal.
    • Faulty Cable: A faulty or damaged HDMI cable can prevent a clear signal transmission. A damaged cable may exhibit a variety of symptoms, from intermittent connection loss to complete signal failure. Replacing the cable is usually the first step to try.
    • Damaged HDMI Port: Physical damage to the HDMI ports on either the PS5 or the TV can hinder signal transmission. Inspect the ports for signs of damage, such as bent pins or cracks. A damaged port requires professional repair.

    Verifying HDMI Ports and Restarting Devices

    Ensuring the correct port selection and restarting both devices is often overlooked but crucial in troubleshooting HDMI issues.

    1. Verify TV Input Settings: Check the TV’s input selection to ensure it’s set to the HDMI input that the PS5 is connected to. Incorrect input selection prevents the TV from receiving the PS5 signal.
    2. Restart the PS5 and TV: Restarting both the PS5 and the TV can resolve minor glitches that might be affecting the HDMI connection. This action can refresh the system and clear temporary glitches.

    Testing with a Different Device

    Using a different device to test the HDMI port can quickly determine if the problem lies with the PS5 or the TV.

    • Laptop or Computer Test: Connect a laptop or computer to the same HDMI port on the TV. If the laptop displays correctly, the issue is likely with the PS5. If the laptop doesn’t display, the problem could be with the TV’s HDMI port or cable.

    Possible Causes and Troubleshooting Steps

    The following table summarizes potential causes and corresponding troubleshooting steps for HDMI connection issues.

    Issue Troubleshooting Steps
    Loose cable connection Check the HDMI connection on both the PS5 and TV. Ensure the cable is firmly seated.
    Faulty HDMI cable Try a different HDMI cable. If a different cable works, replace the faulty one.
    Damaged HDMI port Inspect the ports for damage. If damaged, seek professional repair.

    TV Settings Affecting HDMI Connection

    Various TV settings can impact the HDMI connection. Adjusting these settings might resolve certain issues.

    • HDMI Input Settings: Verify that the HDMI input settings on the TV are correctly configured. This includes the input format and resolution. Confirm the resolution settings match the PS5’s output.

    Software and System Checks

    Ps5 Hdmi Not Working

    The PS5’s internal software and firmware play a crucial role in its functionality. Issues within these areas can manifest as a variety of problems, including the dreaded HDMI connection failure. This section delves into diagnosing and resolving software-related problems.Troubleshooting PS5 issues often requires examining the system’s internal workings. Problems with the operating system, updates, or conflicting software can disrupt the PS5’s ability to function properly, sometimes leading to HDMI display issues.

    Checking for System Updates

    System updates are vital for maintaining optimal PS5 performance. Outdated firmware can cause compatibility problems and stability issues, potentially affecting the HDMI output. Regularly checking for and installing available updates is a crucial troubleshooting step.To check for system updates, navigate to the “System” settings on the PS5’s home screen. Within the “System” settings, look for an option related to “System Software Update”.

    My PS5’s HDMI port is acting up, which is a real bummer. It’s driving me crazy trying to figure out why the image isn’t displaying properly. Maybe it’s a simple fix, but then again, maybe I need to look into how the thanoscopter could be deployed in Avengers 4, a fascinating hypothetical scenario that could definitely distract me from the current HDMI issue.

    Either way, I’m going to have to get this PS5 problem sorted out, so I can enjoy my gaming again. Hopefully, it’s not a catastrophic hardware failure!

    If an update is available, the system will prompt you to download and install it. Follow the on-screen instructions to complete the update process. Remember to have a stable internet connection during the update.

    Verifying System Status

    A comprehensive check of the PS5’s system status is essential for diagnosing potential problems. This includes examining the system’s resources and verifying their proper allocation.The PS5’s system status can be accessed through the “System” settings. Checking for any error messages or warnings is crucial. These messages often provide clues about the specific problem. Pay close attention to any error codes displayed on the PS5 screen, as they can provide valuable information for troubleshooting.

    Troubleshooting Software Conflicts

    Software conflicts can disrupt the PS5’s operation, including its ability to output video via HDMI. Identifying and resolving these conflicts can be critical for restoring proper functionality.To identify potential software conflicts, examine any recently installed or updated applications. Look for any unusual behavior or error messages. Temporarily uninstalling or disabling recently installed software can help isolate the source of the conflict.

    Error Codes and Messages

    The PS5 often displays error codes or messages to help pinpoint the problem. These codes can be found within the system settings or error screens.A list of potential error codes and their corresponding solutions is essential. These error codes provide a specific diagnosis, facilitating a targeted troubleshooting approach.

    Troubleshooting Strategies for Software Conflicts

    • Restarting the PS5: A simple but effective method for resolving many software-related issues. A restart can refresh the system and clear any temporary glitches.
    • Checking for software conflicts: Examine recently installed software for potential conflicts. Temporarily uninstalling or disabling these applications can isolate the source of the problem.
    • Updating drivers: Outdated drivers can lead to compatibility problems. Ensure all connected devices have the latest drivers installed.

    Possible Software/System Problems and Solutions

    Problem Solution
    Update required Download and install the latest system update.
    Software conflict Check for and resolve any software conflicts. Try uninstalling or disabling recently installed software.
    Error code displayed Refer to the PS5 error code guide for a specific solution.

    External Factors and Settings

    Sometimes, the problem isn’t with your PS5, but with your TV. Issues with the TV’s HDMI input, settings, or even firmware updates can prevent a proper connection. Let’s delve into these potential external factors to troubleshoot your PS5 HDMI woes.

    TV’s HDMI Input Issues

    Problems with the TV’s HDMI input can manifest as a lack of video signal, a distorted image, or no picture at all. Ensure the HDMI cable connecting your PS5 to your TV is properly seated in both devices. Try a different HDMI cable, as a faulty cable can be a culprit. If the issue persists, the TV’s HDMI input itself might be malfunctioning.

    TV Settings Affecting HDMI

    Various TV settings can impact the HDMI connection. Incorrect resolution, refresh rate, or audio settings can cause display problems. Check your TV’s menu for settings like HDMI input resolution, output format, and audio options. Ensure these settings match your PS5’s output capabilities. Sometimes, forcing the TV to use a specific input format, like 4K or 1080p, can resolve the issue.

    TV Updates and Firmware, Ps5 Hdmi Not Working

    Outdated TV firmware can cause compatibility problems with modern devices like the PS5. Regularly check for available updates for your TV model. Updating the firmware can often resolve various issues, including those affecting HDMI connections. Follow your TV’s manufacturer instructions to update its firmware.

    Verifying TV’s HDMI Input Settings

    Confirm that the correct HDMI input is selected on your TV. Your TV’s remote likely has buttons or menus to switch between HDMI inputs. If the PS5 is connected to HDMI 2, ensure the TV’s input selection is set to HDMI 2. Double-check the input selection on the TV’s display to confirm the correct input is active.

    TV Error Codes

    Some TVs display error codes when encountering problems. Look for any error messages displayed on the TV screen. Consult your TV’s manual or online resources to understand the meaning of these codes. The error code can provide specific clues about the issue.

    PS5 and TV Compatibility

    While most modern TVs are compatible with the PS5, some older models or specific TV types might not fully support the PS5’s output capabilities. Compatibility can vary based on the HDMI version supported by the TV and the PS5. Ensure your TV supports the HDMI version required by the PS5 for optimal performance.

    TV Type Compatibility with PS5

    The table below summarizes the general compatibility of different TV types with the PS5. This is a general guideline, and specific models may vary.

    My PS5’s HDMI port is acting up, which is seriously frustrating. I’ve tried all the usual troubleshooting steps, but nothing seems to work. Meanwhile, I’m also completely buzzing about the exciting news that Rihanna and ASAP Rocky have welcomed their second child! Rihanna and ASAP Rocky welcome second baby report This definitely takes my mind off things for a bit, but hopefully, a solution to my PS5 HDMI issue will surface soon.

    I’m hoping a firmware update or a simple cable swap will fix it.

    TV Type Compatibility with PS5
    LED TV Compatible
    OLED TV Compatible
    QLED TV Compatible

    Ensuring Proper Signal Reception

    Verify that the PS5 is sending a proper signal to the TV. If the TV isn’t receiving a signal, ensure the HDMI cable is securely connected to both the PS5 and the TV. If the PS5 is displaying a message indicating no signal, this is a crucial step to check. Sometimes, a simple restart of both devices can resolve the issue.

    Advanced Troubleshooting

    When basic troubleshooting steps fail to resolve your PS5 HDMI connection issues, delving into advanced techniques becomes necessary. This section explores more in-depth diagnostic methods, focusing on potential hardware problems and professional repair options. Addressing these more complex issues requires careful attention to detail and a methodical approach.

    HDMI Cable Integrity Check

    Proper HDMI cable functionality is crucial for a stable connection. Inspecting the cable’s integrity can identify any physical damage that might be hindering signal transmission.

    • Visually inspect the cable for any signs of damage, such as frayed wires, broken connectors, or bent pins. Look for any unusual wear and tear along the cable’s length. Damage in these areas could compromise the signal.
    • Test the cable with another device. If the HDMI cable works correctly with other devices, the issue is likely with the PS5 or the TV’s HDMI port, rather than the cable itself.
    • Use a different HDMI cable to test the connection. If the problem persists, the cable is likely the culprit.

    Testing HDMI Ports

    Confirming the functionality of both the PS5’s and the TV’s HDMI ports is critical. This ensures that the ports themselves are not the source of the problem.

    • Use a different HDMI cable with another device (e.g., a Blu-ray player or a streaming device) to test the HDMI port on the TV. If the other device functions correctly, the problem is likely with the PS5’s HDMI port.
    • If the TV’s HDMI port is confirmed functional, use a different HDMI cable with the PS5 to test the PS5’s HDMI port. If another device works with the PS5’s HDMI port, then the TV’s port is likely the source of the problem.

    Power Supply Assessment

    The PS5’s power supply is essential for its operation. Checking the power supply ensures that sufficient power is reaching the console.

    • Verify the power cord is securely connected to the PS5 and the wall outlet.
    • Ensure the power outlet is functional by testing another device at the same outlet. If the outlet is faulty, this could be the source of the problem.
    • Check the PS5’s power supply unit for any physical damage or signs of overheating.

    Potential Hardware Problems

    Possible hardware issues within the PS5’s HDMI port or circuitry can cause connection problems. Identifying these issues might require professional assistance.

    • The HDMI port itself may be damaged internally, preventing a proper connection. This is often the result of physical damage or repeated stress.
    • Internal circuitry issues could prevent the PS5 from sending or receiving the necessary signals through the HDMI port.

    Professional Repair Options

    If the problem persists after thorough troubleshooting, professional repair services may be necessary.

    My PS5 HDMI port’s been acting up lately, which is seriously frustrating. It’s driving me bonkers trying to figure out why the picture keeps cutting out. While searching for solutions, I stumbled across this hilarious video of President Obama and Chance the Rapper singing Jingle Bells. watch president obama and chance the rapper sing jingle bells It was a total mood booster, but I’m still hoping to get my PS5 HDMI sorted out.

    Maybe this festive distraction will inspire a fresh approach to the technical problem.

    • Authorized PlayStation repair centers can diagnose and repair the PS5’s HDMI port or other hardware components.
    • Independent repair shops with experience in electronic device repair can also be a viable option, but it’s crucial to ensure they have the necessary expertise.
    • Consider the cost and warranty implications of each repair option before making a decision.

    PS5 Console Opening Procedure (Safety First!)

    Opening the PS5 console requires careful handling to avoid damaging internal components. Safety precautions should always be prioritized.

    • Consult the official PlayStation troubleshooting guide for precise instructions on safely opening the PS5 console. This will ensure that you are following proper procedure to prevent any potential damage to the console’s delicate components.
    • Always disconnect the power cord from the PS5 before attempting any internal inspection or repair.
    • Work in a well-lit area to avoid making mistakes during the process.

    Troubleshooting Specific Situations

    Ps5 Hdmi Not Working

    Pinpointing the exact cause of your PS5 HDMI issues is crucial for effective troubleshooting. This section dives into specific scenarios, from problems with particular HDMI ports to error messages and distorted images. Understanding these situations will help you isolate the problem and find a tailored solution.

    HDMI Port and Cable-Specific Issues

    Different HDMI ports and cables can lead to varying problems. Some ports may have inherent quality issues, while certain cable types might not be compatible with your PS5 or TV. It’s essential to check both the source (PS5) and destination (TV) HDMI ports. Using a different cable or port might resolve the issue.

    Black Screen Display

    A black screen on your PS5 display can stem from various connectivity problems. First, ensure the HDMI cable is firmly connected to both the PS5 and TV. Check the input selection on your TV to confirm it’s receiving a signal from the PS5’s HDMI output. If the PS5 is in standby mode, power it off and then back on.

    If the problem persists, check the PS5’s settings for any HDMI-related configuration errors.

    Distorted Image or No Picture

    Distorted images or a complete lack of picture on your PS5 display usually point to a connectivity issue. Verify the HDMI cable’s integrity and firmness. A damaged or loose cable can cause these problems. Try a different HDMI cable to rule out cable malfunction. If the problem persists, inspect the HDMI ports on both the PS5 and TV for any visible damage.

    Ensure the correct input source is selected on your TV.

    HDMI Error Messages

    Error messages related to the HDMI connection can provide valuable clues about the problem. Carefully review the error message displayed on your TV or PS5. Consult the troubleshooting guide for your specific PS5 model or your TV’s manual for instructions on how to resolve the issue. Many HDMI error messages are associated with connectivity problems or incorrect settings.

    HDMI Cable Variations

    HDMI cables come in various brands and models. While most modern HDMI cables should work with the PS5, some lower-quality cables might experience compatibility issues or signal degradation. High-quality HDMI cables, especially those designed for high-resolution displays, can help prevent signal problems and improve image quality. Look for cables that are certified and have a reputable manufacturer.

    Troubleshooting Table Based on Error Messages

    Error Message Troubleshooting Steps
    HDMI Input Error Verify HDMI input settings on both the PS5 and TV. Check the HDMI input selection on your TV. Ensure the PS5’s HDMI output settings are correct.
    No Signal Check the HDMI cable connection. Ensure the cable is securely plugged into both the PS5 and the TV. Verify the input selection on your TV. Restart both the PS5 and TV.

    Testing Different HDMI Ports

    If possible, test different HDMI ports on both the PS5 and the TV. If the issue persists across all ports, the problem may lie elsewhere, such as a faulty HDMI cable or a malfunctioning component. Swap the HDMI cable to a different port and test each port in turn on both the PS5 and the TV. Keep a record of the ports that worked.

    Conclusive Thoughts: Ps5 Hdmi Not Working

    In conclusion, troubleshooting PS5 HDMI issues requires a systematic approach. By following the steps Artikeld in this guide, you can effectively diagnose and resolve problems ranging from loose connections to software conflicts. Remember to start with the simplest solutions and progressively move to more advanced techniques if needed. This guide aims to equip you with the knowledge and tools to resolve your PS5 HDMI woes and get back to enjoying your favorite games.