Tag: home improvement

  • Caulk the Kitchen Sink A Complete Guide

    Caulk the Kitchen Sink A Complete Guide

    Caulk the Kitchen Sink: A comprehensive guide to properly sealing your kitchen sink, ensuring a watertight and aesthetically pleasing finish. This post covers everything from choosing the right caulk type to preparing the surface, applying the caulk, and achieving a professional-looking result. We’ll also explore different sink styles and the specific caulking considerations for each, along with essential safety precautions.

    Proper caulking is crucial for kitchen sink maintenance. It prevents water damage, mold growth, and keeps your sink looking its best. This guide will walk you through the entire process, from initial preparation to final touches, equipping you with the knowledge and confidence to tackle this DIY project with ease.

    Introduction to Caulking a Kitchen Sink: Caulk The Kitchen Sink

    Caulking a kitchen sink is a crucial part of maintaining its water-tightness and aesthetic appeal. Properly applied caulk creates a barrier against water damage, preventing leaks and mold growth, which are common issues in kitchens. It also ensures a clean, seamless look around the sink’s perimeter, maintaining the overall visual appeal of the countertop. A well-maintained caulk seal protects the surrounding materials from moisture, extending the lifespan of the sink and countertop.Caulking involves applying a sealant material to the joint between the sink and countertop.

    This process not only addresses potential leaks but also improves the overall appearance of the kitchen. The right type of caulk is essential for a successful job, ensuring longevity and effectiveness. Different caulk types are available, each with its unique properties and compatibility with various materials.

    Types of Caulking for Kitchen Sinks

    Choosing the right caulk is critical for a lasting and effective seal. Various caulk types offer different properties, and selecting the correct one for your sink’s material is paramount. Understanding the characteristics of each type is essential for a successful installation.

    • Silicone Caulk: Silicone caulk is a popular choice for kitchen sinks due to its excellent water resistance, flexibility, and durability. It can withstand moisture and temperature fluctuations, making it ideal for wet areas. Silicone caulk is also mold and mildew resistant, which is a significant advantage in a kitchen environment. It’s compatible with a wide range of materials, including ceramic, porcelain, and most types of countertop materials.

    • Acrylic Caulk: Acrylic caulk is another common choice, known for its ease of application and relatively low cost. It’s often preferred for its simple application process and quick drying time. However, it may not be as durable or water-resistant as silicone caulk. Acrylic caulk is suitable for some types of countertops and is generally more cost-effective.
    • Polyurethane Caulk: Polyurethane caulk is a highly durable option, providing a strong and resilient seal. It is frequently used in demanding applications and offers exceptional weather resistance. However, it can be more challenging to work with compared to other types, and may not be the ideal choice for every kitchen sink installation.

    Materials of Kitchen Sinks and Compatible Caulks

    The material of your kitchen sink significantly influences the appropriate caulk choice. Compatibility is key for achieving a long-lasting and effective seal.

    Sink Material Compatible Caulks Considerations
    Ceramic/Porcelain Silicone, Acrylic Silicone is generally recommended for its water resistance and durability.
    Stainless Steel Silicone, Polyurethane Silicone is a good choice due to its flexibility and water resistance; Polyurethane offers exceptional strength.
    Granite Countertops Silicone, Polyurethane Silicone is recommended for its water resistance and flexibility. Polyurethane is a strong choice for high-impact areas.
    Solid Surface Countertops Silicone, Acrylic Silicone offers good adhesion and water resistance; Acrylic is a good choice due to its ease of application.

    Selecting the correct caulk type for your specific sink material is critical for a lasting and reliable seal. This ensures the caulk will effectively withstand the demands of a kitchen environment.

    Preparation for Caulking

    Caulk the Kitchen Sink

    Getting your kitchen sink ready for caulking is crucial for a successful and long-lasting repair. Proper preparation ensures a tight, waterproof seal and prevents future leaks or mold growth. This involves meticulous cleaning, careful surface preparation, and efficient removal of old caulk. Thoroughness in these initial steps will significantly impact the final result.

    Cleaning the Sink

    A clean sink is essential for a good caulk job. Residue, grease, and food particles can prevent the caulk from adhering properly. Use a solution of warm water and a mild detergent or a dedicated sink cleaner to thoroughly scrub the area. Pay close attention to crevices and corners, ensuring all debris is removed. Allow the sink to dry completely before proceeding to the next step.

    This ensures a clean and dry surface for optimal caulk adhesion.

    Surface Preparation

    Preparing the surface for caulking involves more than just cleaning. Any rough or uneven surfaces will prevent a smooth and lasting caulk seal. Using fine-grit sandpaper, carefully smooth out any imperfections. This step is crucial, as a perfectly smooth surface ensures even caulk application and a watertight seal. If necessary, use a putty knife to fill any significant gaps or holes.

    Removing Old Caulk

    Removing old caulk is an important part of the preparation process. Old caulk can become brittle and ineffective, leading to future leaks. A variety of methods can be used, each with its own advantages and disadvantages.

    Methods for Removing Old Caulk

    • Utility Knife or Caulk Remover Tool: This method is efficient for removing relatively soft caulk. The utility knife can be used to score the caulk, and then the caulk remover tool can be used to pry it off. This method can be effective, but care must be taken to avoid damaging the surrounding surface. A sharp utility knife or a specialized caulk removal tool is critical for this step.

    • Caulk Remover: Caulk remover is a chemical solution that softens the caulk, allowing it to be easily scraped away. It is often effective on various types of caulk, but it may also damage certain materials or leave a residue if not properly cleaned. Apply the remover according to package instructions and use a putty knife to scrape off the softened caulk.

      Protecting surrounding surfaces with painter’s tape is important when using caulk remover.

    • Heat Gun: Using a heat gun to soften the caulk before scraping it off is another option. This method works well for tougher caulk, but extreme care is required to avoid scorching or damaging the sink. Apply the heat gun carefully and only for a short time to prevent any damage to the sink.

    Measuring and Cutting Caulk

    Accurate measurement is vital for a proper caulk job. Use a measuring tape to determine the length of caulk required. Cut the caulk tube using a sharp utility knife or a caulk cutter. For precise cuts, use a caulk cutter or a sharp knife.

    Tools Needed for the Job

    The right tools can significantly improve the efficiency and quality of your caulk job. These are essential for a successful caulk application.

    • Measuring Tape: Essential for accurately measuring the length of caulk needed.
    • Utility Knife or Caulk Cutter: Needed for cutting the caulk tube to the required length.
    • Putty Knife: Used for smoothing the caulk and filling gaps.
    • Caulk Gun: This tool is essential for applying the caulk evenly and smoothly.
    • Fine-Grit Sandpaper: For smoothing out any imperfections in the sink’s surface.
    • Caulk Remover (optional): Used for removing old caulk, if necessary.
    • Cleaning Supplies: A mild detergent, warm water, and cleaning cloths are crucial for thoroughly cleaning the sink and removing any residue.
    • Painter’s Tape (optional): Protect the surrounding areas from caulk.

    Applying the Caulk

    Getting the caulk job right is crucial for a watertight and aesthetically pleasing result. Proper application technique, coupled with the right tools and pressure, will significantly impact the final outcome. A well-caulked kitchen sink not only looks professional but also prevents water damage and mold growth.Applying caulk effectively involves more than just squeezing it out of the tube.

    Precision in beading, smoothing, and using the correct amount of pressure is key to achieving a flawless finish. Understanding the different caulking tools and their respective strengths will guide you to a superior result.

    So, I’m tackling the kitchen sink caulk project. It’s a surprisingly involved process, but I’m determined to get it done right. Thinking about the meticulous precision needed to match the existing grout, I can’t help but draw a parallel to the intense artistry in Jenny Hval’s work, like her portrayal of a female vampire, jenny hval female vampire.

    Hopefully, my caulk job will be as meticulously done as her music. Now, back to the silicone and the caulking gun!

    Caulk Beading Techniques

    A consistent bead is essential for a professional look and ensures proper water sealing. Varying bead sizes will depend on the specific application and gap size. A smooth, even bead prevents gaps and minimizes the risk of leaks. A proper bead, applied with the right pressure and tools, is crucial for a successful caulking job.

    Pressure Application

    Applying the correct pressure is critical for a smooth, even application. Too much pressure can cause the caulk to be squeezed out of the beading, creating uneven surfaces and potential for cracking. Too little pressure, on the other hand, might result in a thin bead that won’t adequately seal the gap. Finding the right balance is important for creating a resilient and visually appealing seal.

    A good example would be applying pressure as if you were spreading butter on bread – firm, but not forceful.

    Caulking Tools and Effectiveness

    Several tools are available for caulking, each with its own advantages. A caulking gun is a standard tool that provides controlled application. Its use ensures even pressure and consistent beading. Caulk guns with different pressure settings allow for adjusting the force, making it ideal for a variety of situations. Caulk scrapers and putty knives are valuable for smoothing and shaping the caulk bead.

    They provide precision in smoothing and refining the finished caulk. Using the correct tool for the job is essential for achieving the desired result.

    Achieving a Clean Finish

    A clean and professional finish is attainable through careful attention to detail. Cleaning the area to be caulked thoroughly before application is paramount. Remove any dust, dirt, or debris that could interfere with the caulk’s adhesion. Wipe the surface with a damp cloth or sponge to ensure it’s clean and dry. After applying the caulk, immediately wipe away any excess caulk with a damp cloth or sponge while the caulk is still wet.

    This ensures a neat and clean final result. Using a damp sponge and a smooth, flat tool like a putty knife to spread the caulk is helpful in achieving a clean and professional finish. Using a damp sponge to smooth and remove excess caulk, working with the grain of the bead, will lead to a clean finish.

    Finishing Touches and Maintenance

    Caulk the Kitchen Sink

    The final steps in caulking a kitchen sink are crucial for a professional-looking and long-lasting result. Careful cleanup, understanding drying times, and proactive maintenance will prevent future issues and ensure your caulking job stands the test of time. This section covers these important aspects, providing you with the knowledge to complete the project with confidence.

    Okay, so I finally tackled caulking the kitchen sink. It was a bit of a pain, but hey, at least it’s watertight now. Speaking of things that are watertight, did you hear about how the Binding of Isaac developer is working on a new, totally secret project? the binding of isaac developer confirms hes working on a secret project Pretty cool, right?

    Now, back to the sink – I’m going to have to replace that sponge soon. Maybe get a nice, new one for the caulked sink!

    Cleaning Up Excess Caulk

    Proper cleanup is essential to avoid unsightly blemishes and ensure a smooth, finished look. Immediately after applying caulk, use a damp sponge or a damp cloth to wipe away any excess caulk that has squeezed out from the joint. Use a utility knife or a putty knife to carefully remove any stubborn or large amounts of caulk. This proactive approach prevents caulk from hardening in undesirable places, saving you time and effort in later cleanup.

    Caulk Drying Times and Curing

    Caulk requires a specific amount of time to cure and fully harden. Different types of caulk have varying drying times. Allowing the caulk to cure completely is critical for its long-term durability and effectiveness in sealing the joint. Rushing this process can lead to cracking, chipping, or the caulk coming loose over time.

    Importance of Maintenance for Prevention

    Regular maintenance is key to preventing future caulking issues. Inspect the caulked area periodically for any signs of damage or deterioration. If you notice any cracks, gaps, or peeling, address them promptly. Early intervention can prevent small issues from escalating into larger problems that require extensive repairs. Regular wiping down of the caulked area can also prevent dirt and grime from accumulating and potentially causing damage over time.

    Caulk Type Comparison

    The following table compares common caulk types based on drying time, durability, and ease of application:

    Caulk Type Drying Time Durability Ease of Application
    Silicone 24-72 hours High Medium
    Acrylic 24 hours Medium Easy
    Polyurethane 24-48 hours High Medium

    Understanding these differences allows you to choose the appropriate caulk type for your specific needs and project requirements. For example, silicone caulk is often preferred for wet areas like bathrooms due to its superior water resistance. Acrylic caulk, on the other hand, is generally easier to work with and suitable for many interior applications. Always refer to the manufacturer’s instructions for specific drying times and application guidelines.

    Troubleshooting and Common Mistakes

    Caulking a kitchen sink is a relatively straightforward task, but even experienced DIYers can encounter problems. Understanding common mistakes and how to troubleshoot them is crucial for a successful and lasting result. Proper caulking ensures a watertight seal, preventing leaks and maintaining the aesthetic appeal of your kitchen.Caulking issues, if not addressed promptly, can lead to water damage, mold growth, and the need for costly repairs.

    Careful attention to detail throughout the process, from preparation to finishing, is key to avoiding these problems. Identifying potential issues early and implementing effective solutions will save you time and money in the long run.

    Identifying Common Caulking Mistakes

    Common mistakes during caulking often stem from rushing the process or neglecting crucial steps. Inadequate preparation, improper application techniques, and neglecting post-caulking maintenance can all contribute to problems. Addressing these issues early minimizes the need for costly repairs.

    Troubleshooting Caulking Issues

    This section details how to identify and fix common caulking problems. By understanding the root cause of the issue, you can implement the right solution. Prompt action is key to preventing further damage and maintaining the integrity of your kitchen.

    Problem Cause Solution
    Gaps in the caulk Improper application or insufficient caulk, using too little caulk, or not applying even pressure. Incorrect beading technique or improper priming of the surface also contribute. Re-apply caulk, ensuring proper beading and consistent pressure throughout the application. Use a caulking gun to maintain a consistent bead and apply enough caulk to fill the gap completely. Ensure the surface is clean, dry, and primed before application.
    Uneven surface Improper smoothing, using too much pressure, or not using the correct smoothing tool. Uneven surface preparation also contributes to uneven caulk. Use a damp cloth or a specifically designed caulk smoothing tool to gently create an even surface. Work in small sections and avoid applying too much pressure. Apply smooth, consistent pressure while smoothing to prevent uneven surfaces and ridges.
    Cracks in the caulk Drying too quickly, insufficient bonding between the caulk and the surface, or improper surface preparation. Using the wrong type of caulk for the job can also contribute. Remove the cracked caulk section using a utility knife or a scraper. Clean the area thoroughly and apply a fresh bead of caulk, ensuring proper surface preparation. Ensure the caulk is appropriate for the specific material and environment (e.g., exterior or interior).
    Mold or mildew growth Moisture trapped behind the caulk or poor surface preparation. The caulk may not be watertight enough to prevent moisture from seeping through. Remove the affected caulk and thoroughly clean the area. Ensure the surface is completely dry and free of any moisture. Apply a mildew-resistant sealant to the surface to prevent future growth.

    Preventing Future Caulking Problems, Caulk the Kitchen Sink

    Proper preparation is key to avoiding future problems. A clean, dry, and primed surface is crucial for a strong, long-lasting seal. Using the right type of caulk for the specific application is essential for ensuring durability and longevity. Regular maintenance and vigilance can prevent future issues.

    Different Kitchen Sink Styles and Caulking

    Caulking a kitchen sink is crucial for water-tightness and a polished aesthetic. However, the technique varies depending on the sink style. Understanding these differences is vital for a successful and lasting job. Proper caulking ensures that water doesn’t seep into the surrounding areas and creates a seamless transition between the sink and the countertop.Different sink types require specific caulking techniques to achieve a watertight seal and a visually appealing finish.

    This section will explore the various sink styles and the corresponding caulking considerations. It will also provide examples and a table outlining the differences in caulking for each type.

    Undermount Sink Caulking

    Undermount sinks are installed below the countertop, creating a flush, seamless appearance. The caulking process for an undermount sink focuses on sealing the perimeter where the sink meets the countertop. A bead of caulk is applied along the entire perimeter, ensuring a complete seal. This ensures water doesn’t seep into the gap between the sink and countertop.

    The caulk should be a color that blends seamlessly with the countertop for a unified look. A professional-looking job involves applying a thin, even bead of caulk, smoothing it out with a wet finger, and removing any excess. The caulk needs to be cured properly before the countertop is placed back in place.

    Okay, so caulking the kitchen sink. It’s a pretty mundane task, but you know, sometimes those little jobs can be surprisingly satisfying. Like, the meticulous precision needed reminds me of the intricate layers in Tyler, the Creator’s Igor album. tyler the creator igor really delves into that feeling of meticulous crafting. Getting that perfect bead of caulk, it’s almost like creating a sonic masterpiece, just on a much smaller scale.

    Back to the sink, gotta get that sealant perfect!

    Drop-in Sink Caulking

    Drop-in sinks sit on the countertop, creating a more visible joint line. The caulking for a drop-in sink is slightly different. It involves caulking around the edges and the back of the sink. The caulk creates a seal along the sink’s perimeter, ensuring water doesn’t seep into the space between the sink and countertop. A visible bead of caulk is often acceptable, and a sealant that matches the countertop or a similar color is preferred.

    Proper curing of the caulk before using the sink is critical.

    Sink Feature Caulking Considerations

    Caulking around sink features like the drain and faucet is equally important for a complete watertight seal. For the drain, a bead of caulk should be applied around the drain opening. The caulk should be a smooth, even layer, ensuring a complete seal. Caulking around the faucet is done similarly, ensuring a tight seal between the faucet and the sink.

    When applying caulk around these features, make sure to press firmly to ensure adhesion.

    Caulking Examples for Different Sink Styles

    An undermount sink, seamlessly integrated beneath the countertop, requires caulking only along the perimeter. A drop-in sink, resting on the countertop, needs caulk around the edges and back, ensuring a watertight seal around the sink.

    Table of Caulking Differences

    Sink Style Caulking Considerations Visual Example
    Undermount Caulk the perimeter of the sink, ensuring a tight seal along the entire edge where the sink meets the countertop. Imagine a sink recessed into a countertop with a thin, even bead of caulk precisely along the entire perimeter. The caulk should be the same color as the countertop for a seamless look.
    Drop-in Caulk around the edges and the back of the sink, ensuring a complete seal along the sink’s perimeter and back edge. Visualize a sink sitting on the countertop, with a noticeable bead of caulk around the edges and the back, providing a watertight seal.

    Safety Precautions

    Caulking a kitchen sink, while often a DIY project, requires careful attention to safety. Improper handling of caulk and other materials can lead to significant health risks and costly mistakes. This section details essential safety precautions to ensure a safe and successful project.Proper safety measures are crucial when working with construction materials, especially caulk. Ignoring these precautions can result in adverse health effects and damage to your project.

    Chemical Exposure Hazards

    Caulk, primers, and other materials used in kitchen sink repair often contain chemicals that can irritate the skin, eyes, and respiratory system. Long-term exposure can lead to more serious health problems.

    • Always wear appropriate personal protective equipment (PPE), including gloves, eye protection, and a respirator, when handling caulk and other materials. This will help prevent direct contact with harmful substances.
    • Work in a well-ventilated area. Adequate ventilation minimizes inhalation of harmful fumes and vapors, thus reducing the risk of respiratory issues.
    • Follow the manufacturer’s instructions carefully regarding material handling, ventilation, and safe disposal of leftover materials. Manufacturers provide crucial safety guidelines that should always be followed.
    • If you experience any adverse reaction, such as skin irritation or breathing difficulties, immediately discontinue work and seek medical attention. Your health is paramount; don’t hesitate to take necessary action.

    Physical Hazards

    Besides chemical hazards, there are potential physical risks involved in caulking. These risks can range from minor cuts to more serious injuries.

    • Use caution when handling tools like utility knives or putty knives. Sharp objects require careful handling to prevent cuts and injuries.
    • Ensure a stable and secure work area. A slippery or unstable surface can lead to falls and injuries. Choose a level and sturdy workspace.
    • When working with caulk guns, maintain a firm grip and control to avoid accidental discharges. Incorrect handling can lead to the caulk being applied in unexpected places.
    • Take frequent breaks to avoid fatigue, which can increase the risk of accidents. Taking breaks helps maintain focus and prevents errors.

    Safety Equipment

    Using the correct safety equipment is critical for minimizing potential risks during caulking.

    • Gloves: Protective gloves, such as nitrile or latex gloves, should be worn to prevent skin irritation and chemical exposure from the caulk.
    • Eye Protection: Safety glasses or goggles are essential to protect your eyes from splashes or fumes.
    • Respirator: A respirator, if necessary, should be used in poorly ventilated areas to prevent inhalation of harmful vapors and dust.
    • Work Clothing: Wear old clothes or a protective apron to prevent staining or soiling. This prevents the caulk from permanently marking your clothes.

    Safety Measures

    Following a comprehensive set of safety measures ensures a safe and efficient caulking process.

    1. Thoroughly read and understand the manufacturer’s instructions for all materials and tools. This step is critical to avoid potential hazards.
    2. Ensure proper ventilation in the work area. Adequate airflow helps to reduce exposure to harmful fumes and vapors.
    3. Wear all necessary personal protective equipment (PPE) at all times during the project. PPE provides an essential barrier against potential hazards.
    4. Store all materials safely and securely, away from children and pets. Proper storage prevents accidents and unintended exposures.
    5. Clean up any spills or messes immediately. This helps to prevent slips, falls, and further contamination.

    Caulk Types and Their Applications

    Choosing the right caulk for your kitchen sink is crucial for a watertight seal and a professional finish. Different caulk types have varying properties, making some better suited for specific applications than others. Understanding these differences will help you avoid costly mistakes and ensure your caulking job lasts for years to come.Selecting the correct caulk type depends on factors like the sink material, the location of the caulking, and the desired level of flexibility and water resistance.

    Different caulks offer varying degrees of these properties, which directly impact the longevity and effectiveness of the seal. Consider the potential for movement or expansion of the sink material and the frequency of water exposure when making your choice.

    Silicone Caulk

    Silicone caulk is a popular choice for kitchen sinks due to its excellent water resistance and flexibility. It can withstand repeated exposure to moisture and temperature fluctuations, making it ideal for areas prone to splashing or high humidity. Its flexibility allows it to conform to slight imperfections in the surface, further enhancing its suitability for sealing around sinks.

    Acrylic Caulk

    Acrylic caulk is a more affordable option, but it doesn’t offer the same level of water resistance or flexibility as silicone. It’s generally suitable for applications where water exposure is minimal and the risk of movement is low. While it may be easier to apply and remove, its durability is lower, especially in high-moisture environments.

    Butyl Caulk

    Butyl caulk is a good choice for sealing around sinks where there’s a need for an extremely strong and durable seal, often in areas with significant movement or expansion. It’s known for its strong adhesion to a wide variety of surfaces, but its flexibility is limited, and it might not be ideal for areas where movement is expected. This is important to consider when installing the caulk around a sink, especially if the material will experience changes in temperature or expansion/contraction.

    Comparison Table of Caulk Types

    Caulk Type Pros Cons
    Silicone Water-resistant, flexible, long-lasting, good adhesion to various surfaces Can be difficult to remove, may require more tools, potentially more expensive
    Acrylic Affordable, easy to apply, easy to remove Lower water resistance, less flexible, shorter lifespan in high-moisture areas
    Butyl Excellent adhesion, strong seal, suitable for areas with significant movement Less flexible, may not be ideal for areas with potential for movement or expansion, can be difficult to apply

    Selecting the Right Caulk for Your Kitchen Sink

    To choose the best caulk type for your kitchen sink, consider these factors:

    • Material of the sink: Different materials may react differently to various caulks. For instance, stainless steel sinks might work well with silicone or acrylic, while composite materials might need a specific caulk.
    • Location of the caulking: Areas prone to constant water exposure, such as the base of the sink, require a more water-resistant caulk like silicone. Less-exposed areas might be suitable for acrylic.
    • Desired flexibility: If there’s potential for movement or expansion of the sink, a flexible caulk like silicone is recommended. Rigid caulks like butyl may be better suited for applications with little to no movement.

    For example, a kitchen sink with a stainless steel countertop and a noticeable gap around the sink would benefit from a flexible, water-resistant silicone caulk. This ensures a durable seal that withstands water exposure and potential movement. Conversely, a sink with a stable composite countertop in a low-humidity area could be sealed with acrylic caulk, due to its ease of application and lower cost.

    Final Thoughts

    In conclusion, caulking your kitchen sink is a straightforward process that can significantly enhance its longevity and appearance. By following the steps Artikeld in this guide, you can achieve a watertight seal and a professional-looking finish. Remember to choose the right caulk type for your sink material, prepare the surface thoroughly, apply the caulk with precision, and allow ample drying time.

    Addressing potential issues and understanding different sink styles further ensures a successful project.

    This guide is a complete resource to make your kitchen sink caulking project a success. With the right knowledge and preparation, you can transform your kitchen sink into a watertight and visually appealing feature.

  • Cover Up a Bad Wall  A Complete Guide

    Cover Up a Bad Wall A Complete Guide

    Cover Up a Bad Wall: This comprehensive guide delves into the art of transforming unsightly walls into beautiful focal points. Whether your wall suffers from cracks, uneven surfaces, or plumbing nightmares, we’ll equip you with the knowledge and tools to tackle any issue head-on.

    From identifying the problem’s root cause to choosing the perfect cover-up method, we’ll explore the entire process, emphasizing proper preparation, execution, and long-term maintenance. Discover how to create a visually appealing and functional space, even with a challenging starting point.

    Identifying the Problem

    A poorly finished wall can significantly detract from a room’s overall aesthetic appeal and even compromise its structural integrity. Understanding the various types of “bad” walls and the potential consequences of simply covering them up is crucial before embarking on any cosmetic repair project. Ignoring underlying issues can lead to costly and time-consuming problems down the line.Addressing the root cause of a wall’s imperfections is always the best approach, even if it requires more upfront effort.

    A superficial fix will only mask the problem, potentially leading to more extensive repairs later. This section explores different types of problematic walls, the reasons behind their flaws, and the long-term implications of overlooking them.

    Types of Bad Walls

    Various factors can contribute to a wall’s undesirable appearance. These imperfections range from minor cosmetic issues to more significant structural problems.

    • Cracked Plaster: Cracked plaster is a common issue, often caused by settling, temperature fluctuations, or improper application. These cracks can range from hairline fractures to wider fissures, significantly impacting the wall’s aesthetic appeal. If left unaddressed, cracks can widen, allowing moisture penetration and potentially causing further damage.
    • Uneven Surfaces: Uneven surfaces are often a result of inconsistent application of materials like drywall or plaster. The resulting bumps, dips, or irregularities create an unprofessional and unappealing look. Such imperfections can affect the way paint or other finishes are applied, further compromising the wall’s appearance.
    • Visible Plumbing Issues: Exposed pipes, leaks, or poorly installed plumbing fixtures can create significant aesthetic problems. These issues not only detract from the wall’s visual appeal but can also lead to moisture damage and mold growth, posing health risks. In such cases, immediate repairs are necessary to prevent further complications.
    • Poorly Finished Drywall: Drywall imperfections, including visible seams, gaps, or uneven textures, can make a wall appear unfinished and unprofessional. These issues can be corrected with proper techniques, but ignoring them can create a significant visual concern.

    Reasons for Wall Imperfections

    Several factors can contribute to the poor quality of a wall, from simple oversight to more significant issues.

    • Budget Constraints: Limited budgets can sometimes result in the use of inferior materials or rushed workmanship, leading to visible imperfections. However, investing in quality materials and skilled labor can prevent many of these issues from arising in the first place.
    • Rushed Construction: Construction projects that are rushed often lead to corners being cut, resulting in poor quality and visible imperfections in the walls. Prioritizing thorough work processes can minimize these problems.
    • Design Flaws: Sometimes, the design itself might not account for potential issues, leading to problems with the wall’s structure or finish. Careful planning and consideration of construction methods can help mitigate these problems.

    Long-Term Problems of Covering Up Bad Walls

    Ignoring underlying issues can lead to more significant problems down the line.

    • Moisture Damage: Cracked plaster or poorly finished drywall can allow moisture to penetrate the wall, leading to mold growth, rot, and structural damage. This can be a costly and time-consuming issue to resolve.
    • Structural Instability: Uneven surfaces or cracked plaster can compromise the wall’s structural integrity, making it more prone to further damage. Ignoring these problems can result in the wall becoming unstable over time.
    • Increased Repair Costs: Addressing the problem later will likely involve more extensive and costly repairs than a simple fix early on. Early identification and remediation is key to minimizing future expenses.

    Importance of Addressing the Underlying Issue

    Ignoring the underlying issue can lead to a multitude of problems. This is crucial for ensuring a structurally sound and aesthetically pleasing wall.

    • Prevention of Further Damage: Addressing the root cause of the problem is essential to prevent further damage to the wall and the surrounding areas.
    • Maintaining Structural Integrity: Repairing the underlying issue ensures that the wall maintains its structural integrity, preventing future problems and maintenance costs.
    • Long-Term Value: A properly repaired wall contributes to the long-term value of a property by ensuring its structural soundness and visual appeal.

    Choosing the Right Cover-Up Method

    Deciding how to conceal a damaged wall depends heavily on the extent of the damage, your budget, and your aesthetic preferences. A thorough assessment of the problem is crucial, as different materials will handle varying degrees of damage and imperfections differently. The choice isn’t just about covering up the issue, but about creating a lasting and visually appealing solution.Different materials offer varying degrees of practicality, visual appeal, and cost-effectiveness.

    Understanding the strengths and weaknesses of each option is essential to making an informed decision. This section explores the diverse range of cover-up methods, analyzing their suitability for different situations.

    Paint

    Paint is a common and often cost-effective solution for minor imperfections. Its versatility allows for a quick and relatively easy application, making it a popular choice for concealing minor cracks, stains, or uneven textures. The wide variety of colors and finishes available ensures that paint can be used to match existing décor or create a completely new look.

    However, paint’s effectiveness is limited by the severity of the underlying damage. If the damage is significant, multiple coats may be necessary, which can impact the overall cost.

    Wallpaper

    Wallpaper provides a more substantial cover-up than paint, offering a wide range of patterns and textures to create a more dramatic effect. Its ability to mask significant flaws and imperfections makes it an excellent choice for covering more substantial damage. However, wallpaper can be more expensive than paint, and the installation process can be more complex, potentially requiring specialized tools and labor.

    The longevity of wallpaper depends on the quality of the paper and the care taken in its application.

    Paneling

    Paneling is a more substantial cover-up method, providing a more durable and potentially longer-lasting solution. It can effectively conceal significant structural issues, providing a more permanent solution. However, paneling often comes with a higher price tag, both in material and labor costs. The installation process can be more time-consuming than other methods. Paneling can create a more sophisticated and visually appealing effect, adding depth and character to a room.

    Decorative Wall Coverings

    Decorative wall coverings, such as vinyl or fabric, offer a balance between the cost-effectiveness of paint and the visual impact of wallpaper. These coverings come in a wide variety of styles and textures, providing a more dynamic and interesting alternative to standard paint or wallpaper. The cost of decorative wall coverings typically falls between paint and wallpaper, while the installation process is often similar to wallpapering.

    Durability depends heavily on the specific type of material used and the care it receives.

    Comparison Table

    Material Pros Cons Cost Durability
    Paint Cost-effective, versatile, quick application, wide range of colors Limited concealing power for major flaws, may require multiple coats Low Moderate
    Wallpaper Conceals significant flaws, wide range of patterns/textures More expensive than paint, more complex installation, potentially less durable than paneling Medium Moderate
    Paneling Durable, masks substantial structural issues, adds depth and character High cost, complex installation, more time-consuming High High
    Decorative Wall Coverings Good balance of cost and visual impact, wide variety of styles Durability depends on material type, installation similar to wallpaper Medium Moderate-High

    Preparation and Planning

    Cover Up a Bad Wall

    Getting a bad wall looking good again involves more than just slapping on a fresh coat of paint. Thorough preparation is key to a successful cover-up, ensuring a smooth, durable finish that lasts. This crucial step often determines the longevity and quality of the final result. Proper surface preparation prevents issues like peeling paint, uneven surfaces, and premature failure of the cover-up material.A well-prepared surface is a happy surface, and a happy surface is a surface that accepts the cover-up material with enthusiasm.

    This section delves into the essential preparation steps, from cleaning and patching to priming, to help you achieve a flawless transformation.

    Covering up a bad wall can be tricky, requiring careful planning and often a lot of elbow grease. But sometimes, the best way to handle a less-than-stellar wall is to make a bold statement, like the artist Mias, whose album cover, as discussed in this insightful article on mias album cover is not subtle , is anything but subtle.

    It’s a vibrant, attention-grabbing design that certainly makes a statement, which could be a great inspiration for dealing with a less-than-perfect wall, too.

    Cleaning the Wall

    Thorough cleaning is the first step in preparing a wall for a cover-up. Dirt, dust, loose paint, and debris can hinder the adhesion of the new cover-up material, leading to an uneven or short-lived finish. Use a damp sponge or cloth to remove loose debris. For tougher grime, a mild detergent solution can be effective, but avoid harsh chemicals that could damage the wall’s existing surface.

    Patching Wall Damage

    Wall damage, from cracks to holes, needs careful attention to prevent future problems. Imperfections can compromise the integrity of the cover-up, leading to visible flaws or even the failure of the entire project. Appropriate patching is crucial. Different patching techniques are suitable for various types of damage.

    Covering up a bad wall can be tricky, but sometimes a fresh coat of paint is just the ticket. Speaking of creative solutions, did you hear that Jonny Greenwood, the incredible composer known for his haunting scores (like Jonny Greenwood to score Tilda Swinton film ), is working on a new project? Hopefully, his unique musical talents can inspire a similar transformative effect on a dull wall in my house! Maybe I’ll tackle it this weekend.

    Patching Techniques

    • For small holes or cracks, a patching compound is ideal. Apply the compound to the damaged area, smoothing it out with a putty knife. Allow the compound to dry completely before moving on to the next step.
    • For larger holes, use a patching compound mixed with fiberglass mesh or similar reinforcement. This creates a strong, durable patch that can withstand future stress. Ensure the patch is properly embedded and level with the surrounding wall.
    • For significant damage or large gaps, a drywall patch is the recommended approach. Cut a piece of drywall that matches the damaged area, reinforce it with supporting materials, and secure it to the wall with screws or adhesive.

    Priming the Wall

    Priming the wall is a crucial step that often gets overlooked. A primer creates a uniform surface for the cover-up material to adhere to, ensuring a more even finish and preventing the cover-up material from absorbing too much of the paint. It also helps seal any imperfections, preventing them from showing through the cover-up.

    Choosing the Right Tools

    Selecting the right tools is essential for efficient and effective preparation. A good quality putty knife, a variety of brushes, a primer sprayer (if appropriate), and appropriate sandpaper are all necessary. The correct tools will make the process smoother, faster, and produce a better result.

    Step-by-Step Preparation Guide, Cover Up a Bad Wall

    1. Clean the Wall: Remove loose debris, dirt, and dust with a damp cloth or sponge.
    2. Assess the Damage: Identify and assess the extent of wall damage (holes, cracks, etc.).
    3. Patch Wall Damage: Apply appropriate patching compounds or drywall patches as needed. Allow to dry completely.
    4. Prime the Wall: Apply a coat of primer to the entire wall, ensuring complete coverage. Allow to dry according to the primer instructions.
    5. Sand (Optional): If necessary, lightly sand the primed wall to create a smooth surface for the cover-up material.

    Execution and Application

    Transforming a problematic wall into a stunning feature requires careful execution. This phase involves applying the chosen cover-up material with precision and attention to detail. The right techniques can significantly impact the final outcome, ensuring a seamless and professional result. Following a step-by-step approach, combined with understanding the unique characteristics of each material, will lead to a successful and satisfying outcome.Proper execution and application of the chosen material is crucial for a successful wall cover-up project.

    This phase is about transforming a less-than-ideal wall into a stunning feature. Careful consideration of the chosen material’s properties and characteristics, along with meticulous execution, are key to achieving a flawless result.

    Applying Paint

    Applying paint effectively is a fundamental skill for a successful wall cover-up. A smooth and even finish requires preparation, precise application, and attention to detail.

    • Preparation is key. Ensure the surface is clean, free of dust, debris, and imperfections. Patch any holes or cracks before painting. Primer is essential to ensure proper adhesion and a smooth finish. A properly prepped surface will yield superior results.

    • Select the right tools. High-quality brushes, rollers, and sprayers are essential. Choosing the appropriate tool for the paint type and desired coverage is important.
    • Apply the paint in thin, even coats. Avoid applying too much paint in one go, as this can lead to drips and runs. Work in sections, allowing each coat to dry completely before applying the next.
    • Use techniques like feathering and blending for smooth transitions. This helps to eliminate visible brushstrokes and creates a seamless finish. Understanding these techniques is crucial for achieving a professional-looking outcome.
    • Addressing imperfections is vital. If you encounter imperfections or uneven surfaces, use putty or filler to correct them before applying the final coat. Be patient and meticulous in your approach.

    Applying Wallpaper

    Wallpaper application demands precision and patience. Choosing the right adhesive and following the manufacturer’s instructions is paramount.

    • Thorough preparation is crucial. Clean the wall, ensuring it’s free of dirt, dust, and any loose paint. Smooth out any imperfections. Ensure the surface is clean and ready to accept the wallpaper.
    • Prepare the wallpaper according to the manufacturer’s instructions. Unroll the wallpaper and let it acclimate to the room’s temperature and humidity. This prevents wrinkles and ensures even adhesion.
    • Apply the adhesive carefully. Following the manufacturer’s instructions is crucial for successful application. Apply the adhesive evenly to both the wall and the wallpaper.
    • Position the wallpaper carefully. Start at a corner and work your way across the wall, ensuring the wallpaper is aligned and smooth. Avoid stretching or tearing the wallpaper.
    • Use a wallpaper smoother or a damp sponge to remove any air bubbles or wrinkles. Thorough smoothing and removal of bubbles is key to a professional look.

    Applying Paneling

    Paneling adds a distinct visual element to a room. Precision and careful alignment are vital for a successful application.

    • Accurate measurements are essential. Ensure the paneling fits the wall’s dimensions correctly. Carefully measure and cut the panels to fit.
    • Apply adhesive according to the manufacturer’s directions. Proper application of the adhesive is critical for secure and lasting installation.
    • Carefully align the panels. Use a level to ensure the panels are straight and even. Ensure proper alignment for a seamless look.
    • Secure the panels firmly to the wall. Use the appropriate tools and techniques to secure the panels. Pay attention to detail and follow the manufacturer’s instructions.
    • Seal any gaps or seams properly. Use caulk or similar materials to fill any gaps and create a smooth transition between panels. This step is important to maintain the integrity of the paneling.

    Applying Decorative Wall Coverings

    Decorative wall coverings offer diverse styles and textures. Each material requires specific application techniques.

    Covering up a bad wall can feel like a temporary fix, a band-aid on a deeper problem. It’s like trying to mask the underlying feelings of isolation and disconnect, much like the themes explored in the new zine, the presents void emas new zine tackles modern alienation. Ultimately, though, a good paint job or wallpaper can’t truly erase the issue.

    Maybe a new perspective or a fresh approach, like a new zine, is what’s really needed to fix that bad wall for good.

    • Understand the material’s properties. Different materials, such as textured wall coverings or self-adhesive tiles, require different approaches. Knowing the material’s characteristics is important.
    • Follow the manufacturer’s instructions. Each material has specific instructions for preparation and application. Adhering to these guidelines is critical.
    • Apply the material according to the manufacturer’s guidelines. Carefully adhere the covering to the wall. Pay attention to detail.
    • Address any imperfections or irregularities. Correct any irregularities during the application process. This is vital to ensure a smooth finish.
    • Use appropriate tools for different materials. Using the right tools can significantly impact the quality of the finish. Different materials require different tools.

    Maintaining the Cover-Up: Cover Up A Bad Wall

    Cover Up a Bad Wall

    Keeping your wall cover-up looking its best over time requires a proactive approach. Proper maintenance is key to preventing damage and extending the life of your investment. This involves understanding the specific needs of the material you’ve chosen, from paint to wallpaper. A little preventative care goes a long way in ensuring a beautiful, long-lasting result.

    Material-Specific Maintenance Strategies

    Different materials require different maintenance strategies. Understanding these nuances is crucial for preserving the integrity of your cover-up. Paint, wallpaper, and other materials each react to environmental factors differently, demanding specific care. Consistency in care is vital for preventing premature degradation.

    • Paints: Regular cleaning and touch-ups are essential for maintaining the finish of paint-based cover-ups. Avoid harsh chemicals and abrasive cleaners. A gentle soap and water solution is typically sufficient. For minor imperfections, touch-up paint can restore the wall’s uniformity. In cases of larger damage, a complete repaint may be necessary.

      Remember that the quality of the initial paint job significantly impacts the ease of maintenance and long-term appearance.

    • Wallpapers: Wallpaper cleaning methods vary significantly depending on the type of wallpaper. Some wallpapers can be gently wiped down with a damp cloth, while others require specialized cleaning solutions. Always test any cleaning solution in an inconspicuous area first to prevent damage to the wallpaper’s design or texture. Frequent dusting helps to maintain the overall aesthetic and prevent dirt buildup.

    • Other Cover-Ups: Decorative panels, murals, and other unique cover-up materials require specific cleaning and maintenance routines. Manufacturers’ instructions should always be consulted for proper handling and care. Understanding the material’s susceptibility to moisture, UV exposure, or other environmental factors is key to preventing long-term damage.

    Preventative Measures for Damage

    Implementing preventative measures is crucial to maintain the integrity of your cover-up. Proactive strategies will minimize the need for extensive repairs or replacements in the future.

    • Environmental Control: Controlling humidity and temperature fluctuations can significantly reduce the risk of mold growth or warping. Maintaining a stable environment is crucial, especially for wallpaper and other materials sensitive to moisture.
    • Protective Coatings: Applying a protective sealant or varnish to certain cover-ups, like wood panels or painted surfaces, can help to shield them from environmental elements and wear and tear. This is particularly helpful for areas that are frequently exposed to moisture or direct sunlight.
    • Regular Inspections: Routine inspections are crucial for early detection of potential problems. This involves checking for any signs of damage, such as peeling paint, discoloration, or loose wallpaper. Addressing issues promptly can prevent them from escalating into more significant problems.

    Addressing Common Problems

    Recognizing and resolving common issues can help to maintain the aesthetic appeal and integrity of your wall cover-up.

    • Peeling Paint: Peeling paint is often caused by inadequate preparation, poor quality paint, or environmental factors like humidity fluctuations. Removing the loose paint, repairing the surface, and applying a fresh coat of paint is the usual solution.
    • Damaged Wallpaper: Damaged wallpaper can be caused by physical damage, moisture, or improper handling. The appropriate repair strategy depends on the type of damage. Minor tears can often be mended with specialized wallpaper repair kits. More extensive damage may necessitate a complete replacement.
    • Mold and Mildew: Mold and mildew growth is often a result of high humidity. Addressing the moisture issue is critical. Cleaning the affected area with a solution of bleach and water, then addressing the underlying humidity issue, is often the best course of action.

    Cleaning and Repairing Techniques

    Implementing proper cleaning and repair techniques is crucial for preserving the beauty and longevity of your cover-up. Specific cleaning and repair methods vary depending on the type of cover-up.

    • General Cleaning: Use a soft cloth or sponge with a mild soap and water solution for most paint or wallpaper cover-ups. Avoid harsh chemicals or abrasive materials, which could damage the surface. Regular dusting helps prevent buildup and maintain cleanliness.
    • Repairing Tears and Holes: The method for repairing tears and holes depends on the material. For paint, touch-up paint or patching compound can be used. For wallpaper, specialized repair kits or a similar color patch are often effective. Always follow the manufacturer’s instructions for best results.

    Aesthetic Considerations

    Transforming a flawed wall into a captivating focal point hinges on thoughtful aesthetic choices. The right design approach, color palette, and lighting can dramatically enhance the overall ambiance of a room. Careful consideration of the existing room design is essential for a seamless integration of the cover-up.Choosing the right style and color for the cover-up is not merely about aesthetics; it’s about creating a space that feels cohesive and harmonious.

    The selected method must complement the existing furniture, fixtures, and decor, fostering a unified and inviting atmosphere. This is achieved by understanding the interplay between different design elements and how they contribute to the overall visual narrative.

    Different Design Styles

    A variety of design styles can effectively mask imperfections while simultaneously adding character to a room. Modern, traditional, rustic, and eclectic designs each offer unique opportunities for creative expression. A modern approach might involve clean lines, geometric patterns, and a muted color palette. A traditional style could embrace floral patterns, rich colors, and intricate details. Rustic designs often feature natural materials, earthy tones, and textures inspired by nature.

    Eclectic styles, in contrast, blend elements from diverse sources to create a dynamic and personalized look.

    Color and Pattern Selection

    The color and pattern choices play a crucial role in creating a visually appealing and harmonious space. The goal is to select hues and patterns that complement the existing color scheme of the room. For example, if the room is predominantly neutral, incorporating accent colors and patterns into the cover-up can add depth and interest. Conversely, if the room features bold colors, a more subdued cover-up with subtle patterns might be more appropriate.

    The selection of patterns should also be mindful of the scale of the room. Large-scale patterns might overwhelm a small room, while subtle patterns can appear lost in a large space.

    Lighting and Decorative Elements

    Proper lighting can dramatically enhance the aesthetics of a covered wall. Strategically placed lighting fixtures can highlight the texture and patterns of the cover-up. For instance, recessed lighting can subtly illuminate the design, while pendant lights can add a touch of elegance. The addition of mirrors or decorative artwork can further enhance the visual appeal of the wall.

    Incorporating elements that reflect light and draw attention to the cover-up will elevate the overall ambiance of the room.

    Considering the Overall Room Design

    The chosen cover-up method should seamlessly integrate with the existing room design. A traditional-style cover-up would be less suitable in a modern room, as it would disrupt the overall aesthetic. Therefore, carefully analyze the existing room design to select a cover-up method that complements it. Consider factors like the furniture style, existing color scheme, and overall architectural style.

    Table of Design Style Suggestions

    Style Color Palette Material Pattern
    Modern Neutral (greys, whites, blacks), accented with pops of color Smooth, matte paints, textured wallpaper, panels Geometric, stripes, abstract
    Traditional Rich, warm tones (reds, blues, greens), gold accents Paints, wallpapers with floral or damask patterns, wooden paneling Floral, damask, toile
    Rustic Earthy tones (browns, greens, grays), natural wood accents Wood paneling, textured paints, natural fibers Natural elements, stripes, checks
    Eclectic Combination of colors and patterns from various styles Various materials (fabric, wallpaper, wood) Mix-and-match patterns, bold colors

    Closing Summary

    In conclusion, covering up a bad wall isn’t just about masking imperfections; it’s about transforming a space. By understanding the problem, selecting the right materials, and meticulously preparing the surface, you can achieve a beautiful and durable result. Remember, proper preparation is key to a successful outcome. With the right approach, any wall can be transformed into a stunning feature of your home.

    So, dive into the detailed guide, arm yourself with knowledge, and get ready to tackle that bad wall!

  • Install an AC Filter A Comprehensive Guide

    Install an AC Filter A Comprehensive Guide

    Install an AC Filter is crucial for maintaining a comfortable and healthy indoor environment. Proper filter selection and installation directly impacts your air conditioner’s efficiency, lifespan, and your overall comfort. This guide will walk you through everything from understanding different filter types to troubleshooting common problems, empowering you to maintain optimal AC performance and reduce your environmental footprint.

    From choosing the right filter size for your unit to understanding the various filter materials and their impact on efficiency, this guide provides a step-by-step approach to ensure a smooth installation process. We’ll also explore maintenance tips, common troubleshooting steps, and even the environmental benefits of responsible AC filter management.

    Introduction to AC Filters

    Air conditioner filters are crucial components of your cooling system, acting as a barrier against dust, pollen, pet dander, and other airborne particles. These tiny contaminants, if allowed to circulate through your air conditioner, can quickly reduce its efficiency and potentially damage internal components. Regular filter maintenance is vital for maximizing the lifespan and performance of your AC unit.Regularly replacing or cleaning your AC filter is essential for maintaining good indoor air quality and ensuring your air conditioner functions optimally.

    A clogged filter restricts airflow, forcing the compressor to work harder. This increased strain leads to higher energy consumption, reduced cooling capacity, and premature wear and tear on your unit. Proper filter maintenance not only protects your AC but also enhances your comfort by providing cleaner, healthier air.

    Types of AC Filters

    Various types of air conditioner filters are available, each with unique characteristics. Choosing the right filter for your needs ensures optimal performance and extends the life of your system. Common types include pleated and fiberglass filters.

    Pleated Filters

    Pleated filters are designed with a series of folds that increase their surface area, allowing them to trap more contaminants. This enhanced filtration capability often translates to improved air quality. The increased surface area also results in a higher capacity for dust and particle collection. This is a common feature that helps to minimize the need for frequent filter changes.

    Keeping your air conditioner running smoothly is important, and a key part of that is installing a new AC filter. While I’m thinking about preventative maintenance, I’m also excited about the new digital livestream network launched by Vans, vans launches new digital livestream network. It’s a great way to keep up with all things skate and music.

    Getting a new filter will definitely help the AC last longer, so it’s a win-win!

    Fiberglass Filters

    Fiberglass filters are a more economical option compared to pleated filters. They typically consist of a woven structure of fiberglass fibers. These filters are generally less efficient at trapping fine particles compared to pleated filters, potentially impacting indoor air quality. However, they are an effective barrier against larger particles, protecting the system from dust and debris.

    Comparison of Filter Types

    Filter Type Material Cost Efficiency
    Pleated Polyester or polypropylene material with a pleated structure Moderate High (due to the large surface area)
    Fiberglass Fiberglass fibers Low Moderate (compared to pleated)

    How to Choose the Right AC Filter

    Selecting the right air conditioner filter is crucial for maintaining optimal performance and efficiency. A poorly chosen filter can lead to reduced airflow, increased energy consumption, and a shorter lifespan for your unit. Understanding the factors influencing filter selection will help you make informed decisions and ensure your AC system functions at its best.Choosing the correct air conditioner filter involves considering several key factors, including filter size, rating, and compatibility with your specific AC model.

    The filter’s effectiveness directly impacts the system’s ability to cool your home efficiently. Proper sizing ensures adequate airflow, while the right rating guarantees the filter can handle the volume of air it must process.

    Factors to Consider When Selecting an AC Filter, Install an AC Filter

    Selecting the correct filter is crucial for maintaining optimal performance and extending the lifespan of your air conditioner. Several factors need consideration, such as filter size, type, and compatibility with your specific model.

    • Filter Size: Matching the filter size to your air conditioner’s specifications is paramount. An improperly sized filter can restrict airflow, leading to reduced cooling capacity and increased energy consumption. Oversized filters may not fit properly, causing air leaks and hindering performance. Therefore, accurately determining the filter size is essential for optimal operation.
    • Filter Type: Different filter types offer varying levels of filtration. Pleated filters, for example, generally provide more comprehensive filtration than basic foam filters. Understanding the type of filter best suited for your needs is crucial to achieving the desired level of air quality.
    • Filter Rating: Filter ratings, typically expressed in MERV (Minimum Efficiency Reporting Value) or similar standards, indicate the filter’s ability to trap airborne particles. A higher MERV rating usually means better filtration, potentially improving indoor air quality, but also may slightly impede airflow.
    • Compatibility with Unit Model: Ensuring the filter is compatible with your specific AC model is vital. Using an incompatible filter can lead to installation issues, improper airflow, or damage to the unit.

    Determining the Correct Filter Size

    The correct filter size is essential for optimal AC performance. Incorrect sizing can hinder airflow and negatively impact energy efficiency. Referencing your AC unit’s manual is crucial for determining the precise filter size required. The manual usually provides the dimensions for the correct filter.

    Comparing Filter Ratings

    Filter ratings, such as MERV, are essential in determining the filter’s efficiency in capturing airborne particles. A higher MERV rating generally indicates better filtration, which might improve air quality, but may also slightly impede airflow.

    Checking Filter Packaging for Proper Selection

    Carefully examining the filter packaging is vital for proper selection. Look for the following information:

    • AC Model Compatibility: Ensure the filter is compatible with your specific AC model. This is often listed on the packaging.
    • Filter Size: Verify the filter dimensions match the specifications of your AC unit.
    • Filter Type: Knowing the filter type (e.g., pleated, foam) helps understand its filtration capabilities.
    • Filter Rating: Check the MERV or equivalent rating to understand the level of particle filtration.

    Filter Size and Unit Model Compatibility Table

    The following table provides a sample of filter sizes and corresponding unit models. This is not an exhaustive list, and always consult your AC unit’s manual for specific compatibility information.

    Filter Size (in inches) Unit Model Compatibility Notes
    16×20 AC-12345 Ensure proper installation and avoid forcing the filter into the unit.
    20×24 AC-67890 This size is compatible with most standard units of this model range.
    24×30 AC-12346 May require extra care during installation.

    Installation Procedures

    Installing an air conditioner filter correctly is crucial for optimal performance and longevity of your unit. Improper installation can lead to reduced airflow, increased energy consumption, and potential damage to the system. This section will guide you through the process, ensuring you achieve the best possible results.Proper filter placement directly impacts the air conditioner’s efficiency. A well-positioned filter allows for smooth airflow, enabling the unit to cool your space effectively and maintain optimal indoor air quality.

    Step-by-Step Installation Process

    The specific steps for installing an AC filter vary depending on the type of air conditioner unit. However, a general procedure typically involves the following:

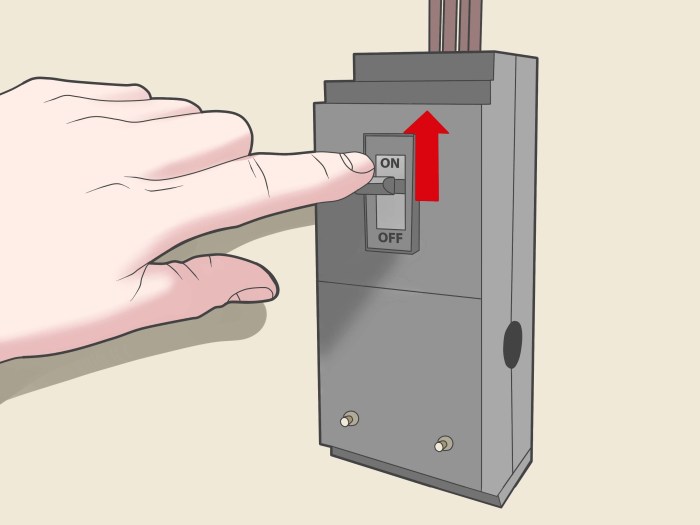
    1. Turn off the power to the air conditioner unit. This is a critical safety step to prevent electrical shocks.
    2. Carefully remove the access panel or cover to gain access to the filter compartment.
    3. If there’s an existing filter, carefully remove it, taking note of its orientation or any markings that indicate placement.
    4. Examine the new filter and ensure it matches the specifications for your air conditioner model. This is vital to guarantee proper fit and functionality.
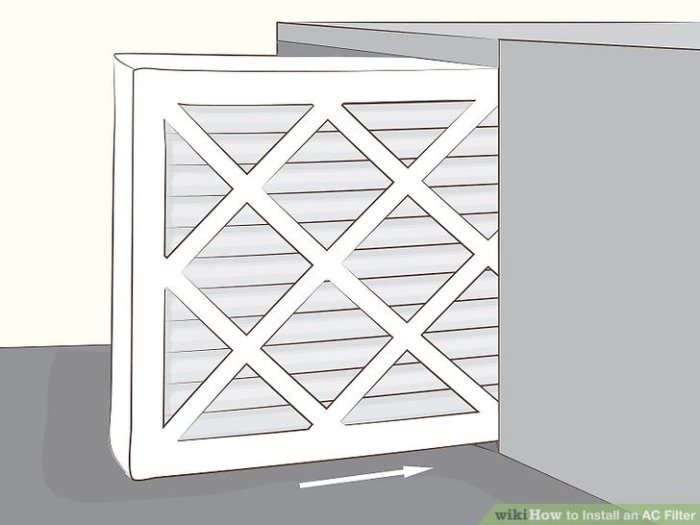
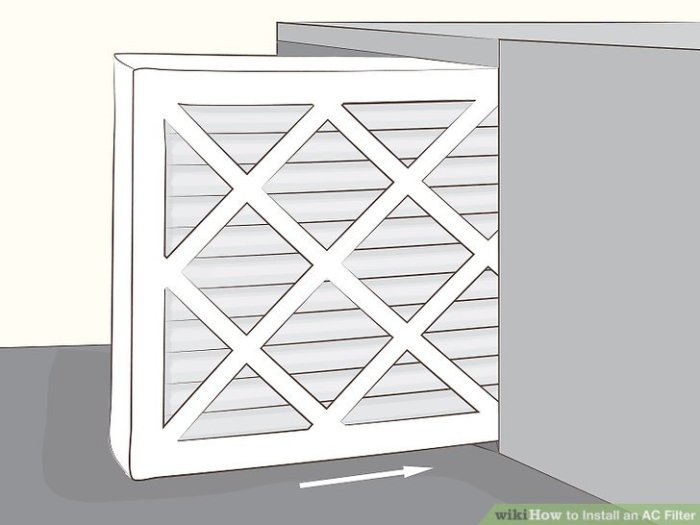
    5. Place the new filter into the filter compartment, ensuring it aligns with the designated grooves or slots. The filter should sit flush against the back of the compartment to avoid any gaps or obstructions to airflow.
    6. Carefully replace the access panel or cover, ensuring it is securely fastened. This step is crucial to prevent any leakage of air or moisture.
    7. Turn the power to the air conditioner unit back on. Test the unit to confirm proper operation.

    Filter Positioning and Placement

    Correct filter positioning is paramount for optimal performance. Misalignment can severely impact the unit’s ability to cool your space efficiently. The filter should be inserted in the designated compartment, aligned with any markings or guides provided on the unit.

    • Ensure the filter’s air intake side faces the direction of the air conditioner’s airflow. This allows the filter to capture contaminants effectively as air passes through it.
    • Avoid over-tightening the filter, as this can damage the filter material or the unit itself. Proper seating is key for effective filtration.
    • Use the correct filter type and size. Using a filter that is too small or large will not fit properly and can restrict airflow.

    Illustrative Diagrams

    Visual representations of filter installation can significantly aid understanding. A schematic showing a standard filter installation would demonstrate the filter’s placement in the designated area. Another example could illustrate the filter’s position within a more complex unit with multiple compartments.

    Importance of Proper Filter Placement

    Proper filter placement is essential for several reasons. First, it guarantees the filter effectively captures dust, pollen, and other contaminants, improving indoor air quality. Second, proper filter positioning maintains consistent airflow, enabling the air conditioner to cool the space efficiently. Finally, correct placement prevents the accumulation of debris behind the filter, ensuring the unit functions at peak performance.

    Potential Installation Problems and Solutions

    Problem Cause Solution
    Filter won’t fit Incorrect filter type or size Select the correct filter for your specific air conditioner model.
    Airflow is weak Filter is positioned improperly or blocked Ensure the filter is properly seated and aligned; check for any obstructions.
    Unit is not cooling effectively Filter is dirty or clogged Replace the filter with a new one.
    Leaks/moisture around the unit Improperly sealed access panel Ensure the access panel is securely fastened.
    Unit malfunctions Improper installation of the filter Consult a qualified technician for assistance.

    Maintenance and Cleaning

    Keeping your air conditioner’s filter clean is crucial for optimal performance and energy efficiency. A clogged filter restricts airflow, forcing your AC unit to work harder and increasing energy consumption. Regular maintenance also helps extend the life of your entire system.Proper cleaning and maintenance extend the lifespan of your AC unit and contribute to better indoor air quality.

    Clogged filters reduce airflow, which can lead to overheating and decreased cooling efficiency.

    Installing an AC filter is crucial for maintaining a clean and efficient system, but did you know that some of the coolest robot battles are being forged in the digital realm? Check out the awesome creations and epic conflicts in meet bots transformers forged fight. These virtual battles, though, don’t replace the need for a proper AC filter to keep your real-world home cool and comfortable.

    A clean filter will ensure your AC unit runs smoothly.

    Cleaning Frequency

    Regular cleaning is key to maintaining a healthy AC system. The frequency of cleaning depends on usage and environmental factors. For homes with pets or those located in dusty areas, weekly or bi-weekly cleaning is recommended. In typical homes, monthly cleaning is usually sufficient. However, if you experience noticeable decreases in cooling performance or increased energy consumption, cleaning the filter more frequently is warranted.

    Cleaning Methods

    Choosing the right cleaning method depends on the type of filter. Some filters are designed for hand-washing, while others can be machine-washed.

    Hand-Washing

    For washable filters, hand-washing is often the simplest and most effective method. Fill a basin with cool water and mild detergent. Submerge the filter and gently agitate to remove dust and debris. Rinse thoroughly until the water runs clear. Gently squeeze out excess water, ensuring the filter is not excessively wet.

    Allow the filter to air dry completely before reinstalling it. Avoid using harsh chemicals or bleach, as these can damage the filter material.

    Machine-Washing

    Some filters can be safely machine-washed. Check the manufacturer’s instructions for specific guidelines. Use a gentle cycle and avoid using harsh detergents or bleach. Rinse thoroughly to remove all traces of detergent. Follow the drying instructions provided by the manufacturer.

    Extending Filter Life

    Proper handling and storage can extend the lifespan of your AC filters. Store filters in a cool, dry place, away from direct sunlight. Avoid folding or bending the filter excessively. Replacing filters regularly and promptly handling spills or dust buildup will maintain optimal function and lifespan.

    Signs of Filter Replacement

    Recognizing when to replace your filter is crucial for maintaining optimal AC performance. Signs that your AC filter needs replacement include:

    • Reduced cooling efficiency:
    • Your air conditioner may struggle to maintain the desired temperature, leading to higher energy bills.

    • Increased energy consumption:
    • The AC unit may work longer and harder to compensate for reduced airflow.

    • Visible dirt and debris buildup:
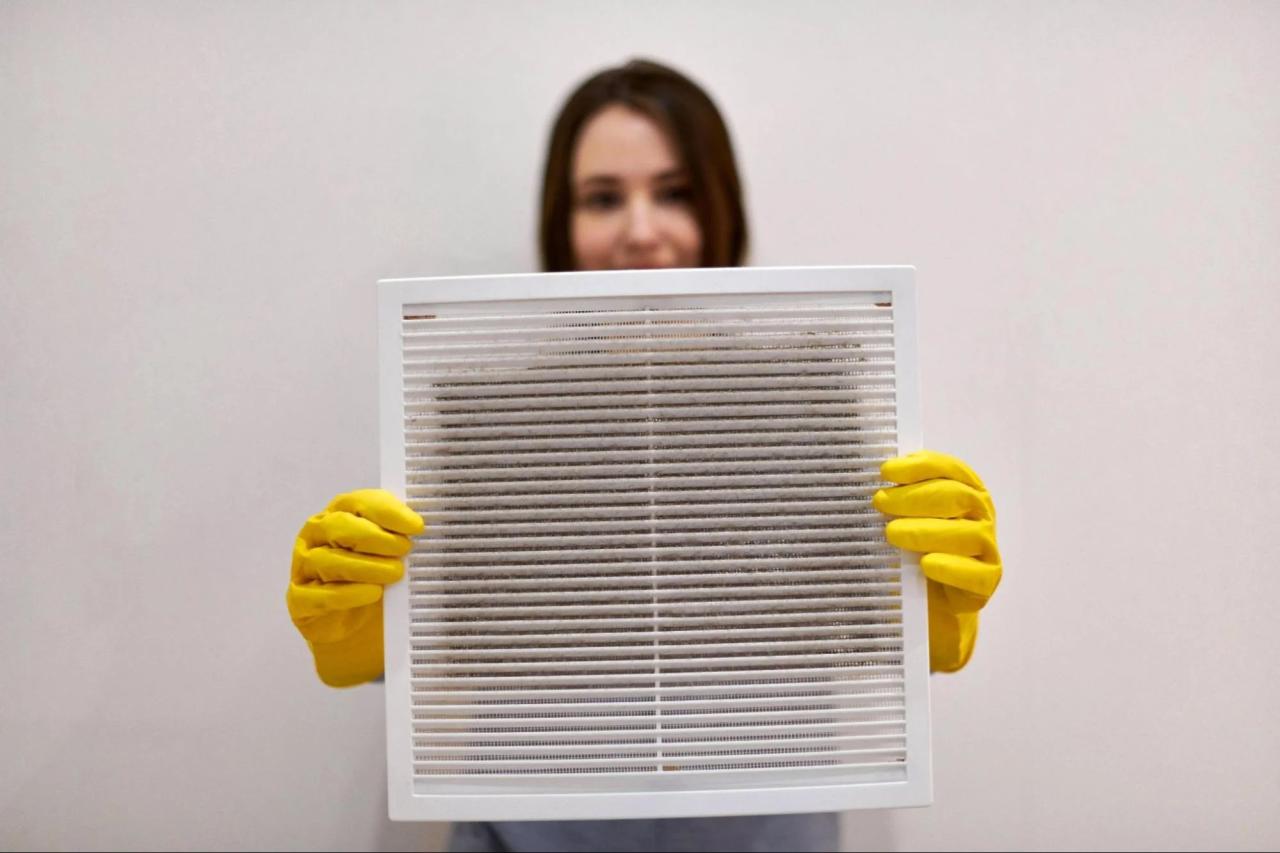
    • A significant amount of dust, pet hair, or other contaminants on the filter indicates it’s time for replacement.

    • Unusual noises:
    • A clogged filter can sometimes cause unusual sounds, like rattling or whistling.

    Cleaning Solutions

    The best cleaning solution depends on the material of your AC filter. For washable filters, a mild detergent and cool water are usually sufficient. However, if the filter is made of a special material, always consult the manufacturer’s instructions for specific cleaning recommendations.

    Filter Type Cleaning Solution
    Washable Mild detergent and cool water
    Disposable Consult manufacturer’s instructions

    Troubleshooting Common Issues

    Install an AC Filter

    AC filter malfunctions can stem from various factors, impacting the efficiency and lifespan of your air conditioning system. Understanding these issues and their solutions is crucial for maintaining optimal performance and preventing costly repairs. Proper troubleshooting can save you time and money in the long run.

    Common AC Filter Problems

    Understanding the potential problems with AC filters is essential for effective troubleshooting. Faulty filters can lead to decreased cooling efficiency, increased energy consumption, and premature compressor wear. Different issues stem from various causes and require distinct solutions.

    Causes of Filter-Related Malfunctions

    Several factors can contribute to AC filter problems. Incorrect installation, inadequate maintenance, and the accumulation of debris are common culprits. Improper installation might lead to air gaps, restricting airflow and impacting cooling performance. Inadequate maintenance, such as neglecting regular cleaning, can cause filter clogging, hindering airflow and increasing energy consumption. Accumulated debris, including dust, dirt, and other particles, can block the filter’s pores, leading to similar issues.

    Solutions for Resolving Filter Issues

    Troubleshooting filter problems requires a systematic approach. Correcting the cause is key to preventing recurrence. Addressing installation issues might involve tightening connections or ensuring proper seal placement. For maintenance issues, a regular cleaning schedule is essential. If debris accumulation is a concern, frequent cleaning, ideally on a monthly basis, will maintain optimal airflow.

    These solutions can significantly enhance the AC system’s longevity and performance.

    Installing an AC filter seems like a small task, but it’s a crucial step in maintaining your home comfort. It’s like a tiny act of rebellion against the heat, a silent battle against the relentless summer. You know, sometimes you just need to embrace the chaos, like the band’s new album, “goodbye cruel world hello crueler world” goodbye cruel world hello crueler world.

    Ultimately, a clean filter ensures your AC unit runs efficiently, saving energy and keeping your home cool without unnecessary drama. Just remember to replace it regularly for optimal performance.

    Recognizing and Preventing Filter-Related AC Malfunctions

    Recognizing the signs of a malfunctioning filter is crucial for preventing potential AC problems. Noticeable symptoms include reduced cooling capacity, increased energy bills, and unusual noises from the AC unit. Regular inspection and prompt maintenance are crucial in preventing filter-related issues. This proactive approach ensures optimal system performance and prolongs its lifespan.

    Flowchart for Troubleshooting a Faulty Filter

    A structured approach to troubleshooting a faulty AC filter is essential. This flowchart Artikels the steps involved in identifying and resolving the problem.

    Step Action Possible Outcomes
    1 Inspect the filter for visible obstructions or damage. Filter is clean and undamaged; proceed to step 2. Filter is clogged or damaged; proceed to step 3.
    2 Check for proper filter installation and airflow. Filter is correctly installed; proceed to step 4. Issues with installation; proceed to step 5.
    3 Clean or replace the filter, depending on the damage. Filter cleaned; system restored to normal operation. Filter needs replacement; replace the filter and check operation.
    4 Monitor system performance for 24-48 hours. System performs normally; no further action needed. System still experiencing issues; proceed to step 6.
    5 Correct any installation issues. Installation issues resolved; proceed to step 4. Issues cannot be resolved; contact a technician.
    6 Contact a qualified HVAC technician for further assessment. Technician diagnoses the problem and provides a solution.

    Environmental Impact: Install An AC Filter

    Air conditioning units, while essential for comfort, can have an environmental footprint. Choosing and maintaining your AC filter plays a crucial role in mitigating this impact. Properly functioning filters improve energy efficiency, reducing the overall strain on the environment. This section explores the environmental considerations related to AC filters, including recycling options, material compositions, waste reduction strategies, and the benefits of proper maintenance.AC filters, though seemingly small, can contribute significantly to the overall environmental impact of air conditioning systems.

    The material used in their construction, their lifespan, and the disposal methods all affect the ecological balance. Implementing responsible practices throughout the filter’s lifecycle, from selection to disposal, can lessen the environmental burden.

    Recycling Options for Old Filters

    Many communities offer recycling programs for old air conditioner filters. This initiative helps divert these materials from landfills and conserves resources. Contact your local waste management or recycling center for details on specific programs. Often, filters can be recycled with other household materials, such as cardboard and plastic. It’s crucial to follow local guidelines to ensure proper disposal and avoid contaminating the recycling stream.

    Material Composition of Various Filters

    The materials used in AC filters vary significantly. Common materials include pleated paper, fiberglass, and synthetic materials like polyester. Paper filters are often biodegradable, while fiberglass filters are typically composed of recycled glass fibers. Synthetic filters are frequently made from polymers and may require specific disposal procedures. Understanding the material composition allows for informed choices about recycling and disposal methods.

    Filter Type Common Materials Recycling Potential
    Paper Cellulose, paper pulp High
    Fiberglass Recycled glass fibers Moderate
    Synthetic Polyester, polypropylene Lower, may require specialized recycling

    Reducing Waste Associated with AC Filters

    Reducing waste associated with AC filters is achievable through several practices. One strategy is to extend the lifespan of your filters by following the manufacturer’s recommendations for replacement intervals. Another important step is to choose filters made from recycled or recyclable materials whenever possible. Furthermore, consider purchasing filters with longer lifespans or more efficient designs to minimize the frequency of replacements.

    Environmental Benefits of Proper Filter Maintenance

    Proper maintenance, including regular filter replacement, leads to significant environmental benefits. Efficient AC systems consume less energy, resulting in reduced greenhouse gas emissions. This, in turn, contributes to cleaner air and a healthier environment. Statistics demonstrate that regular filter maintenance can reduce energy consumption by a substantial percentage, thus lowering the carbon footprint associated with air conditioning operation.

    For instance, studies have shown that replacing a filter every 3 months can lower energy consumption by up to 15% compared to systems with neglected filters. The cost savings associated with reduced energy consumption can be a strong incentive to adopt these practices.

    Epilogue

    Install an AC Filter

    In conclusion, installing an AC filter is a straightforward yet essential task for maximizing your air conditioner’s performance and minimizing potential issues. By understanding the different filter types, selecting the right size, and following the proper installation procedures, you can ensure optimal air quality and a longer lifespan for your AC unit. Proper maintenance and troubleshooting will also help you avoid common problems and reduce your environmental impact.

    Remember, a well-maintained AC system translates to a more comfortable and healthier home environment for you and your family.

  • Install a Gas Dryer A Comprehensive Guide

    Install a Gas Dryer A Comprehensive Guide

    Install a Gas Dryer: This guide dives deep into the world of gas dryers, exploring their function, installation, safety precautions, and even their environmental impact. From the initial setup to ongoing maintenance, we’ll cover everything you need to know to confidently install your new gas dryer.

    We’ll detail the various types of gas dryers available, comparing their features, advantages, and disadvantages. Understanding the components and the installation process is crucial. We’ll also address safety concerns and offer troubleshooting tips to ensure smooth operation.

    Introduction to Gas Dryers

    Install a Gas Dryer

    Gas dryers have become a staple in many households, offering a convenient way to dry clothes quickly and efficiently. They are a significant improvement over traditional outdoor drying methods, especially in areas with unpredictable weather patterns. This exploration delves into the workings, history, advantages, disadvantages, and safety considerations associated with gas dryers.Gas dryers utilize the heat generated from burning natural gas to warm the air and evaporate moisture from clothes.

    This process, while seemingly simple, has evolved considerably over time, leading to the advanced condensing models prevalent today.

    Function and Operation of a Gas Dryer

    Gas dryers function by heating air using a gas burner. The heated air then circulates through the dryer’s drum, containing the clothes. The heat evaporates the moisture from the garments, and the dryer’s system extracts and removes the moisture. This process differs from electric dryers, which use resistive heating elements. The efficiency of the gas dryer depends on factors such as the type of gas burner used, the design of the dryer’s ventilation system, and the user’s drying settings.

    Historical Context of Gas Dryers

    Early gas dryers relied on open flames and less sophisticated mechanisms for moisture extraction. The development of more efficient burners and improved ventilation systems led to significant improvements in drying times and energy efficiency. This advancement distinguished gas dryers from their predecessors, particularly when compared to electric dryers, which had a slower drying process in the early stages.

    Advantages of Gas Dryers

    Gas dryers offer several benefits. They are generally faster than electric dryers, especially for large loads, and can provide efficient drying in a shorter timeframe. The higher heat output of gas dryers can be particularly beneficial for drying thick or heavily soiled items. Furthermore, gas dryers are often more cost-effective to operate than electric dryers in regions where natural gas is a cheaper energy source.

    Disadvantages of Gas Dryers

    Gas dryers, while efficient, also have potential drawbacks. They can be more expensive to install than electric models, and the installation process requires a qualified professional to ensure safe gas line connections. Potential safety hazards, such as gas leaks or improper venting, also need careful consideration. Finally, the reliance on natural gas makes gas dryers less environmentally friendly than electric dryers in regions where natural gas production or distribution has environmental concerns.

    Basic Components of a Gas Dryer

    Gas dryers consist of several essential parts working together. The gas burner, responsible for heating the air, is a critical component. The drum, where clothes are placed, is a crucial element in the drying process. The moisture extraction system removes excess moisture, and the ventilation system expels the moisture-laden air. The controls panel allows users to regulate drying settings.

    Installing a gas dryer can seem daunting, but it’s totally manageable with the right steps. Thinking about how much easier laundry day will be is motivating! If you’re a teen with a knack for the spotlight, you might also consider exploring modeling opportunities. It’s a great way to build confidence and learn about the industry, like exploring different looks and styles.

    Check out some tips on Become a Model when You Are a Teen for more ideas. Ultimately, a new gas dryer will streamline your laundry routine, leaving you with more time for other pursuits!

    Different Types of Gas Dryers

    Dryer Type Features Advantages Disadvantages
    Condensing Dryer Utilizes a condenser to collect moisture, rather than venting it directly. More energy-efficient due to reduced venting needs; better for indoor air quality. Can be more expensive to purchase; may require more maintenance.
    Venting Dryer Releases moisture-laden air through a vent system to the outdoors. Generally more affordable to purchase; simpler design. Less energy-efficient; can negatively impact indoor air quality.

    Different types of gas dryers cater to various needs and preferences. Condensing dryers prioritize energy efficiency, while venting dryers often offer a more budget-friendly option.

    Safety Precautions

    Proper installation and operation of a gas dryer are essential for safety. Regular maintenance, including checking for gas leaks and ensuring proper venting, is crucial. Never operate a gas dryer if you suspect a gas leak. The dryer’s vent system must be properly installed and maintained to prevent fires. Always consult a qualified professional for installation and maintenance.

    Following manufacturer instructions is essential for safe operation.

    Installation Process: Install A Gas Dryer

    Installing a gas dryer isn’t a DIY project for everyone. It requires careful attention to safety protocols and proper procedures. This guide provides a comprehensive overview of the process, from gathering the necessary tools to completing the electrical connections. Remember, if you are unsure about any step, it’s crucial to contact a qualified HVAC technician.

    Required Tools and Materials

    Before beginning the installation, ensure you have all the necessary tools and materials readily available. This will help streamline the process and prevent delays. A well-stocked toolbox will include:

    • Gas line wrenches (various sizes)
    • Adjustable wrench
    • Screwdrivers (Phillips and flathead)
    • Wire strippers/cutters
    • Safety glasses and gloves
    • Level
    • Measuring tape
    • Electrical tape
    • Dryer vent kit (including elbows, connectors, and vent pipe)
    • Gas shut-off valve (if not already present)
    • Appropriate sealant for gas connections

    Connecting the Gas Supply Line

    Connecting the gas supply line to the dryer requires extreme caution. Improper connections can lead to gas leaks and safety hazards. Follow these steps carefully:

    1. Turn off the main gas supply valve to the dryer area.
    2. Disconnect the old gas supply line from the dryer, if applicable.
    3. Carefully connect the new gas supply line to the dryer’s gas connection point using the appropriate wrenches and sealant.
    4. Tighten the connections securely, ensuring no leaks.
    5. Turn on the gas supply valve slowly, and check for leaks with soapy water.

    Connecting to the Exhaust Vent System

    The exhaust vent system ensures proper air circulation and prevents moisture buildup in the area. This involves careful routing and sealing:

    1. Measure and cut the vent pipe to the correct length, accounting for turns and clearances.
    2. Connect the dryer vent to the exhaust vent pipe using the appropriate connectors.
    3. Seal all joints with the provided sealant to prevent air leaks and ensure proper ventilation.
    4. Secure the vent pipe to the wall or ceiling using appropriate mounting hardware.
    5. Make sure the vent pipe extends away from the house and is not blocked by anything.

    Electrical Connections

    Correct electrical connections are essential for dryer operation and safety. Follow these steps carefully:

    1. Disconnect the power supply to the dryer area.
    2. Ensure the dryer’s electrical connections match the local electrical codes and the dryer’s specifications.
    3. Connect the wires using appropriate wire connectors and electrical tape.
    4. Verify all connections before turning on the power.
    5. Connect the dryer to the appropriate electrical outlet, ensuring the outlet is properly grounded.

    Installation Steps Table

    The following table summarizes the steps involved in gas dryer installation.

    Step Description Tools/Materials
    1 Turn off gas supply and disconnect old line (if applicable). Gas line wrenches, adjustable wrench, safety glasses, gloves
    2 Connect new gas supply line to dryer, using sealant. Gas line wrenches, sealant, adjustable wrench
    3 Check for gas leaks with soapy water. Soapy water
    4 Install vent pipe, securing with appropriate hardware. Dryer vent kit, measuring tape, level, screws, anchors
    5 Perform electrical connections, ensuring grounding. Wire strippers/cutters, electrical tape, multimeter (optional)

    Common Installation Mistakes and How to Avoid Them

    Common mistakes during gas dryer installation can lead to costly repairs and safety hazards.

    Installing a gas dryer can be a worthwhile upgrade, offering potentially higher efficiency than electric models. While considering that, it’s interesting to see how a recent case, like Desiigner being cleared of all charges in a New York drug and gun arrest here , highlights the complexities of the legal system. Ultimately, installing a gas dryer still requires careful planning and professional installation to ensure safety and optimal performance.

    • Incorrect gas line connections: Ensure all gas connections are tight and leak-free. Using the wrong tools or sealant can lead to dangerous leaks. Always follow the manufacturer’s instructions.
    • Improper vent installation: Incorrectly routed or sealed vents can cause air leaks and damage to the dryer. Proper venting is crucial for efficient operation and safety.
    • Inadequate electrical connections: Ensure proper grounding and wire connections. Incorrect wiring can cause short circuits or electrical shocks.
    • Ignoring safety protocols: Always turn off the gas supply before working on any gas lines. Never attempt any installation without proper safety gear or knowledge.

    Gas Dryer Safety

    Installing a gas dryer is a significant undertaking. Safety must be paramount throughout the process, from initial planning to final inspection. Proper ventilation, safe distances, and meticulous handling of gas lines are crucial for preventing accidents and ensuring the long-term reliability of your appliance.Ensuring a safe installation process involves more than just following instructions; it demands a proactive approach to recognizing and mitigating potential hazards.

    By understanding the specific safety considerations for gas dryers, you can create a secure and efficient installation.

    Importance of Safety During Installation

    Gas dryers, while convenient, use flammable gas. Neglecting safety precautions can lead to serious risks, including fires, explosions, and carbon monoxide poisoning. A meticulous approach to installation, emphasizing proper ventilation, safe distances, and careful handling of gas lines, is essential to prevent these hazards.

    Proper Ventilation for Gas Dryers

    Adequate ventilation is critical to prevent the buildup of potentially harmful gases. Gas dryers, like any appliance that burns fuel, need proper ventilation to safely exhaust combustion byproducts. This ensures the dryer operates efficiently and prevents the accumulation of harmful gases in the surrounding area. Insufficient ventilation can result in incomplete combustion and the release of harmful fumes.

    • Ensure the dryer is installed in a well-ventilated area, away from obstructions that could impede airflow.
    • Verify that the dryer’s exhaust system is properly connected and free of blockages.
    • Check the local building codes and regulations regarding ventilation requirements for gas appliances.

    Maintaining Safe Distances

    To minimize fire risks, maintain a safe distance between the dryer and any flammable materials. This includes combustible fabrics, paper, or other items that could ignite easily. Carefully consider the potential ignition sources and the risk of fire propagation in the surrounding area. Understanding the specific flammability characteristics of nearby materials is crucial.

    • Keep the dryer a safe distance from curtains, drapes, or other combustible materials.
    • Install the dryer away from flammable storage areas.
    • Check the dryer’s exhaust vent to ensure it is not positioned near combustible materials.

    Handling Gas Lines During Installation

    Gas lines require specialized handling. Any work involving gas lines should be performed by qualified professionals. Improper handling of gas lines can lead to leaks, fires, and explosions. Ensuring that gas lines are correctly connected and secured is vital.

    • Do not attempt to connect or disconnect gas lines yourself unless you are a certified gas fitter.
    • Always ensure gas lines are securely fastened and free of leaks.
    • Follow manufacturer instructions meticulously when handling gas lines.

    Safety Procedures for Different Gas Dryer Types

    Different gas dryer types might have slightly different safety procedures. Understanding these variations ensures a tailored and effective installation.

    Installing a gas dryer can be a worthwhile project, but it’s important to factor in the potential for increased energy efficiency. Speaking of efficiency, I’m already looking forward to the fall movie preview horror season, especially with the new releases like those previewed on fall movie preview horror. Ultimately, a well-installed gas dryer can save you money in the long run, especially with the rising energy costs.

    Dryer Type Safety Procedure 1 Safety Procedure 2
    Condensing Dryer Ensure proper condensation drainage is in place. Verify exhaust system is compatible with condensing technology.
    Conventional Gas Dryer Maintain proper clearance from flammable materials. Adhere to local codes for venting and exhaust.

    Safety Checks Before and After Installation

    Comprehensive safety checks are essential to confirm a safe installation. A thorough inspection before and after installation helps identify any potential hazards. This is a critical step in ensuring the dryer operates safely and reliably.

    • Inspect the gas connection for leaks before energizing the gas supply.
    • Verify the dryer’s exhaust system is free of blockages.
    • Check for proper grounding of the dryer.
    • Test the dryer’s operation to ensure it functions correctly.

    Troubleshooting and Maintenance

    Keeping your gas dryer running smoothly and safely requires regular maintenance and troubleshooting. Ignoring potential problems can lead to costly repairs, decreased efficiency, and even safety hazards. This section provides a guide to common gas dryer issues, their potential causes, and effective solutions, along with essential maintenance tips to prolong its lifespan.

    Common Gas Dryer Problems and Solutions

    Understanding the common problems associated with gas dryers and their potential causes is crucial for effective troubleshooting. This section Artikels potential issues and solutions to help you diagnose and fix problems quickly.

    Problem Possible Causes Solutions
    Dryer not heating Faulty heating element, gas valve malfunction, insufficient gas supply, thermostat problems, or a tripped circuit breaker. Check the circuit breaker; if tripped, reset it. Inspect the gas supply; ensure there’s no blockage. Verify the gas valve’s operation. If the heating element is faulty, it needs replacement. If the thermostat is malfunctioning, it must be replaced.
    Dryer is making loud noises Worn-out bearings, loose components, or a build-up of lint or debris. Check for loose screws or parts. Clean lint traps regularly. If the noise persists, the dryer may require a professional repair, particularly if the noise is grinding or screeching.
    Dryer is not drying clothes properly Clogged lint filter, low gas supply, or a faulty heating element. Incorrect temperature setting. Ensure the lint filter is clean. Inspect the gas supply for blockages or low pressure. If the heating element is faulty, it needs replacement. Verify the temperature setting; adjust if needed.
    Dryer is leaking gas Damaged gas lines, a faulty gas valve, or a worn-out hose connection. Immediately shut off the gas supply to the dryer. Do not attempt any repairs yourself. Contact a qualified appliance technician to inspect and repair the gas lines, valve, or hose connection. This is a critical safety issue.

    Troubleshooting Methods, Install a Gas Dryer

    Effective troubleshooting involves systematic checks to identify the root cause of the issue. These methods help you pinpoint the problem and take the necessary steps to resolve it.

    • Visual Inspection: Carefully examine the dryer for any visible signs of damage, leaks, or unusual wear. Look for loose connections, signs of overheating, or blockages in the lint trap. This simple step can often reveal the problem.
    • Checking the Gas Supply: Ensure the gas supply to the dryer is turned on and that there are no blockages or obstructions in the gas lines. Check the gas valve to ensure it’s functioning correctly.
    • Electrical Checks: Verify that the circuit breaker for the dryer is not tripped. Inspect the electrical connections for any signs of damage or loose wiring.
    • Professional Assistance: If you are unable to diagnose or fix the issue yourself, contact a qualified appliance technician. This is particularly important for gas-related problems or any safety concerns.

    Maintenance Requirements

    Regular maintenance is essential for prolonging the lifespan and safety of your gas dryer. This involves simple tasks that can significantly improve its performance and prevent major repairs.

    • Cleaning the Lint Trap: Regularly cleaning the lint trap prevents overheating and ensures efficient drying. A clogged lint trap can lead to reduced drying performance and potential fire hazards. This is a critical maintenance task.
    • Checking the Gas Supply: Regularly checking the gas supply and connections ensures that there are no leaks or blockages. This is crucial for safety.
    • Cleaning the Dryer Vent: The vent system can accumulate lint, which can cause overheating or reduced drying performance. Clean the vent system annually to maintain optimal dryer operation. Hire a professional if the vent is hard to reach.
    • Inspecting Components: Periodically inspecting the dryer’s components, such as the heating element, thermostat, and gas valve, can help detect potential issues before they become major problems. This preventative measure helps to prolong the dryer’s lifespan.

    Frequency of Maintenance Checks

    Regular maintenance intervals can vary based on usage frequency. Frequent use may necessitate more frequent checks, whereas less frequent use might allow for less frequent maintenance. However, adhering to a consistent schedule is crucial for optimal dryer performance and safety. Aim for monthly checks for lint traps and gas supply, and annual cleaning of the vent system.

    Always consult your dryer’s manual for specific maintenance recommendations.

    Environmental Impact

    Gas dryers, while convenient, have a significant environmental footprint. Understanding the trade-offs between convenience and sustainability is crucial for responsible home appliance choices. This section explores the environmental impact of gas dryers compared to other types of dryers, focusing on energy efficiency, carbon footprint, and potential mitigation strategies.The choice between a gas dryer and an electric dryer is not just about convenience; it significantly impacts the environment.

    Factors like energy source, operational efficiency, and emissions all play a role in determining the overall sustainability of a gas dryer. This comparison highlights the environmental trade-offs and offers insights into reducing the impact of dryer use.

    Comparison of Energy Efficiency

    Gas dryers, while potentially more energy-efficient than older electric models, can vary considerably in their energy consumption. The efficiency depends on factors such as the specific model, its design features, and how it’s used. The overall energy consumption of a dryer is affected by the type of fabric being dried, the drying cycle chosen, and the efficiency of the venting system.

    • Different drying cycles (e.g., light, medium, heavy) require varying amounts of energy, influencing the overall consumption. The heavier the load, the more energy is typically required. Proper maintenance of the dryer, including regular cleaning of the lint trap, is vital to maintaining its energy efficiency.
    • Electric dryers often rely on readily available electricity. However, the source of electricity, whether from renewable or non-renewable sources, can influence their environmental impact. This is a factor to consider in regions with a mix of energy sources.

    Carbon Footprint Analysis

    The carbon footprint of a gas dryer depends on the source of the natural gas. Natural gas, when produced and distributed, can release greenhouse gases. The specific carbon footprint of a gas dryer is also affected by its energy efficiency rating and the frequency of use.

    • Natural gas extraction and distribution processes themselves have an environmental impact. This impact can vary depending on the specific methods and infrastructure used.
    • The energy efficiency of a gas dryer directly influences the amount of gas consumed. More efficient dryers lead to a lower carbon footprint compared to less efficient models.
    • A gas dryer’s carbon footprint can be influenced by the amount of use, including factors like drying frequency and the type of laundry loads. Drying a larger load or more frequently will result in a larger carbon footprint.

    Potential for Reducing Environmental Impact

    Several strategies can reduce the environmental impact of gas dryer use. These include improving energy efficiency, promoting sustainable gas sources, and encouraging responsible consumer choices.

    • Using energy-efficient dryer models, those with higher Energy Star ratings, can significantly reduce the energy consumption and, subsequently, the carbon footprint. The use of these models is one of the key factors to consider when choosing a gas dryer.
    • Supporting the use of renewable natural gas sources, or biogas, can lessen the environmental impact associated with natural gas production and distribution. The use of alternative energy sources in dryer manufacturing and use will likely reduce the carbon footprint.
    • Proper maintenance and regular cleaning of the lint trap can prevent significant energy waste. This also ensures optimal dryer function.

    Energy Consumption Comparison

    A detailed comparison of energy consumption across different dryer types reveals varying levels of efficiency. The table below provides a general overview.

    Dryer Type Energy Consumption (kWh/cycle) Environmental Impact
    Gas Dryer (Energy Star qualified) 0.5 – 1.5 kWh/cycle Lower if natural gas source is sustainable.
    Electric Dryer (Energy Star qualified) 1.0 – 2.0 kWh/cycle Lower if electricity source is sustainable.
    Condenser Dryer 0.7 – 1.2 kWh/cycle Lower energy consumption compared to older models.

    Gas Dryer Models and Energy Efficiency

    Gas dryer models come with various energy efficiency ratings, influencing their overall environmental impact. Manufacturers provide energy efficiency ratings for different models.

    • Manufacturers provide energy efficiency ratings (e.g., Energy Star ratings) for their gas dryer models. These ratings are crucial in comparing different models.
    • Choosing a gas dryer with a higher Energy Star rating can significantly reduce energy consumption and the overall environmental impact of its use.

    Cost Considerations

    Install a Gas Dryer

    Investing in a gas dryer might seem appealing, but understanding the total cost of ownership is crucial. This involves not only the initial purchase price but also ongoing expenses like installation, maintenance, and energy consumption. A thorough cost analysis helps in making an informed decision that aligns with your budget and long-term needs.

    Typical Installation Costs

    Gas dryer installation costs vary depending on factors like labor rates in your area, complexity of the installation (e.g., venting requirements), and any necessary modifications to your existing plumbing or venting systems. On average, expect to pay between $300 and $800 for installation. This range considers a standard installation in a typical home setting. However, more complex installations, such as those requiring significant plumbing or venting adjustments, could exceed this amount.

    Gas vs. Electric Dryer Costs

    The cost comparison between gas and electric dryers extends beyond the initial purchase price. Gas dryers often have a higher upfront cost, but their operational expenses can be lower over time, especially in regions with relatively lower gas prices. Electric dryers, conversely, have lower initial costs but incur higher energy bills. A significant factor in the long run is the fluctuating cost of natural gas versus electricity.

    Consider local energy rates and usage patterns when comparing the long-term financial implications.

    Long-Term Cost Implications of Gas Dryers

    The long-term cost of a gas dryer involves more than just energy bills. Gas dryers generally consume less energy than comparable electric models, resulting in lower utility bills, particularly in areas with affordable gas rates. The long-term cost savings can be substantial, offsetting potentially higher initial costs. Furthermore, the efficiency of a gas dryer can impact the lifespan of other appliances in your home, such as your water heater.

    Repair and Maintenance Costs

    Gas dryers, like any appliance, require occasional repairs and maintenance. Potential issues might include burner problems, vent clogs, or issues with the gas supply line. Repair costs can vary widely depending on the specific problem. Routine maintenance, such as cleaning the lint filter and ensuring proper venting, can help prevent major issues and reduce repair costs. Regular maintenance is a key element in extending the lifespan of your gas dryer and reducing unexpected repair bills.

    Total Cost Breakdown

    Cost Category Estimated Cost
    Initial Purchase Price $500 – $1500 (depending on features and brand)
    Installation $300 – $800
    Annual Energy Costs (Gas) $100 – $300 (depending on usage and gas rates)
    Annual Energy Costs (Electric) $200 – $500 (depending on usage and electricity rates)
    Maintenance (every few years) $50 – $200
    Repair Costs (average per incident) $100 – $500

    Note: The estimated costs in the table are general guidelines. Actual costs may vary based on individual circumstances.

    Last Word

    In conclusion, installing a gas dryer is a significant undertaking, but with careful planning and attention to detail, you can successfully navigate the process. This comprehensive guide has provided a detailed roadmap, highlighting safety procedures, installation steps, and potential cost factors. Remember to prioritize safety throughout the entire process, and don’t hesitate to consult professionals when needed. Enjoy your new gas dryer!

  • Home Blitz Frozen Track A Deep Dive

    Home Blitz Frozen Track A Deep Dive

    Home blitz frozen track – a fascinating concept that deserves exploration. This comprehensive guide delves into the intricacies of this intriguing term, examining its various interpretations, strategies, challenges, and real-world examples. We’ll unravel the historical context and visual representation of a home blitz frozen track, offering a complete picture of this unique phenomenon.

    From defining the core meaning of “home blitz frozen track” to exploring the different types and strategies for success, this guide provides a thorough analysis. We’ll investigate the potential obstacles and how to overcome them, all within the context of real-world scenarios. Expect detailed tables and lists to illustrate key concepts and strategies.

    Defining “Home Blitz Frozen Track”

    Home blitz frozen track

    The phrase “Home Blitz Frozen Track” likely refers to a specific type of competitive or recreational activity, possibly involving a combination of home-based challenges and a frozen surface. The exact meaning hinges on the context in which it’s used. This could be a gaming event, a sports training regimen, or even a creative concept.The term suggests a dynamic and potentially challenging activity.

    “Home Blitz” implies a concentrated effort within a domestic setting, while “Frozen Track” points to a surface, often outdoors, that’s frozen and suitable for a particular type of movement or sport. This could involve speed skating, ice hockey drills, or even a unique game played on ice.

    Possible Interpretations

    The phrase “Home Blitz Frozen Track” can be interpreted in several ways, depending on the specific context. It could be a training method for athletes, a unique game format, or even a creative exercise.

    Contexts of Use

    This phrase could be used in various contexts, ranging from sports training to gaming events, creative projects, or even business strategies. Understanding the context is key to accurately interpreting its meaning.

    Speaking of exciting reunions, the upcoming home blitz frozen track event has me pumped! It’s a great chance to catch some incredible local talent. Meanwhile, I’m also super stoked about the Tony Toni Tone reunion tour after 25 years, which is a fantastic musical comeback! Tony Toni Tone reunite for first tour in 25 years. Fingers crossed that the energy from the tour translates into an amazing atmosphere at the home blitz frozen track too! Can’t wait!

    Applications Table

    Context Description Example Further Notes
    Sports Training (Ice Hockey) Athletes practicing drills and skills on a frozen surface within their home environment. A hockey player practicing shooting and stick-handling techniques on a frozen driveway. This could involve using specialized equipment and drills designed for skill development.
    Gaming Competition A game with a competitive focus, played on a frozen surface (simulated or real) as part of a home-based event. A virtual ice skating game with a competitive mode, played in a home setting. Could involve using virtual reality or augmented reality technology.
    Creative Writing/Project A creative exercise involving a narrative or story centered around a home environment with a frozen track element. A short story about a group of friends who create a makeshift skating rink in their backyard for a winter competition. The focus here is on narrative and imagery rather than physical activity.
    Business Strategy A strategic approach to a business challenge, possibly involving rapid decision-making and adaptability in a competitive market (using the concept metaphorically). A company implementing a “blitz” approach to quickly address a critical market need, adapting to rapid changes. The concept of “frozen track” could represent the market conditions, which might be difficult to navigate.

    Types of Home Blitz Frozen Tracks

    Home Blitz Frozen Tracks, a fascinating phenomenon in the world of competitive gaming, presents a diverse range of variations, each with its own unique characteristics and gameplay mechanics. Understanding these types is crucial for strategizing and adapting to different environments and challenges. This exploration delves into the different kinds of frozen tracks, highlighting their distinctions and similarities.The design and implementation of home blitz frozen tracks significantly impact the gameplay experience.

    Variations in ice patterns, obstacles, and available resources influence tactics, strategy, and ultimately, the outcome of the game. Recognizing these distinctions empowers players to make informed decisions, enhancing their competitive edge.

    Classification of Home Blitz Frozen Tracks

    The variety of Home Blitz Frozen Tracks can be categorized into distinct types based on their underlying design principles and features. These categories offer a structured way to understand and compare the unique characteristics of each type.

    Types of Frozen Tracks

    • Basic Frozen Tracks: These tracks feature a relatively simple layout with a consistent ice pattern. Obstacles are minimal, and resources are evenly distributed, leading to a more balanced gameplay experience. Strategies focus on navigating the track efficiently and collecting resources effectively. An example would be a track with a straightforward winding path and a single resource checkpoint.
    • Complex Frozen Tracks: These tracks exhibit intricate designs, featuring multiple loops, narrow passages, and challenging obstacles. Resources are strategically placed, and their collection requires skillful navigation and precise timing. Strategies in these scenarios prioritize planning and precise movements, as a single misstep can drastically alter progress.
    • Dynamic Frozen Tracks: These tracks are characterized by shifting ice patterns, which dynamically change over time. This introduces an element of surprise and unpredictability, requiring players to adapt to constantly evolving conditions. The resources available may shift position or even disappear altogether. Imagine a track where sections of ice melt, creating gaps or sudden turns that require quick reflexes.

    • Obstacle-Focused Frozen Tracks: These tracks prioritize the inclusion of challenging obstacles like ice shards, hidden pits, or strategically placed walls. Players must navigate these obstacles carefully, often relying on specialized equipment or skills to overcome them. The success in these scenarios depends on the player’s ability to identify and exploit the weaknesses of the obstacles and the track layout.

    Comparative Analysis of Track Types

    Track Type Characteristics Gameplay Features Strategies
    Basic Frozen Tracks Simple layout, consistent ice, minimal obstacles, even resource distribution Balanced, efficient navigation, resource collection Prioritize smooth movement, efficient pathfinding
    Complex Frozen Tracks Intricate layout, multiple loops, narrow passages, strategic resource placement Requires skillful navigation, precise timing, calculated resource management Plan ahead, focus on precise movements, adapt to the layout
    Dynamic Frozen Tracks Shifting ice patterns, unpredictable conditions, dynamic resource distribution Requires adaptation, quick reflexes, strategic resource management in changing environments Monitor changes, anticipate shifts, adjust strategies accordingly
    Obstacle-Focused Frozen Tracks Emphasis on overcoming obstacles, challenging terrain, specialized equipment needed Navigation, obstacle avoidance, leveraging skills Identify weaknesses of obstacles, use equipment effectively, utilize track layout to advantage

    Strategies for Home Blitz Frozen Tracks

    Home blitz frozen track

    Navigating a home blitz frozen track requires a nuanced approach that goes beyond simply knowing the rules. Success hinges on adapting strategies to the specific conditions of the track and the playing style of your opponent. This involves anticipating their moves, understanding track characteristics, and making calculated decisions under pressure. Knowing how to execute these strategies effectively can significantly impact your chances of victory.Effective strategies for home blitz frozen tracks depend heavily on understanding the interplay between ice conditions, player positioning, and the specific ruleset of the game.

    Different types of frozen tracks present varying challenges, demanding unique tactical approaches. Factors such as track layout, surface texture, and available obstacles all influence the most effective strategies.

    Analyzing Track Conditions

    Analyzing the track’s characteristics, such as ice firmness, elevation changes, and the presence of obstacles, is crucial. Different ice conditions impact speed, maneuverability, and the efficacy of specific tactics. For example, a very hard frozen track might favor aggressive maneuvers, while a softer surface might require more controlled approaches.

    Opponent Strategy Prediction

    Anticipating your opponent’s strategy is key to success. Observing their initial moves, analyzing their tendencies, and considering their playing style allows you to predict their likely actions and counter them proactively. A well-practiced opponent reading is a critical skill to maintain an advantage.

    Adapting Tactics for Different Scenarios

    • Aggressive Maneuvering: This strategy focuses on maintaining a high speed and aggressive position. It’s ideal for tracks with minimal obstacles and a firm surface, but it can be risky in areas with uneven terrain or loose ice.
    • Defensive Positioning: Employing a defensive strategy involves carefully positioning yourself to minimize risks. This approach is effective in areas with challenging terrain, obstacles, or unpredictable ice conditions. It’s often employed when facing a more aggressive opponent.
    • Combined Maneuvers: Sometimes, a successful strategy involves a combination of aggressive and defensive maneuvers. For example, a player might aggressively pursue an opponent in open areas but shift to a defensive position when approaching obstacles.

    Potential Tactics and Effectiveness

    Understanding the effectiveness of various tactics is vital. Factors like the opponent’s style, track conditions, and available resources all play a role in determining the optimal approach.

    • Aggressive Weaving: High-speed weaving through tight turns is effective on tracks with consistent ice conditions but may be risky on uneven surfaces. Effectiveness depends on the opponent’s ability to react and the track’s layout.
    • Controlled Slides: These maneuvers are useful for maintaining momentum while navigating obstacles or uneven surfaces. Accuracy and timing are critical for success, and it’s effective in specific track configurations.
    • Exploiting Terrain Advantages: Leveraging elevation changes, slopes, or obstacles to gain an advantage is a key strategy. It requires understanding the track layout and opponent’s tendencies.

    Tactics for Success in Home Blitz Frozen Tracks

    Mastering home blitz frozen tracks requires a nuanced understanding of the environment and a strategic approach. These tracks, often characterized by unpredictable ice conditions and challenging terrain, demand adaptability and precision in execution. Successful players recognize the importance of meticulous preparation and tactical awareness to navigate the complexities of the game.

    Specific Tactics Employed

    Several key tactics are crucial for success in home blitz frozen tracks. These include precise maneuvering, optimized gear selection, and calculated risk management. Players must understand the interplay between these tactics to maximize their chances of victory.

    Maneuvering Techniques

    Predicting ice conditions and adjusting your route is paramount. Skilled players utilize their knowledge of the terrain to identify potential hazards and adjust their approach accordingly. This involves careful observation of the ice’s texture, visibility, and any signs of hidden obstacles. For example, a player might choose a slightly longer but safer route across a seemingly less treacherous area rather than risk a fall on a patch of thin ice.

    By anticipating potential problems and reacting swiftly, players can minimize the impact of unforeseen circumstances.

    Gear Selection and Adjustment

    The proper gear selection and adjustments are vital to success. This includes using appropriate footwear and protective gear that provides the necessary grip and stability. Players should choose equipment based on the specific conditions of the track, considering factors such as temperature, ice thickness, and potential for sudden changes in weather. For example, if the temperature is dropping significantly, a player might opt for warmer layers to avoid hypothermia, or adjust their footwear to better grip the ice.

    Having extra gear like spare batteries for equipment, a first aid kit, and a communication device are also crucial.

    Risk Management Strategies

    Calculated risk management is essential to avoid unnecessary accidents or delays. Players should carefully assess the risks associated with each maneuver and decide if the potential reward outweighs the risk. This involves identifying and mitigating potential dangers, such as uneven terrain or hidden obstacles, before initiating a move. For instance, if a player encounters a steep incline, they might choose to use a slower, more controlled approach to prevent slips or falls, thus avoiding a more dangerous and possibly more time-consuming recovery.

    Furthermore, having a backup plan is critical for handling unexpected situations.

    Table Illustrating Steps in Different Tactics

    Tactic Step 1 Step 2 Step 3
    Maneuvering Assess ice conditions (texture, visibility, obstacles) Identify safe routes, considering potential hazards Adjust trajectory based on assessment
    Gear Selection Analyze environmental conditions (temperature, ice thickness) Choose appropriate footwear and protective gear Adjust gear as needed to match changing conditions
    Risk Management Evaluate potential risks associated with each maneuver Identify and mitigate potential dangers Develop backup plans for unexpected situations

    Home Blitz Frozen Track Challenges and Considerations

    Navigating a home blitz frozen track presents unique challenges, demanding careful strategy and adaptation. The unpredictable nature of the ice, coupled with the often-confined spaces and pressure of the game, necessitates a nuanced approach. Understanding these hurdles is crucial for success, allowing players to proactively address potential pitfalls. Success hinges on anticipating problems and having contingency plans in place.The key to overcoming challenges in home blitz frozen tracks lies in recognizing the interplay of factors, from the specific ice conditions to the limitations of the playing area.

    By considering these variables, players can develop strategies that mitigate risks and capitalize on opportunities. This analysis focuses on the potential obstacles and solutions, offering a roadmap to triumph in these dynamic scenarios.

    Potential Ice Conditions and Their Impact

    Varied ice conditions can significantly impact gameplay. Temperature fluctuations, humidity levels, and even the type of ice (e.g., natural vs. artificial) all affect the friction and consistency of the playing surface. Uneven ice patches, hidden imperfections, and the presence of frost or snow can dramatically alter skating trajectories, creating unpredictable movements and challenging maneuvering. This variability demands adaptable strategies and the ability to react swiftly to unexpected changes in ice conditions.

    Limited Playing Area and Its Constraints

    Home blitz frozen tracks often feature confined spaces, creating a high-pressure environment. The restricted area necessitates precise movements, efficient use of space, and strategic positioning. Players must be aware of the limitations imposed by the surroundings, optimizing their skating techniques and passing strategies to navigate the smaller arena effectively. This consideration requires a tactical understanding of how to exploit and manage the space available, often requiring adjustments to usual play styles.

    Opponent Strategies and Their Countermeasures

    Analyzing opponent strategies is crucial for success. Different players will adopt various approaches, utilizing different skating styles and puck control techniques. Understanding these strategies allows players to anticipate and counter them. This includes developing a proactive game plan, anticipating likely plays, and employing counter-strategies to gain an advantage.

    Equipment and its Limitations

    Equipment plays a critical role in home blitz frozen tracks. The condition of skates, the suitability of protective gear, and the efficiency of equipment maintenance are all factors influencing performance. Inadequate or poorly maintained equipment can lead to injuries and hinder performance. A player with optimal equipment is far more likely to execute precise maneuvers and maintain control during the game.

    Home blitz frozen track is all about speed and efficiency, right? Well, sometimes, even the most organized home blitz can feel a little… frosty. To really heat things up, you might need a strategy like the one in Get a Aries Female to Fall in Love with You – understanding the dynamics of your target. Once you’ve got that figured out, your home blitz frozen track will be a breeze! Just sayin’.

    Potential Problems and Solutions

    • Uneven ice surface: Players can adapt by using a combination of skating techniques (e.g., controlled glides and quick pivots) and strategies (e.g., playing close to the walls or edges). Proper pre-game ice assessment and communication among players are vital.
    • Confined playing area: Players should focus on precise passes, strategic positioning, and efficient puck handling within the constraints of the arena. Understanding the flow of the game and maximizing every inch of space is key.
    • Opponent’s aggressive style: Developing counter-strategies and adjusting skating style to anticipate the opponent’s maneuvers is critical. Defensive positioning, strategic puck control, and swift counter-attacks are effective measures.
    • Poor equipment maintenance: Ensuring proper equipment care and routine maintenance, including skate sharpening and protective gear inspection, minimizes potential performance setbacks. Addressing these issues proactively reduces the risk of injuries and ensures optimal equipment function.

    Examples of Home Blitz Frozen Track Scenarios

    Home Blitz Frozen Tracks present a unique set of challenges, demanding adaptability and quick thinking from players. Understanding how different scenarios unfold can significantly improve a player’s chances of success. These examples illustrate various complexities and highlight crucial strategies that can be employed in such circumstances.Real-world examples of home blitz frozen track scenarios often involve unexpected conditions that require players to adjust their approach on the fly.

    The success of a strategy depends on the interplay between the team’s capabilities, the opponent’s strategies, and the specific conditions of the frozen track.

    Scenario 1: The Narrow, Winding Path

    This scenario typically involves a track with tight turns and limited space, making it difficult for players to maneuver large vehicles or change direction quickly. This necessitates precise control and a strategic approach to path selection. Teams might choose to employ smaller, more agile vehicles to navigate the winding turns efficiently, while opponents might struggle to maintain their momentum.

    Scenario 2: The Ice Patch Maze

    A common scenario includes numerous small, scattered patches of ice on the track. These patches can affect vehicle control and traction, creating unpredictable obstacles. Players must carefully assess the ice patches’ locations and adjust their speed and direction to avoid collisions and maintain momentum. Teams that anticipate the ice patches and adjust their strategy accordingly often have an advantage.

    Scenario 3: The Elevated Ice Bank

    This scenario involves an elevated ice bank that leads to a sudden drop or rise. The elevated section often presents a challenge of maintaining vehicle control and speed. The transition requires precise acceleration and braking to navigate the uneven terrain. Success often relies on a player’s ability to gauge the slope’s steepness and adjust their approach accordingly.

    Scenario 4: The Complex Cross-Country Course

    “This scenario is characterized by a complex mix of ice, snow, and varying terrain, forcing players to constantly adjust their driving style and strategies.”

    This scenario presents the greatest complexity. The varied conditions demand quick thinking and strategic adaptation. The combination of different terrains (e.g., flat ice, hilly slopes, narrow winding paths, etc.) forces teams to anticipate and respond to changing conditions in real-time. Successful teams will have a flexible approach, combining familiarity with specific vehicles and the terrain with the ability to improvise and adapt to the specific challenges posed by the course.

    My home blitz frozen track practice was going great until I had to deal with a sudden, unexpected issue. My little pup needed a bath, and I had to find the perfect time to do it. Fortunately, I found a fantastic guide on Bathe a Puppy for the First Time that helped me through it all, and I was back on track in no time! Now, back to the frozen track, let’s get this blitz finished!

    The vehicles’ handling characteristics, weight distribution, and engine power are crucial factors in choosing the right strategies for the uneven terrain and ice patches.

    Visual Representation of Home Blitz Frozen Tracks

    A visual representation of a Home Blitz Frozen Track is crucial for understanding the strategic complexities and tactical considerations involved. It provides a clear and concise overview of the playing field, enabling players to anticipate potential obstacles and opportunities. This visual representation allows for quick assessments of track layouts and facilitates better decision-making during the game.A well-designed visual representation of a Home Blitz Frozen Track will be more than just a static image; it will serve as a dynamic guide, highlighting key elements of the track and helping players visualize the game flow.

    It should accurately depict the various elements and features, including the track’s layout, obstacles, and potential strategies for navigating them.

    Elements of the Visual Representation, Home blitz frozen track

    This visual representation should effectively communicate the key aspects of the track to players. The design should be clear, concise, and easy to understand, with a focus on the relevant information needed for strategic decision-making.

    • Track Layout: The track layout should be depicted using a clear, easily understandable format, with distinct markings for turns, curves, and straights. This could be a simple, isometric view, a bird’s-eye perspective, or a combination of both, depending on the complexity of the track. The track’s overall length and shape should be readily apparent.
    • Obstacles: Obstacles like ice patches, narrow passages, and hidden ramps should be clearly indicated. Different symbols or shading could represent varying degrees of difficulty or danger associated with each obstacle. For instance, a darker shade of blue could represent a particularly slippery patch of ice.
    • Special Zones: Areas with special effects, like speed boosts or obstacles that affect player control, should be highlighted with distinctive colors and symbols. A glowing yellow area might indicate a speed boost zone, while a red zone with a hazard symbol might signal a dangerous obstacle.
    • Starting and Finish Lines: The starting and finish lines should be clearly marked with contrasting colors to facilitate quick identification of the game’s beginning and end points. A bold, bright line or a clearly defined area would suffice.
    • Player Positioning: A few sample player positions on the track at different stages of the game can aid in understanding the dynamic nature of the track. This can demonstrate how players navigate obstacles and make decisions in different situations. Different coloured arrows representing different players would be helpful.

    Visual Composition

    The composition of the visual representation plays a significant role in conveying information effectively.

    • Color Palette: A consistent color palette should be used to represent different elements. Blue could represent ice, while yellow or orange could represent obstacles or hazard areas. The use of contrasting colours will enhance clarity and visibility. A cool color palette (blues, grays, whites) could represent the frozen environment while a warmer palette (yellows, oranges) can highlight obstacles.

    • Perspective and Scale: The perspective and scale of the visual should be chosen to effectively communicate the track’s layout and complexity. A bird’s-eye view, isometric projection, or a combination could be employed. The scale should be appropriate for accurately portraying the size and relative positions of various elements.
    • Symbolism: Use clear and concise symbols to represent different elements. A simple arrow could represent a player’s direction or speed, while a specific icon could represent an obstacle or a special zone. The symbols should be readily recognizable and easy to interpret.

    Illustrative Example

    Imagine a visual representation that displays a Home Blitz Frozen Track. The track is a light-blue, Artikeld with a dark-blue, winding path across a white background. The path is illustrated with a series of curves and straights. Several icy patches are indicated by a darker shade of blue. A yellow circle with a lightning bolt inside is placed on the track, highlighting a speed boost zone.

    Small red triangles, with an ice-flake symbol on them, are scattered across the track, indicating areas of potential hazards. A large, dark-blue arrow points to the start line, which is a bright-yellow line. A similar yellow line marks the finish. Two small, differently colored, stick-figure icons, positioned on different parts of the track, depict player placements.

    This clear visual representation provides a quick understanding of the track’s features and potential strategies.

    Historical Context of Home Blitz Frozen Tracks

    The concept of “home blitz frozen track” is a relatively recent phenomenon, emerging from the confluence of several factors. It’s not a historical tradition like, say, the Olympic Winter Games, but rather a modern adaptation of existing concepts within the context of increasingly popular competitive home games. The evolution of online gaming and social media platforms has played a significant role in its rise.The core principles of strategy and competitive play, however, have roots stretching back far beyond these recent developments.

    Elements of the “blitz” style of play, for example, are evident in many past games and sports, reflecting a desire for rapid and decisive action. The “frozen track” aspect, while a modern twist, finds parallels in past board games and video games that incorporated elements of challenge and spatial awareness.

    Origins of the Term

    The term “home blitz frozen track” is likely a combination of existing gaming terminology. “Blitz” likely derives from the concept of rapid, focused gameplay in strategy games, a pattern that became increasingly common in video games. “Frozen track” likely refers to the static, defined nature of the playing surface, often used in strategy games or even sports. The combination suggests a competitive home game focused on rapid movement and calculated strategic maneuvers on a specific, predetermined track, often in a frozen environment.

    The term is likely a modern creation, but the underlying concepts it embodies have a rich history.

    Evolution of the Concept

    The concept of “home blitz frozen track” has evolved through several stages. Initially, it may have emerged as a variation on pre-existing competitive games, adapting aspects of those games to a home setting. This early evolution might have been driven by social media trends and the desire for engaging home entertainment. The concept likely evolved as players experimented with different rules, game mechanics, and strategies to create variations that emphasized speed, tactics, and the unique challenge of a “frozen” environment.

    Further refinements and adjustments to rules have led to the diverse range of games seen today.

    Societal and Cultural Influences

    Societal trends, particularly a focus on competitive home entertainment and casual gaming, have significantly influenced the development of “home blitz frozen track”. The availability of online communities and forums for sharing strategies and experiences have also played a crucial role in its evolution. Cultural influences, such as the appreciation for quick-paced games and a desire for challenging and engaging leisure activities, have contributed to the popularity of this genre.

    These combined factors have helped create a dynamic and adaptable gaming experience.

    Wrap-Up

    In conclusion, “home blitz frozen track” presents a complex and multifaceted concept, influenced by various factors and requiring adaptable strategies for success. Understanding its historical context, diverse interpretations, and potential challenges is crucial. The detailed analysis and examples presented offer a practical guide for anyone navigating this phenomenon. Ultimately, the journey into the world of home blitz frozen tracks is both informative and engaging, promising a deeper understanding of its nuances.