Tag: furniture repair

  • Fix a Sinking Desk Chair A Complete Guide

    Fix a Sinking Desk Chair A Complete Guide

    Fix a Sinking Desk Chair: Learning how to diagnose and fix a sinking desk chair can save you money and frustration. This comprehensive guide will walk you through the process, from identifying the problem to implementing effective solutions, ensuring your chair is once again a comfortable and supportive companion.

    We’ll delve into the various causes of sinking, from worn springs to faulty gas lifts, providing clear explanations and actionable steps to assess the situation. We’ll also explore DIY fixes, professional repair options, and essential preventative measures to keep your chair in tip-top shape for years to come.

    Identifying the Problem: Fix A Sinking Desk Chair

    A sinking desk chair can be a frustrating issue, impacting comfort and potentially even your posture. Understanding the specific symptoms of a sinking chair is crucial before attempting any fixes. This often involves a careful examination to differentiate the problem from other chair malfunctions. Ignoring the problem can lead to long-term discomfort and potential health issues.

    Common Signs of a Sinking Chair

    Recognizing the symptoms of a sinking desk chair is the first step in addressing the problem. Various signs indicate a potential issue, ranging from subtle to pronounced. Sagging, tilting, and unevenness are key indicators.

    • Sagging: A chair that sinks in the middle or on one side when you sit, causing a dip or a noticeable depression, is a clear sign of sagging. This can happen gradually over time or suddenly after a specific incident.
    • Tilting: If the chair tilts forward or backward while you’re sitting, it might be a sign of uneven support or weakened components. This can be accompanied by a feeling of instability or wobbling.
    • Unevenness: An uneven distribution of support, such as one leg sinking more than others, is a strong indicator of a sinking issue. This unevenness can manifest as the chair leaning to one side or causing discomfort on one side of your body.

    Distinguishing Sinking from Other Chair Malfunctions

    Accurately diagnosing the problem is crucial. A sinking chair isn’t always the only issue. Other potential malfunctions may present similar symptoms.

    • Loose or broken parts: Loose or broken parts like screws, joints, or wheels can create wobbly or tilting sensations, mimicking sinking. A thorough inspection is essential to identify the source of the problem.
    • Damaged springs: Faulty or damaged springs, especially in a posture-supporting chair, might lead to sinking and unevenness. Listen for unusual sounds, like creaks or pops, when moving the chair.
    • Defective cushions or padding: If the chair’s padding or cushions are worn out or damaged, this can contribute to a sinking feeling. Inspect the padding for tears or lumps that might be affecting the chair’s support.

    Importance of Accurate Diagnosis

    Before attempting any repairs, correctly diagnosing the sinking issue is paramount. Incorrect diagnosis can lead to wasted time and resources, or worse, worsen the problem.

    • Avoid unnecessary repairs: Misdiagnosis could lead to fixing a symptom rather than the root cause. This could be costly and inefficient.
    • Prevent further damage: Understanding the root cause helps avoid making the situation worse. Attempting a fix based on incorrect assumptions could damage the chair beyond repair.
    • Ensure optimal repair: A precise diagnosis ensures the right repair solution, leading to a more effective and lasting fix.

    Causes of a Sinking Desk Chair

    Identifying the underlying causes of a sinking chair is crucial for effective repair.

    Cause Description
    Worn-out springs or mechanisms Over time, the springs or mechanisms supporting the chair can weaken or break down, leading to sinking.
    Damaged or broken components Structural damage or breaks in the chair’s frame or components can cause unevenness and sinking.
    Excessive weight or usage Prolonged use or excessive weight placed on the chair can stress the structure and cause sinking.
    Poor quality materials Chairs made from inferior materials may not be able to withstand the stresses of daily use, leading to sinking over time.
    Manufacturing defects Some chairs might have manufacturing flaws that lead to structural weakness, causing the chair to sink.

    Assessing the Chair’s Structure

    Fix a Sinking Desk Chair

    A sinking desk chair isn’t just a minor inconvenience; it can impact posture and overall comfort. Understanding the chair’s internal structure is crucial to identifying the root cause of the problem. Proper assessment will help pinpoint the specific components that are failing to support the weight adequately.Careful examination of the chair’s components can pinpoint the source of the sinking.

    This involves identifying potential issues in springs, gas lifts, and other critical mechanisms that maintain the chair’s support. Understanding the role each component plays is essential to a successful repair or replacement strategy.

    Typical Desk Chair Components and Their Role

    Desk chairs are complex pieces of furniture with multiple components working together to provide support and adjustability. A breakdown of the components and their function helps understand why a chair might sink.

    • Seat Frame: The seat frame is the foundational structure of the chair’s seat. Made from materials like steel or wood, its integrity is critical. A damaged or weakened frame will directly affect the chair’s ability to support weight evenly. A warped frame, for example, will cause uneven sinking.
    • Backrest Structure: The backrest supports the user’s back, offering comfort and posture support. If the backrest structure is damaged or worn, the chair’s ability to maintain its proper shape is compromised, leading to sinking in the seat. Loose or broken parts in the backrest framework contribute to a poor seated experience.
    • Gas Lift Mechanism: This mechanism controls the height of the chair. A faulty gas lift can either prevent the chair from adjusting to the correct height or allow the seat to drop unexpectedly, causing sinking. A common cause of sinking is a weakened or leaking gas cylinder.
    • Springs: Springs, particularly in the seat cushion or back support, contribute to the chair’s resilience and provide some support. Weak or broken springs may result in a gradual sinking or uneven support, causing the chair to sag.
    • Casters: While not directly related to support, damaged or worn casters can contribute to uneven sinking if the chair isn’t balanced properly on the floor.

    Potential Contributing Components to Sinking

    Several chair components can contribute to the sinking problem. Pinpointing these components is crucial for effective repair or replacement.

    • Bent or Broken Springs: A bent or broken spring can cause the seat to sag or sink unevenly in specific areas. This issue is more prevalent in chairs with spring-loaded mechanisms for cushioning.
    • Faulty Gas Lift: A leaking or weak gas lift cylinder will cause the chair to drop unexpectedly or sink in a non-adjustable manner. This issue affects the chair’s height adjustment and support, contributing to the sinking.
    • Damaged Seat Frame: A damaged or warped seat frame directly affects the chair’s ability to distribute weight evenly. Cracks or warping in the frame compromise the structural integrity and will lead to sinking.

    Inspecting the Chair’s Structure

    Thorough inspection is crucial for determining the source of the sinking problem.

    1. Visual Inspection: Begin by visually inspecting the chair for any visible damage to the seat frame, backrest, springs, and gas lift. Look for cracks, dents, or loose parts.
    2. Functionality Check: Test the chair’s height adjustment and stability. Note any unusual movement or sinking.
    3. Spring Assessment: If the chair has springs, examine them for any signs of damage, such as bending or breakage. Pay close attention to the areas where the springs are attached to the frame.
    4. Gas Lift Examination: Check the gas lift cylinder for any leaks or signs of damage. Attempt to adjust the height of the chair and note any unusual movements.

    Table: Chair Components and Sinking

    This table summarizes the potential connection between chair components and their contribution to the sinking issue.

    Chair Component Potential Contribution to Sinking
    Seat Frame Warping, cracks, or structural weakness lead to uneven weight distribution and sinking.
    Gas Lift Leaking or weak cylinders prevent proper height adjustment and support, causing the seat to sink.
    Springs Broken or bent springs provide uneven support, resulting in sinking in specific areas.
    Backrest Damage or wear in the backrest structure compromise the chair’s overall support, contributing to seat sinking.

    Potential Fixes for a Sinking Chair

    A sinking desk chair can be a frustrating problem, impacting comfort and potentially leading to back pain. Fortunately, various solutions exist, ranging from simple DIY fixes to more involved professional repairs. Understanding the causes and potential fixes can empower you to restore your chair to its former glory.Addressing a sinking chair often involves identifying the specific cause of the issue.

    Is the foam padding compressed? Are the springs or mechanisms weakened? Pinpointing the root cause is crucial for selecting the most effective repair strategy.

    DIY Repair Options

    Several DIY methods can address a sinking chair, depending on the underlying problem. These methods are often cost-effective and allow for a hands-on approach.

    • Replacing the foam padding: If the foam is compressed, replacing it can significantly improve the chair’s support. This usually involves removing the old foam, measuring the area to ensure a proper fit, and carefully installing the new foam. Tools needed include a utility knife, measuring tape, and a new piece of foam that conforms to the chair’s dimensions. Effectiveness varies based on the chair’s design; in some cases, this is the most efficient and cost-effective solution.

      A high-density foam may provide better support over time.

    • Adjusting or Replacing Springs: If the chair’s springs are the culprit, carefully adjusting their tension might restore the chair’s functionality. If adjustment is not feasible, replacing the springs with new ones may be necessary. This requires removing the seat cushion and carefully examining the spring mechanism. This task often necessitates specific tools, like pliers and screwdrivers, depending on the chair’s construction.

      Care must be taken to maintain the correct tension to avoid further issues.

    • Reinforcing the chair’s structure: If the chair’s frame or components are showing signs of wear or damage, reinforcing these areas might be necessary. For example, adding extra support or bracing to the frame can prevent future sinking. The specifics of this method vary considerably depending on the chair’s design. This may involve using wood glue, screws, or other reinforcement materials.

      Assessing the structural integrity is essential to avoid worsening the problem.

    Professional Repair Options

    Professional repair services are an alternative for more complex or intricate chair repairs. These services provide expertise and specialized tools that may not be readily available to the average user.

    • Professional Upholstery Services: If the foam padding needs replacement or extensive repair, a professional upholstery service can provide a clean and efficient solution. They typically have the experience and tools to handle a wide range of upholstery needs. This option may involve removal and replacement of the cushion.
    • Chair Repair Specialists: Specialized chair repair technicians are equipped to diagnose and repair a wider range of issues, from damaged springs to broken frames. These professionals have the knowledge and tools to assess the chair’s structural integrity and implement appropriate repairs.

    Comparison Table

    This table summarizes the different repair approaches, their estimated costs, and time requirements. These are approximate values, and actual costs and times may vary depending on the complexity of the repair and the specific chair.

    Repair Approach Estimated Cost Estimated Time
    DIY Foam Replacement $20-$50 1-3 hours
    DIY Spring Adjustment $10-$30 1-4 hours
    Professional Upholstery $50-$200 2-5 days
    Chair Repair Specialist $75-$300+ 1-3 days

    Preventing Future Sinking

    A sinking desk chair is more than just an uncomfortable seating experience; it’s a sign that something is amiss. Proactive maintenance and understanding the chair’s limitations are crucial to extend its lifespan and prevent further issues. Ignoring warning signs can lead to costly repairs or replacements down the line.Preventing sinking goes beyond simply fixing the current problem; it’s about establishing a routine to keep the chair in optimal condition.

    This includes understanding the mechanics of the chair, recognizing potential problems early, and adopting practices that minimize stress on the chair’s components.

    Regular Maintenance Practices

    Regular maintenance is vital for prolonging the life of any piece of furniture, and desk chairs are no exception. Routine checks can identify minor issues before they escalate into significant problems. This includes inspecting the chair’s springs, mechanisms, and cushioning. Cleaning the chair regularly, removing any debris or dust, will also help maintain the chair’s structural integrity.

    Proper Usage for Prevention

    Proper usage plays a significant role in preventing sinking issues. Using the chair according to its intended design is essential. Avoid excessive leaning or stretching, as these actions can put undue strain on the chair’s support structure. Gentle and controlled movement are key to avoiding abrupt or forceful stress on the chair’s mechanisms.

    Maintaining Weight Limits

    Exceeding the weight limit for a desk chair can lead to significant damage and premature sinking. Each chair has a specified maximum weight capacity. This is often clearly marked on the chair or in its product documentation. Understanding and adhering to this limit is crucial to the chair’s long-term functionality. For example, if a chair’s weight limit is 250 pounds, exceeding that weight will put undue stress on the chair’s frame and potentially cause it to sink or collapse.

    Preventive Measures

    To avoid future sinking issues, several proactive steps can be taken:

    • Regularly check the chair’s springs and mechanisms for signs of wear and tear.
    • Inspect the chair’s cushioning and ensure it’s properly supporting your weight.
    • Avoid leaning excessively on the chair, as this can stress the support mechanisms.
    • Ensure you are sitting within the chair’s designated weight limit.
    • Clean the chair regularly to prevent dust buildup and maintain its structural integrity.
    • Store the chair in a dry environment, away from direct sunlight and extreme temperatures, to minimize potential damage.

    Identifying Warning Signs

    Early detection of potential sinking issues is crucial to preventing further damage. Look for signs such as uneven seating, creaking sounds, or a noticeable decrease in the chair’s support. If you notice any of these warning signs, take immediate action to address the problem. Addressing these early can prevent a chair from sinking completely. A chair that groans or squeaks when you sit or lean on it is a clear indicator that there might be stress points on the chair’s structural components.

    Safety Precautions During Repair

    Fix a Sinking Desk Chair

    Fixing a sinking desk chair can be a rewarding DIY project, but safety should always be paramount. Ignoring safety precautions can lead to injuries, damage to the chair, or even more serious issues. Understanding potential hazards and employing appropriate safety gear is crucial for a successful and injury-free repair.A crucial aspect of any repair project, especially involving mechanical components like desk chairs, is recognizing and mitigating potential risks.

    Proper safety measures prevent accidents and ensure the integrity of the work environment, minimizing the chances of injury and damage. Understanding the inherent risks associated with the repair process empowers you to make informed decisions and implement effective preventative measures.

    Potential Hazards and Risks

    Repairing a desk chair can expose you to a variety of hazards, ranging from minor cuts and scrapes to more serious injuries. Improper handling of tools, loose parts, or damaged components can lead to accidents. The mechanics of the chair, including springs, screws, and other metal parts, can be sharp or cause pinching if not handled carefully. Additionally, improper lifting or awkward postures can result in muscle strains or sprains.

    Dust and debris generated during disassembly can also affect your respiratory system.

    Safety Equipment

    Prioritizing safety equipment is essential for a safe and efficient repair process. The right tools and gear can significantly reduce the risk of injury. A well-equipped workspace ensures you have everything needed for the job.

    • Safety glasses or goggles: Protect your eyes from flying debris, dust, or small parts.
    • Work gloves: Protect your hands from cuts, abrasions, and sharp objects.
    • Heavy-duty work gloves: Especially important when handling metal components to prevent slips and injuries.
    • Closed-toe shoes: Prevent foot injuries from dropped tools or sharp objects.
    • A sturdy work surface: Prevents the chair from moving or tipping during disassembly.

    These safety measures ensure the safety of the repairer during the process.

    Preventing Injuries During Repair, Fix a Sinking Desk Chair

    Implementing safety measures is not just about wearing gear; it’s about a cautious and methodical approach. Proper technique minimizes risks.

    • Inspect the chair thoroughly before starting any disassembly. Identify any loose or damaged components and address them before proceeding.
    • Use appropriate tools for the task. Avoid using tools that are damaged or worn, as this can compromise their effectiveness and safety.
    • Work in a well-lit area to avoid accidents due to poor visibility.
    • Take breaks to avoid fatigue and maintain focus on the task. Overexertion can lead to mistakes and injuries.
    • If you encounter a problem you’re unsure about, consult a professional or seek help from a knowledgeable friend or family member.

    Careful planning and adherence to safety protocols ensure a successful and injury-free repair.

    Safety Precautions Table

    Potential Hazard Safety Precautions
    Sharp edges/components Wear safety glasses and gloves; inspect chair thoroughly for loose parts; use protective coverings where necessary.
    Falling parts Secure the chair and work area; use appropriate tools and techniques; keep a stable workspace.
    Lifting heavy parts Use proper lifting techniques; enlist help if necessary; avoid straining muscles.
    Dust/debris inhalation Work in a well-ventilated area; wear a dust mask or respirator if needed.
    Slips/trips Maintain a clean and organized workspace; wear appropriate footwear; use a sturdy work surface.

    Following these safety precautions during desk chair repair will greatly minimize the risk of injury and ensure a safe and productive repair experience.

    Troubleshooting Common Issues

    Fixing a sinking desk chair can be a rewarding experience, but unexpected problems can arise during the repair process. Understanding potential issues and their solutions is crucial for a successful outcome. This section will detail common problems, their potential causes, and troubleshooting steps to help you navigate any challenges you might encounter.Troubleshooting involves identifying the root cause of a problem, not just the symptom.

    By carefully examining the chair’s structure and understanding the mechanisms at play, you can address the issue effectively and avoid future problems. This section will help you diagnose and fix various common issues during the chair repair process.

    Identifying and Resolving Loose Screws

    Loose screws are a frequent problem during chair repair. They can be caused by over-tightening, gradual loosening due to stress on the chair, or issues with the screw itself. Tightening loose screws is a common fix, but the root cause must be addressed to prevent future problems. Using the correct screwdriver and torque settings is crucial for preventing further damage.

    Fixing a sinking desk chair can be a real pain, but thankfully, it’s often a simple fix. Listening to Aimee Mann’s latest album, aimee mann bachelor no 2 or the last remains of the dodo , while tackling the wobbly chair, actually made the whole process more enjoyable. Ultimately, a few well-placed shims or a new chair part might be all it takes to have that comfortable workspace back again.

    Assessing Broken Springs

    Broken springs are another potential problem. These springs can snap due to excessive weight, impact, or age. If a spring is broken, it can lead to instability and discomfort. Replacing broken springs is essential for restoring the chair’s functionality and comfort. Careful removal and replacement of springs are important to maintain the chair’s structure and avoid further damage.

    Addressing Worn-Out or Damaged Mechanisms

    Worn-out or damaged mechanisms, such as the swivel or tilt mechanisms, can contribute to chair sinking. Wear and tear can cause these parts to malfunction, affecting the chair’s stability and functionality. Identifying and replacing worn-out parts is vital to restore the chair’s proper functioning.

    Fixing a sinking desk chair can be a real pain, but hey, at least it’s not as frustrating as trying to figure out why someone decided to remix the Fresh Off the Boat theme song with the style of Danny Brown. Seriously, though, that whole project, danny brown does the fresh off the boat theme song , is something else! Back to the chair, though – some simple adjustments might just be the ticket to getting you back to a comfortable work setup.

    Troubleshooting Issues with the Chair’s Base

    Issues with the chair’s base can also lead to sinking. Loose or damaged base components, such as the castors or the support structure, can impact the chair’s stability. Addressing these issues is important for restoring the chair’s functionality.

    Fixing a sinking desk chair can feel like tackling a frustrating problem, almost as if you’ve had a tough time yourself. It’s a real pain, isn’t it? Sometimes, those everyday struggles, like a wobbly chair, can make you wonder, “Have You Had a Difficult Life?” Have You Had a Difficult Life. But, with a little know-how and some basic tools, you can get that chair feeling sturdy again, and your back will thank you.

    So, let’s get this sinking desk chair fixed!

    Table: Troubleshooting Steps for Common Chair Problems

    Problem Potential Cause Troubleshooting Steps
    Loose Screws Over-tightening, stress on the chair, or issues with the screw Use the correct screwdriver, apply appropriate torque, and check the screw for damage. If the screw is damaged, replace it.
    Broken Springs Excessive weight, impact, or age Identify the broken spring and replace it with a new one of the correct type and size.
    Worn-out/Damaged Mechanisms Wear and tear on the swivel or tilt mechanisms Identify the worn-out part and replace it with a new one or repair the mechanism.
    Issues with the Chair’s Base Loose or damaged base components Inspect the base components for damage. Tighten loose bolts or replace damaged components.

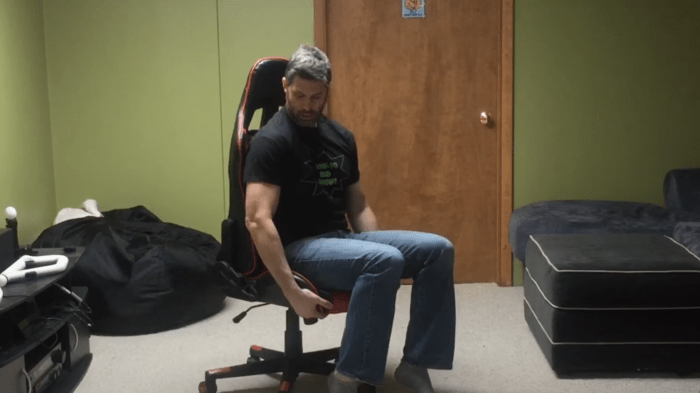
    Illustrations and Visual Aids

    Visual aids are crucial for understanding the intricacies of a sinking desk chair. They help break down complex mechanisms into digestible parts, allowing for easier troubleshooting and repair. This section provides visual representations of chair components, internal structures, signs of sinking, repair methods, and comparative analyses of sinking issues.

    Desk Chair Components

    A clear understanding of a desk chair’s parts is essential for identifying the source of sinking. The following diagram illustrates the key components: Desk Chair Components Diagram

    The diagram above displays a standard office chair, highlighting components like the seat pan, backrest, base, and adjustable mechanisms. Each part plays a vital role in the chair’s functionality, and defects in any of these parts can contribute to sinking.

    Internal Structure of the Chair

    Visualizing the chair’s inner workings provides insights into potential causes of sinking. Desk Chair Internal Structure Diagram

    This diagram reveals the internal structure, showcasing the springs, levers, and support mechanisms within the seat pan. These components are essential for proper support and prevent sinking. Defects or wear in these components can lead to reduced support, resulting in the chair sinking.

    Identifying Signs of Sinking

    Recognizing the signs of sinking is the first step in effective troubleshooting. Desk Chair Sinking Signs Diagram

    This diagram illustrates various signs of sinking, from uneven seating to excessive sag. The diagrams indicate different levels of sinking, helping determine the severity of the problem and the potential causes. Identifying these early indicators is crucial to prevent further damage and discomfort.

    Repair Methods

    Understanding the various repair methods is vital for addressing the sinking issue effectively. Desk Chair Repair Methods Diagram

    The illustrations depict different repair approaches, from tightening loose screws to replacing worn springs. The step-by-step diagrams guide users through the repair process, enabling them to address the problem effectively. Proper tools and techniques are crucial for successful repairs and to avoid further damage.

    Comparison of Sinking Issues and Causes

    A comparative analysis of sinking issues and their root causes provides a comprehensive understanding of the problem.

    Sinking Issue Possible Cause Diagram
    Uneven Sag Loose screws, worn springs, or damaged frame [Diagram placeholder for uneven sag]
    Excessive Sag Damaged springs, weak frame, or worn-out support mechanisms [Diagram placeholder for excessive sag]
    Sudden Drop Broken springs, fractured frame, or loose joints [Diagram placeholder for sudden drop]

    This table illustrates how different sinking issues correlate with specific causes. This comparison helps in diagnosing the problem accurately and determining the most suitable repair approach.

    Conclusion

    In conclusion, fixing a sinking desk chair is a manageable task with the right knowledge and approach. By carefully diagnosing the issue, understanding the chair’s structure, and employing the appropriate repair methods, you can restore comfort and functionality to your workspace. This guide has equipped you with the tools and insights to tackle this common problem, ensuring your chair provides long-lasting support.

  • Fix a Hole in Your Desk A Comprehensive Guide

    Fix a Hole in Your Desk A Comprehensive Guide

    Fix a Hole in Your Desk: This comprehensive guide will walk you through the process of repairing various types of holes in your desk, from small dents to large gouges. We’ll cover different desk materials, the best repair methods, and even preventative measures to keep your workspace looking its best. Whether your desk is made of wood, metal, or laminate, we’ve got you covered!

    Understanding the cause and type of damage is key to successful repair. We’ll delve into common causes like impacts and wear and tear, and explain how the size and location of the hole affect the repair process. The guide includes a helpful table comparing different materials and their ideal repair methods. This ensures you’re choosing the right approach for your specific desk and situation.

    Understanding the Issue

    Fix a Hole in Your Desk

    Fixing a hole in your desk is more than just a cosmetic fix; it’s about understanding the root cause and choosing the right repair method. A small dent can quickly escalate into a major problem if not addressed promptly. Different desk materials react differently to damage, impacting the repair process and cost. Proper identification of the damage type and the desk’s construction is key to a successful repair.A desk hole, regardless of its size, can be traced back to a combination of factors: material properties, the type and force of impact, and the desk’s overall usage history.

    Understanding these factors allows for a more informed approach to repair. For instance, a heavy object dropped on a laminate desk might create a significantly different hole than a small, persistent scratch from a frequently used drawer.

    Types of Desk Holes

    Various types of damage can lead to holes in a desk. Small dents, caused by minor impacts, can be easily overlooked but still require attention to prevent further damage. Gouges, resulting from more forceful impacts or prolonged friction, will require more extensive repair. Cracks, appearing as lines of weakness, might be subtle but indicate underlying structural issues that need careful evaluation.

    Identifying the precise type of hole is crucial for selecting the right repair strategy.

    Fixing a hole in your desk can be surprisingly satisfying. It’s a small project that can make a big difference to your workspace, and a little DIY can really boost your confidence. Plus, think about how your perfectly repaired desk might relate to the manicured perfection of suburban lawns, a fascinating study of aesthetics and design, particularly when you see how they’re meticulously maintained.

    suburban lawns suburban lawns offer a great comparison to the precision of a repaired desk, in the end, both demonstrate the satisfaction of fixing something that’s broken. Ultimately, a fixed desk is a symbol of your commitment to a neat and tidy environment.

    Desk Materials and Their Impact on Repair

    The material from which a desk is constructed significantly affects the repair process. Wood, a common desk material, is relatively easy to repair with wood filler or patching. Metal desks, often featuring sturdy construction, may require welding or patching, which can be more complex and costly. Laminate desks, a popular choice for their durability and aesthetic appeal, can often be repaired using epoxy or patching, offering a balance between ease and effectiveness.

    Common Causes of Desk Holes

    Impacts from objects, like books, stationery, or even a misplaced laptop, are a frequent culprit for desk damage. Wear and tear, caused by constant use and friction, can lead to small holes or gouges, especially on the edges of the desk. Misuse, including placing heavy objects on unstable surfaces or using sharp objects that scratch the surface, can quickly create damage.

    Preventing misuse is crucial in minimizing the need for repairs.

    Significance of Hole Size and Location

    The size and location of the hole directly impact the repair process. Small holes might be easily concealed with filler or patching, while larger gouges require more substantial repairs. Holes near critical areas, such as joints or support structures, require extra attention to ensure the desk’s structural integrity. Understanding the implications of location is vital in preventing future issues.

    Comparison of Repair Methods for Different Desk Materials

    Material Repair Method Difficulty Cost
    Wood Wood filler, patching Medium Low
    Metal Welding, patching High Medium
    Laminate Epoxy, patching Medium Low

    This table provides a general overview of repair methods for common desk materials. The difficulty and cost associated with each repair method can vary based on the specific damage and the expertise of the repair professional. Factors such as the extent of the damage and the availability of specialized tools can influence the overall cost and time required.

    Repair Methods and Tools

    Fixing a hole in your desk is often a DIY project that requires careful consideration of the material and the size of the damage. A well-chosen repair method, along with appropriate tools, can effectively restore the desk’s aesthetic appeal and structural integrity. Understanding the nature of the damage and the desk’s composition is crucial for selecting the right approach.Various methods are available for addressing desk holes, each with its own advantages and disadvantages.

    Careful assessment of the damage is key to determining the most suitable repair strategy.

    Patching

    Patching is a common method for repairing small to medium-sized holes in wooden desks. It involves covering the hole with a patch of matching material. This technique is often preferred for its simplicity and aesthetic appeal.

    • Pros: Relatively straightforward to implement, preserves the original aesthetic of the desk, and is often cost-effective for smaller holes.
    • Cons: May not be suitable for larger holes, and the patch may not perfectly match the surrounding wood if not carefully chosen.

    Filling

    Filling involves using a suitable material to fill the hole, effectively concealing the damage. This method is particularly useful for deeper holes or those that affect the desk’s structural integrity.

    • Pros: Can be used for larger holes and often restores the desk’s structural integrity. A variety of materials are available for filling, accommodating different wood types and finishes.
    • Cons: Requires careful selection of filler material to match the desk’s color and texture. The filling process may require multiple applications to achieve a smooth finish, and may take longer than patching.

    Reinforcing

    Reinforcing is necessary when the hole compromises the desk’s structural integrity. This method involves adding support to the area surrounding the hole to prevent further damage.

    • Pros: Provides long-term structural support for the desk. It is often crucial when the hole is large or located in a high-stress area.
    • Cons: Can be more complex than patching or filling, requiring specialized tools and potentially altering the desk’s original appearance.

    Tools and Materials

    The appropriate tools and materials depend on the chosen repair method and the desk’s material.

    Repair Method Necessary Tools Materials
    Patching Wood glue, wood filler, sandpaper, utility knife, matching wood patch Matching wood, wood glue, filler
    Filling Wood filler, putty knife, sandpaper, wood stain (if necessary) Wood filler, wood stain (if needed)
    Reinforcing Screws, wood glue, wood blocks, clamps Wood blocks, screws, glue

    Choosing the Right Tools and Materials

    The size and depth of the hole, along with the desk’s material (wood type, finish, and construction), significantly influence the selection of repair tools and materials. A small, superficial hole in a solid-wood desk may require a simple patch, whereas a larger, deeper hole in a particleboard desk might need reinforcing with wood blocks.

    Patching a Small Hole in a Wooden Desk – Step-by-Step

    This procedure demonstrates patching a small hole in a wooden desk.

    1. Preparation: Clean the area around the hole with a damp cloth. Ensure the wood is completely dry before proceeding.
    2. Patch Selection: Choose a patch of wood that matches the desk’s color and grain as closely as possible. Cut the patch slightly larger than the hole to allow for shaping.
    3. Patch Application: Apply wood glue to the edges of the hole and the back of the patch. Press the patch firmly into the hole, ensuring it’s flush with the surrounding wood.
    4. Clamping: Use clamps to hold the patch in place for at least 24 hours to allow the glue to dry completely.
    5. Finishing: Once the glue is dry, use sandpaper to smooth any imperfections. Apply wood filler to any remaining gaps. Sand the area smooth, and then finish with wood stain if necessary.

    Materials and Supplies

    Fixing a hole in your desk requires careful selection of materials. Choosing the right material is crucial to ensure a durable and aesthetically pleasing repair. Mismatched materials can lead to a visible repair or a weak spot that fails over time. Understanding the desk’s material and the properties of different filling materials is key to a successful repair.

    Fixing a hole in my desk has been a bit of a project lately. Turns out, finding the right wood filler and avoiding a dust cloud is more challenging than I anticipated. Fortunately, while I was browsing online for tips on the perfect repair, I stumbled across some interesting news in brief about Bruce Springsteen, The Feelies, Saint Etienne, and Deadmau5.

    This article was pretty cool, and I’m already picturing my new, improved desk with its patched-up hole! Now, back to the task at hand – getting this desk repair completed.

    Common Repair Materials

    A variety of materials can be used to repair desk holes. The most common options include wood filler, epoxy putty, and plastic Bondo. Selecting the appropriate material depends heavily on the desk’s construction and the type of hole.

    Matching Repair Material to Desk Material

    A critical aspect of desk repair is matching the repair material to the desk’s material. Using an unsuitable material can lead to a noticeable repair, or worse, a weak spot that may lead to further damage. For instance, using wood filler on a metal desk will not adhere properly and may not fill the hole effectively.

    Properties of Filling Materials

    Different filling materials possess unique properties that influence their suitability for various repair tasks. Wood filler, commonly used for wood desks, is known for its ability to blend seamlessly with the surrounding wood. Epoxy putty, on the other hand, offers excellent adhesion to a wide range of materials, including wood, metal, and laminate. Plastic Bondo is often a good option for laminate surfaces, although it might not provide the same strength as epoxy putty.

    Preparing the Hole for Repair

    Proper preparation of the hole is essential for a successful repair. First, thoroughly clean the hole of any dust, debris, or loose particles. This ensures good adhesion of the repair material. Next, fill the hole with the selected repair material, ensuring a smooth, even surface. Finally, allow the repair material to dry and cure completely, following the manufacturer’s instructions.

    Material Suitability Table

    This table Artikels the suitability of different materials for various desk types:

    Material Desk Type Suitability
    Wood Filler Wood Excellent
    Epoxy Putty Wood, Metal, Laminate Good
    Plastic Bondo Laminate Fair

    Preventative Measures

    A pristine desk is not just aesthetically pleasing; it’s a testament to efficient workflow. Preventing holes in your desk is far more economical and time-saving than repairing them. This section dives into proactive strategies for maintaining your desk’s integrity and avoiding future damage.Proper desk care involves more than just occasional cleaning. It necessitates a mindful approach to usage and placement, coupled with preventative measures to mitigate potential hazards.

    Fixing a hole in my desk is proving surprisingly tricky. It’s definitely a project that deserves a bit of focus, but honestly, I’m more excited about Steely Dan announcing a tour with the Doobie Brothers! This tour is going to be epic. Back to the desk, though – hopefully, some wood glue and patience will solve this problem soon.

    By understanding the common causes of desk damage, you can proactively implement strategies to maintain a functional and attractive workspace.

    Strategies for Maintaining Desk Integrity

    Preventing damage requires a proactive approach. Understanding the potential stressors on your desk is crucial. Heavy objects, sharp objects, or even repeated impacts from items dropped can create weaknesses over time.

    • Strategic Desk Placement: Choosing the right location for your desk can significantly impact its longevity. Avoid placing the desk in high-traffic areas or near sources of potential impact, such as doorways or areas with heavy foot traffic. A well-considered placement minimizes the risk of accidental knocks and bumps. Positioning the desk away from direct sunlight, especially if it’s made of wood, can also reduce the risk of warping or damage.

    • Protective Measures for High-Risk Areas: Certain parts of the desk are more susceptible to damage. A laptop tray, for instance, often bears the brunt of dropped items. Protecting these vulnerable areas with a non-slip mat or a dedicated tray cover can significantly reduce the risk of punctures or dents. Likewise, using desk organizers to manage clutter can reduce the risk of items shifting and potentially impacting other surfaces.

    • Proper Desk Usage: The way you use your desk significantly influences its lifespan. Avoid placing excessively heavy items directly on the desk’s surface, especially in areas not designed for such weight distribution. Distributing weight evenly is crucial to preventing stress on specific points and potential cracking. Using a monitor riser or adjustable keyboard tray can also reduce strain on the desk and promote proper posture.

    • Impact Protection: Consider the possibility of items falling onto the desk. Protecting the surface with a desk pad or cover can significantly reduce the impact of accidental drops or knocks. For instance, a felt or rubber desk mat can cushion the blow and prevent scratches and dents. Similarly, placing protective coverings on frequently used areas of the desk (e.g., the area under the keyboard) can help prevent scratches and spills.

    Dos and Don’ts for Desk Usage

    Consistent, responsible desk usage can significantly extend its lifespan. This section Artikels key dos and don’ts to minimize the risk of future damage.

    • Do: Use desk organizers to keep items in their designated areas. Avoid placing items that could potentially fall and cause damage on the desk’s surface.
    • Do: Utilize desk pads or mats in areas that are frequently subjected to high-impact activities or potential spills.
    • Do: Regularly inspect the desk for signs of wear and tear, such as cracks, warping, or loose parts. Address these issues promptly to prevent further damage.
    • Do: Keep the desk clean and free from debris. Dust and dirt accumulation can contribute to damage over time. Dust buildup can also interfere with the proper function of electronic devices.
    • Don’t: Place extremely heavy objects directly on the desk’s surface, especially in a concentrated area.
    • Don’t: Use the desk as a surface for placing extremely hot or cold items, as these could cause thermal damage.
    • Don’t: Place sharp or pointed objects directly on the desk’s surface without proper protection.
    • Don’t: Drop heavy or sharp items onto the desk’s surface, which can easily cause damage.

    Advanced Techniques: Fix A Hole In Your Desk

    Fix a Hole in Your Desk

    Fixing a complex hole in your desk requires more than just a quick patch. Advanced techniques address the structural integrity and aesthetic appeal of the repair, ensuring the desk retains its functionality and looks its best. These techniques often involve reinforcement, meticulous surface restoration, and specialized materials to achieve a lasting solution.

    Reinforcement Methods for Larger Holes, Fix a Hole in Your Desk

    Reinforcement is crucial for large holes that compromise the desk’s structural integrity. This involves adding support to the weakened area, preventing future damage and ensuring stability. Various methods can be employed, depending on the size and location of the hole. Using wood plugs, strategically placed screws, or even reinforcing strips, will bolster the weakened section. For instance, a large hole near the desk’s edge might require a supplementary support beam or a thicker piece of plywood affixed underneath.

    Careful consideration of the underlying wood structure is essential to prevent further damage.

    Repairing Damaged Edges and Corners

    Damaged edges or corners of a desk often require specialized attention. These areas are prone to chipping and splintering, and restoring them necessitates a nuanced approach. Wood filler or epoxy resin can effectively fill minor cracks and gaps. For more significant damage, veneer repair may be necessary. Veneer, a thin layer of wood, can be carefully applied over the damaged area, matching the existing grain for a seamless repair.

    The application of veneer often requires specific tools and expertise to ensure a smooth, natural-looking finish. A crucial step is shaping and sanding the repair to match the surrounding edges.

    Restoring Aesthetic Appeal

    The final step in any desk repair is restoring its aesthetic appeal. This involves meticulously sanding the repaired area to match the existing surface, ensuring no noticeable difference. Matching the wood grain is critical for a seamless look. A final coat of stain or varnish, carefully applied, will protect the repaired area and enhance its appearance. Professional-grade finishing materials often provide superior results.

    For instance, carefully selecting a matching stain or varnish can help blend the repair seamlessly with the original desk surface.

    Advanced Repair Techniques Comparison

    Technique Description Suitability
    Reinforcement Adding support to the hole area using wood plugs, screws, or strips. Large holes compromising structural integrity, especially near edges.
    Sanding and Refinishing Smoothing and restoring the surface to match the existing finish using sandpaper and appropriate wood fillers. Various hole types, including small to medium-sized holes and surface imperfections.
    Veneer Repair Replacing damaged surface areas with a thin layer of wood (veneer) that matches the existing grain. Significant damage, extensive surface area damage, and holes requiring substantial replacement of the top layer.

    Final Conclusion

    In conclusion, fixing a hole in your desk is a manageable task with the right knowledge and tools. By understanding the different materials, repair methods, and preventative measures, you can effectively restore your desk to its former glory. Whether you opt for simple patching or more advanced techniques, this guide provides a solid foundation for a successful repair.

    Now go forth and fix those holes!

  • Install a Sliding Bolt A Comprehensive Guide

    Install a Sliding Bolt A Comprehensive Guide

    Install a Sliding Bolt: This guide dives deep into the world of sliding bolts, from their various types and materials to safe installation methods and troubleshooting. Whether you’re a seasoned DIYer or a novice, this comprehensive guide will equip you with the knowledge and steps to confidently install sliding bolts in furniture, cabinetry, or doors.

    We’ll explore surface-mount and concealed options, examine different materials like steel and brass, and highlight the advantages and disadvantages of each. Plus, we’ll cover crucial safety precautions and troubleshooting tips, ensuring a smooth and successful installation. Learn how to choose the right tools and materials, and get ready to master this essential fastening technique.

    Introduction to Sliding Bolts

    Sliding bolts are a versatile and essential fastening mechanism used in a wide range of applications. Their design allows for secure fastening while enabling easy opening and closing, making them crucial in furniture, cabinetry, and door systems. Understanding their different types, materials, and applications is key to choosing the right solution for a specific task.Sliding bolts offer a practical alternative to traditional fasteners like screws or rivets, providing a secure connection while maintaining the aesthetic appeal and ease of use of the component.

    Their smooth action allows for repeated opening and closing without excessive wear or strain.

    Installing a sliding bolt is surprisingly straightforward, especially if you’re familiar with the intricate mechanisms of the Imperial government, as detailed in the imperial government guide imperials rogue one. Understanding the different ranks and protocols within the Empire can actually help you visualize the bolt’s operation and ensure a smooth installation. Once you’ve got the hang of it, a sliding bolt is a reliable and effective security solution.

    Types of Sliding Bolts

    Sliding bolts are broadly categorized into surface mount and concealed types. Surface mount bolts are readily visible, while concealed bolts are integrated into the design, creating a seamless aesthetic. The choice between these two depends heavily on the desired aesthetic and the surrounding environment.

    • Surface Mount Bolts: These bolts are affixed directly to the surface of the component, making them readily accessible for installation and maintenance. They are commonly used in furniture where a visible fastener is acceptable, like drawers or cabinets.
    • Concealed Bolts: These bolts are designed to be hidden within the component, offering a clean and modern aesthetic. They are particularly useful in applications requiring a minimalist or sophisticated design, such as high-end cabinetry or specialized furniture pieces.

    Materials Used in Sliding Bolts

    The choice of material significantly impacts the bolt’s strength, durability, and aesthetic appeal. Common materials include steel, brass, and aluminum.

    • Steel: Steel sliding bolts are known for their exceptional strength and durability, making them suitable for heavy-duty applications. Their cost-effectiveness also makes them a popular choice for mass-produced furniture.
    • Brass: Brass sliding bolts are prized for their corrosion resistance and beautiful finish. They are often used in applications requiring a more decorative or high-end look, such as antique furniture or premium cabinetry.
    • Aluminum: Aluminum sliding bolts are lighter than steel or brass, offering a lower overall weight in applications where this is a concern. They are also known for their resistance to corrosion and are often used in outdoor furniture or environments prone to moisture.

    Applications of Sliding Bolts

    Sliding bolts are employed in various contexts, each with specific design considerations.

    • Furniture: In furniture construction, sliding bolts provide secure connections for drawers, cabinets, and other movable components. They contribute to the structural integrity and smooth operation of the furniture piece.
    • Cabinets and Drawers: Sliding bolts are essential in cabinetry for connecting drawer fronts to their runners. Their ability to open and close smoothly enhances the user experience and prolongs the lifespan of the cabinet.
    • Doors: Sliding bolts are sometimes employed in doors to provide an extra layer of security and prevent forced entry. This is particularly useful in commercial settings or homes where enhanced security is required.

    Comparison of Sliding Bolt Types

    Feature Surface Mount Concealed
    Aesthetics Visible, potentially less appealing in some cases Hidden, clean aesthetic
    Installation Relatively straightforward More complex, requiring precise placement
    Strength Generally strong, dependent on material Strength can vary, dependent on design and material
    Durability Durable if made of high-quality materials Durable if well-designed and constructed
    Cost Generally lower Generally higher

    Installation Methods

    Installing a sliding bolt involves precise measurements and careful execution. Proper installation ensures the bolt’s longevity and functionality, enhancing security and aesthetics. Different installation methods exist for surface-mount and concealed bolts, each with its own set of steps and considerations.

    Surface-Mount Sliding Bolt Installation

    Surface-mount sliding bolts are readily accessible for installation. This straightforward approach offers visibility and easy maintenance. The following steps detail the installation process:

    1. Preparation: Thoroughly examine the mounting surface for any imperfections. Ensure the area is clean and level for optimal adhesion.
    2. Marking and Measuring: Use a pencil and measuring tape to accurately mark the bolt’s mounting holes on the door or frame. Double-check measurements to prevent errors.
    3. Drilling Pilot Holes: Drill pilot holes slightly smaller than the mounting screws to prevent the wood from splitting. Using a drill bit appropriate for the screw type is crucial.
    4. Installing the Bolt: Align the bolt’s mounting plates with the marked holes and secure them using appropriate screws. Ensure the bolt slides smoothly.
    5. Finishing Touches: Check the bolt’s functionality. Adjust as needed to ensure proper operation. Apply any necessary sealant or finish to the mounting area.

    Concealed Sliding Bolt Installation

    Concealed sliding bolts offer a clean aesthetic, integrating seamlessly with the door and frame. This approach requires meticulous planning and execution.

    1. Planning the Concealment: Determine the best location for the bolt’s mounting plate to minimize visual impact and ensure smooth operation.
    2. Precise Measurements: Accurately measure the depth and width of the recess required for the mounting plate. Precise measurements are critical to avoid issues.
    3. Preparing the Recess: Carefully cut out the recess in the door and frame using a router or jigsaw. The precision of the cut will affect the bolt’s operation.
    4. Mounting the Bolt: Install the mounting plate within the recess. Secure the plate using appropriate screws and ensure alignment with the frame.
    5. Testing and Adjustment: Verify the bolt’s functionality and smooth operation. Make adjustments as needed for proper alignment.

    Measuring and Marking Installation Locations

    Accurate measurements are paramount for proper installation. Inaccurate measurements can lead to misalignment and operational issues. Ensure all measurements are precise.

    • Using a Measuring Tape: Measure the distance between the desired mounting points on the door and frame using a measuring tape. Take multiple measurements to ensure accuracy.
    • Using a Ruler: Use a ruler to measure shorter distances. Ensuring accuracy is crucial.
    • Using a Level: Verify the surface’s levelness using a level to avoid uneven mounting. This is essential for proper functionality.
    • Transferring Measurements: Use a pencil or marker to transfer the measurements to the door and frame. Ensure the marks are clear and easily visible.

    Tools for Installation

    Using appropriate tools is vital for efficient and safe installation. Improper tools can lead to damage or complications.

    • Drill: A drill is essential for creating pilot holes for screws, ensuring the wood doesn’t split.
    • Screwdriver: A screwdriver is used for securing the mounting screws. Using the correct type of screwdriver for the screws is important.
    • Measuring Tape: Essential for accurate measurements of distances.
    • Level: Ensures a level surface for mounting. Uneven surfaces can affect the bolt’s operation.
    • Pencil/Marker: Used for marking installation points on the door and frame.

    Installation Methods Comparison

    Installation Method Pros Cons
    Surface-Mount Visible, easy maintenance, readily accessible Less aesthetically pleasing, may require more space
    Concealed Clean aesthetic, seamless integration More complex installation, less visible maintenance

    Safety Considerations

    Installing sliding bolts, while generally straightforward, requires careful attention to safety precautions. Ignoring these precautions can lead to injuries, damage to property, and even more serious consequences. This section Artikels crucial safety considerations to ensure a smooth and safe installation process.Proper safety procedures, combined with the correct tools and equipment, minimize risks and maximize the safety of the installation process.

    A well-planned approach, prioritizing safety at every step, is essential for a successful installation.

    Potential Hazards

    Several hazards can arise during sliding bolt installation. These include the risk of cuts from sharp edges on the bolt or the mounting surface, injuries from falling tools or materials, and potential electric shocks if working near electrical wiring. Improper handling of heavy components can also lead to back injuries. Furthermore, if not stored properly, the sliding bolts themselves can become a tripping hazard.

    Safety Precautions

    Implementing proper safety precautions is paramount during the installation process. This involves using appropriate personal protective equipment (PPE), such as safety glasses, gloves, and sturdy work boots. Ensuring a clear workspace, free of obstructions, is also crucial. Never work alone when installing large or heavy components. Always have a designated spotter or assistant for safety.

    Safety Equipment

    Appropriate safety equipment is essential for a safe installation. This includes safety glasses to protect the eyes from flying debris, work gloves to prevent cuts and abrasions, and sturdy work boots for foot protection. If working in a high-risk environment, consider additional PPE such as a hard hat or safety harness.

    Tool Selection

    Using the correct tools is vital for efficient and safe installation. Incorrect tools can damage the sliding bolt or the mounting surface, increasing the risk of injury or malfunction. Using the appropriate tools, such as screwdrivers, wrenches, and impact drivers, will help prevent accidental damage. For example, using a power drill with the wrong bit can strip the screw head, leading to a dangerous situation.

    Handling and Storage

    Proper handling and storage of sliding bolts are important for preventing injuries and ensuring their longevity. Sliding bolts should be handled with care, avoiding dropping or throwing them. Store them in a dry, secure location away from moisture and extreme temperatures to maintain their quality and prevent rust. When transporting multiple sliding bolts, use a sturdy container to prevent them from shifting or falling.

    Installing a sliding bolt is a straightforward process, but a crucial one for securing your property. The recent box office performance of “Power Rangers: Can’t Kill the Beast,” however, seems to be struggling to make a dent in the movie market. Luckily, the installation of a well-placed sliding bolt is a much simpler and more reliable solution to protect your home, and you won’t find that sort of box office trouble with a secure lock! box office power rangers cant kill the beast highlights the recent box office trends.

    Regardless, a sturdy sliding bolt will keep your valuables safe, offering a simple yet effective way to safeguard your home.

    Ensure that the container is appropriately labeled with the type and quantity of sliding bolts. For example, if you have multiple sizes of sliding bolts, using separate labeled containers will help prevent confusion.

    Troubleshooting Sliding Bolt Installation

    Install a Sliding Bolt

    Sometimes, despite meticulous preparation, sliding bolt installation can encounter unexpected snags. Understanding potential problems and their solutions is crucial for a smooth and successful installation. This section delves into common issues, diagnostics, and solutions, equipping you with the knowledge to tackle any hurdles that may arise.

    Common Installation Problems

    Various factors can contribute to difficulties during sliding bolt installation. These range from simple user errors to more complex issues related to the bolt’s components or the mounting surface. Recognizing these problems early on allows for prompt resolution and prevents further complications.

    • Incorrect Bolt Size or Type: Using a bolt that’s not compatible with the application or improperly sized for the load can lead to slippage, breakage, or premature wear. Carefully verify the specifications provided by the manufacturer to ensure the correct bolt is being used.
    • Improper Mounting Surface: Uneven or damaged surfaces can lead to misalignment, poor grip, and bolt failure. Ensure the mounting surface is clean, stable, and adequately prepared to accommodate the bolt.
    • Insufficient Pre-Drilling or Holes: Inadequate pre-drilling or misaligned holes can result in improper bolt seating and subsequent issues. Precise drilling and accurate hole placement are essential.
    • Insufficient or Incorrect Fastener: Insufficient or the wrong type of fasteners can compromise the bolt’s integrity. Appropriate fasteners, in the correct size and type, are crucial for the bolt’s proper function.
    • Excessive Force or Incorrect Torque: Excessively tightening the bolt can damage the mounting surface or the bolt itself. Employ the correct torque specifications provided by the manufacturer to prevent these issues.

    Diagnostic Procedures

    Effective troubleshooting begins with careful observation and methodical investigation. Thoroughly examine the installation process and the components involved to identify the root cause of the problem.

    1. Visual Inspection: Carefully examine the bolt, fasteners, and mounting surface for any signs of damage, misalignment, or improper installation.
    2. Check for Loose or Damaged Components: Inspect the bolt’s components for any signs of looseness, cracks, or other damage.
    3. Verify Bolt Size and Type: Ensure the bolt size and type are consistent with the application and manufacturer’s specifications.
    4. Evaluate Mounting Surface Integrity: Assess the mounting surface for any imperfections, damage, or insufficient preparation.
    5. Assess Pre-Drilling and Hole Alignment: Verify that the pre-drilled holes are accurately positioned and appropriately sized.

    Solutions for Common Problems

    Addressing installation problems promptly and correctly is crucial for maintaining the integrity and longevity of the sliding bolt system. Here are some potential solutions.

    Problem Diagnosis Solution
    Incorrect Bolt Size/Type Bolt doesn’t fit the application; mismatched specifications. Select the correct bolt size and type per manufacturer’s specifications.
    Improper Mounting Surface Surface is uneven, damaged, or insufficiently prepared. Ensure the surface is clean, stable, and adequately prepared before installation.
    Insufficient Pre-Drilling/Holes Holes are too small, misaligned, or absent. Redrill holes to the correct size and ensure proper alignment.
    Insufficient/Incorrect Fasteners Fasteners are inadequate or inappropriate. Use the correct type and size of fasteners per manufacturer’s specifications.
    Excessive Force/Incorrect Torque Overtightening damages the bolt or mounting surface. Use the recommended torque settings and avoid overtightening.

    Preventive Measures

    Proactive steps can significantly reduce the likelihood of encountering installation problems. Following these guidelines can save time and resources.

    • Thorough Planning: Carefully review the installation instructions and specifications before beginning the process.
    • Accurate Measurements: Double-check all measurements to ensure accuracy and precision.
    • Proper Surface Preparation: Ensure the mounting surface is clean, stable, and prepared according to specifications.
    • Use of Quality Components: Employ high-quality components to minimize the risk of failure.
    • Following Manufacturer’s Instructions: Adhere to the manufacturer’s instructions for installation, torque specifications, and safety precautions.

    Variations and Alternatives: Install A Sliding Bolt

    Sliding bolts offer a practical and versatile fastening solution, but they aren’t always the best choice. Understanding their limitations and exploring alternative methods is crucial for effective project completion. This section explores the nuances of choosing the right fastening mechanism for different scenarios.Sliding bolts excel in applications demanding quick and secure connections, but their suitability hinges on the specific requirements.

    Installing a sliding bolt is a pretty straightforward process, but it can sometimes feel a bit fiddly. You know, those little details that can make or break a project. While I was wrestling with the bolt, I found myself listening to Interpol’s Paul Banks cover of Iggy Pop’s “Gimme Danger” and “Sister Midnight” here. The music really helped me focus and get the bolt installed perfectly, making the whole process a bit more enjoyable.

    Definitely worth checking out the music if you’re ever stuck on a similar project!

    This section examines when sliding bolts shine, where other fastening methods are more appropriate, and offers creative uses for this often-overlooked mechanism.

    Comparison with Other Fastening Mechanisms

    Sliding bolts provide a unique combination of speed and security, but they differ significantly from other common fastening techniques. Understanding these differences is vital for selecting the optimal method.

    • Compared to Screws: Screws offer greater holding power in many situations, particularly when dealing with materials requiring a more permanent attachment. Sliding bolts, on the other hand, are ideal for applications needing frequent adjustments or disconnections. For instance, a cabinet door on a sliding bolt can be quickly removed for cleaning, whereas a screwed-in door typically requires more extensive disassembly.

    • Compared to Hinges: Hinges are designed for rotational movement, suitable for doors and gates. Sliding bolts are better for applications requiring linear movement or securing a sliding component, such as a gate latch or a workbench drawer.

    Situations Where Sliding Bolts Might Not Be Ideal

    Sliding bolts, while practical, have limitations. Recognizing these scenarios is essential for selecting the right fastening method.

    • High-Stress Applications: Sliding bolts are less suitable for high-stress applications where a more robust and permanent connection is needed. For example, securing a heavy machine component would likely require stronger fasteners like bolts and nuts.
    • Repeated Opening/Closing: While sliding bolts are useful for frequent adjustments, excessive opening and closing cycles can potentially wear down the mechanism over time. Consider alternative methods for high-usage applications.

    Alternative Fastening Methods for Specific Applications, Install a Sliding Bolt

    Choosing the correct alternative depends heavily on the application. This section provides examples of suitable replacements for sliding bolts.

    • For Permanent Connections: When a permanent connection is necessary, consider using screws, rivets, or welds. These methods provide a stronger and more enduring bond, unlike sliding bolts that are designed for more flexible attachment. For example, a workbench permanently attached to a wall is better secured with screws than sliding bolts.
    • For Rotational Movement: When rotational movement is required, hinges are the appropriate choice. These mechanisms allow for controlled and smooth pivoting, as seen in doors and gates.

    Creative Uses for Sliding Bolts

    Sliding bolts can be used in imaginative ways beyond their standard applications. Thinking outside the box can lead to innovative solutions.

    • Securing Temporary Structures: Sliding bolts can be used to quickly and securely assemble temporary structures like staging or scaffolding. This provides a flexible method of connection that is faster than welding or riveting.
    • Adjustable Workbenches: Adjustable workbenches often benefit from sliding bolts for securing workpieces or tools. This allows for quick and easy adjustments to accommodate different projects or tasks.

    Benefits and Drawbacks of Different Fastening Alternatives

    Each fastening method comes with its own advantages and disadvantages. A careful evaluation is needed to choose the optimal solution for each project.

    Fastening Method Benefits Drawbacks
    Sliding Bolts Quick assembly, easy adjustment, removable Lower load-bearing capacity, potential wear over time
    Screws High load-bearing capacity, permanent attachment Slower assembly, less flexibility
    Hinges Smooth rotational movement, suitable for doors Not suitable for linear movement, limited adjustability

    Visual Guide

    Sliding bolts, though seemingly simple, offer a range of options for securing doors, gates, and other applications. Understanding the different types and their appropriate installations is crucial for ensuring security and longevity. This visual guide provides a detailed breakdown of various sliding bolt types, installation procedures, troubleshooting, and tool/material requirements.A comprehensive visual guide to sliding bolts aids in the selection of the right bolt for a specific application.

    Clear visual demonstrations of installation steps, common problems, and various bolt types help users to understand the process effectively and choose the most suitable solution.

    Types of Sliding Bolts

    Different sliding bolt designs cater to diverse needs. Understanding these variations is vital for optimal application. The following illustrations depict common sliding bolt types:

    • Standard Sliding Bolt: A simple, rectangular-shaped bolt that slides horizontally to secure a door or gate. Ideal for basic security applications.
    • Mortise Sliding Bolt: A recessed bolt, installed into a door frame, offering greater security and a clean aesthetic. Often used in high-traffic areas or where aesthetics are a concern.
    • Double-Acting Sliding Bolt: Features two sliding bolts that work in tandem for increased security and force. Suitable for heavy-duty applications where extra strength is needed.

    Sliding Bolt Installation

    Proper installation ensures the bolt’s effectiveness and longevity. The following steps detail the installation process, including necessary tools and materials.

    1. Preparation: Measure the door opening and select the appropriate bolt size. Ensure the chosen bolt’s length aligns with the application’s security needs. The illustration should display a ruler measuring the doorframe, highlighting the bolt size to be used.
    2. Marking: Mark the positions for the mounting holes on the door frame using a pencil. Accuracy is critical for a secure fit. A close-up image should show the marked holes on the door frame.
    3. Drilling: Drill pilot holes at the marked positions. The size of the pilot holes should correspond to the screws used. The image should showcase the use of a drill bit to drill the pilot holes.
    4. Mounting: Insert the screws and secure the sliding bolt to the door frame. The illustration should show the bolt being secured using screws into the pilot holes. Ensure the bolt slides smoothly in the frame.
    5. Testing: Test the sliding bolt’s functionality by sliding it in and out of the frame. Check for smooth operation and secure locking. The image should depict the user testing the bolt’s function.

    Troubleshooting

    Addressing common installation issues promptly prevents costly repairs.

    • Bolt Doesn’t Slide Smoothly: Ensure the bolt’s track is free of debris or obstructions. If necessary, lubricate the track with a suitable lubricant. The illustration should depict the track of the bolt and show a person applying lubricant.
    • Bolt Doesn’t Lock Securely: Check for proper alignment of the bolt with the strike plate. Adjust the bolt’s position or the strike plate as needed. The illustration should show the bolt’s alignment with the strike plate.
    • Bolt Comes Loose: Tighten the mounting screws to ensure a secure hold. The illustration should show the user tightening the screws using a screwdriver.

    Tools and Materials

    Proper tools and materials are essential for a successful installation.

    Tool Description Image
    Drill Used for creating pilot holes Illustration of a drill with a drill bit
    Screwdriver Used for securing the bolt to the frame Illustration of a screwdriver
    Measuring Tape Used for measuring the door frame Illustration of a measuring tape
    Pencil Used for marking positions on the door frame Illustration of a pencil

    Bolt Type Comparison

    Evaluating the pros and cons of different sliding bolt types helps in making informed choices.

    • Standard Bolt: Simple to install, affordable, but offers limited security. Suitable for basic security needs.
    • Mortise Bolt: Offers enhanced security and a clean aesthetic, but installation can be more complex. Ideal for high-security applications.
    • Double-Acting Bolt: Provides superior security and strength, but installation is more challenging. Suitable for high-security or heavy-duty applications.

    Material Selection

    Choosing the right material for your sliding bolt is crucial for its longevity, performance, and overall effectiveness. A poorly chosen material can lead to premature failure, increased maintenance costs, and potential safety hazards. Understanding the factors influencing material selection, such as durability, corrosion resistance, and cost, is essential for making informed decisions.Selecting the correct material for a sliding bolt involves careful consideration of various factors, including the environment in which the bolt will operate, the expected load, and the desired lifespan.

    Factors such as temperature fluctuations, exposure to moisture, and the presence of corrosive substances all play significant roles in determining the ideal material.

    Factors to Consider in Material Selection

    Understanding the operating environment is paramount. Exposure to harsh weather conditions, chemicals, or excessive moisture necessitates the selection of materials with superior corrosion resistance. Similarly, the anticipated load and frequency of use influence the material’s strength and durability requirements. Cost is also a significant factor, as different materials vary in price, impacting the overall budget for the project.

    Durability and Longevity of Different Materials

    The durability and longevity of a sliding bolt material depend on its ability to withstand repeated cycles of movement, stress, and environmental factors. Steel, often used for its strength, can exhibit excellent durability if properly treated and maintained. Stainless steel, a corrosion-resistant variant, offers extended longevity in corrosive environments. Aluminum, while lighter and less expensive, might have a shorter lifespan in demanding applications compared to steel or stainless steel.

    Corrosion Resistance of Different Materials

    Corrosion resistance is a critical factor, particularly for sliding bolts exposed to moisture or corrosive substances. Stainless steel, due to its chromium content, exhibits superior corrosion resistance compared to regular steel. Aluminum, while generally resistant to corrosion in some environments, might be less effective in highly corrosive conditions. Zinc-plated steel can provide a protective layer against corrosion but may not be as durable as stainless steel in severe conditions.

    Summary Table of Sliding Bolt Materials

    Material Strength Corrosion Resistance Cost Applications
    Steel (Carbon Steel) High Moderate Low General-purpose applications where corrosion isn’t a major concern.
    Stainless Steel (304, 316) High Excellent Medium to High Applications requiring high corrosion resistance, such as marine environments or chemical plants.
    Aluminum Moderate Good (in some environments) Low Applications where weight is a concern and corrosion isn’t severe. Good for exterior applications in dry climates.
    Zinc-plated Steel High Good (initial protection) Medium Applications requiring moderate corrosion resistance and cost-effectiveness. Suitable for exterior applications in mild environments.

    Conclusion

    Install a Sliding Bolt

    In conclusion, installing a sliding bolt, whether surface-mount or concealed, is a manageable task with careful planning and attention to detail. This guide has provided a detailed overview of the process, from initial measurements to final adjustments. Remember to prioritize safety, select the right materials, and follow the step-by-step instructions for a flawless installation. By understanding the variations and alternatives to sliding bolts, you’ll be able to make informed decisions for your specific project needs.

    Ultimately, this guide empowers you to confidently tackle sliding bolt installations, from simple to complex projects.