Make Fossils Using Plaster of Paris: Uncover the fascinating world of paleontology by creating your own realistic fossil replicas. This guide provides a comprehensive, hands-on approach to casting fossils using plaster of Paris, taking you from initial preparation to final display. Learn about the science behind fossil preservation, the crucial materials needed, and safe techniques for creating detailed, lasting casts.
We’ll delve into the process of creating molds from fossils, exploring various methods and factors influencing mold quality. The detailed steps for mixing plaster, pouring, curing, and removing the cast will be covered, ensuring a successful outcome. We’ll also touch upon safety precautions, troubleshooting common problems, alternative casting methods, and proper display and preservation techniques.
Introduction to Fossil Casting
Fossils are the preserved remains or traces of ancient organisms. They provide invaluable insights into the history of life on Earth, revealing extinct species, evolutionary relationships, and past environmental conditions. Understanding these ancient records is crucial for comprehending the planet’s dynamic past.The preservation of fossils is a complex process that often involves exceptional circumstances. Rapid burial, the absence of oxygen, and the presence of minerals crucial for fossilization are key factors in the preservation of organic remains.
This preservation process is critical to our understanding of the evolutionary history of life and the changes that have occurred on Earth.
Fossil Preservation Processes
The process of fossilization involves the replacement of the original organic material with minerals, often silica or calcium carbonate. This process can take millions of years and requires specific environmental conditions. Some fossils are formed by the preservation of the organism’s hard parts, such as bones and shells, while others are formed by the preservation of impressions or traces of the organism’s activity, like footprints or burrows.
The types of fossils we find depend significantly on the conditions that existed when the organism lived and died.
The Science of Fossil Replication
Creating a fossil replica, or cast, is a scientific method for studying fossils without damaging the original. The process involves carefully extracting a mold of the fossil and then filling it with a casting material. This allows researchers to study the fossil in detail without removing it from its original location. This meticulous process is fundamental to the preservation of valuable fossils and ensures that future generations can also study them.
Making fossils using plaster of Paris is a cool science project, and it’s super fun to see your creations take shape. To make things even more interesting, why not try inventing a new word, like “petrifaction-ology” to describe the process? Check out this helpful guide on Create a Made Up Word for inspiration. Then, you can label your awesome fossil collection with your very own scientific terms! It’s a fantastic way to make your plaster of Paris fossil project even more unique and personalized.
Materials Used in Fossil Casting
Various materials can be used for fossil casting, each with its own advantages and disadvantages. One common and effective material is plaster of Paris, known for its ease of use and relatively low cost. Other materials include epoxy resins, which offer greater strength and durability, and various types of concrete. Choosing the appropriate material depends on the specific needs of the project and the characteristics of the fossil being cast.
Plaster of Paris: A Versatile Casting Material
Plaster of Paris, a fine white powder, is a popular choice for fossil casting. It is composed primarily of calcium sulfate hemihydrate, which, when mixed with water, undergoes a chemical reaction, hardening into a solid. Its fine grain structure allows for detailed replication of the fossil’s surface. This fine detail preservation is crucial for the scientific study of the fossil.
The relative ease of mixing and setting makes it suitable for educational purposes and amateur fossil enthusiasts.
Benefits of Using Plaster of Paris
Plaster of Paris offers several advantages for fossil casting. Its relatively low cost makes it accessible to a wide range of users. Its quick setting time allows for efficient casting, and its fine texture enables the reproduction of intricate details. The material is also relatively easy to work with, which makes it a suitable choice for both experienced professionals and beginners.
These qualities make plaster of Paris a versatile and accessible option.
Brief History of Fossil Casting
The practice of creating fossil replicas dates back to the early days of paleontology. Early methods involved using materials like clay or wax. The development of plaster of Paris in the 19th century revolutionized the field, allowing for more accurate and detailed casts. Modern techniques, including the use of epoxy resins, have further refined the process, allowing for a more durable and detailed replication of fossils.
The evolution of fossil casting techniques demonstrates the continuous improvement in scientific methods for studying fossils.
Materials Needed for Fossil Casting
Creating a precise fossil cast requires careful selection and preparation of materials. The right combination ensures a faithful representation of the original fossil’s form and detail, crucial for scientific study and educational purposes. The materials should be readily available, affordable, and easy to handle, minimizing potential risks during the casting process.
Essential Materials
A successful fossil cast relies on a specific set of materials, each playing a crucial role in the process. Proper selection and preparation of these materials is essential to achieving an accurate and durable cast.
| Material | Quantity | Role |
|---|---|---|
| Plaster of Paris | Variable, depending on the size of the mold and desired thickness of the cast | The primary casting material. It is a fine, powdery substance that hardens when mixed with water. Its ability to flow into intricate details of the mold and set quickly makes it ideal for fossil casting. |
| Water | Variable, depending on the amount of plaster used. A precise ratio is critical for optimal results. | Acts as a binding agent, allowing the plaster to mix uniformly and harden properly. The consistency of the water mixture directly impacts the quality of the cast. |
| Mold | One | The mold acts as a negative space, capturing the shape of the fossil. The mold should be robust enough to withstand the pressure of the plaster mixture. Different materials can be used for the mold, such as latex, silicone, or even clay, depending on the specific fossil and the desired durability of the cast. |
| Mixing Container | One | A suitable container, like a large bowl or bucket, is needed to mix the plaster and water. It should be large enough to accommodate the entire plaster mixture without overflowing. |
| Gloves | Pair(s) | Protects hands from the plaster mixture. Plaster of Paris can be irritating to the skin. |
| Stirring Tool | One | A tool like a wooden spoon or spatula is used to thoroughly mix the plaster and water. Ensure the tool is clean and appropriate for the mixing process. |
| Paper towels or cloth | Variable | Used for wiping away excess plaster from the mold or cast. |
| Support material (optional) | Variable | If the fossil is fragile, a support material, like plaster or a sturdy frame, can be used to hold it in place during the casting process. This ensures the fossil doesn’t shift or break. |
Properties of Materials and their Relevance
Understanding the properties of each material is vital for a successful fossil casting. Plaster of Paris, for example, has a specific setting time that must be considered to prevent the cast from hardening too quickly or too slowly. Water’s role in the mix is crucial, influencing the consistency and the final outcome of the cast. The mold, whether made of latex or silicone, must be strong enough to resist pressure during the pouring process and hold its shape while the plaster hardens.
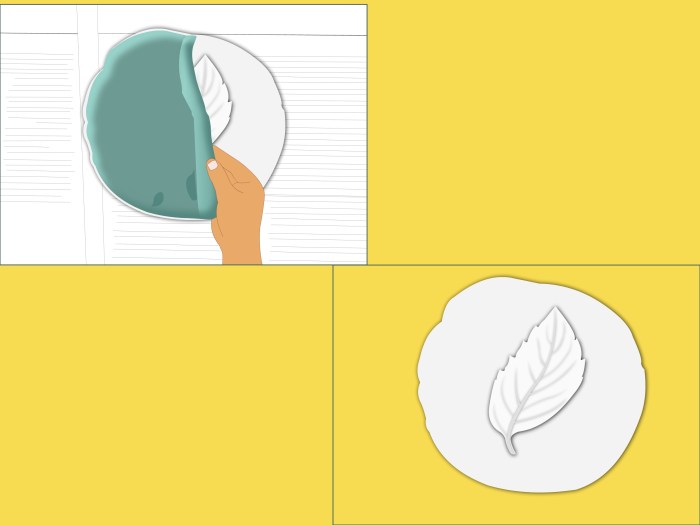
Preparing the Fossil Replica Mold
Creating a replica of a fossil is a fascinating process that allows us to study and appreciate these ancient remnants. A crucial step in this process is the creation of a mold that accurately captures the fossil’s shape and details. This mold will then be used to create a cast, a replica of the fossil itself. Different methods exist for creating these molds, each with its own advantages and disadvantages, and each best suited for different fossil types.The quality of the mold directly impacts the accuracy and preservation of the fossil replica.
Careful consideration of the fossil’s characteristics, the chosen molding material, and the molding process is vital to achieving a high-quality result. Factors like the fossil’s size, shape, and the presence of delicate structures all need to be taken into account.
Molding Methods for Fossils
Various methods can be used to create molds from fossils. The best choice depends on the fossil’s size, fragility, and the desired level of detail in the replica. Common methods include using materials like plaster of Paris, latex, or even silicone. Each material offers unique properties, affecting the mold’s durability, flexibility, and ability to capture fine details.
Creating a Mold with Plaster of Paris
Plaster of Paris is a popular choice for creating fossil molds due to its relatively low cost, ease of use, and ability to create detailed impressions. The process involves carefully preparing the fossil and the mold material, ensuring a precise and durable impression.
Steps for Creating a Plaster of Paris Mold
- Preparation of the Fossil: Clean the fossil thoroughly, removing any loose sediment or debris. Protect delicate parts with a protective coating or carefully support them to prevent breakage during the molding process. Consider the fossil’s orientation and ensure it is stable and won’t shift during the molding process. This includes determining how the fossil will be embedded in the casting material.
- Preparing the Molding Material: Mix the plaster of Paris according to the manufacturer’s instructions. Ensure the mix is homogenous and free of lumps. Adding a small amount of water will create a smoother mix, and too much water will weaken the mold’s structural integrity. Mixing too quickly will create air bubbles.
- Creating the Mold Cavity: Carefully pour the plaster mixture into the mold box around the fossil. Ensure a smooth, even coating. Avoid air bubbles by gently tapping the box or using a gentle vibrating tool.
- Allowing Time to Set: Allow the plaster to harden completely. This may take several hours depending on the thickness of the plaster layer and the environmental conditions. Checking for a strong structure is critical.
- Removing the Fossil: Once the plaster is firm, carefully remove the fossil from the mold. This should be done with care, especially for delicate fossils. Gently tap around the fossil to dislodge it, or use a chisel to carefully pry it loose.
- Finishing the Mold: Check for any imperfections in the mold. Repair any cracks or gaps with additional plaster. If needed, smooth the surface of the mold to create a more professional finish.
Factors Influencing Mold Quality
Several factors influence the quality of a plaster of Paris mold. The consistency of the plaster mixture is paramount. Too much water weakens the mold, while insufficient water results in a brittle mold. The time allowed for the plaster to set is crucial; insufficient time results in a fragile mold, whereas too long a setting time may result in hardening issues.
The cleanliness of the fossil surface and the accuracy of the fossil’s positioning are also essential for a high-quality mold.
Fossil Types and Mold Suitability
The suitability of a fossil for casting depends on its characteristics. Hard, dense fossils, such as some shells or petrified wood, often lend themselves well to casting. More delicate fossils, such as those with intricate structures, might require special support or protective measures during the molding process. Examples include trilobites, ammonites, and brachiopods, which often have intricate details that can be captured by a well-made mold.
For very fragile fossils, specialized techniques might be required to avoid damage.
Mixing and Pouring the Plaster of Paris: Make Fossils Using Plaster Of Paris
Crafting a precise fossil replica hinges on the meticulous mixing and pouring of plaster of Paris. The right technique ensures a sharp, detailed cast, preserving the intricate details of the original fossil. A well-executed pour minimizes air bubbles, guaranteeing a flawless replica that accurately reflects the fossil’s form.
Optimal Plaster and Water Proportions
The correct ratio of plaster of Paris to water is crucial for a successful cast. A standard ratio is typically 1 part plaster to 0.3 to 0.4 parts water by volume. This ensures the plaster sets at a suitable pace, allowing for proper handling and avoiding premature hardening. Deviations from this ratio can lead to a brittle cast or one that sets too quickly, making it difficult to work with.
Experimentation within this range might be necessary to fine-tune the setting time for specific plaster types.
Mixing Techniques for a Smooth Cast
Proper mixing is essential for a high-quality cast. Stirring the plaster and water mixture ensures even distribution of the plaster particles. Vigorous stirring is crucial, creating a smooth paste without lumps. Using a whisk or a specialized mixing tool, instead of just a spoon, can help ensure a more even distribution of the water, reducing the chance of uneven setting.
Pouring the Plaster Mixture
Carefully pour the plaster mixture into the prepared mold. Ensure the mold is stable and positioned correctly. A steady pour minimizes the risk of air bubbles and helps to fill the mold evenly. Pour slowly and evenly to prevent the formation of air pockets. Gently tap the mold on a flat surface to release any trapped air.
Preventing Air Bubbles in the Cast
Air bubbles can severely mar the quality of the cast. To minimize air bubbles, use a slow and controlled pouring technique, ensuring the mold is completely filled. A steady hand and a consistent pour can prevent air pockets. Gently tapping the mold, as mentioned previously, can also release trapped air. Using a vacuum or a vibrating tool in the mold is a specialized method to remove air pockets.
Types of Plaster of Paris and Their Uses
Different types of plaster of Paris exhibit varying properties. Dental plaster is known for its fine-grained texture and quick setting time, making it suitable for detailed casts. Art plaster, on the other hand, is used for larger or less intricate casts, offering a longer setting time. Common plaster of Paris is a general-purpose option, suitable for most fossil casting projects.
Handling Plaster Mixtures and Tools
Proper handling of plaster mixtures and tools is crucial for maintaining cleanliness and safety. Wear gloves to protect your hands from the plaster. Use clean containers and tools for each mix to prevent cross-contamination. Keep the work area organized to avoid spills and accidents. Clean tools thoroughly after each use to maintain their effectiveness and prevent future problems.
Curing and Removing the Cast
Patience is key when working with plaster of Paris. The curing process is crucial for the strength and durability of your fossil replica. Proper removal techniques prevent damage to both the mold and the delicate cast. Following these steps ensures a successful and rewarding experience.
Curing Time of Plaster of Paris
Plaster of Paris sets relatively quickly, typically within 10-15 minutes for a workable consistency. However, the complete curing time, where the plaster reaches its maximum strength, can vary from several hours to a full day, depending on the thickness of the cast and environmental conditions. It’s important to allow sufficient curing time to prevent cracking or deformation during the removal process.
For example, a thin layer of plaster might be fully cured in 12 hours, while a thicker cast might need up to 24 hours.
Steps for Safe Cast Removal
Careful handling during removal is vital to prevent damage to the cast and mold. Begin by carefully inspecting the cast and the mold for any signs of adhesion. If any parts are stuck, use a gentle tapping or a soft, plastic tool to dislodge them. Use a plastic or wooden tool to gently pry the cast from the mold, ensuring you are not applying excessive force that could damage either the cast or the mold.
Supporting the Cast During Removal
Supporting the cast during removal is critical to avoid breakage or deformation. A stable support system is essential, especially for larger or thicker casts. Use sturdy materials like foam boards, cardboard, or even soft wood to support the cast from underneath. For fragile casts, consider wrapping the cast in a soft cloth or paper towels before removal to provide additional protection.
Preventing Damage to the Cast
Minimizing the risk of damage is crucial for a pristine fossil replica. Avoid excessive pressure or jarring movements during the removal process. Work slowly and methodically. Using soft tools or materials like plastic scrapers and cotton swabs to loosen the cast can help prevent damage. A gentle, controlled approach will ensure the cast remains intact and undamaged.
Handling and Storing the Finished Cast
Once the cast is removed, handle it carefully to prevent damage. Support the cast with both hands and avoid placing it on rough or uneven surfaces. Store the finished cast in a safe, dry place away from direct sunlight or extreme temperatures. Use a protective covering like a soft cloth or plastic wrap to prevent dust or damage.
Examples of Proper Curing and Removal Techniques
For a small, thin cast, gently tap the edges of the mold with a plastic tool to release the cast. For a larger cast, use a sturdy board as a support beneath the cast. Carefully lift the cast with both hands, using soft tools to help separate the cast from the mold. If the cast seems stuck, use a spray bottle filled with water to loosen any adhering areas of the mold and cast, applying it to the interface between the cast and the mold.
Always prioritize a gentle, controlled approach to prevent damage.
Making fossils with plaster of Paris is a cool science project, and it’s surprisingly easy! You can really get creative with the shapes and details. To get the best results, you might want to consider installing a swag hook, like this one Install a Swag Hook , for extra support while you’re working on your fossil displays.
Ultimately, making fossils using plaster of Paris is a fun and educational project for all ages!
Safety Precautions During Fossil Casting
Working with plaster of Paris, while rewarding, requires careful attention to safety precautions. Ignoring these measures can lead to injuries or material damage. Following the guidelines below will ensure a safe and successful fossil casting experience.Proper safety precautions are crucial for preventing accidents and ensuring a positive experience during fossil casting. This section details essential safety measures, focusing on the potential hazards associated with plaster of Paris and necessary procedures to minimize risks.
Essential Safety Gear
Ensuring appropriate personal protective equipment (PPE) is crucial for a safe fossil casting process. This includes wearing safety glasses or goggles to protect eyes from splashes and dust, and long sleeves and pants to shield skin from direct contact with the materials. A dust mask or respirator is also recommended to prevent inhalation of plaster dust, which can irritate the respiratory system.
Always ensure the chosen PPE is appropriate for the specific task and environment.
Ventilation and Workspace
Adequate ventilation is critical when working with plaster of Paris. Plaster dust can irritate the lungs and cause respiratory problems. Ensure the workspace is well-ventilated, either by opening windows or using a fan to circulate air. Avoid working in poorly ventilated areas, or in enclosed spaces where plaster dust can accumulate. A properly ventilated workspace minimizes the risk of respiratory issues.
Handling Plaster of Paris
Plaster of Paris is a fine powder that can be irritating to the skin. Avoid direct skin contact whenever possible. Always wear gloves when handling plaster of Paris, and wash hands thoroughly after completing the casting process. Ensure the plaster is handled with care and attention, preventing unnecessary exposure to the powder. Proper handling methods mitigate skin irritation and allergic reactions.
Emergency Procedures
Knowing what to do in case of an accident is essential. If someone experiences an eye injury, immediately flush the eyes with cool water for at least 15 minutes. If someone inhales plaster dust, move them to a well-ventilated area and monitor their breathing. If there is a spill or significant dust exposure, notify the appropriate personnel and follow emergency procedures.
Understanding and practicing emergency procedures is vital for ensuring the safety of everyone involved.
Safety Precautions Table
| Safety Measure | Explanation |
|---|---|
| Wear safety glasses/goggles | Protects eyes from splashes and dust. |
| Use gloves | Prevents skin irritation and contact with plaster. |
| Wear long sleeves and pants | Protects skin from direct contact with plaster. |
| Use a dust mask/respirator | Prevents inhalation of plaster dust. |
| Ensure good ventilation | Minimizes exposure to plaster dust, reducing respiratory issues. |
| Follow emergency procedures | Addresses potential accidents or spills, ensuring quick and appropriate action. |
Troubleshooting Common Casting Problems
Casting fossils with plaster of Paris can be a rewarding experience, but unexpected issues can sometimes arise. Understanding potential problems and their solutions is crucial for achieving a successful and accurate replica. This section will detail common pitfalls and provide effective troubleshooting strategies.
Air Bubbles in the Cast
Air bubbles are a common issue in plaster casts, often leading to imperfections and weak spots in the replica. Understanding the causes behind these bubbles is essential for effective troubleshooting.Air bubbles can be introduced during the mixing process, if the plaster isn’t thoroughly incorporated with the water, or if the mixture is too thick. Poorly prepared molds, with trapped air pockets, can also be a source of air bubbles in the cast.
Additionally, improper pouring techniques, like pouring too quickly or vigorously, can introduce air into the mold cavity.
- Thorough Mixing: Ensure the plaster and water are mixed thoroughly using a gentle, yet consistent, motion to eliminate any lumps or uncombined plaster. Avoid rapid or vigorous mixing, as this can incorporate air. A whisk or spatula works well for this. Avoid creating excess water that can cause the plaster to become too thin.
- Mold Preparation: Thoroughly clean the mold to remove any dust or debris that could harbor air pockets. Ensure the mold is completely dry to prevent water from reacting with the plaster, causing the bubbles to expand.
- Controlled Pouring: Pour the plaster slowly and steadily into the mold, minimizing the introduction of air. Avoid excessive splashing or jarring movements. Use a gentle pouring action to evenly distribute the plaster.
- Vacuum Technique (Advanced): For particularly stubborn air pockets, a vacuum pump can be used to extract trapped air from the mold before pouring the plaster.
Cracks in the Cast
Cracks in the plaster cast can arise from various factors. These cracks can be unsightly and compromise the integrity of the fossil replica. The causes and solutions for this issue are Artikeld below.The primary causes of cracks in plaster casts are related to the setting process of the plaster, often due to rapid drying or uneven setting. The use of inappropriate water ratios, causing the plaster to set too quickly, can also be a contributing factor.
Uneven drying, or applying pressure on the cast before it is fully set, can also lead to cracks.
- Appropriate Water Ratio: Use the recommended water-to-plaster ratio to avoid rapid setting, which can create internal stresses that cause cracking. A consistent ratio, using the same plaster batch, is crucial for uniform setting.
- Slow and Even Drying: Avoid excessive heat or direct sunlight, which can accelerate the drying process and lead to cracking. Allow the cast to cure slowly and naturally in a stable environment. Avoid any mechanical pressure on the plaster cast until it has completely cured.
- Mold Support: If the mold is not adequately supported, the plaster may not set uniformly. Ensure the mold has proper support to prevent warping or flexing during the setting process. This is especially crucial for larger or complex molds.
Uneven Surface Texture
An uneven surface texture on the cast can result from several factors, impacting the replica’s accuracy and aesthetics. Addressing the causes of this issue will ensure a smooth, professional-looking fossil cast.Unevenness often arises from inconsistencies in the plaster application or uneven drying, leading to areas that are thicker or thinner than others. Poor mold preparation, including incomplete mold filling or surface imperfections, can also contribute to an uneven final product.
- Uniform Application: Ensure the plaster is applied evenly throughout the mold cavity to avoid creating thicker or thinner sections. Gentle and controlled pouring is crucial to distribute the plaster uniformly.
- Mold Detail: Carefully check the mold for any imperfections that could transfer to the cast. Fill in any gaps or inconsistencies in the mold before pouring the plaster.
- Controlled Drying: Consistent drying is vital to achieving a uniform texture. Avoid direct sunlight or excessive heat, which can cause uneven drying. Ensure the mold is in a stable, controlled environment for optimal curing.
Alternative Casting Methods

Beyond the familiar plaster of Paris method, several alternative casting materials and techniques offer unique advantages for fossil replication. These methods cater to various needs, from specific material properties to desired aesthetic outcomes. Careful consideration of the fossil’s characteristics, the desired final product, and the available resources is crucial when choosing an alternative casting method.
Making fossils using plaster of Paris is a super cool science project! You can recreate ancient creatures, and it’s surprisingly easy. Plus, the results are amazing. Speaking of cool projects, have you heard the new release “Bomb the Bass Back to Light” by downrightmusic.net ? It’s got some seriously funky basslines that’ll have you grooving while you’re mixing up your plaster of Paris.
The project is a blast, and the music is a blast too! Perfect for a fun weekend activity!
Comparison of Casting Materials, Make Fossils Using Plaster of Paris
Different casting materials offer varying properties, impacting the final replica’s durability, aesthetics, and ease of handling. Plaster of Paris, while common, has limitations. Alternative materials can address these limitations, leading to improved results in specific scenarios.
- Epoxy Resin: Epoxy resin, known for its exceptional strength and durability, is a popular choice for creating high-quality fossil casts. Its ability to bond tightly to the mold surface, along with its resistance to cracking and weathering, makes it ideal for preserving delicate fossils and producing robust replicas. Epoxy resin casts often have a glossy finish. However, the curing process can take longer than plaster of Paris, and the material can be more expensive.
- Silicone Rubber: Silicone rubber offers a flexible and highly detailed mold-making option. Its elasticity allows for capturing intricate fossil structures, and it is often preferred for delicate or complex specimens. Silicone rubber molds can be reused, reducing material waste. However, the process of creating the silicone rubber mold can be more involved and time-consuming. Additionally, silicone rubber casts may not have the same level of durability as epoxy resin.
- Polyurethane Resin: Polyurethane resin combines the desirable characteristics of strength and flexibility, making it a versatile alternative. Its durability rivals epoxy resin, and its ability to withstand environmental factors makes it suitable for outdoor displays. Polyurethane resin casts are often lightweight, which is advantageous for large or heavy fossils. However, some types of polyurethane resin can have a slightly rougher texture compared to epoxy resin.
Steps for Epoxy Resin Casting
Epoxy resin casting, a popular alternative, offers a durable and aesthetically pleasing replica. Following these steps ensures a successful outcome.
- Prepare the Mold: Thoroughly clean the fossil and mold cavity. Ensure there are no air pockets. Apply a release agent to the mold surface to prevent sticking. Proper mold preparation is essential for a high-quality cast.
- Mix the Resin and Hardener: Precisely measure the epoxy resin and hardener according to the manufacturer’s instructions. Mixing in a well-ventilated area is crucial. Stir the mixture thoroughly and consistently to ensure a uniform consistency.
- Pouring the Resin: Slowly pour the mixed epoxy resin into the prepared mold cavity. Avoid trapping air bubbles by gently pouring the resin or using a vacuum technique. Any trapped air bubbles will weaken the final cast.
- Curing and Demolding: Allow the epoxy resin to cure according to the manufacturer’s guidelines. This typically involves a specific time and temperature. Once cured, carefully remove the fossil cast from the mold. Proper curing time is vital for the final strength and durability of the cast.
Comparison Table
| Material | Strength | Durability | Detail | Cost |
|---|---|---|---|---|
| Plaster of Paris | Moderate | Moderate | High | Low |
| Epoxy Resin | High | High | High | Medium |
| Silicone Rubber | Moderate | Moderate | Very High | Medium |
| Polyurethane Resin | High | High | Moderate | Medium |
Displaying and Preserving Casts

Bringing your fossil casts from the wet studio to a beautiful display is a crucial step in appreciating your hard work. Proper display and preservation techniques ensure your casts remain in pristine condition for years to come, allowing you to share your finds with others. The careful consideration of these aspects will transform a simple cast into a fascinating display piece.Displaying fossil casts isn’t just about putting them on a shelf; it’s about showcasing their unique beauty and scientific value.
Preservation is equally important, preventing damage from environmental factors like humidity, dust, and light. The methods used for display and preservation are directly correlated to the longevity and quality of the exhibit.
Methods for Displaying Casts
Different display methods highlight different aspects of the fossil. Choosing the right method depends on the size, shape, and overall aesthetic appeal of the cast. A well-chosen display can dramatically enhance the visual impact of the fossil replica.
- On a pedestal: This classic approach works well for larger, more substantial casts. A sturdy pedestal provides support and elevates the cast for better viewing, drawing attention to the details. Consider using a pedestal with a base that provides stability to prevent accidental tipping. Adding a small, engraved plaque with the fossil’s name or classification can enhance the presentation further.
- In a shadow box: Shadow boxes offer a versatile solution, allowing you to present the fossil in a contained environment. This is particularly useful for smaller casts or those with delicate features. The controlled environment of a shadow box can help protect the cast from dust and humidity, preventing deterioration. Choose a shadow box with a clear or semi-transparent material for optimal viewing.
- Mounted on a wall: For a museum-like feel, mounting the cast on a wall can make a bold statement. Use strong adhesive or specialized mounting brackets for secure placement. Ensure the mounting method is appropriate for the cast’s size and weight, preventing damage during installation or subsequent handling.
- Within a glass case: Encasing the cast in a glass case offers an elegant and protective display method. This approach is excellent for delicate casts or those you want to showcase in a controlled environment. Consider using a display case with a moisture-controlled interior to further protect the fossil.
Importance of Proper Preservation Techniques
Preservation is paramount for maintaining the integrity of your fossil casts. Protecting them from environmental factors like humidity, dust, and light will significantly extend their lifespan. Proper preservation extends beyond visual appeal, ensuring that future generations can appreciate the scientific value and beauty of the fossils.
- Protecting from dust: Regular dusting, using soft brushes, is crucial for removing dust particles that can cause damage over time. Enclosed display cases or shadow boxes can minimize dust accumulation.
- Controlling humidity: Fluctuations in humidity can cause the cast to crack or warp. Maintaining a stable environment using humidity control solutions or desiccants can greatly enhance the preservation of your fossils.
- Preventing exposure to light: Prolonged exposure to sunlight or strong artificial light can fade the color of the cast. Using UV-filtering materials or placing the display in a shaded area can prevent this damage.
- Using appropriate materials: Choose display materials that are compatible with the cast material. Avoid using materials that could react with the cast, causing discoloration or damage. Ensure the display method doesn’t exert undue stress on the cast.
Steps to Preserve Casts from Damage
Following these steps will ensure the long-term preservation of your casts:
- Regular inspection: Periodically check the cast for any signs of damage, such as cracks or discoloration. Addressing issues promptly can prevent further deterioration.
- Proper storage: Store casts in a cool, dry, and dark environment, away from direct sunlight or extreme temperature fluctuations. Using acid-free boxes can help maintain the integrity of the cast.
- Environmental control: If possible, control the humidity and temperature of the display area to minimize environmental damage. Consider using a dehumidifier or a humidifier, as needed.
- Use of protective materials: Consider using protective materials, such as acid-free tissue paper, to cushion and support the cast during storage and display. This can prevent accidental damage during transport or handling.
Examples of Different Display Setups
Here are a few examples to inspire your own display ideas:
| Display Type | Description | Suitable for |
|---|---|---|
| Fossil Collection | Displaying a variety of fossils in a cohesive manner. | Larger collections with diverse specimens |
| Fossil Timeline | Arranging fossils chronologically, showcasing evolutionary progression. | Fossil collections with a specific geographic or time range |
| Interactive Display | Incorporating educational elements, such as information plaques or touch screens. | Educational settings or museums |
Suggestions for Long-Term Preservation
Implementing these suggestions will ensure the long-term preservation of your casts:
- Regular cleaning: Regular cleaning using appropriate methods will remove dust and debris, preventing damage and extending the lifespan of the cast.
- Professional conservation: If the cast shows signs of significant damage, consider consulting a professional conservator for specialized treatment.
- Documenting the process: Record your display setup, preservation techniques, and any necessary maintenance steps. This will be helpful for future reference.
Final Summary
In conclusion, creating fossil casts with plaster of Paris is a rewarding and educational experience. From understanding the scientific principles behind fossil preservation to mastering the practical steps of casting, this comprehensive guide equips you with the knowledge and skills to create impressive replicas of ancient life. Remember to prioritize safety throughout the process and enjoy the journey of bringing prehistoric wonders to life.