Tag: fitness

  • Build a Balance Board Your Fitness Journey Starts Now

    Build a Balance Board Your Fitness Journey Starts Now

    Build a Balance Board, a comprehensive guide to understanding and utilizing balance boards for enhanced fitness and well-being. This guide delves into the history, types, benefits, and practical applications of balance boards. From beginner exercises to advanced techniques, we’ll explore the diverse ways to integrate balance boards into your routine, emphasizing safety and optimal performance.

    Imagine effortlessly improving your balance, strengthening core muscles, and preventing injuries. This guide will walk you through everything you need to know about creating your own personalized balance board journey.

    Introduction to Balance Boards

    A balance board is a specialized piece of equipment designed to enhance proprioception and core strength. It provides an unstable platform that challenges the body’s equilibrium, forcing the user to actively engage muscles for balance. This active engagement leads to improved coordination, stability, and overall body awareness.Balance boards have evolved from simple, rudimentary designs to sophisticated tools used in various fields, including physical therapy, athletic training, and general fitness.

    Their development reflects a growing understanding of the body’s need for dynamic stability and control.

    Types of Balance Boards

    Different types of balance boards cater to various skill levels and intended uses. These differences are largely based on the board’s design, surface, and dimensions.

    • Wobble Boards: These boards typically feature a flat, slightly concave surface with a wide base. The surface’s slight curvature and flexibility provide a degree of instability, making them suitable for beginners. Wobble boards often come in various sizes and materials, offering a range of difficulty levels for users.
    • Balance Discs: Characterized by their circular shape, balance discs offer a unique challenge for maintaining equilibrium. The smaller surface area of the disc compared to a wobble board demands greater control and precision from the user. They are commonly used for advanced balance exercises and core strengthening.
    • Balance Platforms: These are often larger and more stable than wobble boards, offering a platform for a wider range of exercises. The larger surface area and a more pronounced curvature offer a controlled challenge to balance and coordination.

    Materials Used in Balance Board Construction

    The choice of material significantly impacts a balance board’s properties, including its durability, stability, and responsiveness.

    • Wood: A traditional and widely used material, wood balance boards provide a solid, natural feel. They are often more affordable than other options and can offer a good level of responsiveness. However, wood may not be as durable as some other materials.
    • Plastic: Plastic balance boards are typically lightweight and resistant to moisture, making them suitable for various environments. Their lower cost often makes them a popular choice. However, plastic boards may not provide the same responsiveness or feel as wood.
    • Composite Materials: Combining various materials, such as wood and plastic, or using specialized composite materials, allows for balance boards with enhanced stability and durability. These boards can be more expensive but often provide a combination of superior responsiveness, stability, and longevity.

    Comparison of Balance Board Types

    The table below compares different balance board types based on their dimensions, materials, and intended use cases.

    Type Dimensions Materials Use Cases
    Wobble Board Typically 12-18 inches in diameter, 2-4 inches in height Wood, Plastic, Composite Beginner to intermediate users, improving balance, coordination, and core strength
    Balance Disc Typically 8-12 inches in diameter Plastic, Wood, Composite Intermediate to advanced users, advanced balance training, core strengthening, and improving body awareness
    Balance Platform Typically 18-24 inches in diameter, 2-4 inches in height Wood, Composite Various skill levels, rehabilitation, strengthening exercises, and improved stability

    Benefits of Using a Balance Board

    Balance boards, far from being just a trendy fitness gadget, offer a wide array of physical and cognitive benefits. They challenge your body’s equilibrium, engaging multiple muscle groups and promoting overall well-being. From improving posture to preventing injuries, the benefits are substantial and accessible to individuals of all fitness levels.Balance board exercises require your body to constantly adjust and compensate for instability.

    Building a balance board can be surprisingly challenging, but it’s a rewarding project. I’ve been fascinated by the intricate mechanisms in musical instruments lately, especially the detailed breakdown of the Superstition Clavinet, as seen in this great article on superstition clavinet parts revealed. Knowing how those parts work might give you some insight into the kind of precision needed for creating a stable and responsive balance board.

    This process strengthens muscles and improves coordination, ultimately leading to enhanced stability and a reduced risk of falls. Furthermore, the mental focus required to maintain balance enhances cognitive function.

    Physical Benefits of Balance Board Exercises

    Balance board exercises engage a diverse range of muscle groups, working not only major muscle groups, but also smaller stabilizing muscles, which are often neglected in traditional workouts. This multifaceted approach to exercise leads to a significant improvement in overall strength, power, and endurance. The constant challenge of maintaining balance promotes neuromuscular efficiency, meaning the brain and muscles communicate more effectively, leading to improved performance in daily activities.

    Furthermore, the dynamic nature of balance board exercises helps to improve proprioception, or the body’s awareness of its position in space. This heightened awareness reduces the risk of injuries by enabling a quicker and more accurate response to changes in body position.

    Cognitive Benefits of Balance Board Training

    Balance board training is not just about physical strength; it also significantly impacts cognitive function. Maintaining balance requires constant adjustments and reactions, which in turn improves reaction time, focus, and concentration. This focused attention required for balance training translates to enhanced cognitive function in other areas of life, such as multitasking and problem-solving. The intricate interplay between the brain and body during balance board exercises fosters neuroplasticity, the brain’s ability to reorganize itself by forming new neural connections.

    Building a balance board can be surprisingly challenging, requiring focus and precision. It’s a bit like navigating the complexities of life, isn’t it? Just like the subtle shifts in perspective explored in Shannen Moser’s beautiful track, ” The Sun Still Seems to Move “, finding equilibrium is key. Ultimately, mastering the board, like mastering any personal challenge, is rewarding.

    This process enhances cognitive flexibility and adaptability.

    Improvements in Posture and Stability

    Consistent balance board training leads to significant improvements in posture and stability. The exercises strengthen core muscles, which are crucial for maintaining proper posture and spinal alignment. By engaging these muscles, balance boards promote better posture and reduce the risk of back pain. Improved stability, gained through consistent balance board use, translates to better performance in daily activities like walking, running, and even sitting.

    This improved stability can help prevent falls, especially in older adults or individuals with balance issues.

    Role of Balance Boards in Injury Prevention

    Balance boards play a crucial role in injury prevention by strengthening the muscles that support joints and improve overall stability. By engaging these stabilizing muscles, balance boards reduce the risk of injuries associated with falls and other physical activities. This proactive approach to injury prevention can lead to a healthier, more active lifestyle by minimizing the risk of future injuries.

    Balance boards are particularly beneficial for athletes, helping them to prevent common sports injuries.

    Balance Board Exercises and Their Benefits

    Exercise Muscles Targeted Benefits
    Single-leg stance Calves, hamstrings, quadriceps, core, gluteus medius, and gluteus maximus Improved balance, stability, and proprioception.
    Forward/backward walking Lower body muscles, core, and ankles Enhanced balance, strength, and coordination.
    Side-to-side walking Inner and outer thighs, core, and ankles Improved balance, stability, and coordination, especially for lateral movement.
    Heel-toe walking Calves, hamstrings, quadriceps, and ankles Improved ankle stability, posture, and gait.
    Heel-toe walking with a twist Core muscles, hip abductors and adductors, and lower body Improved balance, stability, and coordination.
    Standing on one leg with board Legs, core, and glutes Improved balance, stability, and strength.

    Exercises and Training with Balance Boards

    Balance boards are more than just fun toys; they’re powerful tools for improving balance, coordination, and overall fitness. They challenge your body’s equilibrium, engaging muscles you might not typically use in everyday activities. This section delves into various exercises suitable for different skill levels, offering routines for beginners and advanced practitioners alike.Mastering balance board exercises requires patience and consistency.

    Gradually increasing difficulty and incorporating progressive exercises is key to maximizing results and minimizing the risk of injury. Focus on controlled movements and proper form to reap the full benefits of balance board training.

    Beginner-Friendly Balance Board Exercises

    Consistent practice with basic exercises is crucial for building a solid foundation on the balance board. These initial steps will help you gain confidence and control before progressing to more complex maneuvers. Begin with short sessions, gradually increasing duration as you become more comfortable.

    • Static Holds: Standing on the board with feet shoulder-width apart, maintaining a neutral posture. Focus on maintaining balance for a set duration, increasing the time as your balance improves. This exercise activates core muscles and strengthens your stabilizing muscles.
    • Forward/Backward Slides: Gently glide the board forward and backward, keeping your core engaged and your posture upright. This exercise enhances balance and coordination while working the leg muscles.
    • Side-to-Side Slides: Moving the board from side to side, maintaining balance by engaging core muscles. Practice smooth transitions, increasing the amplitude as you improve your stability. This improves lateral balance and hip stability.
    • Heel-Toe Touches: Bringing one heel to the opposite toe while standing on the board, maintaining balance with controlled movements. This exercise strengthens ankle stability and improves balance.

    Advanced Balance Board Training Routines

    Once you’ve mastered the fundamentals, you can elevate your training with more challenging exercises. Advanced routines demand greater stability, coordination, and core strength. Gradually increasing the difficulty is vital to avoid injury and maximize gains.

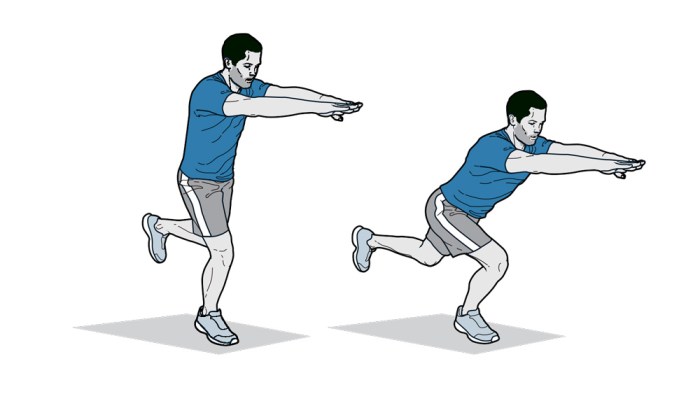
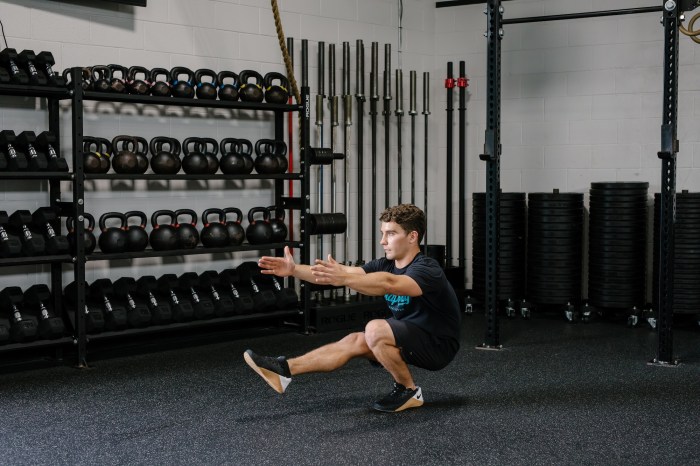
    • Single-Leg Stands: Standing on one leg while balancing on the board. Maintain a neutral spine and focus on engaging core muscles. Progress to longer durations as stability improves.
    • Squats on the Balance Board: Performing squats while maintaining balance on the board. This exercise targets multiple muscle groups, including legs, core, and glutes, while significantly enhancing balance.
    • Push-ups and Dips on the Balance Board: Performing push-ups and dips while balancing on the board, challenging both upper and lower body strength and stability. Start with a stable base and gradually progress to more challenging positions.
    • Dynamic Movements: Incorporating dynamic movements like twisting, turning, and pivoting on the balance board. These exercises increase agility, coordination, and stability. Focus on smooth and controlled transitions.

    Progression for Balance Board Exercises

    Progressing from beginner to advanced exercises is a gradual process. Start with shorter durations and simple movements, then gradually increase the duration, difficulty, and complexity of the exercises.

    • Increasing Duration: Extend the time spent performing each exercise as balance improves.
    • Increasing Difficulty: Move to more challenging positions, such as single-leg stands or dynamic movements.
    • Adding Resistance: Incorporate resistance bands or weights to make the exercises more challenging and build strength.

    Balance Board Exercise Chart

    This table illustrates the various balance board exercises and the corresponding muscle groups they target.

    Exercise Muscle Groups Description
    Static Holds Core, Leg, Ankle Maintaining balance on the board for a set time.
    Forward/Backward Slides Core, Legs Gliding the board forward and backward.
    Side-to-Side Slides Core, Legs, Hip Moving the board from side to side.
    Heel-Toe Touches Ankle, Core, Leg Bringing one heel to the opposite toe while standing on the board.
    Single-Leg Stands Core, Leg, Hip Balancing on one leg on the board.
    Squats on the Balance Board Legs, Core, Glutes Performing squats while maintaining balance on the board.

    Safety Considerations for Balance Board Use

    Balance boards, while offering numerous benefits for fitness and balance, require careful consideration of safety. Understanding potential risks and implementing proper precautions is crucial for maximizing the benefits and minimizing the risk of injury. This section delves into essential safety measures to ensure a safe and effective balance board experience.

    Potential Risks and Injuries

    Balance board use, like any physical activity, carries the potential for injury. Common risks include falls, sprains, strains, and joint pain. The instability inherent in balance board exercises can lead to unexpected movements and falls, especially for beginners. Improper technique, inadequate warm-up, or using an unsuitable board can further increase the risk. Injuries can range from minor discomfort to more serious conditions requiring medical attention.

    Importance of Warm-up and Cool-down Routines

    A proper warm-up before balance board exercises is essential to prepare the muscles and joints for the demands of the activity. This helps prevent injuries by increasing blood flow to the muscles, increasing flexibility, and improving range of motion. A dynamic warm-up, incorporating movements similar to those used in balance board exercises, is particularly beneficial. Similarly, a cool-down after exercise is equally crucial to gradually return the body to its resting state.

    This helps prevent muscle soreness and stiffness. A cool-down routine can include static stretching, holding each stretch for 15-30 seconds.

    Choosing the Right Balance Board

    Selecting a balance board appropriate for your fitness level and needs is vital. Beginners should opt for boards with a wider base and more stable construction. As skills improve, users can progressively choose boards with smaller bases and greater challenges. Consider factors like board size, material, and weight capacity to ensure the board’s suitability. A board that’s too unstable or too challenging for a user’s current abilities can increase the risk of injury.

    Proper Form and Technique

    Maintaining correct form and technique during balance board exercises is paramount to prevent injuries. For example, when performing a simple stance on the board, ensure your feet are positioned evenly on the board, and your weight is distributed evenly. Focus on maintaining a neutral spine and engaging core muscles for stability. Practice slowly, and gradually increase the difficulty as your balance improves.

    Learning from a qualified instructor can greatly assist in acquiring proper form and technique.

    Building a balance board can be surprisingly challenging, requiring focus and a bit of practice. It’s a great way to improve your core strength, but sometimes I need a mental break, like when I’m listening to Pusha T discuss his Drake diss on The Breakfast Club. Pusha t discusses drake diss on the breakfast club listen is a fascinating look into the rap game, but nothing beats the satisfying feeling of mastering a balance board, though.

    Definitely a good way to end a day.

    Table of Potential Balance Board Injuries and Prevention Strategies

    Injury Causes Prevention
    Sprains/Strains Sudden twisting movements, improper form, inadequate warm-up, excessive force on joints. Proper warm-up, gradual progression in difficulty, maintaining proper form, listening to body signals.
    Falls Loss of balance, lack of stability, improper technique, poor board selection. Thorough warm-up, proper technique instruction, appropriate board selection, cautious progression in exercises.
    Muscle Soreness Overexertion, inadequate warm-up, insufficient cool-down. Proper warm-up and cool-down, gradually increasing exercise intensity, listening to body signals, appropriate rest periods.
    Joint Pain Overuse, improper form, lack of stability, poor board selection. Proper form, appropriate board selection, gradual progression, rest between sessions.
    Wrist Injuries Improper landing after a fall, awkward movements. Proper landing techniques, appropriate board selection, maintaining proper form, using wrist support if needed.

    Balance Board Selection and Considerations

    Build a Balance Board

    Choosing the right balance board is crucial for maximizing its benefits and ensuring a safe and effective workout. Factors like board size, surface, stability, and user comfort play a significant role in the overall experience. This section delves into the key considerations for selecting a balance board that aligns with individual needs and fitness goals.Selecting the correct balance board involves careful consideration of various factors.

    Understanding these elements ensures a positive experience, optimizing results, and minimizing the risk of injury. A well-chosen board can enhance balance, coordination, and overall fitness.

    Factors to Consider When Purchasing a Balance Board

    Careful consideration of factors like size, surface, stability, and user comfort is crucial in selecting the optimal balance board. These factors directly impact the effectiveness and safety of your workouts. The right board will facilitate progress and reduce the risk of discomfort or injury.

    • Board Size: Balance boards come in various sizes. Larger boards generally provide more stability, making them suitable for beginners or those with limited balance. Smaller boards challenge balance more, and are better suited for experienced users. A larger board will be less challenging than a smaller board. The size of the board is a key consideration when selecting a board for your needs.

    • Surface Characteristics: The surface of the board significantly impacts user experience. A smooth surface provides a more stable platform for beginners, while a textured or slightly uneven surface offers a greater challenge and promotes better balance. The board surface should be non-slippery and should provide adequate grip.
    • Board Stability: Stability is paramount. A highly stable board is essential for beginners and those with balance concerns. A more stable board will allow for more effective and controlled exercises.
    • User Comfort: The board’s size, shape, and material should promote comfort during extended use. A comfortable board encourages adherence to the workout routine. Consider the material and the design of the board to ensure user comfort.

    Comparing Different Balance Board Brands and Models

    Numerous brands and models of balance boards are available, each with unique features and price points. Evaluating different brands and models is essential to selecting the best fit for your needs.

    Brand Model Features Price
    BalancePro ProBalance 10 Large platform, adjustable height, non-slip surface, lightweight construction $129.99
    StabilityBoards BalanceMaster 5 Ergonomic design, textured surface, adjustable tilt, durable construction $159.99
    FitForce FlexiBoard 2.0 Compact size, versatile exercises, lightweight, portable $99.99
    ActiveCore ZenBoard Smooth surface, excellent stability, advanced tilt adjustment, suitable for experienced users $199.99

    This table provides a brief overview of some balance board models. It’s crucial to research individual models further to find the most suitable option based on specific needs and preferences.

    Tips for Choosing a Balance Board Based on Individual Needs and Goals

    Selecting the right balance board depends on the individual’s needs and fitness goals. Considering factors like experience level, fitness level, and desired intensity is essential.

    • Beginners: Opt for a larger, more stable board with a smooth surface to build confidence and balance. A larger board will reduce the challenge for beginners.
    • Intermediate Users: A board with a textured surface and adjustable tilt provides a greater challenge, encouraging further development of balance and coordination skills. Intermediate users can benefit from a textured surface.
    • Experienced Users: A smaller, less stable board with a textured surface can offer a more demanding workout. Advanced users should look for boards with advanced tilt adjustments to maximize the benefits.

    Balance Board Applications: Build A Balance Board

    Balance boards aren’t just for fitness enthusiasts; they offer a wide range of applications across diverse fields, from rehabilitation to sports training. Their versatility stems from their ability to challenge and improve balance, coordination, and proprioception – the body’s awareness of its position in space. Understanding these applications can help you tailor balance board use to specific needs and goals.Beyond general fitness, balance boards can be effectively integrated into various routines and activities.

    Their adaptability makes them a valuable tool for individuals seeking to enhance physical performance, improve rehabilitation outcomes, or simply enhance their daily stability.

    Balance Board Use in Rehabilitation and Therapy

    Balance boards are increasingly utilized in physical therapy and rehabilitation programs. They provide a dynamic platform for practicing balance and coordination, crucial for individuals recovering from injuries or dealing with conditions that affect these abilities. Exercises on a balance board can help re-establish neuromuscular control, improve joint stability, and enhance functional movement patterns.For example, individuals recovering from stroke or knee injuries can benefit from targeted exercises on a balance board.

    These exercises can improve balance and coordination, ultimately leading to better functional outcomes and a faster recovery.

    Balance Board Use in Sports Training

    Balance boards are gaining traction in sports training, as they can be used to improve agility, coordination, and proprioception. Athletes in various sports, including basketball, soccer, and tennis, can benefit from balance board exercises to enhance their performance.By incorporating balance board exercises into their training routine, athletes can improve their reaction time, body awareness, and balance during high-speed movements.

    This can lead to better control and precision in sports-specific skills.

    Balance Board Use in Fitness Routines

    Balance boards can be a valuable addition to any fitness routine, offering a low-impact way to improve core strength, balance, and coordination. They provide a challenging and engaging workout for all fitness levels, from beginners to advanced users.Including balance board exercises in a fitness routine can contribute to improved core strength, improved balance, and enhanced body awareness. This is especially beneficial for individuals looking to strengthen their core muscles without putting too much strain on their joints.

    Progressive exercises can be designed to cater to individuals at various fitness levels.

    Balance Board Use in Everyday Life, Build a Balance Board

    Balance boards can be integrated into everyday life to improve balance and coordination, enhancing stability and preventing falls, particularly for older adults. They provide a practical tool to improve overall body awareness and proprioception. Simple exercises can be done at home or in the office, making it easier to incorporate into daily routines.For example, incorporating balance board exercises into daily routines can enhance overall stability and coordination, which is especially beneficial for older adults, who often experience a decline in these areas.

    This can translate to reduced risk of falls and increased independence in daily activities.

    Table of Balance Board Applications and Benefits

    Application Benefits Examples
    Rehabilitation/Therapy Improved balance, coordination, joint stability, functional movement Post-stroke exercises, knee injury recovery
    Sports Training Enhanced agility, coordination, proprioception, reaction time Basketball drills, soccer agility training, tennis balance drills
    Fitness Routines Improved core strength, balance, coordination, body awareness Plank variations on a balance board, squats on a balance board
    Everyday Life Improved balance, reduced fall risk, enhanced stability, increased independence Standing on a balance board while brushing teeth, incorporating balance board exercises into office routines

    Advanced Techniques and Variations

    Build a Balance Board

    Taking your balance board training to the next level involves exploring advanced techniques and variations. This allows you to challenge your stability, build core strength, and enhance your overall fitness routine. These advanced exercises push your body’s limits, leading to faster progress and more pronounced results.

    Advanced Balance Board Exercises

    Mastering balance board exercises requires a gradual progression from basic to advanced techniques. This progression allows for a safer and more effective learning curve. Building strength and control in the basic movements paves the way for the more demanding advanced exercises.

    • Single-Leg Exercises: Single-leg exercises on a balance board are a critical component of advanced balance training. These exercises significantly improve single-leg strength and proprioception. Examples include single-leg squats, lunges, and calf raises, performed while maintaining balance on the board. These exercises challenge your body’s ability to maintain equilibrium and coordinate muscle groups.
    • Dynamic Movements: Dynamic movements such as hopping, jumping, and lateral shuffling on a balance board enhance coordination and agility. Incorporating dynamic movements increases cardiovascular fitness while further challenging your body’s stability and balance. These movements are great for athletes or those seeking a more challenging fitness routine.
    • Weighted Exercises: Incorporating weights during balance board exercises adds resistance and significantly increases the challenge. Examples include holding dumbbells while performing squats or lunges on the board. Weighted exercises are a fantastic way to enhance strength training and build muscle mass while promoting balance.
    • Plyometrics: Plyometric exercises on a balance board, such as jump squats and lateral bounds, build explosive power and agility. This is a highly effective approach for athletes and those aiming to improve their athletic performance. These exercises significantly improve lower body strength and power.

    Incorporating Balance Boards into Existing Routines

    Integrating balance board exercises into your existing fitness regimen is a valuable way to add variety and challenge. This ensures a holistic and effective workout routine.

    • Warm-up: Begin with 5-10 minutes of light cardio and dynamic stretching before using the balance board. This prepares the muscles for the workout and reduces the risk of injury.
    • Circuit Training: Incorporate balance board exercises into a circuit routine, alternating between strength training exercises and balance board work. This method allows you to maximize your workout’s effectiveness. This approach helps to increase muscular endurance and stability.
    • Yoga and Pilates: Balance boards can be a useful tool for yoga and Pilates practitioners. Incorporate balance board work into your yoga flow to challenge balance and stability. This approach can add a new dimension to your yoga practice. For example, holding a plank pose on the board adds significant complexity and engages the core muscles more effectively.

    Modifying Exercises for Different Fitness Levels

    Adjusting exercises to suit different fitness levels is crucial for maximizing the benefits of balance board training. This ensures a safe and effective workout for everyone.

    • Beginner Modifications: Beginners should start with simple exercises, such as standing on the board and gradually progressing to more complex movements. For example, holding a static pose on the board can be a great start for beginners. Modifications for beginners include performing exercises with hands on a stable surface or using support to maintain balance.
    • Intermediate Modifications: Intermediate users can incorporate weighted exercises or more dynamic movements. This adds complexity and intensity to the training. Examples include performing lunges or squats while holding light weights.
    • Advanced Modifications: Advanced users can perform more challenging exercises, such as single-leg jumps or plyometrics. This is a great way to challenge your limits and maximize your training potential.

    Advanced Balance Board Exercises and Benefits

    Exercise Benefits Modifications
    Single-Leg Squat Improved single-leg strength, balance, and proprioception. Start with a stable surface, progress to a balance board.
    Weighted Lunges Increased strength, balance, and muscle endurance. Start with light weights and progress to heavier weights.
    Dynamic Hopping Improved agility, coordination, and cardiovascular fitness. Start with short hops and progress to longer hops.
    Plyometric Jump Squats Enhanced explosive power, coordination, and lower body strength. Reduce the height of the jump or use a lower surface.

    Last Recap

    In conclusion, building a balance board routine is a journey of self-discovery and empowerment. From selecting the right board to mastering various exercises, this guide provides a structured approach to enhancing your physical and cognitive well-being. Remember to prioritize safety, listen to your body, and enjoy the rewarding process of incorporating balance board training into your lifestyle. So, get ready to build your balance board and experience the transformative power of balance training!

  • Do a Single Leg Squat Your Fitness Journey Starts Here

    Do a Single Leg Squat Your Fitness Journey Starts Here

    Do a Single Leg Squat is a fantastic exercise for building lower body strength and balance. It’s a versatile movement that can be adapted for all fitness levels, from beginners to seasoned athletes. This guide dives deep into the fundamental movement, exploring variations, benefits, proper form, and crucial safety considerations. Whether you’re aiming to improve athletic performance, prevent injuries, or simply enhance your overall fitness, mastering the single leg squat is a worthwhile endeavor.

    We’ll break down the exercise, examining different variations like goblet squats, pistol squats, and Bulgarian split squats. Each variation targets specific muscle groups and requires a unique approach to form and technique. We’ll also look at the progression from beginner to advanced levels, offering practical tips for modifying the exercise and progressing safely. Plus, we’ll pinpoint common mistakes and provide corrective strategies to help you avoid potential injuries and achieve optimal results.

    Introduction to Single Leg Squats

    Single leg squats, a fundamental exercise in fitness, challenge balance and strength in a unique way. They demand greater stabilization and engagement of core muscles compared to traditional squats, making them beneficial for overall athletic performance and injury prevention. This detailed exploration dives into the intricacies of single leg squats, covering their history, importance, and various variations.The single leg squat movement pattern involves lowering the body by bending one leg while keeping the other leg straight and lifted off the ground.

    Working on single-leg squats lately, and honestly, it’s been a bit of a mind-bender. The focus required is intense, almost like watching Frank Ocean perform with a string orchestra – watch frank ocean perform with a string orchestra it demands complete concentration and balance. But the payoff? Seriously impressive gains in strength and stability.

    Definitely worth the effort for those sculpted legs.

    This requires exceptional control and coordination, directly impacting the strength of the glutes, quads, hamstrings, and core. Mastering this pattern improves functional movement and contributes to improved posture and balance in daily activities.

    Single Leg Squat History and Evolution

    Single leg squats, in various forms, have existed for centuries. Ancient cultures often incorporated variations of these exercises into their training routines, focusing on strength and stability. However, the modern, formalized approach to single leg squats has evolved alongside the growing emphasis on functional fitness and injury prevention. Scientific understanding of muscle activation and biomechanics has contributed to the development of different variations tailored to specific fitness goals and needs.

    Importance of Single Leg Squats in Overall Fitness

    Single leg squats play a crucial role in improving overall fitness. Their emphasis on balance, stability, and strength development translates into improved athletic performance. Strengthening the stabilizing muscles of the core, hips, and legs also enhances posture, reduces the risk of injuries, and improves daily functional movements. The improved strength and coordination contribute significantly to better balance and stability, which can reduce the likelihood of falls, especially as individuals age.

    Single Leg Squat Variations

    Different variations of single leg squats target specific muscle groups and require varying levels of balance and strength. Understanding these variations allows individuals to tailor their workouts to their fitness levels and goals. Exploring different variations allows individuals to target specific muscle groups and improve balance and coordination in a progressive manner.

    Variation Stance Equipment Benefits
    Goblet Squat One leg, one leg elevated Dumbbell/Kettlebell Strengthens core, glutes, and quads. The weight held in front of the body provides added stability and control.
    Pistol Squat One leg, no support None Develops exceptional balance and lower body strength. Requires advanced mobility and strength.
    Bulgarian Split Squat One leg, one leg elevated on a bench Bench Strengthens quads, glutes, and hamstrings. The elevated leg provides resistance and targets specific muscle groups in a controlled manner.

    Benefits of Single Leg Squats

    Do a Single Leg Squat

    Single-leg squats, a seemingly simple exercise, pack a powerful punch when it comes to overall fitness. They demand a higher level of control and coordination compared to their bilateral counterparts, translating into significant improvements in lower body strength, balance, and stability. Beyond these foundational benefits, single-leg squats play a crucial role in injury prevention and enhance athletic performance across various disciplines.Single-leg squats, by their very nature, challenge the body to stabilize and control movement from a single base of support.

    This inherent demand fosters remarkable improvements in strength, balance, and coordination. The focus on proprioception (awareness of body position) and neuromuscular control translates directly into enhanced stability and injury prevention, making them invaluable for both athletes and everyday individuals.

    Impact on Lower Body Strength

    Single-leg squats target multiple muscle groups in the lower body with a greater intensity than bilateral squats. The demand for stabilization and controlled movement forces the muscles to work harder, leading to significant strength gains. This focused effort translates into increased power and explosiveness, vital for activities ranging from sports to everyday tasks like climbing stairs or carrying groceries.

    The unique challenge of maintaining balance while performing the exercise effectively strengthens muscles that often get overlooked in traditional workouts, such as the gluteus medius, which plays a critical role in hip stability.

    Effects on Balance and Stability

    The inherent instability of single-leg squats directly translates into improved balance and stability. By challenging the body to maintain equilibrium on a single leg, these exercises hone proprioceptive abilities. This heightened awareness of body position and movement contributes to enhanced stability, reducing the risk of falls and injuries, particularly in older adults. Individuals with pre-existing balance issues can benefit immensely from single-leg squats as a way to retrain their neuromuscular control and improve their overall balance.

    Role in Injury Prevention

    Single-leg squats are exceptionally valuable in injury prevention due to their targeted strengthening of muscles crucial for joint stability. By strengthening muscles like the gluteus medius and the muscles around the ankle, knee, and hip, these exercises help to mitigate the risk of common injuries. For example, athletes can significantly reduce their risk of ACL tears by strengthening the supporting muscles around the knee joint.

    This proactive approach to strengthening supporting structures is key to preventing injuries and maintaining long-term fitness.

    Advantages for Athletic Performance

    Single-leg squats are instrumental in enhancing athletic performance by improving power, agility, and explosiveness. The controlled movement and focused effort required in single-leg squats translate directly into improved performance in sports requiring quick changes in direction, jumping, and sprinting. These exercises effectively improve the power output of the lower body, giving athletes an edge in their respective disciplines.

    Trying to up my workout game? Doing single leg squats is a great way to build strength and stability. It’s all about finding new challenges, just like Cousin Stizz is trying to find his next thrill in his new music cousin stizz trying to find my next thrill. Focusing on balance and proper form, you’ll feel the burn in your glutes and hamstrings, making it a killer exercise for overall lower body power.

    Benefits for Different Muscle Groups

    Muscle Group Benefit
    Quads Strengthens quads
    Glutes Strengthens glutes
    Hamstrings Strengthens hamstrings
    Core Strengthens core
    Calves Strengthens calves
    Balance Improves balance

    Proper Form and Technique

    Mastering the single-leg squat involves more than just lifting one leg. Precise form and technique are crucial for safety, effectiveness, and maximizing results. Proper execution prevents injuries and ensures you’re targeting the intended muscles. This section dives into the specifics of achieving correct posture, alignment, and execution steps for various single-leg squat variations.Correct form and technique in single-leg squats are essential for both injury prevention and optimal results.

    By understanding and practicing the proper steps, you can significantly improve the effectiveness of your workouts and minimize the risk of potential problems.

    Posture and Alignment

    Maintaining proper posture and alignment is fundamental to a safe and effective single-leg squat. A straight spine and a stable core are key elements. Avoid rounding your back or slouching, as this compromises spinal integrity and can lead to injury. Maintaining a neutral spine throughout the movement, engaging the core muscles to stabilize the torso, and keeping the chest up and shoulders back are crucial aspects of achieving optimal posture and alignment during single-leg squats.

    Crucial Steps for Safe and Effective Execution

    The following steps are crucial for safe and effective single-leg squat execution:

    • Initiate the movement: Start with your feet shoulder-width apart and your torso upright. A stable base is essential for the squat. Engage your core muscles to maintain a neutral spine throughout the movement.
    • Lower your body: Slowly lower your body by bending your supporting leg at the knee, keeping the knee aligned with the toes. Ensure your supporting knee doesn’t extend past your toes, and maintain control of the movement.
    • Maintain control: Maintain control throughout the entire movement. Control is paramount to prevent injuries.
    • Maintain balance: Use your core and supporting leg muscles to maintain balance and stability throughout the squat. Focus on maintaining a stable base and controlled movement.
    • Ascend: Push through your supporting heel to rise back to the starting position. Keep your back straight and your core engaged throughout the ascent.

    Step-by-Step Guide for Performing a Single Leg Squat

    This detailed guide will help you master the technique of single-leg squats.

    1. Find a stable surface: Ensure a stable and supportive surface to minimize the risk of falls or slips. Choose a place where you won’t encounter any obstacles.
    2. Assume an upright posture: Stand tall with your feet shoulder-width apart (or as per the specific variation), maintaining a neutral spine and engaged core. This is the starting position.
    3. Engage your core: Engage your core muscles to maintain stability and control during the entire movement. This is essential for maintaining balance and preventing injury.
    4. Lower your body: Slowly lower your body by bending the supporting leg at the knee. Keep your knee aligned with your toes. Maintain a controlled descent.
    5. Maintain balance: Use your core muscles and supporting leg muscles to maintain balance and control throughout the squat. Focus on maintaining a stable base and controlled movement.
    6. Return to the starting position: Push through your supporting heel to rise back to the starting position. Maintain a straight back and engaged core throughout the ascent.

    Common Mistakes and How to Avoid Them

    Common mistakes in single-leg squats often stem from improper posture or technique. These mistakes can lead to injuries or less effective workouts. Recognizing and correcting these errors is vital for improving your form and results.

    • Knee collapsing inward: This can happen when the knee collapses inward during the squat. To avoid this, focus on keeping your knee aligned with your toes and maintaining proper engagement of the supporting leg muscles.
    • Leaning forward or backward: Maintaining an upright torso is critical. Leaning forward or backward disrupts balance and can strain the lower back. Maintain an upright posture to prevent imbalances and maximize results.
    • Lack of core engagement: A weak core can lead to instability during the squat. Actively engage your core muscles throughout the entire movement to maintain balance and stability.

    Key Points of Form for Each Variation, Do a Single Leg Squat

    The following table Artikels the key points of form for different single-leg squat variations.

    Variation Posture Foot Placement Core Engagement
    Goblet Squat Upright torso Feet shoulder-width apart Tight core
    Pistol Squat Upright torso Feet together Tight core
    Bulgarian Split Squat Slight forward lean One leg elevated on bench Engaged core

    Variations and Progressions: Do A Single Leg Squat

    Single-leg squats, while offering numerous benefits, require careful progression to avoid injury and maximize results. Proper variations and progressions cater to different fitness levels, allowing individuals to gradually increase the challenge and build strength and stability. This section explores various modifications, from beginner-friendly options to advanced techniques, guiding you through a structured approach to mastering this powerful exercise.

    Beginner Variations

    Beginner variations focus on building foundational strength and stability in the single-leg squat, using modifications to minimize stress on the joints and increase comfort. These modifications typically involve elevating the supporting leg or using additional support. The goblet squat with an elevated foot is an excellent example. This approach helps in developing proper form and neuromuscular control before progressing to more challenging variations.

    • Goblet Squat with Elevated Foot: Elevating the working leg on a stable surface (like a small platform or a few stacked books) reduces the range of motion and the overall stress on the supporting leg and hip joint. This modification helps build strength and stability in the supporting leg and core while ensuring proper form. This approach is particularly beneficial for those new to single-leg exercises or those recovering from injuries.

      Doing single leg squats is a fantastic way to build strength and stability, especially for those looking to improve their overall athletic performance. It’s a great exercise, but it’s even more useful when you’re trying to stay fit while you’re eager to learn more about the new content in Battlefield 1’s next DLC, like what’s being shown in battlefield 1 first look next dlc.

      The core engagement and balance required really translates to those single leg squats you’ve been working on, making it a perfect pairing for improved fitness.

    Intermediate Variations

    Intermediate variations build on the foundation established in beginner modifications. These involve reducing the support and increasing the difficulty. The goblet squat with bodyweight is a common intermediate variation. This approach allows individuals to practice the full range of motion and stability required for a single-leg squat while maintaining a safe and controlled environment.

    • Goblet Squat with Bodyweight: Maintaining the goblet hold, the intermediate variation removes the elevation of the supporting leg, which increases the difficulty and forces the body to work harder to maintain balance and control. This progression allows for a more challenging range of motion and improved strength and stability. Proper form is critical at this stage to prevent knee pain or imbalances.

    Advanced Variations

    Advanced variations require significant strength, stability, and balance. The pistol squat is a prime example of an advanced single-leg squat variation. It demands considerable hip and core strength, as well as exceptional balance and coordination.

    • Pistol Squat: The pistol squat is a full-range single-leg squat performed without any support. This advanced variation demands significant strength and balance. It is important to progressively increase strength and mobility in the hip and core before attempting this exercise. A gradual progression is crucial to prevent injury. This variation pushes the limits of strength and stability, offering substantial gains in power and coordination.

    Progression Plan

    A structured progression plan is crucial for achieving optimal results and minimizing injury risk. The following plan Artikels a step-by-step approach from beginner to advanced levels:

    • Beginner: Focus on mastering the goblet squat with an elevated foot, emphasizing proper form and maintaining control throughout the movement.
    • Intermediate: Gradually reduce the elevation of the supporting leg until the squat can be performed with bodyweight. Practice the goblet squat with bodyweight. Focus on maintaining balance, proper form, and engaging the core.
    • Advanced: Once comfortable with bodyweight goblet squats, consider working towards the pistol squat. Begin with assisted variations and gradually reduce the assistance as strength and stability improve. Focus on maintaining a controlled and stable movement.

    Equipment Modifications

    Using equipment can modify single-leg squats to adjust the challenge and target specific muscle groups. Resistance bands can be used to provide assistance or increase the difficulty of the exercise.

    Advanced Techniques

    Advanced techniques can further improve performance in single-leg squats. Focus on engaging the core throughout the exercise, maintaining a neutral spine, and driving through the heel of the supporting foot. Practice maintaining a stable and controlled movement throughout the entire range of motion. Proper form is essential for maximizing the benefits and minimizing injury risk.

    Common Mistakes and How to Correct Them

    Do a Single Leg Squat

    Single-leg squats, while offering significant benefits, are susceptible to several common errors. Understanding these mistakes and their consequences is crucial for achieving optimal results and preventing potential injuries. By mastering proper form, you can maximize the effectiveness of this challenging exercise and build a strong, balanced physique.Improper form during single-leg squats can lead to a range of issues.

    Knee pain, back problems, and muscle imbalances are just some of the potential consequences. Knowing how to correct these errors is key to a safe and effective workout.

    Postural Errors

    Maintaining an upright torso is essential for single-leg squats. A rounded back compromises spinal alignment and places undue stress on the lower back. This can lead to pain and hinder the effectiveness of the exercise. Conversely, maintaining a neutral spine promotes stability and efficient power transfer.

    • Rounded Back: A rounded back during a single-leg squat significantly increases the risk of lower back pain. This posture places excessive pressure on the spine, hindering proper engagement of the core and potentially causing injury. Imagine a slouched posture; this is the opposite of the ideal, upright posture. To correct this, focus on engaging your core muscles and maintaining a straight line from your head to your heels.

      Think of pulling your belly button towards your spine. Visualize a string pulling you up from the crown of your head. This creates a stable foundation for the squat.

    Knee Position Errors

    Proper knee alignment is crucial for preventing knee pain and maintaining balance. Allowing your knee to cave inwards (valgus collapse) during the squat places excessive stress on the knee joint and can lead to pain and potential long-term damage. Maintaining alignment with your toes is essential for a safe and effective movement.

    • Knee Valgus Collapse: Allowing your knee to collapse inwards during a single-leg squat places a considerable amount of stress on the knee joint. This can result in pain, discomfort, and potential long-term joint damage. Imagine a knee buckling inwards. This is a clear indication of improper form. To correct this, focus on keeping your knee aligned with your toes throughout the entire movement.

      Actively push your knee outward as you descend into the squat. Imagine a slight outward force pushing from the center of your knee. This will help maintain proper alignment and protect your knee joint.

    Core Engagement Errors

    Engaging your core muscles is paramount for maintaining stability and balance during single-leg squats. A weak core can lead to instability, poor posture, and increased risk of injury. Actively engaging your core muscles throughout the entire movement is vital for proper form.

    • Weak Core: A weak core during a single-leg squat compromises stability and balance, increasing the risk of losing balance and falling. This can lead to various injuries, ranging from mild muscle strains to more severe joint problems. To correct this, focus on engaging your core muscles throughout the entire squat. Imagine pulling your belly button towards your spine and squeezing your glutes.

      Maintain this contraction as you descend and ascend, effectively supporting your spine and enhancing stability.

    Comparison Table

    Aspect Proper Form Improper Form
    Posture Upright torso, neutral spine Rounded back, slouched posture
    Knee Position Knee aligned with toes Knee caving inwards (valgus collapse)
    Core Engagement Engaged core muscles Weak core, lacking core support

    Safety Considerations and Precautions

    Single-leg squats, while offering significant benefits, require careful consideration of safety measures to prevent injuries. Proper technique, warm-up, cool-down, and rest are crucial elements in mitigating risks and maximizing the benefits of this exercise. Understanding potential risks and appropriate precautions for individuals with specific health conditions is essential for a safe and effective workout routine.Thorough preparation and awareness of potential risks are key to minimizing injuries during single-leg squats.

    This includes recognizing the importance of proper form, adequate warm-up and cool-down, and sufficient rest and recovery. By prioritizing safety, individuals can maximize the benefits of single-leg squats while minimizing the risk of injury.

    Potential Risks and Injuries

    Single-leg squats, like any exercise, can pose risks if not performed correctly. Common injuries associated with improper form include knee pain, ankle sprains, and lower back pain. Inadequate warm-up can increase the risk of muscle strains and tears. Failing to maintain proper form during the exercise can lead to stress on joints and ligaments, potentially causing injuries.

    Proper technique and precautions significantly reduce the risk of these complications.

    Warm-up and Cool-down Procedures

    A comprehensive warm-up is essential to prepare the muscles and joints for the demanding movements of single-leg squats. This should involve dynamic stretches, such as leg swings and torso twists, to increase blood flow and flexibility. Static stretches, held for 15-30 seconds, can also be included to improve flexibility. A cool-down period, consisting of static stretches, helps to gradually reduce muscle tension and prevent delayed-onset muscle soreness (DOMS).

    Importance of Rest and Recovery

    Adequate rest and recovery are critical for muscle repair and growth. Allowing sufficient time for muscle repair between workout sessions is crucial to avoid overtraining and injury. Listen to your body, and adjust the intensity and frequency of workouts based on your individual needs. Sufficient sleep and a balanced diet further contribute to optimal recovery and muscle repair.

    Precautions for Individuals with Specific Health Conditions

    Individuals with pre-existing knee or back problems should consult with a healthcare professional before starting a single-leg squat program. Modifying the exercise or seeking professional guidance is essential to prevent exacerbating existing conditions. Consult your doctor or physical therapist for personalized recommendations and safe exercise adjustments. The intensity and frequency of workouts should be adjusted to accommodate individual limitations.

    Importance of Proper Breathing During the Exercise

    Proper breathing techniques during exercise are essential for optimal performance and injury prevention. Inhale deeply before each squat to fill the lungs with air, ensuring proper oxygen supply to the muscles. Exhale during the exertion phase of the movement, which can help maintain stability and balance. Maintaining a controlled and rhythmic breathing pattern throughout the exercise promotes efficiency and prevents strain on the respiratory system.

    Closing Summary

    So, are you ready to take your fitness to the next level? Mastering the single leg squat can be a game-changer, offering a powerful combination of strength, balance, and injury prevention. This comprehensive guide equips you with the knowledge and tools to approach this exercise confidently and effectively. Remember, consistency and proper form are key to reaping the full benefits of this dynamic movement.

    Now go out there and crush it!

  • Use a Hip Thrust Machine Your Guide

    Use a Hip Thrust Machine Your Guide

    Use a Hip Thrust Machine to unlock your full potential! This comprehensive guide dives deep into the world of hip thrust machines, exploring everything from proper form and technique to variations, benefits, and safety considerations. We’ll cover different machine types, comparing features, and helping you choose the perfect one for your needs.

    Discover the benefits of incorporating hip thrusts into your workout routine, targeting key muscle groups and boosting strength and power. We’ll also provide variations and alternatives to keep your workouts interesting and challenging.

    Introduction to Hip Thrust Machines

    Use a Hip Thrust Machine

    The hip thrust machine is a popular piece of gym equipment designed for targeting the glutes, hamstrings, and lower back. It provides a controlled environment for isolating these muscle groups, facilitating progressive overload and maximizing strength gains. Its controlled nature also minimizes the risk of injury compared to free-weight hip thrusts, making it a valuable option for beginners and experienced lifters alike.This machine’s versatility allows for a wide range of adjustments, catering to different fitness levels and goals.

    Proper use of the machine is crucial for optimal results and injury prevention. Understanding the variations and adjustments available is key to maximizing your hip thrust workouts.

    Types of Hip Thrust Machines

    Hip thrust machines come in various forms, each with unique features and benefits. Some are simpler, focusing on basic functionality, while others offer more extensive adjustability. This variety allows users to find a machine that best suits their needs and preferences.

    Using a hip thrust machine is a great way to build your glutes, but lately, I’ve been thinking about the hustle and bustle of getting tickets to shows. It’s a total pain when artists like PJ Harvey, Noel Gallagher, Arctic Monkeys, and Chvrches have managers banding together to fight ticket scalping, like this recent alliance , highlighting the need for fair access to events.

    Thankfully, that doesn’t impact my workout routine; a solid hip thrust machine session is still my go-to for glute growth.

    • Standard Hip Thrust Machines: These machines typically feature a fixed seat and a back pad. They offer a basic platform for performing hip thrusts and are often more affordable than advanced models. The simplicity allows for quick and effective workouts, particularly for beginners.
    • Adjustable Hip Thrust Machines: These machines offer greater versatility by allowing adjustments to the seat height and back pad angle. This enables personalized fit and exercise variations. This adjustability accommodates different body types and workout preferences, making them a popular choice for those looking for a longer-lasting piece of equipment.
    • Smith Machine Hip Thrust Attachment: Some Smith machines offer a hip thrust attachment. This attachment allows for hip thrusts within a guided system, which can help beginners maintain proper form. The controlled nature of the Smith machine can help reduce the risk of injury, but the attachment may limit range of motion compared to dedicated hip thrust machines.

    Variations and Adjustments

    Understanding variations and adjustments is crucial for maximizing the effectiveness of hip thrust exercises.

    • Foot Placement: Foot placement on the platform influences the muscle emphasis. Wider foot placement typically targets the glutes more, while narrower placement can engage the hamstrings more prominently. Adjusting foot placement is a key technique to achieve specific training goals.
    • Back Pad Angle: The angle of the back pad can alter the exercise focus. A more reclined back pad angle places more emphasis on the glutes, while a more upright angle may engage the lower back more. This variation in back pad angle is critical for targeting specific muscle groups.
    • Weight Loading: Increasing the weight gradually is essential for progressive overload and strength gains. The weight loading process is crucial for safe and effective workouts, ensuring consistent and safe increases in weight over time.

    Comparison of Hip Thrust Machine Models

    Model Weight Capacity Adjustability Price
    Powertec Fitness HT-1000 500 lbs Adjustable seat height, back pad angle $800-$1000
    Body-Solid HTH-1000 450 lbs Adjustable seat height, back pad angle $700-$900
    Titan Fitness HT-400 300 lbs Adjustable seat height $500-$700

    Note: Prices are approximate and may vary based on retailer and current promotions.

    Proper Form and Technique: Use A Hip Thrust Machine

    Use a Hip Thrust Machine

    Mastering the hip thrust involves more than just lifting weight; it’s about executing the movement with precision and control to maximize effectiveness and minimize risk of injury. Proper form ensures engagement of the target muscles and prevents strain on other areas. This section dives into the crucial aspects of posture, positioning, and execution, guiding you towards optimal results.

    Correct Posture and Positioning

    Proper posture and positioning are foundational for a safe and effective hip thrust. Maintaining a stable and controlled position throughout the movement is paramount. Position the hips directly over the base of the machine, ensuring your body forms a straight line from shoulders to knees. This alignment distributes force effectively and prevents unnecessary strain. Keep your core engaged throughout the entire exercise, maintaining a neutral spine to protect the lower back.

    Steps for a Proper Hip Thrust, Use a Hip Thrust Machine

    The hip thrust follows a specific sequence for optimal performance. Understanding each step is crucial for mastering the technique.

    1. Starting Position: Position yourself on the hip thrust machine with your upper back firmly against the pad. Feet should be flat on the ground, hip-width apart, and secure in their position. Ensure your shins are perpendicular to the ground. This ensures proper leverage and prevents unnecessary stress.
    2. The Movement: Initiate the movement by driving through your heels. Engage your glutes and hamstrings to extend your hips upward, maintaining a straight line from shoulders to knees. Pause briefly at the top of the movement, fully contracting your glutes. This is the peak contraction point, maximizing muscle engagement.
    3. Return to Starting Position: Slowly lower your hips back to the starting position, controlling the movement. Avoid dropping your hips suddenly, as this can lead to loss of control and potential injury. Maintain tension in your glutes and core throughout the entire descent.

    Common Mistakes and How to Avoid Them

    Several common errors can hinder progress and potentially lead to injury. Identifying these mistakes and implementing corrective measures is essential for safe and effective training.

    • Arching the Lower Back: Maintaining a neutral spine is critical. Excessive arching can put undue stress on the lower back. Focus on engaging your core muscles to maintain a straight line from shoulders to knees. Proper core engagement prevents arching and ensures that the hip thrust is targeting the intended muscles.
    • Pushing with the Knees: The driving force should originate from the glutes and hamstrings. Avoid pushing with your knees, as this can lead to knee strain and reduce glute activation. Keep your knees aligned with your feet and concentrate on driving through your heels to maximize glute engagement.
    • Not Engaging the Core: A strong core is vital for stability and preventing injury. A weak core can lead to instability and strain on the lower back. Actively engage your core throughout the entire movement to maintain a stable and controlled position.

    Key Anatomical Movements During the Hip Thrust

    Understanding the key anatomical movements during the hip thrust helps optimize technique and maximize muscle activation.

    Body Part Movement Description
    Hips Extension The primary movement during a hip thrust, extending the hip joint from a flexed position to a fully extended position. This action primarily involves the glutes and hamstrings.
    Glutes Contraction The primary muscles activated during the hip thrust, contracting to extend the hips. Proper form ensures maximum glute engagement.
    Hamstrings Contraction Assisting the glutes in hip extension. Proper form activates the hamstrings in conjunction with the glutes.
    Core Stabilization Maintaining a stable torso and protecting the lower back throughout the movement. Core engagement is crucial for preventing injury and maximizing efficiency.

    Benefits of Using a Hip Thrust Machine

    Hip thrusts, a powerful exercise for strengthening the posterior chain, are increasingly popular in fitness routines. This exercise, performed on a machine or with bodyweight, targets multiple muscles crucial for overall strength, power, and athletic performance. Beyond building strength, hip thrusts play a key role in injury prevention and rehabilitation, offering significant advantages over bodyweight alternatives. Let’s delve into the specifics of these benefits.

    Primary Muscle Groups Targeted

    The hip thrust primarily activates the glutes, hamstrings, and lower back muscles. These muscles work synergistically to extend the hips, creating a powerful movement. Proper form ensures engagement of these key muscle groups, maximizing the effectiveness of the exercise. This targeted activation contributes to overall strength and power development.

    Benefits for Strength, Power, and Athletic Performance

    Hip thrusts are an excellent exercise for building strength and power in the posterior chain. The compound nature of the exercise engages multiple muscle groups, leading to significant strength gains. This strength translates to improved athletic performance across various activities, from sprinting to jumping. By increasing the force production of the hip extensors, athletes can enhance their explosiveness and power output.

    For example, a stronger posterior chain contributes to better performance in sports requiring rapid acceleration or jumping.

    Role in Injury Prevention and Rehabilitation

    Hip thrusts play a crucial role in injury prevention, particularly in preventing lower back pain and injuries related to the hips and glutes. Strengthening the posterior chain helps stabilize the spine and pelvis, reducing the risk of injury during daily activities and sports. Furthermore, hip thrusts are often incorporated into rehabilitation programs to help restore strength and function after injuries.

    By targeting specific muscle groups, the exercise helps to restore mobility and stability, promoting a faster recovery process.

    Machine vs. Bodyweight Exercises

    Using a hip thrust machine offers several advantages over bodyweight hip thrusts. The controlled environment of the machine allows for greater isolation of the targeted muscles, promoting greater focus and consistent engagement. The machine provides a stable platform, reducing the risk of improper form and potential injury. The resistance can be easily adjusted, allowing for progressive overload and tailoring the exercise to individual fitness levels.

    The machine also allows for greater weight load, allowing for more significant strength gains.

    Advantages of Using a Hip Thrust Machine

    • Enhanced Muscle Activation: The machine provides a stable platform, allowing for greater focus on the glutes, hamstrings, and lower back muscles. This isolation maximizes muscle activation and minimizes the risk of compensation from other muscle groups.
    • Progressive Overload: The machine facilitates progressive overload, allowing for increasing weight or resistance to progressively challenge the muscles and promote continued strength gains. This is vital for building strength and power over time.
    • Reduced Risk of Injury: The stable nature of the machine reduces the risk of improper form, preventing potential injury. The controlled environment allows for focused effort on the targeted muscle groups.
    • Controlled Range of Motion: The machine guides the user through a controlled range of motion, helping to ensure correct form and prevent injuries.
    • Increased Weight Capacity: The machine allows for heavier weights than bodyweight exercises, leading to faster strength gains. This is particularly useful for those looking to maximize strength development.

    Variations and Alternatives

    While the standard hip thrust machine provides a fantastic way to target the glutes, hamstrings, and core, exploring variations and alternative exercises can further enhance your training and address potential limitations. Understanding different machine setups and their corresponding effects allows you to tailor your workouts for specific goals and prevent plateaus.

    Machine Hip Thrust Variations

    Numerous hip thrust machine variations allow for adjustments in resistance, range of motion, and muscle emphasis. These modifications can significantly impact the effectiveness of your workout, leading to better results.

    One common variation involves adjusting the seat height. Lowering the seat position increases the range of motion, placing greater emphasis on the glutes and hamstrings. Conversely, raising the seat reduces the range of motion, which can be beneficial for isolating the glutes and for individuals with lower back issues. Proper form remains crucial in all variations to avoid injury.

    Another significant variation lies in altering the foot placement on the platform. Moving the feet closer together concentrates the effort on the glutes, while positioning them wider apart emphasizes the hamstrings. This allows for targeting different muscle fibers within the same exercise. Consider your individual strengths and weaknesses when choosing the appropriate foot placement for optimal results.

    Alternative Exercises

    Alternative exercises targeting similar muscle groups offer a way to switch up your routine and address different needs. They also prevent overtraining in specific muscle groups. These alternatives often involve free weights or resistance bands, and are important to have in a balanced training regime.

    • Romanian Deadlifts (RDLs): This exercise effectively targets the hamstrings and glutes while also working the lower back and core. The RDL allows for a greater range of motion than a machine hip thrust, enabling a more comprehensive workout. Proper form is crucial to prevent lower back injuries.
    • Glute Bridges: A classic exercise that isolates the glutes and hamstrings. While not utilizing a machine, the glute bridge can be performed with variations such as adding weight or resistance bands. This exercise can be used as a warm-up or as an alternative when a machine isn’t accessible.
    • Cable Pull-Throughs: This exercise focuses on the posterior chain and can be tailored for greater hamstring emphasis, potentially offering a good alternative to hip thrusts when other equipment is unavailable. It’s important to maintain good form to prevent strain on the lower back.

    Comparison Table

    Variation Benefits Description
    Standard Hip Thrust Excellent for overall glute and hamstring development. Standard machine setup with feet flat on platform.
    Low-Seat Hip Thrust Increased range of motion, emphasizes glutes and hamstrings. Lowering the seat for a greater range of motion.
    High-Seat Hip Thrust Reduced range of motion, isolates glutes. Raising the seat to limit range of motion.
    Narrow-Stance Hip Thrust Increased glute activation. Feet positioned closer together on the platform.
    Wide-Stance Hip Thrust Increased hamstring activation. Feet positioned wider apart on the platform.

    Safety Considerations

    Hip thrusts, while a powerful exercise, can lead to injuries if not performed correctly and safely. Proper technique, warm-up, and cool-down are crucial for minimizing risk. This section will delve into safety precautions, spotting techniques, potential risks, and a structured warm-up and cool-down routine.

    Safety Precautions

    Implementing safety precautions is paramount when performing hip thrusts. These precautions protect users from potential injuries and ensure a safe workout environment. Always prioritize safety over the pursuit of heavy weights or ambitious reps.

    • Proper Form: Maintaining correct form throughout the entire exercise is essential. Focus on maintaining a neutral spine and engaging core muscles to prevent lower back strain. Use a controlled tempo, avoiding jerky movements. This consistent form will help you build strength without risking injury.
    • Appropriate Weight Selection: Choose weights that allow you to maintain proper form throughout the exercise. Don’t attempt to lift weights beyond your current strength capacity. Gradually increase the weight over time to challenge your muscles without jeopardizing your safety.
    • Stable Platform: Ensure the hip thrust machine platform is stable and securely positioned. A wobbly platform can lead to instability and injury. Check the platform for any signs of damage or wear before commencing the exercise.
    • Spotter Availability: For heavier weights or beginners, having a spotter is highly recommended. A spotter can provide support and guidance, preventing any potential falls or injuries. Their presence will add an extra layer of security, reducing risks.

    Spotting Techniques

    A spotter plays a crucial role in ensuring the safety of the lifter. Their primary responsibility is to prevent any potential falls or injuries.

    • Spotter Positioning: The spotter should stand on the side opposite the lifter, ensuring their footing is stable. They should be prepared to assist in case of a potential loss of balance or control.
    • Spotter’s Grip: The spotter should position their hands on the lifter’s lower back or upper thighs to provide support and stability. This ensures they can assist in preventing the lifter from falling backwards or forward.
    • Spotting Technique: The spotter should be prepared to support the lifter throughout the entire exercise. They should anticipate potential issues and provide support as needed. They must be ready to guide the lifter back to the starting position if needed. This constant vigilance from the spotter reduces the chance of injury.

    Potential Risks and Injuries

    Improper form or technique during hip thrusts can lead to various injuries. Understanding these potential risks is crucial for implementing preventive measures.

    Using a hip thrust machine is a fantastic way to build glutes and hamstrings. It’s a great exercise for overall lower body strength, and honestly, preparing for a presentation in class, like Do a Presentation in Class , can sometimes require a strong core. You’ll find that a strong lower body, achieved through consistent hip thrust practice, translates to improved posture and stability.

    This is essential when working on a presentation for class, and ultimately, the hip thrust machine is an awesome tool for building that lower body power!

    • Lower Back Pain: A common injury associated with hip thrusts is lower back pain. This is often caused by poor spinal alignment or excessive weight. Maintaining proper form and selecting appropriate weight is crucial to prevent lower back injuries.
    • Knee Injuries: If the knees cave inward during the exercise, or if the weight is excessive, it can lead to knee pain or injury. Focusing on proper knee alignment and weight selection is key to minimizing the risk of knee injuries.
    • Hip Flexor Strain: Overexertion of the hip flexor muscles during hip thrusts can lead to strain or tears. Starting with lighter weights and gradually increasing the load is essential to prevent hip flexor strains.

    Warm-up and Cool-down Routines

    A structured warm-up and cool-down routine is essential to prepare the body for the exercise and to promote recovery. This is crucial for preventing injuries and promoting optimal performance.

    1. Warm-up (5-10 minutes): Begin with dynamic stretches, such as leg swings, torso twists, and hip circles. These movements prepare the muscles for the hip thrust exercise. Following this, perform 5-10 minutes of light cardio to increase blood flow and elevate core body temperature.
    2. Cool-down (5-10 minutes): Static stretches, such as holding hamstring and quad stretches, are crucial for improving flexibility and reducing muscle soreness. Gradually lower the intensity of your stretches, ensuring that each stretch is held for 20-30 seconds. This gradual cool-down will promote recovery and prevent stiffness.

    Potential Risks and Mitigation Strategies

    Risk Mitigation Strategy
    Lower back pain Maintain a neutral spine, use proper form, and select appropriate weight.
    Knee injuries Ensure proper knee alignment, avoid excessive weight, and maintain a controlled tempo.
    Hip flexor strain Start with lighter weights, gradually increase the load, and focus on controlled movements.
    Falls/Instability Use a stable platform, have a spotter available, and ensure proper technique.

    Progression and Programming

    Hip thrusts, like any strength training exercise, require progressive overload to continue stimulating muscle growth and strength gains. Simply performing the same set and rep scheme week after week will eventually lead to plateaus. Understanding how to progressively overload is key to achieving your fitness goals. This section will cover strategies for progressively challenging your muscles, different workout programs tailored to various fitness levels and goals, and a sample weekly training plan to integrate hip thrusts into your routine.

    Progressive Overload Strategies

    To continually challenge your muscles and promote strength gains, you must gradually increase the demands placed on them. This can be achieved by increasing the weight lifted, the number of repetitions performed, the sets completed, or the frequency of workouts. A common method is to increase the weight by a small increment each workout, aiming for a challenging but manageable weight.

    Other methods include increasing the number of sets, reps, or both. Listen to your body and adjust the program accordingly. Avoid overtraining and allow for adequate rest and recovery.

    Workout Programs for Different Fitness Levels

    Different workout programs cater to various fitness levels and goals. Beginners may start with lighter weights and fewer repetitions, focusing on mastering proper form. Intermediate lifters can gradually increase the weight and reps, incorporating variations to target different muscle fibers. Advanced lifters may utilize advanced techniques like drop sets or supersets, pushing their limits further.

    Using a hip thrust machine is a fantastic way to strengthen your glutes and hamstrings. Finding the right rhythm, like in the practice of “melody echo chamber breathe in breathe out” melody echo chamber breathe in breathe out , can really enhance your form and maximize results. Focus on controlled movements and proper breathing for optimal gains and a more effective workout.

    Sample Weekly Training Plan

    A sample weekly training plan for hip thrusts is presented below. This plan assumes a 3-day training schedule and considers both strength and hypertrophy goals.

    • Monday: Focus on strength training with a heavier weight and fewer reps. Aim for 3 sets of 5-8 repetitions.
    • Wednesday: Emphasis on hypertrophy with moderate weight and higher reps. Perform 3 sets of 8-12 repetitions.
    • Friday: Active recovery and lighter exercises to prevent overtraining. Consider a lower weight or bodyweight variations.

    This weekly plan provides a structure for progressive overload. Remember to adjust the weight and reps based on your individual progress and limitations. It is essential to listen to your body and allow for adequate rest between workouts.

    Incorporating Hip Thrusts into a Larger Workout Program

    Hip thrusts can be effectively incorporated into a larger workout program, complementing other exercises. The following sample workout routine integrates hip thrusts into a full-body strength training regimen.

    Day Workout Exercises Sets/Reps
    Monday Upper Body Strength Bench press, overhead press, barbell rows 3 sets of 8-12 reps
    Tuesday Lower Body Strength Barbell squats, Romanian deadlifts 3 sets of 8-12 reps
    Wednesday Hip Thrusts and Core Hip thrusts, planks, Russian twists 3 sets of 8-12 reps for hip thrusts, 3 sets of as many reps as possible for core
    Thursday Active Recovery Light cardio, stretching 30-60 minutes
    Friday Upper Body Hypertrophy Dumbbell bench press, bicep curls, triceps extensions 3 sets of 12-15 reps
    Saturday Lower Body Hypertrophy Leg press, leg extensions, hamstring curls 3 sets of 12-15 reps
    Sunday Rest Complete rest

    This routine provides a balanced approach to strength and hypertrophy training, integrating hip thrusts strategically within the larger program. Remember to adjust the exercises and rep ranges according to your individual needs and goals.

    Equipment Selection and Considerations

    Choosing the right hip thrust machine is crucial for achieving optimal results and preventing injuries. A well-designed machine can enhance your workout experience, allowing for precise adjustments and a safe, controlled range of motion. Proper selection takes into account various factors, from the machine’s construction to its specific features.Investing in a quality hip thrust machine is an investment in your overall fitness journey.

    A durable and well-engineered machine will last for years, providing reliable support for your workouts. Choosing the right machine ensures a safe and effective workout, contributing to your long-term fitness goals.

    Criteria for Selecting a Hip Thrust Machine

    Several key criteria guide the selection process for a suitable hip thrust machine. These criteria ensure the machine’s functionality, safety, and suitability for your specific needs. Consider factors such as adjustability, stability, and overall design when making your choice.

    • Adjustability: The machine’s adjustability is paramount. A machine with adjustable seat height, back angle, and potentially even foot placement allows for personalized workouts catering to individual body types and fitness levels. A versatile machine accommodates a wider range of exercises and ensures proper form for all users.
    • Stability and Construction: Stability is essential for safe and effective workouts. A sturdy frame, robust construction, and secure base are crucial for preventing wobbling or shifting during use. This stability minimizes the risk of injury and allows for a controlled movement. Look for machines made from high-quality materials like heavy-duty steel or reinforced aluminum.
    • Safety Features: Features such as secure locking mechanisms, padded surfaces, and a stable design contribute to a safe workout environment. These features minimize the risk of injury during use and ensure the machine remains stable throughout the exercise.
    • Space Requirements: Consider the available space in your workout area. The machine’s dimensions should fit comfortably within the allocated space without compromising the freedom of movement. A smaller footprint can be a plus, especially in home gyms.

    Types of Hip Thrust Machines

    Different types of hip thrust machines cater to various needs and preferences. Knowing the differences between these machines can help you make an informed decision.

    • Adjustable Hip Thrust Machines: These machines offer the most versatility. They allow for adjustments in seat height, back angle, and sometimes even foot placement. This adjustability enables you to tailor the exercise to your specific needs and target different muscle groups.
    • Fixed Hip Thrust Machines: These machines are generally simpler in design, offering a single preset angle and height. While less versatile, they can be more budget-friendly. Their fixed nature may not suit everyone’s needs for adjusting the exercise to different fitness levels.
    • Commercial-Grade Hip Thrust Machines: These are typically built with heavy-duty materials and advanced features. They are designed for high-volume use in gyms and fitness centers. These robust machines are more expensive but provide superior longevity and stability for intensive use.

    Maintenance and Upkeep

    Regular maintenance is crucial for the longevity and proper function of your hip thrust machine.

    • Cleaning: Regularly clean the machine with a damp cloth to remove sweat and debris. This prevents the buildup of grime and maintains hygiene.
    • Lubrication: Periodically lubricate moving parts to ensure smooth operation and reduce friction. This can help prolong the lifespan of the machine.
    • Inspection: Regularly inspect the machine for any signs of wear and tear, such as loose bolts, damaged parts, or structural issues. Early detection and addressing these issues can prevent more significant problems from developing.

    Key Factors in Choosing the Right Machine

    The following factors are critical when selecting a hip thrust machine:

    • Adjustability for personalized workouts.
    • Stability to prevent injuries.
    • Safety features to mitigate risks.
    • Space requirements to fit in your workout area.
    • Construction quality for durability and longevity.
    • Budget to align with your financial constraints.
    • Specific needs based on your fitness goals.

    Outcome Summary

    In conclusion, using a hip thrust machine can be a powerful tool for building strength and improving overall athletic performance. Remember to prioritize proper form, safety precautions, and progressive overload to maximize your results. This guide has provided a comprehensive overview of hip thrust machines, equipping you with the knowledge to confidently incorporate them into your fitness journey.