Tag: essential oils

  • Make Perfume With Essential Oils Your Guide

    Make Perfume With Essential Oils Your Guide

    Make Perfume With Essential Oils sets the stage for a captivating journey into the world of personalized fragrances. Imagine crafting exquisite scents tailored to your unique preferences, using only natural essential oils. This guide dives deep into the art of perfume creation, revealing the history, benefits, techniques, and essential steps to transforming your home into a fragrant sanctuary.

    From understanding the different types of essential oils and their properties to mastering blending techniques and creating your own signature scents, this comprehensive guide equips you with the knowledge and inspiration to embark on your perfume-making adventure. Discover the secrets to creating unique and personalized fragrances, perfect for gifting or enjoying yourself.

    Introduction to Essential Oil Perfume Making

    From ancient civilizations to modern times, scent has played a vital role in human culture and well-being. Perfume, a blend of fragrant substances, has a rich history, evolving from simple incense to complex, meticulously crafted compositions. Essential oils, extracted from plants, have been a cornerstone of this practice for millennia, treasured for their captivating aromas and potential therapeutic benefits.Creating your own perfume with essential oils offers a rewarding and personalized experience.

    By understanding the properties and safety precautions surrounding these natural ingredients, you can craft unique scents that reflect your personal style and well-being. This contrasts sharply with commercially produced perfumes, which often contain synthetic fragrances and potentially harmful chemicals. The homemade approach empowers you to control the quality and ingredients, ensuring a more natural and potentially healthier alternative.

    History of Perfume and Essential Oils

    Perfume’s history intertwines deeply with the use of essential oils. Ancient Egyptians, for example, used fragrant oils in religious rituals and personal adornment. Later, the Persians and Arabs further developed distillation techniques, leading to more sophisticated and concentrated extracts. This knowledge and practice spread throughout the Mediterranean world, influencing the development of perfumery as we know it today.

    The French, in particular, rose to prominence in the production and refinement of fragrances during the Renaissance, transforming perfume into an art form.

    Benefits of Making Your Own Perfume

    Homemade perfumes offer several key advantages over commercially produced ones. You gain complete control over the ingredients, ensuring the use of high-quality essential oils. This allows you to avoid potentially harmful synthetic fragrances, allergens, and preservatives commonly found in mass-produced perfumes. Furthermore, the process itself becomes a creative outlet, allowing you to design and personalize scents tailored to your preferences and mood.

    Finally, the cost savings can be significant, making this a more economical option in the long run.

    Essential Oil Types and Properties

    Essential oils derive their unique properties from the specific plant they are extracted from. They vary widely in their scent profiles, from the invigorating citrus of lemon to the calming floral aroma of lavender. Beyond their olfactory qualities, many essential oils possess therapeutic benefits, offering potential relief from stress, anxiety, or other ailments.

    Safety Precautions When Working with Essential Oils

    Working with essential oils requires careful consideration of safety protocols. Essential oils, though natural, can be potent. Always dilute them with a carrier oil, like jojoba or almond oil, before applying to skin. Avoid direct contact with eyes and mucous membranes. Patch testing is crucial to ensure you don’t experience an allergic reaction.

    Keep essential oils out of reach of children and pets. Thorough research into the specific essential oils you intend to use is vital for understanding their potential interactions and safe usage guidelines.

    Common Essential Oil Types and Scent Profiles

    Essential Oil Scent Profile
    Lemon Fresh, citrusy
    Lavender Floral, calming
    Peppermint Cooling, invigorating
    Tea Tree Woody, antiseptic
    Vanilla Sweet, warm

    Ingredients and Supplies

    Crafting your own perfume blends is a rewarding journey, starting with the right ingredients. Careful selection of essential oils and carrier oils is key to achieving the desired fragrance and skin compatibility. This section delves into the essential components and their crucial roles in the process.Understanding the properties of various ingredients allows you to create unique and personalized fragrances.

    Knowing how to measure and mix them accurately is equally important to achieving consistent results.

    Essential Oils

    Essential oils are the heart of any perfume blend. They provide the unique fragrances and therapeutic benefits. Choosing the right essential oils for your blend is crucial for the final outcome. Lavender, for example, is known for its calming properties and a light floral scent. Lemon is a bright and uplifting citrus scent.

    Consider the desired mood and effect when selecting essential oils.

    Carrier Oils

    Carrier oils are essential for diluting essential oils and delivering the fragrance to the skin. They also help to nourish and moisturize the skin. Without carrier oils, essential oils could potentially cause irritation or skin damage. The right carrier oil can make a huge difference in the final product.

    Importance of High-Quality Ingredients

    Using high-quality essential oils and carrier oils is vital for safety and efficacy. Low-quality ingredients may contain impurities or contaminants, leading to skin irritation or health concerns. Look for reputable brands and suppliers that prioritize purity and quality control. The quality of the ingredients directly impacts the overall experience.

    Measuring and Mixing Essential Oils and Carrier Oils

    Accurate measurement is critical for achieving consistent results. Use precise measuring tools, such as droppers, measuring spoons, and graduated cylinders, to ensure accurate proportions. A common ratio is to start with a 3% dilution of essential oils in a carrier oil. This means 3 drops of essential oil per 100 drops of carrier oil.

    For a 3% dilution of essential oil, use 3 drops of essential oil for every 100 drops of carrier oil.

    This ratio can be adjusted to suit your preferences and the desired strength of the fragrance.

    Carrier Oil Comparison

    Carrier Oil Properties
    Jojoba Non-comedogenic, moisturizing
    Almond Mild, nourishing
    Sweet Almond Light, easily absorbed
    Grapeseed Lightweight, quickly absorbed, good for sensitive skin
    Olive Oil Moisturizing, nourishing, but may leave a greasy residue

    This table highlights the key properties of common carrier oils. The choice of carrier oil will depend on the desired outcome and the type of skin. For example, jojoba oil is a popular choice for sensitive skin due to its non-comedogenic nature.

    Blending Techniques
    Make Perfume With Essential Oils

    Crafting a unique perfume is more than just combining essential oils; it’s about mastering the art of blending. Understanding the nuances of different blending techniques allows you to create fragrances that resonate with your personal style and evoke desired emotions. This section delves into various methods, popular blends, and the crucial concept of fragrance notes to guide you in your perfume-making journey.Blending essential oils requires a careful approach, considering the interplay of scent profiles.

    This involves understanding how different essential oils interact and how to combine them harmoniously to create a cohesive and desirable fragrance. A good blend is not simply a sum of its parts; it’s a carefully orchestrated composition.

    Different Blending Techniques

    Understanding various blending methods is key to achieving desired results. Each method offers a unique approach to combining essential oils and carrier oils.

    • Layer Blending: This method involves layering essential oils in a specific order, allowing each oil’s distinct characteristics to unfold gradually. Starting with top notes, then middle notes, and finally base notes, creates a well-rounded fragrance. The layering effect creates a more natural progression of scent over time.
    • Dilution Blending: This approach focuses on carefully diluting essential oils with carrier oils to achieve the desired concentration and prevent skin irritation. The correct dilution ratio is essential for both safety and the desired scent strength.
    • Counterpoint Blending: This technique involves using contrasting essential oils to create a more complex and intriguing fragrance. This often creates a vibrant, dynamic, and unique scent profile.

    Combining Essential Oils and Carrier Oils

    Choosing the right carrier oil is crucial for diluting essential oils and ensuring their safe application. Carrier oils also contribute to the overall texture and longevity of the perfume.

    Making perfume with essential oils is a fascinating hobby. It’s so relaxing to blend different scents and create something unique. Speaking of unique, did you hear about the new nightclubs in GTA, featuring the Black Madonna and Solomun? GTA adds new nightclubs featuring the Black Madonna, Solomun, and more. The vibrant energy of these virtual spaces is definitely a source of inspiration for a new, fresh perfume blend.

    I’m already brainstorming some exciting scents to match the club vibe! Back to my essential oil project, though – I’m so excited to try out some new combinations.

    • Jojoba Oil: This oil is highly versatile and often used as a carrier due to its close similarity to sebum, the oil naturally produced by our skin. It blends well with most essential oils and leaves a soft, non-greasy feel.
    • Almond Oil: This oil is known for its moisturizing properties, making it a great choice for sensitive skin. It has a light, slightly sweet scent that can enhance certain essential oil profiles.
    • Fractionated Coconut Oil: This oil is known for its excellent moisturizing and emollience properties. It’s lightweight and absorbs quickly into the skin, making it a good choice for those seeking a smooth, non-greasy application.

    Popular Perfume Blends and Scent Profiles, Make Perfume With Essential Oils

    Many popular perfume blends exist, each with a unique character. These blends offer inspiration for your own creations.

    Blend Scent Profile
    Citrus Bliss A refreshing and uplifting blend of citrus essential oils like lemon, orange, and grapefruit, often blended with a touch of bergamot.
    Floral Delight A harmonious blend of floral essential oils like rose, jasmine, and lavender, often enhanced with a hint of sandalwood or vanilla.
    Woody Elegance A warm and sophisticated blend of woody essential oils like cedarwood, sandalwood, and patchouli, often balanced with a touch of spice or floral notes.

    Fragrance Notes

    Fragrance notes dictate the evolution of a perfume over time. Understanding these notes is essential for crafting a well-rounded and engaging scent.

    • Top Notes: These are the initial scents that you perceive when applying the perfume. They are typically light and fleeting, creating the first impression.
    • Middle Notes (Heart Notes): These notes emerge after the top notes dissipate, providing the perfume’s main character. They are often more complex and lasting.
    • Base Notes: These notes are the longest-lasting and provide depth and warmth to the fragrance. They often have a rich, grounding quality.

    Creating a Custom Perfume Blend – Flowchart

    This flowchart Artikels the steps for creating a custom perfume blend:

    Start with desired scent profile.

    • Choose essential oils based on desired scent profile.
    • Select carrier oil for desired dilution and feel.
    • Experiment with different blending techniques.
    • Consider fragrance notes and layering.
    • Adjust essential oil ratios until desired scent profile is achieved.
    • Test on skin for any adverse reactions.
    • Store perfume in a cool, dark place.

    Perfume Making Procedures: Make Perfume With Essential Oils

    Crafting your own perfume from essential oils is a rewarding journey that allows you to personalize scents and explore the artistry of fragrance blending. This process, from preparation to final bottling, involves meticulous steps and careful consideration of various factors, including dilution methods and concentration levels. Understanding these procedures will empower you to create exquisite, unique perfumes that reflect your personal style.The art of perfume making involves careful consideration of essential oil strengths, carrier oil compatibility, and blending techniques.

    Understanding the dilution methods and concentrations is crucial to achieving the desired scent profile and longevity. Proper storage and handling are essential to maintaining the quality and integrity of your homemade perfume.

    Essential Oil Dilution Methods

    Essential oils are highly concentrated and can be irritating to the skin if used undiluted. Proper dilution with a carrier oil is essential for safe and effective use in perfume creation. Several methods exist for achieving the desired dilution.

    • Simple Dilution: This involves directly mixing a measured amount of essential oil with a carrier oil. The ratio of essential oil to carrier oil is dependent on the desired concentration and the specific essential oils used. For example, a 1% concentration might use 1 drop of essential oil to 99 drops of carrier oil. This method is straightforward and suitable for beginners.

    • Fractionation: This method involves using a specific carrier oil that absorbs the essential oil. The carrier oil acts as a vehicle for the essential oil, potentially enhancing the fragrance’s longevity and diffusion. This method is commonly used in creating perfume oils for higher concentration perfumes. Some carrier oils, like almond oil or jojoba oil, are frequently used for this process.

    • Cold Infusion: In this technique, the essential oil is infused into the carrier oil through a slow and controlled process. This approach is particularly useful when working with delicate essential oils to minimize their potential harshness. This method may be less practical for highly volatile essential oils.

    Perfume Concentrations and Properties

    Different concentrations of essential oils in carrier oils yield perfumes with distinct properties. The concentration directly affects the strength, longevity, and intensity of the fragrance.

    Concentration Properties Typical Usage
    Eau de Parfum (EDP): Stronger fragrance, longer lasting (4-8 hours). Versatile daily wear.
    Eau de Toilette (EDT): Milder fragrance, shorter lasting (2-4 hours). Suitable for everyday use.
    Eau de Cologne (EDC): Lightest fragrance, shortest lasting (1-2 hours). Ideal for refreshing or light scent applications.
    Perfume Oil: Highest concentration, long-lasting (8+ hours). Ideal for special occasions or those seeking a long-lasting fragrance.

    Perfume Making Procedure Steps

    Creating a unique perfume blend involves a series of carefully considered steps.

    1. Gather your ingredients and supplies. This includes essential oils, carrier oils, a measuring device, a mixing bottle, and a funnel. Ensure you have all the required components before starting.
    2. Select your essential oil blend. Choose essential oils that complement each other and create a harmonious fragrance. Consider the notes (top, middle, and base) and how they blend together.
    3. Determine the desired concentration. Decide on the desired strength and longevity of your perfume. This will influence the ratio of essential oil to carrier oil.
    4. Dilute the essential oils. Follow the chosen dilution method to ensure the essential oils are properly mixed with the carrier oil. Carefully measure the essential oils and carrier oil.
    5. Blend the ingredients. Mix the essential oils and carrier oil thoroughly until evenly distributed. Ensure there are no noticeable oil separation issues.
    6. Test the blend. Apply a small amount of the perfume to your skin and allow it to dry. Observe the scent evolution over time to ensure it meets your expectations.
    7. Bottle the perfume. Pour the perfume into a suitable bottle using a funnel to avoid spills. Label the bottle with the name of the blend, ingredients, and date of creation.
    8. Store properly. Store the perfume in a cool, dark place away from direct sunlight to maintain its quality and prevent degradation.

    Storage and Handling

    Proper storage and handling are crucial for maintaining the quality and longevity of homemade perfumes. Protect your creations from light, heat, and moisture.

    “Store your perfumes in a cool, dark place, away from direct sunlight, to maintain their quality and prevent degradation.”

    Making perfume with essential oils is so much fun! It’s a great way to experiment with scents and create something truly unique. Thinking about how aromatherapy can be incorporated into other daily routines, like showering, is interesting too. A great example of this is the way a special shower experience can be beneficial to babies, as described in the “Shower with a Baby” article Shower with a Baby.

    Learning how to create a safe and soothing environment for babies can inspire new ideas for crafting a relaxing and personalized perfume. It’s all about combining scents for a pleasant experience, whether it’s for yourself or a loved one.

    Perfume Blending Ideas

    Unleashing your inner perfumer is a delightful journey of creativity and experimentation. Blending essential oils is a skill that allows you to craft unique and personalized fragrances, tailoring them to your mood and preferences. Understanding the art of blending goes beyond simply combining oils; it involves understanding the interplay of fragrance notes and how they evolve over time.Mastering the nuances of fragrance blending opens doors to a world of personalized scents.

    This section will explore various blending ideas, emphasizing the importance of balancing fragrance notes and providing examples of unique combinations. Techniques for adjusting scent strength and intensity will also be discussed, empowering you to fine-tune your creations to perfection.

    Floral Fragrances

    Floral fragrances evoke feelings of romance, serenity, and femininity. A harmonious blend of floral essential oils can create a truly captivating scent experience. Lavender, rose, and jasmine are classic choices, while geranium and ylang-ylang add depth and complexity. Consider combining delicate floral notes with a touch of earthy or woody undertones for a more nuanced fragrance profile.

    For example, a blend of rose, geranium, and a hint of sandalwood creates a sophisticated and elegant aroma.

    Making perfume with essential oils is a fantastic hobby! It’s incredibly rewarding to craft your own unique scents. And while you’re busy mixing and matching different aromas, remember to take a moment to register to vote online Register to Vote Online. It’s a vital part of being a responsible citizen, and you can do it while you’re perfecting your latest perfume concoction! It’s all about balancing self-care with civic duty, and a beautiful smelling home is a perfect place to start.

    Citrus Scents

    Citrus essential oils are known for their uplifting and invigorating properties. Their fresh and zesty character makes them ideal for creating invigorating and energizing perfumes. Lemongrass, grapefruit, and lime are excellent choices for a bright and cheerful scent. To enhance the vibrancy, consider incorporating a touch of bergamot or mandarin orange. The combination of grapefruit and bergamot creates a refreshing and uplifting aroma, perfect for a summer scent.

    Woody Fragrances

    Woody essential oils impart a sense of grounding, warmth, and sophistication to a perfume. Cedarwood, sandalwood, and vetiver are excellent choices for creating a rich and complex scent. These oils often pair well with earthy or spicy notes, adding a layer of depth and intrigue. For example, a blend of cedarwood, sandalwood, and a hint of cinnamon creates a warm and inviting scent perfect for a sophisticated evening.

    Spicy Blends

    Spicy essential oils add warmth and intrigue to a perfume. Cinnamon, clove, and nutmeg provide a touch of spice and warmth, while ginger adds a fiery kick. These oils pair well with citrus or floral notes to create a captivating and complex scent. Consider combining cinnamon with orange or rose for a unique and balanced fragrance.

    Unique and Interesting Combinations

    Beyond the classic categories, experimenting with unconventional combinations can lead to truly unique and unforgettable scents. For example, a blend of bergamot, patchouli, and a touch of vanilla creates a sophisticated and intriguing aroma. Combining unexpected notes like cardamom with rose or ylang-ylang can lead to surprising and delightful results. The key is to explore, experiment, and let your creativity guide you.

    Adjusting Scent Strength and Intensity

    The intensity of a scent can be adjusted by varying the proportion of essential oils. Start with a small amount of each oil and gradually increase the amount until you achieve the desired intensity. Using a carrier oil, such as jojoba or almond oil, can also dilute the essential oils and control their strength. It’s important to note that essential oils have varying strengths, so some oils may need to be used in smaller quantities than others.

    Potential Fragrance Blends

    Blend Name Essential Oils Notes
    Spring Blossom Lavender, Rose, Geranium Floral, fresh
    Spicy Citrus Orange, Cinnamon, Clove Warm, invigorating
    Earthy Woods Cedarwood, Vetiver, Patchouli Woody, grounding
    Sweet Floral Rose, Jasmine, Vanilla Sweet, romantic
    Ocean Breeze Lime, Bergamot, Mint Fresh, invigorating

    Bottling and Presentation

    Make Perfume With Essential Oils

    Transforming your homemade perfume from a fragrant concoction into a beautiful, professional-looking product is a crucial step in the perfume-making process. The way you bottle and present your perfume speaks volumes about its quality and craftsmanship. Proper presentation enhances the overall experience, making it more appealing and desirable.The right bottle, attractive labeling, and meticulous storage play a vital role in showcasing the fragrance and making it a truly memorable experience for the recipient.

    Thoughtful presentation goes beyond just the practical; it elevates the perfume to an art form.

    Bottle Selection

    Choosing the right bottle is an important aspect of the presentation. Different bottle shapes and sizes can evoke various moods and create different visual impressions. Consider the type of fragrance when selecting the bottle.

    • Small, elegant bottles with a classic design are suitable for delicate floral fragrances or perfumes designed for everyday use.
    • Larger, more substantial bottles are ideal for bolder, more intense fragrances, like oriental or woody scents.
    • Unique, artistic bottles with intricate designs or unusual shapes can be used to showcase more avant-garde or niche fragrances.

    Labeling Techniques

    Attractive labels are crucial for creating a visually appealing and professional product. Craft labels that complement the bottle design and highlight the perfume’s unique characteristics.

    • High-quality, thick paper or cardstock provides a professional look and feel.
    • Consider using a combination of colors, fonts, and images that reflect the perfume’s scent profile and the brand’s identity.
    • The label should clearly display the perfume’s name, ingredients, and any necessary warnings or precautions.
    • Use high-resolution images or graphics to enhance the visual appeal of the label.

    Proper Labeling and Storage

    Proper labeling and storage are essential for maintaining the quality and longevity of your perfumes. Clear and accurate labeling helps avoid misidentification and ensures safe use.

    • Clearly indicate the perfume’s name, ingredients, and batch number on the label. This is essential for tracking and recalling batches if needed.
    • Include any necessary warnings or precautions, such as avoiding contact with eyes or potential allergic reactions.
    • Store perfumes in a cool, dark place, away from direct sunlight and extreme temperatures. This helps maintain the scent’s integrity.
    • Use airtight containers to prevent evaporation and maintain the fragrance’s concentration.

    Presentation and Packaging

    Packaging can significantly impact the perception of your perfume. Consider the overall experience you want to create.

    • A luxurious presentation box can elevate the perfume’s perceived value.
    • High-quality ribbons, satin pouches, or other embellishments can add a touch of elegance and refinement.
    • The packaging should be appropriate to the perfume’s intended use and target audience.
    • Consider the sustainability aspects of your packaging choices. Choose eco-friendly options where possible.

    Ending Remarks

    Crafting your own perfume with essential oils is a rewarding and deeply personal experience. This guide has explored the journey from understanding essential oils and carrier oils to mastering blending techniques and bottling your creations. By understanding the nuances of fragrance notes, you can create a bespoke perfume that reflects your unique personality and preferences. So, gather your essential oils, embrace the artistry of scent, and unlock your inner perfumer.
  • Make Homemade Bath Salts Your Spa Day at Home

    Make Homemade Bath Salts Your Spa Day at Home

    Make Homemade Bath Salts sets the stage for a relaxing spa experience right in your own bathroom. Imagine the luxurious feel of a homemade blend, customized to your preferences, compared to store-bought options. This guide dives deep into the art of creating your own bath salts, from selecting safe ingredients to crafting the perfect blend for stress relief, muscle soreness, or simply unwinding after a long day.

    We’ll explore the benefits of homemade bath salts, the crucial safety aspects of ingredient selection, and various recipes for different moods. Learn about essential oils, storage tips, and even creative packaging ideas to make your bath salts a true indulgence. Get ready to transform your bath time into a personal spa retreat!

    Introduction to Homemade Bath Salts

    Make Homemade Bath Salts

    Homemade bath salts offer a delightful and often more economical alternative to store-bought options. They allow you to customize the scent, texture, and ingredients to your liking, ensuring a truly personalized spa experience. This detailed guide will explore the benefits of homemade bath salts, the fundamental principles behind their creation, and a range of ingredients categorized by their intended effects.Creating your own bath salts is a straightforward process.

    It primarily involves combining Epsom salts (or another mineral salt), essential oils, and various other natural ingredients. The key is understanding how different components interact to create a soothing and potentially therapeutic experience. Proper mixing and drying are essential for creating high-quality bath salts that are both beautiful and effective.

    Benefits of Homemade Bath Salts

    Homemade bath salts often surpass store-bought alternatives in terms of purity and potential health benefits. The ability to tailor the blend to individual preferences makes it an ideal option for targeted treatments or relaxation. By avoiding potentially harmful additives or fillers, homemade bath salts are often a healthier choice for individuals with sensitivities or specific needs.

    Making homemade bath salts is a relaxing way to unwind after a long day. While I’m usually focused on crafting these spa-like essentials, I was also intrigued by the news that Kendrick Lamar’s pgLang just unveiled a new phone! kendrick lamar pglang debuts new phone Talk about a stylish addition to any bathroom. Hopefully, the new phone won’t be too distracting from my next batch of bath salts; lavender and chamomile are definitely on the list!

    Basic Concepts and Principles

    The core principle of homemade bath salts is the careful selection and combination of ingredients. The primary component is typically a mineral salt like Epsom salt, which provides buoyancy and a gentle exfoliating effect. Essential oils add fragrance and therapeutic benefits, while other natural ingredients can enhance relaxation, skin conditioning, or provide specific therapeutic effects. The choice of ingredients significantly impacts the overall experience, so understanding their properties is crucial.

    Common Ingredients and Their Benefits

    • Relaxation: Lavender, chamomile, and rose essential oils are popular choices for promoting relaxation. Their calming fragrances can help reduce stress and promote a sense of tranquility. Adding dried lavender flowers or chamomile tea bags to the mix enhances the relaxing properties.
    • Exfoliation: Sugar, sea salt, or ground oatmeal are commonly used for gentle exfoliation. They help remove dead skin cells, leaving the skin feeling smoother and more rejuvenated. Ensure that the exfoliating agent is not too coarse, as this could potentially irritate the skin.
    • Skin Conditioning: Shea butter, coconut oil, or honey can help moisturize and soften the skin. These ingredients are excellent for individuals with dry or sensitive skin. The moisturizing properties of these ingredients contribute to a more luxurious bath experience.
    • Therapeutic Effects: Ingredients like Epsom salts have been traditionally used for muscle relaxation and pain relief. Ginger, cinnamon, and turmeric can be added for potential anti-inflammatory benefits. Always consult a healthcare professional before using bath salts for specific health concerns.

    Pros and Cons of Homemade Bath Salts

    Pros Cons
    Customization: Tailor the blend to your specific needs and preferences. Potential for irritation: Improper ingredient selection can lead to skin irritation.
    Cost-effectiveness: Often more affordable than store-bought options. Time commitment: Preparation and drying times can be involved.
    Purity: Control the ingredients to ensure purity and avoid potential allergens or fillers. Storage requirements: Proper storage is crucial to maintain quality and prevent contamination.
    Relaxation and sensory experience: The experience can be enhanced with customized scents and textures. Potential for contamination: Proper hygiene during preparation is essential.

    Ingredient Selection and Safety

    Choosing the right ingredients is crucial for creating safe and effective homemade bath salts. Not all ingredients are suitable for skin contact, and some can cause allergic reactions or irritation. Careful consideration of each component’s properties and potential hazards is essential for a pleasurable and safe bathing experience.Understanding the potential risks and benefits of various ingredients allows for informed choices, leading to a more enjoyable and safe bath time.

    This section will delve into the essential characteristics of quality ingredients, the potential hazards of certain components, and provide a categorized list of safe and effective options for different desired effects.

    Quality Ingredients for Homemade Bath Salts

    Selecting high-quality ingredients is paramount for creating effective and safe bath salts. Look for ingredients that are pure, free from impurities, and have a pleasant aroma. Avoid ingredients with a strong or harsh scent, as these may irritate the skin or cause discomfort. Always check the purity and quality of the ingredients to ensure safety and efficacy.

    Potential Hazards and Risks

    Certain ingredients, even natural ones, can pose risks if not handled correctly. For instance, some essential oils can cause skin irritation or allergic reactions in sensitive individuals. Always conduct a patch test before using a new ingredient, especially essential oils, to assess potential allergic reactions. Additionally, be mindful of the concentration of any ingredient to prevent potential hazards.

    Safe and Effective Ingredients for Different Effects

    The following lists provide safe and effective ingredients for various desired effects, including soothing, invigorating, and exfoliating. Remember to always conduct a patch test before applying any new ingredient directly to the skin.

    • Soothing Ingredients: Dead Sea salts, Epsom salts, baking soda, chamomile flowers, lavender essential oil (use diluted). These ingredients are known for their calming properties, promoting relaxation and reducing stress. Using a combination of these can enhance the soothing experience.
    • Invigorating Ingredients: Sea salt, Himalayan pink salt, peppermint essential oil (use diluted), citrus peels (e.g., orange, lemon). These ingredients offer a stimulating effect, promoting circulation and energy levels. Combining ingredients carefully can create a truly invigorating bath experience.
    • Exfoliating Ingredients: Sugar, coffee grounds, sea salt. These ingredients gently remove dead skin cells, promoting smoother, healthier-looking skin. Ensure the exfoliating ingredients are finely ground to avoid scratching the skin.

    Ingredient Comparison Table

    The following table provides a comparative overview of different natural ingredients, highlighting their properties and potential effects. This table serves as a guide for selecting the most suitable ingredients based on your desired outcome.

    Making homemade bath salts is a super relaxing way to unwind after a long day. While I’m busy whipping up a batch, I also have a huge favor to ask. You guys, please take a moment to vote for Lil B to perform at the Grammys! Vote for lil b to perform at the grammys It’s a total no-brainer, and then you can soak in those homemade salts and feel even more zen.

    My next batch will be lavender-infused, perfect for a calming soak.

    Ingredient Properties Potential Effects Safety Considerations
    Epsom Salts (Magnesium Sulfate) Hydrating, mineral-rich Soothes muscle aches, promotes relaxation May cause skin irritation in some individuals
    Dead Sea Salts Mineral-rich, high concentration of minerals Excellent for skin hydration, promotes healing May cause skin irritation in some individuals
    Sea Salt Salty, mineral-rich Exfoliates, promotes circulation May cause skin irritation in some individuals, use sparingly
    Baking Soda Alkaline, absorbent Soothes skin irritation, detoxifies May be harsh for sensitive skin, use sparingly
    Chamomile Floral, calming Promotes relaxation, reduces stress Generally safe, but patch test recommended

    Crafting the Perfect Bath Salt Blend

    Transforming your bath into a spa-like sanctuary is easier than you think! Crafting your own bath salts allows you to customize the experience to your specific needs and preferences. From soothing stress to invigorating tired muscles, the possibilities are endless. This section dives into creating unique blends, highlighting the importance of ingredient selection and precise measurements.Precisely formulated blends are crucial for achieving desired effects.

    Understanding how different ingredients interact and how to adjust recipes for individual sensitivities and preferences will allow you to create truly personalized bath experiences.

    Bath Salt Recipes by Desired Effect

    Customizing your bath salts to address specific needs is key. This section Artikels different recipes, each designed to evoke a particular feeling.

    • Stress Relief: This blend is ideal for unwinding after a long day. A combination of calming essential oils and minerals creates a relaxing atmosphere. Lavender, chamomile, and Epsom salts are excellent choices for stress reduction. Consider adding a touch of sea salt for added texture and a touch of the ocean’s calming energy.
    • Muscle Soreness Relief: For those battling aches and pains, a blend focusing on soothing minerals and potential anti-inflammatory properties is ideal. Epsom salts, known for their magnesium sulfate content, are an excellent choice for muscle recovery. Consider adding a touch of ginger or turmeric, both recognized for their potential anti-inflammatory benefits, but use caution when using them, as they can be irritating to some skin types.

      Always perform a patch test before applying the entire bath salt blend.

    • Exfoliation: For a deep cleanse and renewed skin, an exfoliating blend is a great option. Fine sea salt or sugar crystals provide gentle exfoliation. Combine them with nourishing oils like coconut or jojoba to create a luxurious and revitalizing experience. Avoid using overly coarse exfoliants that could cause skin irritation. Start with a small amount of the exfoliating agent to gauge the appropriate strength for your skin type.

    • Relaxing Aromatherapy: Enhance your relaxation with a blend featuring aromatic essential oils. Combine Epsom salts with a few drops of lavender, chamomile, or eucalyptus essential oils. Essential oils should be used cautiously and diluted in a carrier oil or water. Always dilute essential oils to prevent skin irritation.

    Mixing and Combining Ingredients

    Precise measurements are key to achieving the desired effect of your bath salts. Inconsistency in ingredient ratios can lead to unwanted results. Follow the detailed instructions for each recipe.

    Recipe Ingredients Instructions
    Stress Relief Epsom salts, sea salt, lavender essential oil, chamomile essential oil Combine Epsom and sea salt in a bowl. Add 5-10 drops of each essential oil. Mix thoroughly.
    Muscle Soreness Relief Epsom salts, ginger, turmeric, (optional: essential oils) Combine Epsom salts, ginger, and turmeric. If using essential oils, add 3-5 drops of diluted essential oils. Mix gently.

    Precise Measurements and Ratios

    Precise measurements are vital in bath salt recipes. Small variations in ratios can significantly impact the final product. Use measuring spoons or cups for accurate measurements. Always refer to the recipe for precise ratios.

    The ratios of ingredients are crucial for achieving the desired effects and preventing adverse reactions.

    Adjusting Recipes for Individual Preferences and Sensitivities

    Adjusting recipes based on individual preferences and sensitivities is essential for creating a truly personalized bath experience. If you have sensitive skin, start with a smaller amount of the blend and monitor your reaction. Adjust the essential oil amounts to your preferred level of scent intensity.

    Essential Oils and Aromatherapy

    Make Homemade Bath Salts

    Adding essential oils to your homemade bath salts elevates the experience beyond simply a relaxing soak. The aromatic compounds in essential oils interact with your senses, triggering emotional responses and potentially contributing to physical well-being. This deep dive into aromatherapy will help you choose the right oils to enhance your bath experience.Essential oils, concentrated volatile extracts from plants, offer a multitude of potential therapeutic benefits when used carefully.

    They interact with the body through inhalation and absorption through the skin, influencing mood, relaxation, and even potential physical responses. Understanding their properties and how to use them safely is crucial for maximizing the benefits of your homemade bath salts.

    Common Essential Oils Used in Bath Salts, Make Homemade Bath Salts

    Essential oils are carefully selected for their scents and therapeutic properties. Lavender, for instance, is known for its calming effects, while peppermint can invigorate. Understanding these properties allows you to tailor your bath experience to your specific needs.

    Therapeutic Properties of Essential Oils

    Essential oils can enhance the relaxation and well-being of a bath. Their aromas can soothe the mind, promoting a sense of calm and tranquility. Furthermore, certain oils possess properties that may offer additional benefits, such as pain relief or improved sleep quality. However, it’s important to remember that essential oils are not a substitute for medical treatment.

    Scent Profiles and Potential Therapeutic Benefits

    The following table provides a glimpse into the diverse world of essential oils commonly used in bath salts.

    Essential Oil Scent Profile Potential Therapeutic Benefits
    Lavender Floral, calming Relaxation, stress reduction, sleep promotion
    Peppermint Fresh, invigorating Mental alertness, respiratory support, muscle tension relief
    Eucalyptus Woody, refreshing Respiratory support, decongestion, muscle relief
    Tea Tree Earthy, antiseptic Skin conditions, antiseptic properties
    Chamomile Sweet, floral Relaxation, anxiety reduction, sleep promotion
    Rosemary Woody, invigorating Mental clarity, memory support, circulation support
    Vanilla Sweet, comforting Mood elevation, relaxation, stress reduction

    Essential Oils to Avoid

    Certain essential oils can cause skin irritation or other adverse reactions in some individuals. It’s crucial to exercise caution and consider potential sensitivities when selecting oils.

    • Citrus Oils (e.g., lemon, orange, grapefruit): These oils can be photosensitizing, meaning exposure to sunlight after using them can lead to skin reactions. Using these oils in bath salts is generally not recommended for those planning to be outside for an extended period after their bath.
    • Certain Oils for Pregnant Women and Children: Essential oils like tea tree and rosemary are not always safe for use by pregnant women and children. It’s best to err on the side of caution and consult with a healthcare professional before using essential oils in bath salts for these groups.
    • Fragrances with Potential Allergens: Be aware of the potential for allergies. While uncommon, some people may have allergic reactions to certain essential oils.

    Storage and Usage s

    Preserving the quality and effectiveness of your homemade bath salts is crucial for a truly enjoyable and beneficial soak. Proper storage methods and mindful usage practices ensure the best results and prevent potential issues. Understanding the optimal conditions for storage and the correct way to incorporate these salts into your bath routine is key to maximizing their therapeutic properties.Careful storage and usage techniques not only maintain the effectiveness of your bath salts but also enhance the overall experience.

    This section provides detailed guidance on preserving your homemade creations and maximizing their benefits.

    Best Practices for Storage

    Proper storage is vital to maintaining the quality and effectiveness of homemade bath salts. Exposure to air, light, and moisture can degrade their properties, affecting their aroma and potential therapeutic benefits.

    • Airtight Containers: Store bath salts in airtight containers to prevent moisture absorption and maintain their aroma. Glass jars with tight-fitting lids are ideal. Avoid containers that allow air to penetrate, as this can cause the salts to absorb moisture and lose their potency.
    • Cool, Dark Place: Store the containers in a cool, dark place, away from direct sunlight and heat sources. High temperatures can alter the composition of the salts and diminish their aroma. A cool, dark cupboard or pantry is an excellent choice.
    • Protection from Moisture: Avoid storing bath salts in damp areas, as moisture can cause clumping and affect their texture. A dry environment is essential for preserving the quality of your homemade bath salts.

    Effective and Safe Usage

    Following these guidelines will ensure a safe and enjoyable bath experience.

    • Appropriate Amount: A good starting point is 1/4 to 1/2 cup of bath salts per bath. This amount is usually sufficient to create a pleasant and beneficial experience. Adjust the amount based on your personal preference and the size of your bath tub.
    • Water Temperature: Dissolve the salts in warm, not hot, water. Hot water can cause the salts to lose their properties more quickly and may lead to irritation. Aim for a temperature that is comfortable for your skin.
    • Soaking Time: A 15-20 minute soak is typically recommended for maximum benefit. A longer soak may not offer any additional benefits, but it is important to listen to your body and avoid over-soaking, which can lead to skin dryness.
    • Checking for Reactions: After your bath, monitor your skin for any adverse reactions. If you experience any redness, itching, or discomfort, discontinue use and consult a dermatologist.

    Adverse Reaction Monitoring

    Monitoring for adverse reactions is crucial for a safe bath experience.

    Making homemade bath salts is a fantastic way to pamper yourself! But, have you ever considered the meaning behind the sneeze emoji? It might seem unrelated, but the subtle nuances of online communication can be fascinating, as explored in this insightful article: What Does the Sneeze Emoji Mean. Regardless of emoji interpretations, a good homemade bath salt recipe is always a winning choice for a relaxing soak.

    • Skin Sensitivity: If you have sensitive skin, it’s always a good idea to test a small amount of the bath salt mixture on a small, inconspicuous area of your skin before using it in a full bath. This allows you to check for any allergic reactions or irritations.
    • Immediate Response: Pay close attention to your skin’s reaction during and after the bath. Any unexpected or unusual symptoms, such as redness, itching, or burning, should prompt you to immediately stop the bath and rinse thoroughly.
    • Consult a Professional: If you experience persistent or severe skin reactions, it’s essential to consult a dermatologist or healthcare professional to determine the cause and receive appropriate medical advice.

    Creative Presentation and Packaging

    Turning your homemade bath salts from a simple batch into a delightful spa experience starts with how you present them. Attractive packaging and presentation elevate the sensory experience, making the final product even more appealing to your customers (or yourself!). A thoughtful approach to presentation can significantly enhance the perceived value and desirability of your bath salts.The way you package your homemade bath salts can make a big difference in their perceived value and desirability.

    It’s not just about the product itself; it’s about the entire experience of using them. Think of it as a small gift, a pampering ritual, and a moment of self-care.

    Packaging Materials and Options

    A variety of materials can showcase your homemade bath salts beautifully. Choosing the right material is crucial for both aesthetic appeal and practicality.

    • Glass Jars: Wide-mouth jars offer easy access and a classic, elegant look. Consider clear glass for showcasing the vibrant colors of your bath salts, or use colored glass for a more unique aesthetic. Choose jars with a tight-fitting lid to maintain the freshness of your bath salts.
    • Tin Containers: Metal tins provide a sturdy and durable option, ideal for long-term storage. They often have a sophisticated look, and you can find various sizes and designs to match your brand. Look for tins with airtight seals to prevent moisture absorption.
    • Wooden Boxes: Wooden boxes add a touch of natural warmth and sophistication. They are excellent for presenting a more luxurious feel. Choose boxes with a tight-fitting lid to keep the bath salts dry.
    • Fabric Bags: Reusable fabric bags are an eco-friendly and stylish choice. Choose natural fabrics like cotton or linen for a rustic feel, or opt for patterned fabrics for a more vibrant look. Consider including a small drawstring or tie to close the bag.

    Labeling Homemade Bath Salts

    Proper labeling is crucial for both safety and customer satisfaction. Clearly indicating ingredients and usage instructions is essential.

    • Ingredient List: List all ingredients used in your bath salts, including their specific names and quantities. Include any essential oils, and be precise with measurements. This helps customers understand the contents and any potential allergies or sensitivities.
    • Usage Instructions: Provide clear instructions on how to use the bath salts. Specify the recommended amount to use per bath and any potential precautions.
    • Safety Precautions: Highlight any potential hazards or contraindications associated with using the bath salts. If the bath salts contain essential oils, for example, mention that they may not be suitable for everyone.
    • Contact Information: Include your name, website, or social media handles for customer inquiries or feedback. This is important for customer support and building trust.

    Creative Labels and Tags

    A visually appealing label can make your homemade bath salts stand out.

    • Hand-Drawn Designs: Simple, hand-drawn designs can add a personal touch to your labels. Consider using a chalkboard-style design for a rustic look or incorporate illustrations of the ingredients for a playful approach.
    • Custom Typography: Choose fonts that reflect the desired aesthetic of your bath salts. A whimsical font might be suitable for children’s bath salts, while a more elegant font would work well for adult bath salts.
    • Color Combinations: Select color combinations that complement your bath salt blend. A calming color scheme might be appropriate for a lavender bath salt, while a vibrant color scheme might be better for a citrus blend.
    • Unique Packaging Elements: Consider adding small, decorative elements to your packaging, such as ribbons, twine, or decorative stickers. These small details can enhance the overall aesthetic and elevate the presentation.

    Troubleshooting Common Issues

    Making homemade bath salts can be a delightful experience, but like any craft, it comes with potential pitfalls. Knowing how to address common issues can prevent frustration and ensure your bath salts are not only beautiful but also safe and effective. Understanding these potential problems and their solutions will allow you to confidently create your own unique bath blends.

    Potential Problems and Solutions

    Several factors can affect the final product, from unexpected reactions to simple mistakes in the process. Understanding these potential problems and their solutions will help you troubleshoot any issues that may arise.

    • Clumping: Clumping is a common issue, especially if the ingredients aren’t properly combined or if the mixture isn’t dried thoroughly. Adding a pinch of cornstarch or arrowroot powder to the mixture before drying can help absorb excess moisture and prevent clumping. Ensuring complete drying in a well-ventilated area, such as a dehydrator or on a baking sheet, is crucial.

      Alternately, using a food processor to pulverize the salts can prevent clumping.

    • Discoloration: Certain ingredients can react with each other or with the environment, leading to discoloration. For instance, natural clays can sometimes change color when exposed to air or when combined with certain oils. Using high-quality, pure ingredients can minimize this risk. Thorough mixing and consistent drying procedures can also help prevent discoloration.
    • Reactions after use: While rare, some individuals may experience a reaction after using homemade bath salts. This could be due to an allergic reaction to a specific ingredient, such as a certain essential oil or a natural compound in the salts. If you experience any skin irritation, itching, or other adverse reactions, discontinue use immediately and consult a dermatologist.

      Note the ingredients used in the bath salts, so you can identify the potential culprit in future batches.

    • Uneven Texture: Uneven texture can result from inconsistent drying, or insufficient mixing of ingredients. Ensure you dry the bath salts thoroughly, and that all ingredients are fully incorporated before drying. If the ingredients aren’t fully dissolved, or have a different consistency than desired, use a food processor to achieve a consistent texture.

    Preventing Problems

    Implementing preventative measures is key to creating successful homemade bath salts. By following these steps, you can significantly reduce the likelihood of encountering common issues.

    • High-Quality Ingredients: Using high-quality, pure ingredients is paramount. This reduces the risk of unwanted reactions and discoloration. Choose natural salts and essential oils from reputable suppliers whenever possible.
    • Precise Measurements: Accurate measurements are crucial. Using a digital scale for measuring ingredients will help you achieve the desired results more consistently.
    • Proper Drying Techniques: Thorough drying is essential to prevent clumping. Use a dehydrator, a well-ventilated area, or a baking sheet to ensure complete drying. Avoid using high heat as this can damage the salts or alter their properties.
    • Testing Before Use: Before using your bath salts on a full bath, test a small area of skin to check for any adverse reactions. This is especially important if you’re using new or unfamiliar ingredients. Apply a small amount to a discreet area of skin and wait 24 hours before using them in a full bath.

    Illustrative Examples of Homemade Bath Salts

    Unleashing the spa experience at home is easier than you think! Homemade bath salts offer a personalized touch, allowing you to tailor the scent, color, and therapeutic benefits to your exact preferences. Beyond the pleasure of a relaxing soak, these homemade blends provide a unique and enjoyable way to incorporate self-care into your routine.Creating your own bath salts is a fun and rewarding process, offering a chance to explore aromatherapy and customize your wellness ritual.

    These illustrative examples will guide you through crafting various blends, highlighting the beauty and potential benefits of homemade bath salts.

    Different Types of Homemade Bath Salts

    Homemade bath salts are incredibly versatile, allowing for a multitude of blends tailored to specific needs and preferences. The following examples demonstrate the diverse possibilities available to you.

    Type of Bath Salt Ingredients Preparation Method Color and Appearance Therapeutic Effect Social Media/Website Adaptation
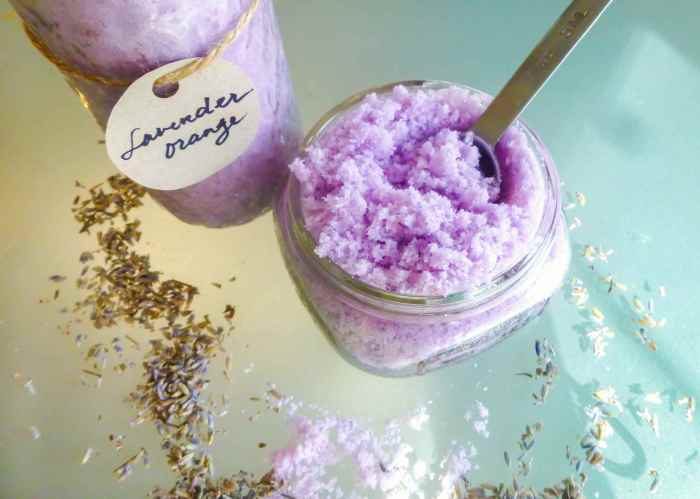
    Relaxing Lavender Bath Salts Dried lavender flowers, Epsom salts, sea salt, dried rose petals, lavender essential oil Combine all dry ingredients in a bowl. Add essential oil, mix well, and store in an airtight container. Muted purple, with hints of rose and lavender. Fine, light texture. Promotes relaxation and sleep. Lavender’s calming properties can reduce stress and anxiety. Use a high-quality photo of the purple salts in a glass jar. Caption could highlight the calming aroma and benefits for sleep. Include a “DIY” hashtag for wider reach.
    Energizing Citrus Burst Bath Salts Epsom salts, sea salt, orange zest, lemon zest, grapefruit essential oil Combine all dry ingredients in a bowl. Add essential oil and mix well. Store in an airtight container. Vibrant orange and yellow hues. Fine, light texture. Stimulates the senses and boosts energy levels. The citrus scent is uplifting and invigorating. Use a photo of the bath salts in a clear glass bowl or container, highlighting the vibrant colors. Include hashtags like #energizingbath #DIYbathsalts. Show how the user can layer different citrus zests for a more intense scent.
    Deep Cleansing Mint & Eucalyptus Bath Salts Epsom salts, sea salt, dried mint leaves, dried eucalyptus leaves, peppermint essential oil, tea tree essential oil Combine all dry ingredients in a bowl. Add essential oils and mix well. Store in an airtight container. Greenish-gray with a slightly coarse texture. Promotes detoxification and stimulates the body. The mint and eucalyptus are known for their invigorating and cleansing properties. Display the salts in a rustic wooden bowl or container. Showcase the vibrant green and gray colors. Encourage users to try adding a few drops of tea tree oil for a more potent cleansing effect.

    Adapting for Website and Social Media

    These examples can be effectively adapted for use on a website or social media platform. High-quality images of the bath salts in various containers (e.g., glass jars, wooden bowls) are crucial for visual appeal. Detailed descriptions of the ingredients, preparation methods, colors, and expected benefits are essential. Use relevant hashtags (#DIYbathsalts, #homemadebeauty, #aromatherapy) to reach a wider audience.

    Showcasing step-by-step tutorials with clear instructions and visual aids will enhance user engagement. Including customer testimonials or before-and-after photos can also build trust and credibility.

    Final Conclusion: Make Homemade Bath Salts

    From understanding the benefits of natural ingredients to creating soothing blends with essential oils, this comprehensive guide empowers you to craft your own personalized bath salts. We’ve covered everything from ingredient selection and safety to creative packaging and troubleshooting common issues. Now you have the knowledge to create a spa-like experience at home, tailored to your specific needs and preferences.

    Enjoy your homemade bath salts and the luxurious relaxation they offer!