Tag: DIY

  • Caulk the Kitchen Sink A Complete Guide

    Caulk the Kitchen Sink A Complete Guide

    Caulk the Kitchen Sink: A comprehensive guide to properly sealing your kitchen sink, ensuring a watertight and aesthetically pleasing finish. This post covers everything from choosing the right caulk type to preparing the surface, applying the caulk, and achieving a professional-looking result. We’ll also explore different sink styles and the specific caulking considerations for each, along with essential safety precautions.

    Proper caulking is crucial for kitchen sink maintenance. It prevents water damage, mold growth, and keeps your sink looking its best. This guide will walk you through the entire process, from initial preparation to final touches, equipping you with the knowledge and confidence to tackle this DIY project with ease.

    Introduction to Caulking a Kitchen Sink: Caulk The Kitchen Sink

    Caulking a kitchen sink is a crucial part of maintaining its water-tightness and aesthetic appeal. Properly applied caulk creates a barrier against water damage, preventing leaks and mold growth, which are common issues in kitchens. It also ensures a clean, seamless look around the sink’s perimeter, maintaining the overall visual appeal of the countertop. A well-maintained caulk seal protects the surrounding materials from moisture, extending the lifespan of the sink and countertop.Caulking involves applying a sealant material to the joint between the sink and countertop.

    This process not only addresses potential leaks but also improves the overall appearance of the kitchen. The right type of caulk is essential for a successful job, ensuring longevity and effectiveness. Different caulk types are available, each with its unique properties and compatibility with various materials.

    Types of Caulking for Kitchen Sinks

    Choosing the right caulk is critical for a lasting and effective seal. Various caulk types offer different properties, and selecting the correct one for your sink’s material is paramount. Understanding the characteristics of each type is essential for a successful installation.

    • Silicone Caulk: Silicone caulk is a popular choice for kitchen sinks due to its excellent water resistance, flexibility, and durability. It can withstand moisture and temperature fluctuations, making it ideal for wet areas. Silicone caulk is also mold and mildew resistant, which is a significant advantage in a kitchen environment. It’s compatible with a wide range of materials, including ceramic, porcelain, and most types of countertop materials.

    • Acrylic Caulk: Acrylic caulk is another common choice, known for its ease of application and relatively low cost. It’s often preferred for its simple application process and quick drying time. However, it may not be as durable or water-resistant as silicone caulk. Acrylic caulk is suitable for some types of countertops and is generally more cost-effective.
    • Polyurethane Caulk: Polyurethane caulk is a highly durable option, providing a strong and resilient seal. It is frequently used in demanding applications and offers exceptional weather resistance. However, it can be more challenging to work with compared to other types, and may not be the ideal choice for every kitchen sink installation.

    Materials of Kitchen Sinks and Compatible Caulks

    The material of your kitchen sink significantly influences the appropriate caulk choice. Compatibility is key for achieving a long-lasting and effective seal.

    Sink Material Compatible Caulks Considerations
    Ceramic/Porcelain Silicone, Acrylic Silicone is generally recommended for its water resistance and durability.
    Stainless Steel Silicone, Polyurethane Silicone is a good choice due to its flexibility and water resistance; Polyurethane offers exceptional strength.
    Granite Countertops Silicone, Polyurethane Silicone is recommended for its water resistance and flexibility. Polyurethane is a strong choice for high-impact areas.
    Solid Surface Countertops Silicone, Acrylic Silicone offers good adhesion and water resistance; Acrylic is a good choice due to its ease of application.

    Selecting the correct caulk type for your specific sink material is critical for a lasting and reliable seal. This ensures the caulk will effectively withstand the demands of a kitchen environment.

    Preparation for Caulking

    Caulk the Kitchen Sink

    Getting your kitchen sink ready for caulking is crucial for a successful and long-lasting repair. Proper preparation ensures a tight, waterproof seal and prevents future leaks or mold growth. This involves meticulous cleaning, careful surface preparation, and efficient removal of old caulk. Thoroughness in these initial steps will significantly impact the final result.

    Cleaning the Sink

    A clean sink is essential for a good caulk job. Residue, grease, and food particles can prevent the caulk from adhering properly. Use a solution of warm water and a mild detergent or a dedicated sink cleaner to thoroughly scrub the area. Pay close attention to crevices and corners, ensuring all debris is removed. Allow the sink to dry completely before proceeding to the next step.

    This ensures a clean and dry surface for optimal caulk adhesion.

    Surface Preparation

    Preparing the surface for caulking involves more than just cleaning. Any rough or uneven surfaces will prevent a smooth and lasting caulk seal. Using fine-grit sandpaper, carefully smooth out any imperfections. This step is crucial, as a perfectly smooth surface ensures even caulk application and a watertight seal. If necessary, use a putty knife to fill any significant gaps or holes.

    Removing Old Caulk

    Removing old caulk is an important part of the preparation process. Old caulk can become brittle and ineffective, leading to future leaks. A variety of methods can be used, each with its own advantages and disadvantages.

    Methods for Removing Old Caulk

    • Utility Knife or Caulk Remover Tool: This method is efficient for removing relatively soft caulk. The utility knife can be used to score the caulk, and then the caulk remover tool can be used to pry it off. This method can be effective, but care must be taken to avoid damaging the surrounding surface. A sharp utility knife or a specialized caulk removal tool is critical for this step.

    • Caulk Remover: Caulk remover is a chemical solution that softens the caulk, allowing it to be easily scraped away. It is often effective on various types of caulk, but it may also damage certain materials or leave a residue if not properly cleaned. Apply the remover according to package instructions and use a putty knife to scrape off the softened caulk.

      Protecting surrounding surfaces with painter’s tape is important when using caulk remover.

    • Heat Gun: Using a heat gun to soften the caulk before scraping it off is another option. This method works well for tougher caulk, but extreme care is required to avoid scorching or damaging the sink. Apply the heat gun carefully and only for a short time to prevent any damage to the sink.

    Measuring and Cutting Caulk

    Accurate measurement is vital for a proper caulk job. Use a measuring tape to determine the length of caulk required. Cut the caulk tube using a sharp utility knife or a caulk cutter. For precise cuts, use a caulk cutter or a sharp knife.

    Tools Needed for the Job

    The right tools can significantly improve the efficiency and quality of your caulk job. These are essential for a successful caulk application.

    • Measuring Tape: Essential for accurately measuring the length of caulk needed.
    • Utility Knife or Caulk Cutter: Needed for cutting the caulk tube to the required length.
    • Putty Knife: Used for smoothing the caulk and filling gaps.
    • Caulk Gun: This tool is essential for applying the caulk evenly and smoothly.
    • Fine-Grit Sandpaper: For smoothing out any imperfections in the sink’s surface.
    • Caulk Remover (optional): Used for removing old caulk, if necessary.
    • Cleaning Supplies: A mild detergent, warm water, and cleaning cloths are crucial for thoroughly cleaning the sink and removing any residue.
    • Painter’s Tape (optional): Protect the surrounding areas from caulk.

    Applying the Caulk

    Getting the caulk job right is crucial for a watertight and aesthetically pleasing result. Proper application technique, coupled with the right tools and pressure, will significantly impact the final outcome. A well-caulked kitchen sink not only looks professional but also prevents water damage and mold growth.Applying caulk effectively involves more than just squeezing it out of the tube.

    Precision in beading, smoothing, and using the correct amount of pressure is key to achieving a flawless finish. Understanding the different caulking tools and their respective strengths will guide you to a superior result.

    So, I’m tackling the kitchen sink caulk project. It’s a surprisingly involved process, but I’m determined to get it done right. Thinking about the meticulous precision needed to match the existing grout, I can’t help but draw a parallel to the intense artistry in Jenny Hval’s work, like her portrayal of a female vampire, jenny hval female vampire.

    Hopefully, my caulk job will be as meticulously done as her music. Now, back to the silicone and the caulking gun!

    Caulk Beading Techniques

    A consistent bead is essential for a professional look and ensures proper water sealing. Varying bead sizes will depend on the specific application and gap size. A smooth, even bead prevents gaps and minimizes the risk of leaks. A proper bead, applied with the right pressure and tools, is crucial for a successful caulking job.

    Pressure Application

    Applying the correct pressure is critical for a smooth, even application. Too much pressure can cause the caulk to be squeezed out of the beading, creating uneven surfaces and potential for cracking. Too little pressure, on the other hand, might result in a thin bead that won’t adequately seal the gap. Finding the right balance is important for creating a resilient and visually appealing seal.

    A good example would be applying pressure as if you were spreading butter on bread – firm, but not forceful.

    Caulking Tools and Effectiveness

    Several tools are available for caulking, each with its own advantages. A caulking gun is a standard tool that provides controlled application. Its use ensures even pressure and consistent beading. Caulk guns with different pressure settings allow for adjusting the force, making it ideal for a variety of situations. Caulk scrapers and putty knives are valuable for smoothing and shaping the caulk bead.

    They provide precision in smoothing and refining the finished caulk. Using the correct tool for the job is essential for achieving the desired result.

    Achieving a Clean Finish

    A clean and professional finish is attainable through careful attention to detail. Cleaning the area to be caulked thoroughly before application is paramount. Remove any dust, dirt, or debris that could interfere with the caulk’s adhesion. Wipe the surface with a damp cloth or sponge to ensure it’s clean and dry. After applying the caulk, immediately wipe away any excess caulk with a damp cloth or sponge while the caulk is still wet.

    This ensures a neat and clean final result. Using a damp sponge and a smooth, flat tool like a putty knife to spread the caulk is helpful in achieving a clean and professional finish. Using a damp sponge to smooth and remove excess caulk, working with the grain of the bead, will lead to a clean finish.

    Finishing Touches and Maintenance

    Caulk the Kitchen Sink

    The final steps in caulking a kitchen sink are crucial for a professional-looking and long-lasting result. Careful cleanup, understanding drying times, and proactive maintenance will prevent future issues and ensure your caulking job stands the test of time. This section covers these important aspects, providing you with the knowledge to complete the project with confidence.

    Okay, so I finally tackled caulking the kitchen sink. It was a bit of a pain, but hey, at least it’s watertight now. Speaking of things that are watertight, did you hear about how the Binding of Isaac developer is working on a new, totally secret project? the binding of isaac developer confirms hes working on a secret project Pretty cool, right?

    Now, back to the sink – I’m going to have to replace that sponge soon. Maybe get a nice, new one for the caulked sink!

    Cleaning Up Excess Caulk

    Proper cleanup is essential to avoid unsightly blemishes and ensure a smooth, finished look. Immediately after applying caulk, use a damp sponge or a damp cloth to wipe away any excess caulk that has squeezed out from the joint. Use a utility knife or a putty knife to carefully remove any stubborn or large amounts of caulk. This proactive approach prevents caulk from hardening in undesirable places, saving you time and effort in later cleanup.

    Caulk Drying Times and Curing

    Caulk requires a specific amount of time to cure and fully harden. Different types of caulk have varying drying times. Allowing the caulk to cure completely is critical for its long-term durability and effectiveness in sealing the joint. Rushing this process can lead to cracking, chipping, or the caulk coming loose over time.

    Importance of Maintenance for Prevention

    Regular maintenance is key to preventing future caulking issues. Inspect the caulked area periodically for any signs of damage or deterioration. If you notice any cracks, gaps, or peeling, address them promptly. Early intervention can prevent small issues from escalating into larger problems that require extensive repairs. Regular wiping down of the caulked area can also prevent dirt and grime from accumulating and potentially causing damage over time.

    Caulk Type Comparison

    The following table compares common caulk types based on drying time, durability, and ease of application:

    Caulk Type Drying Time Durability Ease of Application
    Silicone 24-72 hours High Medium
    Acrylic 24 hours Medium Easy
    Polyurethane 24-48 hours High Medium

    Understanding these differences allows you to choose the appropriate caulk type for your specific needs and project requirements. For example, silicone caulk is often preferred for wet areas like bathrooms due to its superior water resistance. Acrylic caulk, on the other hand, is generally easier to work with and suitable for many interior applications. Always refer to the manufacturer’s instructions for specific drying times and application guidelines.

    Troubleshooting and Common Mistakes

    Caulking a kitchen sink is a relatively straightforward task, but even experienced DIYers can encounter problems. Understanding common mistakes and how to troubleshoot them is crucial for a successful and lasting result. Proper caulking ensures a watertight seal, preventing leaks and maintaining the aesthetic appeal of your kitchen.Caulking issues, if not addressed promptly, can lead to water damage, mold growth, and the need for costly repairs.

    Careful attention to detail throughout the process, from preparation to finishing, is key to avoiding these problems. Identifying potential issues early and implementing effective solutions will save you time and money in the long run.

    Identifying Common Caulking Mistakes

    Common mistakes during caulking often stem from rushing the process or neglecting crucial steps. Inadequate preparation, improper application techniques, and neglecting post-caulking maintenance can all contribute to problems. Addressing these issues early minimizes the need for costly repairs.

    Troubleshooting Caulking Issues

    This section details how to identify and fix common caulking problems. By understanding the root cause of the issue, you can implement the right solution. Prompt action is key to preventing further damage and maintaining the integrity of your kitchen.

    Problem Cause Solution
    Gaps in the caulk Improper application or insufficient caulk, using too little caulk, or not applying even pressure. Incorrect beading technique or improper priming of the surface also contribute. Re-apply caulk, ensuring proper beading and consistent pressure throughout the application. Use a caulking gun to maintain a consistent bead and apply enough caulk to fill the gap completely. Ensure the surface is clean, dry, and primed before application.
    Uneven surface Improper smoothing, using too much pressure, or not using the correct smoothing tool. Uneven surface preparation also contributes to uneven caulk. Use a damp cloth or a specifically designed caulk smoothing tool to gently create an even surface. Work in small sections and avoid applying too much pressure. Apply smooth, consistent pressure while smoothing to prevent uneven surfaces and ridges.
    Cracks in the caulk Drying too quickly, insufficient bonding between the caulk and the surface, or improper surface preparation. Using the wrong type of caulk for the job can also contribute. Remove the cracked caulk section using a utility knife or a scraper. Clean the area thoroughly and apply a fresh bead of caulk, ensuring proper surface preparation. Ensure the caulk is appropriate for the specific material and environment (e.g., exterior or interior).
    Mold or mildew growth Moisture trapped behind the caulk or poor surface preparation. The caulk may not be watertight enough to prevent moisture from seeping through. Remove the affected caulk and thoroughly clean the area. Ensure the surface is completely dry and free of any moisture. Apply a mildew-resistant sealant to the surface to prevent future growth.

    Preventing Future Caulking Problems, Caulk the Kitchen Sink

    Proper preparation is key to avoiding future problems. A clean, dry, and primed surface is crucial for a strong, long-lasting seal. Using the right type of caulk for the specific application is essential for ensuring durability and longevity. Regular maintenance and vigilance can prevent future issues.

    Different Kitchen Sink Styles and Caulking

    Caulking a kitchen sink is crucial for water-tightness and a polished aesthetic. However, the technique varies depending on the sink style. Understanding these differences is vital for a successful and lasting job. Proper caulking ensures that water doesn’t seep into the surrounding areas and creates a seamless transition between the sink and the countertop.Different sink types require specific caulking techniques to achieve a watertight seal and a visually appealing finish.

    This section will explore the various sink styles and the corresponding caulking considerations. It will also provide examples and a table outlining the differences in caulking for each type.

    Undermount Sink Caulking

    Undermount sinks are installed below the countertop, creating a flush, seamless appearance. The caulking process for an undermount sink focuses on sealing the perimeter where the sink meets the countertop. A bead of caulk is applied along the entire perimeter, ensuring a complete seal. This ensures water doesn’t seep into the gap between the sink and countertop.

    The caulk should be a color that blends seamlessly with the countertop for a unified look. A professional-looking job involves applying a thin, even bead of caulk, smoothing it out with a wet finger, and removing any excess. The caulk needs to be cured properly before the countertop is placed back in place.

    Okay, so caulking the kitchen sink. It’s a pretty mundane task, but you know, sometimes those little jobs can be surprisingly satisfying. Like, the meticulous precision needed reminds me of the intricate layers in Tyler, the Creator’s Igor album. tyler the creator igor really delves into that feeling of meticulous crafting. Getting that perfect bead of caulk, it’s almost like creating a sonic masterpiece, just on a much smaller scale.

    Back to the sink, gotta get that sealant perfect!

    Drop-in Sink Caulking

    Drop-in sinks sit on the countertop, creating a more visible joint line. The caulking for a drop-in sink is slightly different. It involves caulking around the edges and the back of the sink. The caulk creates a seal along the sink’s perimeter, ensuring water doesn’t seep into the space between the sink and countertop. A visible bead of caulk is often acceptable, and a sealant that matches the countertop or a similar color is preferred.

    Proper curing of the caulk before using the sink is critical.

    Sink Feature Caulking Considerations

    Caulking around sink features like the drain and faucet is equally important for a complete watertight seal. For the drain, a bead of caulk should be applied around the drain opening. The caulk should be a smooth, even layer, ensuring a complete seal. Caulking around the faucet is done similarly, ensuring a tight seal between the faucet and the sink.

    When applying caulk around these features, make sure to press firmly to ensure adhesion.

    Caulking Examples for Different Sink Styles

    An undermount sink, seamlessly integrated beneath the countertop, requires caulking only along the perimeter. A drop-in sink, resting on the countertop, needs caulk around the edges and back, ensuring a watertight seal around the sink.

    Table of Caulking Differences

    Sink Style Caulking Considerations Visual Example
    Undermount Caulk the perimeter of the sink, ensuring a tight seal along the entire edge where the sink meets the countertop. Imagine a sink recessed into a countertop with a thin, even bead of caulk precisely along the entire perimeter. The caulk should be the same color as the countertop for a seamless look.
    Drop-in Caulk around the edges and the back of the sink, ensuring a complete seal along the sink’s perimeter and back edge. Visualize a sink sitting on the countertop, with a noticeable bead of caulk around the edges and the back, providing a watertight seal.

    Safety Precautions

    Caulking a kitchen sink, while often a DIY project, requires careful attention to safety. Improper handling of caulk and other materials can lead to significant health risks and costly mistakes. This section details essential safety precautions to ensure a safe and successful project.Proper safety measures are crucial when working with construction materials, especially caulk. Ignoring these precautions can result in adverse health effects and damage to your project.

    Chemical Exposure Hazards

    Caulk, primers, and other materials used in kitchen sink repair often contain chemicals that can irritate the skin, eyes, and respiratory system. Long-term exposure can lead to more serious health problems.

    • Always wear appropriate personal protective equipment (PPE), including gloves, eye protection, and a respirator, when handling caulk and other materials. This will help prevent direct contact with harmful substances.
    • Work in a well-ventilated area. Adequate ventilation minimizes inhalation of harmful fumes and vapors, thus reducing the risk of respiratory issues.
    • Follow the manufacturer’s instructions carefully regarding material handling, ventilation, and safe disposal of leftover materials. Manufacturers provide crucial safety guidelines that should always be followed.
    • If you experience any adverse reaction, such as skin irritation or breathing difficulties, immediately discontinue work and seek medical attention. Your health is paramount; don’t hesitate to take necessary action.

    Physical Hazards

    Besides chemical hazards, there are potential physical risks involved in caulking. These risks can range from minor cuts to more serious injuries.

    • Use caution when handling tools like utility knives or putty knives. Sharp objects require careful handling to prevent cuts and injuries.
    • Ensure a stable and secure work area. A slippery or unstable surface can lead to falls and injuries. Choose a level and sturdy workspace.
    • When working with caulk guns, maintain a firm grip and control to avoid accidental discharges. Incorrect handling can lead to the caulk being applied in unexpected places.
    • Take frequent breaks to avoid fatigue, which can increase the risk of accidents. Taking breaks helps maintain focus and prevents errors.

    Safety Equipment

    Using the correct safety equipment is critical for minimizing potential risks during caulking.

    • Gloves: Protective gloves, such as nitrile or latex gloves, should be worn to prevent skin irritation and chemical exposure from the caulk.
    • Eye Protection: Safety glasses or goggles are essential to protect your eyes from splashes or fumes.
    • Respirator: A respirator, if necessary, should be used in poorly ventilated areas to prevent inhalation of harmful vapors and dust.
    • Work Clothing: Wear old clothes or a protective apron to prevent staining or soiling. This prevents the caulk from permanently marking your clothes.

    Safety Measures

    Following a comprehensive set of safety measures ensures a safe and efficient caulking process.

    1. Thoroughly read and understand the manufacturer’s instructions for all materials and tools. This step is critical to avoid potential hazards.
    2. Ensure proper ventilation in the work area. Adequate airflow helps to reduce exposure to harmful fumes and vapors.
    3. Wear all necessary personal protective equipment (PPE) at all times during the project. PPE provides an essential barrier against potential hazards.
    4. Store all materials safely and securely, away from children and pets. Proper storage prevents accidents and unintended exposures.
    5. Clean up any spills or messes immediately. This helps to prevent slips, falls, and further contamination.

    Caulk Types and Their Applications

    Choosing the right caulk for your kitchen sink is crucial for a watertight seal and a professional finish. Different caulk types have varying properties, making some better suited for specific applications than others. Understanding these differences will help you avoid costly mistakes and ensure your caulking job lasts for years to come.Selecting the correct caulk type depends on factors like the sink material, the location of the caulking, and the desired level of flexibility and water resistance.

    Different caulks offer varying degrees of these properties, which directly impact the longevity and effectiveness of the seal. Consider the potential for movement or expansion of the sink material and the frequency of water exposure when making your choice.

    Silicone Caulk

    Silicone caulk is a popular choice for kitchen sinks due to its excellent water resistance and flexibility. It can withstand repeated exposure to moisture and temperature fluctuations, making it ideal for areas prone to splashing or high humidity. Its flexibility allows it to conform to slight imperfections in the surface, further enhancing its suitability for sealing around sinks.

    Acrylic Caulk

    Acrylic caulk is a more affordable option, but it doesn’t offer the same level of water resistance or flexibility as silicone. It’s generally suitable for applications where water exposure is minimal and the risk of movement is low. While it may be easier to apply and remove, its durability is lower, especially in high-moisture environments.

    Butyl Caulk

    Butyl caulk is a good choice for sealing around sinks where there’s a need for an extremely strong and durable seal, often in areas with significant movement or expansion. It’s known for its strong adhesion to a wide variety of surfaces, but its flexibility is limited, and it might not be ideal for areas where movement is expected. This is important to consider when installing the caulk around a sink, especially if the material will experience changes in temperature or expansion/contraction.

    Comparison Table of Caulk Types

    Caulk Type Pros Cons
    Silicone Water-resistant, flexible, long-lasting, good adhesion to various surfaces Can be difficult to remove, may require more tools, potentially more expensive
    Acrylic Affordable, easy to apply, easy to remove Lower water resistance, less flexible, shorter lifespan in high-moisture areas
    Butyl Excellent adhesion, strong seal, suitable for areas with significant movement Less flexible, may not be ideal for areas with potential for movement or expansion, can be difficult to apply

    Selecting the Right Caulk for Your Kitchen Sink

    To choose the best caulk type for your kitchen sink, consider these factors:

    • Material of the sink: Different materials may react differently to various caulks. For instance, stainless steel sinks might work well with silicone or acrylic, while composite materials might need a specific caulk.
    • Location of the caulking: Areas prone to constant water exposure, such as the base of the sink, require a more water-resistant caulk like silicone. Less-exposed areas might be suitable for acrylic.
    • Desired flexibility: If there’s potential for movement or expansion of the sink, a flexible caulk like silicone is recommended. Rigid caulks like butyl may be better suited for applications with little to no movement.

    For example, a kitchen sink with a stainless steel countertop and a noticeable gap around the sink would benefit from a flexible, water-resistant silicone caulk. This ensures a durable seal that withstands water exposure and potential movement. Conversely, a sink with a stable composite countertop in a low-humidity area could be sealed with acrylic caulk, due to its ease of application and lower cost.

    Final Thoughts

    In conclusion, caulking your kitchen sink is a straightforward process that can significantly enhance its longevity and appearance. By following the steps Artikeld in this guide, you can achieve a watertight seal and a professional-looking finish. Remember to choose the right caulk type for your sink material, prepare the surface thoroughly, apply the caulk with precision, and allow ample drying time.

    Addressing potential issues and understanding different sink styles further ensures a successful project.

    This guide is a complete resource to make your kitchen sink caulking project a success. With the right knowledge and preparation, you can transform your kitchen sink into a watertight and visually appealing feature.

  • Change the Faucet Hose in a Kitchen Sink A Guide

    Change the Faucet Hose in a Kitchen Sink A Guide

    Change the Faucet Hose in a Kitchen Sink: This guide walks you through the essential steps for replacing your kitchen sink faucet hose, from initial preparation to final cleanup. A worn or damaged hose can lead to leaks, water waste, and potential damage to your countertop. Knowing how to safely and efficiently replace it is a valuable DIY skill.

    From identifying the right hose for your faucet type to isolating the water supply, we’ll cover every step in detail. We’ll also Artikel the necessary tools and potential hazards, empowering you to tackle this task with confidence and minimal risk.

    Introduction to Faucet Hose Replacement

    A worn or damaged kitchen faucet hose can lead to leaks, water damage, and even potential safety hazards. Replacing a leaky or deteriorated hose is a relatively straightforward task that can save you money and prevent more serious problems. This guide will walk you through the process, from shutting off the water supply to selecting the correct replacement hose.

    Properly replacing your faucet hose is crucial for maintaining a safe and functional kitchen environment.Replacing a kitchen faucet hose is a simple DIY project that can save you money and prevent costly repairs. A faulty hose can cause leaks, wasting water and potentially damaging your kitchen’s cabinetry or flooring. Furthermore, a compromised hose might not be properly sealed, increasing the risk of water-related hazards.

    Understanding the steps and safety precautions involved will ensure a smooth and successful replacement.

    Safety Precautions

    Ensuring safety is paramount when working with water lines. Properly shutting off the water supply before starting any plumbing work is essential to prevent water damage and personal injury. Failing to shut off the water can lead to significant flooding and costly repairs. This section details the critical steps for safely turning off the water supply.

    Turning Off the Water Supply

    Before starting any plumbing work, it’s critical to turn off the water supply to the affected area. This prevents accidental water damage. This involves locating and shutting off the shut-off valves for the hot and cold water lines. These valves are typically located near the water supply lines entering the wall or under the sink. The precise location may vary depending on the plumbing configuration.

    Carefully identify and turn these valves clockwise to fully shut off the water supply.

    Necessary Tools

    Proper tools are essential for a safe and efficient replacement. The following tools are necessary for the job:

    Tool Description
    Adjustable Wrench Used to loosen and tighten connections, ensuring secure fittings.
    Pliers Useful for gripping and holding components, preventing slippage during the replacement process.
    Rags For cleaning up spills and maintaining a clean workspace.
    Bucket For collecting drips and preventing water damage to the surrounding area.

    Faucet Hose Types and Compatibility

    Different types of kitchen faucet hoses exist, each with its own specifications. It’s essential to select a replacement hose compatible with your current faucet. Incompatibility can lead to improper connections and leaks. Refer to the manufacturer’s instructions or consult a plumber if unsure about the correct hose type. Understanding the different types will ensure a proper fit and prevent issues during installation.

    Changing a kitchen faucet hose is surprisingly straightforward, though a little messy. It’s a surprisingly common DIY task, and often easier than you might think. Speaking of unexpected connections, did you know that Radiohead collaborator Nigel Goodrich has a cameo in Star Wars: The Force Awakens? This Radiohead collaborator Nigel Goodrich appearance in Star Wars is a fun little fact, but getting back to the faucet hose, just remember to turn off the water supply first, and you’ll be good to go!

    Identifying the Problem Faucet Hose

    Change the Faucet Hose in a Kitchen Sink

    Spotting a worn-out or damaged faucet hose is crucial for a successful replacement. A failing hose can lead to leaks, water damage, and even costly repairs if ignored. Knowing the signs of a compromised hose will help you avoid these issues and make the replacement process straightforward.Identifying the problem starts with visual inspection. A worn-out hose often exhibits signs of deterioration, making it apparent that replacement is necessary.

    This involves looking for telltale signs of damage and considering the specific type of faucet in your kitchen.

    Changing the faucet hose in a kitchen sink can be surprisingly straightforward. You’ll need some basic tools, and maybe a little elbow grease. It’s a surprisingly satisfying DIY project, kind of like watching a fascinating online performance like trash talk performs explode dig. Once you get the old hose off, you’ll be ready to install the new one and have a perfectly functioning faucet again.

    Visual Characteristics of a Worn-Out Hose

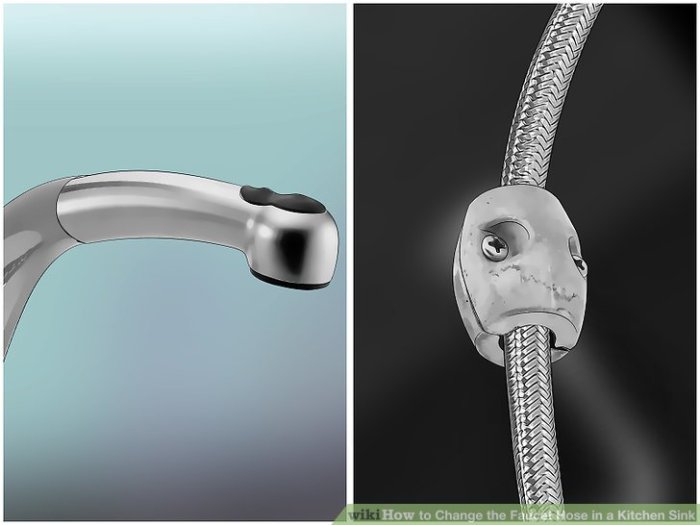
    A worn-out faucet hose might display various visual cues. Look for brittle or cracked sections, particularly in the areas that are most stressed. The hose might show signs of splitting, bulging, or discoloration. These visual cues indicate weakening of the material, and this could lead to leaks. Pay close attention to the areas where the hose connects to the faucet and the water supply line.

    These connections are critical, and any signs of damage there should prompt a replacement. Also, check for unusual kinks or bends in the hose, which can restrict water flow or cause leaks. If the hose is significantly older, this is an additional reason to consider replacing it.

    Identifying the Specific Hose Type, Change the Faucet Hose in a Kitchen Sink

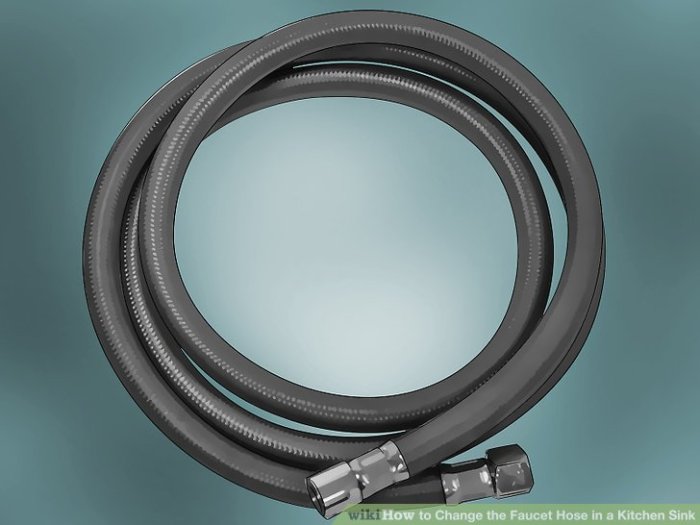
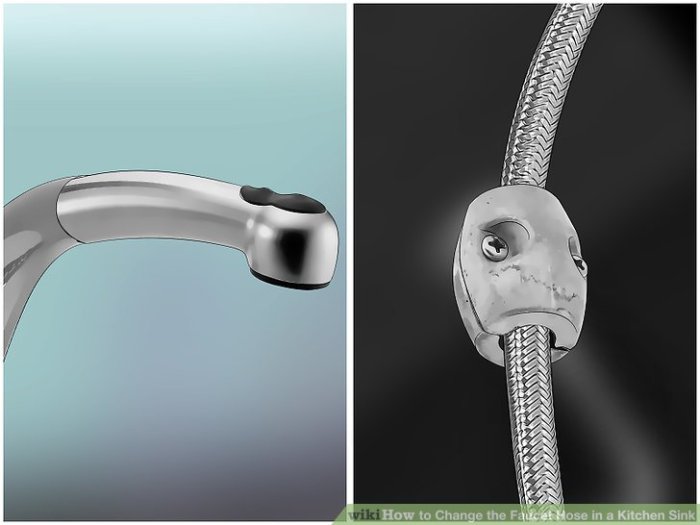
    Matching the new hose to the existing connections is vital for a successful replacement. A precise fit ensures proper water flow and prevents leaks. The faucet’s spout style will dictate the appropriate hose type. A standard spout requires a standard hose, a pull-down spout needs a flexible hose, and a high-arc spout necessitates a long hose to accommodate its design.

    Consider the spout’s reach and adjustability to ensure a suitable hose length and flexibility. Incorrect hose type could result in improper installation or incompatibility with the existing connections.

    Importance of Matching the New Hose to Existing Connections

    Matching the new hose to the existing connections is critical for successful replacement. This includes the fitting types on both the faucet and the water supply line. Mismatched connections can lead to leaks, improper water flow, and potentially damage to your plumbing system. Use a similar hose type to the old one, especially regarding the material and diameter.

    Incorrectly matching the new hose to the existing connections can result in improper installation or incompatibility, leading to issues with water flow and leaks.

    Common Problems with Faucet Hoses

    Several issues can affect faucet hoses. Leaking is the most common problem. It may originate from cracks, splits, or wear in the hose material. The connections can also cause leaks. These include loose fittings, damaged connections, or worn-out washers.

    Restricted water flow is another possibility. If the hose has kinks or bends, or if it’s significantly aged, water flow can be compromised.

    Table of Common Kitchen Sink Faucet and Hose Types

    Faucet Type Hose Type
    Standard Spout Standard Hose
    Pull-Down Spout Flexible Hose
    High-Arc Spout Long Hose

    Preparing the Workspace: Change The Faucet Hose In A Kitchen Sink

    A clean and organized workspace is crucial for a successful faucet hose replacement. This prevents accidental spills, injuries, and makes the entire process much smoother and safer. Proper preparation ensures that you can work efficiently and effectively, minimizing the risk of mistakes.A well-prepared workspace is more than just tidiness; it’s a safety precaution. Careful planning and execution are vital for completing the project smoothly.

    By following these steps, you can minimize potential hazards and ensure a successful and safe project.

    Creating a Safe Workspace

    Preparing the area around the sink is the first step. This involves clearing the immediate area of any unnecessary items. This will create more space for working comfortably and safely. Gather all necessary tools and supplies in a readily accessible location. This will reduce wasted time and prevent searching for misplaced tools during the procedure.

    Covering the countertop with a drop cloth or newspaper will protect the surface from water and potential damage from tools. This is essential for preventing scratches or stains on your countertop.

    Isolating the Water Supply

    Shutting off the water supply is a critical safety step. This prevents any water from flowing while you work on the faucet hose. Locate the shut-off valves for both the hot and cold water lines. Turn these valves completely clockwise to shut off the water supply. These valves are usually located near the water supply pipes beneath or beside the sink.

    Ensure the valves are fully closed to avoid any unexpected water flow during the project.

    Potential Hazards and Prevention Methods

    Proper preparation and safety measures are vital for a successful faucet replacement. Recognizing and addressing potential hazards can significantly reduce the risk of accidents. This is particularly important in the kitchen environment, where water and sharp objects are frequently present.

    Changing a kitchen faucet hose is surprisingly straightforward, but sometimes a bit messy. It’s a handy DIY job, similar to prepping a synthetic wig for a night out. Knowing how to properly wash a synthetic wig, as detailed in this helpful guide Wash a Synthetic Wig , can offer valuable tips for handling delicate materials. Ultimately, both tasks require patience and attention to detail, making them perfect for a relaxing weekend project.

    Just remember to turn off the water before starting either one!

    Hazard Prevention
    Water Spills Use a bucket or basin to catch any drips or spills during the process. This will prevent water from damaging the surrounding area.
    Sharp Objects Wrap tools like screwdrivers and pliers in soft cloth or towels to prevent accidental cuts or injuries. Be mindful of sharp edges on tools and parts of the faucet assembly.
    Slip Hazards Place a non-slip mat or towel on the floor near the sink to prevent slips and falls. This is particularly important if the floor is slippery or wet.

    Disconnecting the Old Hose

    Before you start disconnecting the old faucet hose, it’s crucial to shut off the water supply to the sink. This prevents water damage and ensures your safety during the replacement process. Improperly turning off the water supply can lead to significant water damage, and this step should be taken with the utmost care. Failing to do so can result in a flooded kitchen and substantial repair costs.The process of disconnecting the old hose involves several steps, each crucial for a successful replacement.

    Careful attention to detail throughout this process will prevent unnecessary damage to the faucet or water lines. The steps are Artikeld below.

    Turning Off the Water Supply

    To prevent water damage during the hose replacement, you must shut off the water supply to the sink. Locate the shut-off valves, usually located under the sink or near the water supply lines. Turn these valves clockwise to completely stop the water flow. Test the valves by running your tap to ensure the water is fully off. This step is crucial for the safety and success of the entire replacement process.

    Disconnecting the Hose from the Faucet

    This involves detaching the hose from the faucet’s connection points. First, visually inspect the connection type. Common types include compression fittings and quick-connects. Once identified, use the appropriate tool to carefully disconnect the hose. Care should be taken to avoid damaging the faucet or the connections.

    Disconnecting the Hose from the Water Supply Line

    After disconnecting the hose from the faucet, the next step is to detach it from the water supply line. Again, inspect the connection type. The most common connections are compression fittings or quick-connects. Apply the appropriate tool, such as an adjustable wrench or pliers, to carefully disconnect the hose. Gentle, controlled pressure is vital to prevent breakage or damage.

    Use a towel to protect the area from water spills.

    Identifying Connection Types and Tools

    Different faucet hoses use various connection types. Understanding these types and the correct tools is crucial for a smooth and damage-free replacement.

    Connection Type Tool
    Compression Fitting Adjustable Wrench
    Quick Connect Pliers

    Using the correct tool is essential to prevent damage to the faucet and water lines. An adjustable wrench is ideal for compression fittings, applying even pressure to loosen and tighten. Pliers are best for quick-connect fittings, enabling precise and controlled detachment.

    Avoiding Damage to Faucet and Water Lines

    During the entire disconnecting process, careful handling is paramount. Avoid applying excessive force, which can damage the faucet or water lines. If a fitting is particularly stubborn, consult a professional plumber to prevent further damage or complications. A professional can identify the issue and provide the best approach. Gentle, controlled movements are crucial.

    Using the appropriate tools for each connection type is vital.

    Installing the New Hose

    Getting that new faucet hose installed is a satisfying feeling, knowing you’ve tackled a home improvement project. This step involves connecting the new hose to the faucet and water supply, ensuring a leak-free setup. Proper installation is crucial for both the longevity of the hose and the prevention of water damage.Connecting the new hose to the faucet involves precise alignment and secure tightening.

    The correct technique for connecting the new hose to the water supply line is also essential, and avoiding over-tightening is critical to prevent leaks and potential damage.

    Connecting the New Hose to the Faucet

    Carefully align the new hose’s connections with the faucet’s corresponding openings. Ensure the hose’s connections are oriented correctly and securely fit into the faucet’s ports. Use a gentle, twisting motion to connect the hose, avoiding excessive force that could damage the faucet or the hose itself. Proper alignment ensures a tight seal, minimizing the risk of leaks.

    Connecting the New Hose to the Water Supply Line

    The water supply line connection requires attention to detail. Match the new hose’s fittings to the existing water supply line’s connections. A gentle twisting motion is usually sufficient to connect the hose to the water supply line. Ensure the connections are properly aligned to avoid leaks and ensure a secure seal. It’s vital to pay close attention to the type of fittings involved (e.g., compression, quick-connect) to ensure compatibility.

    Importance of Tightening Connections

    Properly tightening connections is paramount for preventing leaks. Over-tightening can damage the fittings or the hose, while under-tightening will lead to leaks. Use a wrench or pliers, if necessary, to achieve the appropriate tightness. The connections should feel firm and secure without excessive force. A good rule of thumb is to apply enough force to create a snug fit but not so much that you feel the threads are being stripped or the hose is being strained.

    Potential Issues with Improper Tightening

    Improper tightening can result in leaks, which can lead to water damage and wasted water. Over-tightening can damage the threads on the faucet or hose, causing them to strip or break. Under-tightening, on the other hand, creates an insecure seal, leading to dripping or running water. Regular inspections for leaks are important to prevent damage and ensure efficient water usage.

    Testing the New Hose for Leaks

    Thorough leak testing is crucial to confirm a successful installation. The following table Artikels the steps for checking for leaks after connecting the new hose.

    Step Action
    1 Turn on the water supply slightly.
    2 Check for leaks at all connections (faucet, water supply line, and hose).

    By carefully following these steps, you can ensure a leak-free installation and enjoy your newly replaced faucet hose for years to come. Pay attention to any signs of water leakage, and if any issues are observed, immediately turn off the water supply and address the problem before continuing with the project.

    Finishing Touches and Cleanup

    Bringing your kitchen faucet hose replacement project to a successful conclusion involves a few crucial final steps. These steps ensure a leak-free installation and a clean workspace, setting the stage for continued kitchen use. Properly turning the water back on, tidying up, and confirming the job’s completion are essential for a smooth transition.

    Returning Water Supply

    Before you can fully enjoy your newly installed faucet hose, you must restore the water supply. This involves carefully opening the water valves located beneath the sink. Failure to follow this step can lead to water damage.

    • Locate the water supply valves under the sink. These valves are typically shut-off valves, and often have a handle or lever to control the water flow.
    • Turn the valves slowly in the direction indicated to open the water supply. Avoid turning them too quickly, which can lead to water pressure fluctuations.
    • Check for leaks immediately. If water leaks are detected at the connections, tighten the fittings or connections.

    Cleaning Up the Workspace

    A clean workspace is a sign of a well-managed project. Cleaning up debris and tools after completing the faucet hose replacement will maintain a functional and organized kitchen.

    • Remove any tools, rags, or other materials used in the project.
    • Wipe down the sink area and surrounding surfaces to remove any remaining water or debris.
    • Dispose of any excess water or cleaning solutions safely, ensuring proper environmental protection.

    Leak Detection

    Thorough leak detection is paramount after any plumbing project. A single leak can lead to significant water waste and property damage over time.

    • Inspect all connections and fittings for any signs of leakage. Look for dripping water, damp spots, or puddles.
    • Turn on the water faucet and observe the connections for any indications of leaks.
    • Check under the sink and in the area around the sink for any water accumulation. A small leak can often be missed unless thoroughly inspected.

    Disposal of Old Materials

    Proper disposal of old materials is vital for environmental safety and to comply with local regulations. Hazardous materials, such as old plumbing parts or solvents, should be disposed of properly to avoid environmental damage.

    • Place the old faucet hose and any other disposable materials in a designated container for proper disposal.
    • If any solvents or cleaning agents were used, dispose of them according to the instructions on the product label. Check with local authorities for specific guidelines on disposing of plumbing waste.

    Completion Checklist

    A checklist ensures all critical steps are completed, leaving no loose ends.

    • Verify that the water supply is fully turned on.
    • Ensure the new faucet hose is properly connected and secure.
    • Confirm there are no leaks at any connections.
    • Confirm the workspace is clean and tidy.
    • Ensure that old materials have been disposed of safely.

    Potential Problems and Solutions

    Troubleshooting can resolve any issues encountered during the replacement process.

    Problem Solution
    Leak at connection Tighten connection using appropriate tools. If the leak persists, replace the damaged part.
    Hose won’t connect Check the type of hose and fitting to ensure compatibility. If mismatched, obtain the correct hose and fitting.

    Summary

    Change the Faucet Hose in a Kitchen Sink

    Replacing your kitchen faucet hose is a manageable project that can save you money and improve the functionality of your kitchen. By following this step-by-step guide, you’ll be able to confidently handle this task. Remember to prioritize safety, carefully follow the instructions, and if you’re uncertain about any step, consult a professional. A properly replaced faucet hose ensures a reliable water supply and a well-maintained kitchen.

  • Make Your Own Family Feud Game at Home

    Make Your Own Family Feud Game at Home

    Make Your Own Family Feud Game at Home! Get ready to create a fun and engaging family game night experience that will have everyone laughing and competing for bragging rights. This comprehensive guide will walk you through every step, from designing the game board and crafting captivating questions to setting up the rules and enhancing the gameplay for maximum fun.

    Get your creative juices flowing and prepare to make unforgettable memories with your loved ones.

    This detailed guide covers everything from the fundamental game design to the visual elements, ensuring a well-rounded and enjoyable experience. Learn how to create diverse question categories, build a robust question bank, establish clear rules, and adapt the game to different family dynamics and preferences. The information is presented in a step-by-step format, making it easy to follow and implement.

    Discover unique ways to spice up the game with bonus rounds and themed challenges.

    Game Design Basics

    Creating a fun and engaging Family Feud game at home requires careful consideration of its fundamental elements. This involves designing the questions, scoring system, and game structure to ensure a smooth and enjoyable experience for all participants. Understanding these core components is crucial for a successful and memorable game night.

    Fundamental Elements of a Family Feud Game

    A well-structured Family Feud game needs several key components to work effectively. These elements are interconnected, ensuring a dynamic and competitive gameplay experience. These include defining the categories of questions, creating a set of answers, developing a scoring system, and structuring the game rounds. The interplay of these elements determines the overall quality of the game.

    • Question Categories: Categories should be broad enough to encompass a variety of answers, yet focused enough to encourage diverse thinking. For instance, “Movies,” “Pop Culture,” “Sports” or “Current Events” are good choices. Each category should be related to common knowledge, or knowledge that is reasonably accessible to the participants, ensuring a fair and enjoyable challenge for everyone.

    • Answer Variety: The answers for each question need to be diverse and demonstrate a range of thought processes. For example, a question like “What are some popular colors?” should elicit answers beyond just basic colors like red, blue, and green. The aim is to encourage diverse responses.
    • Scoring System: A scoring system is essential for tracking points and determining the winning team. A straightforward point system is best. This allows for quick and easy calculation of scores, which is vital for maintaining momentum during gameplay.

    Types of Questions in Family Feud

    The types of questions in a Family Feud game are varied to cater to different knowledge bases and thinking processes. The key is to keep the questions interesting and engaging.

    • General Knowledge Questions: These questions cover a broad spectrum of information, from history and science to pop culture and current events. Examples include: “Name some famous artists,” or “What are some common household appliances?” These questions are suitable for a wide range of participants.
    • Category-Specific Questions: Questions are focused on specific categories, such as “What are some types of fruits?” or “What are some popular sports?” These questions test the participants’ knowledge within a particular domain.
    • Creative Questions: These questions are designed to stimulate creative thinking and encourage unique responses. For example, “Name some unusual uses for a paperclip” or “What are some unusual ways to cook an egg?” These questions encourage more imaginative answers.

    Scoring System for Family Feud

    A scoring system in Family Feud needs to be clear, concise, and easily understood. It is essential for accurately tracking scores throughout the game and determining the winning team. A simple scoring system is often preferred to ensure easy calculation.

    • Point Allocation: A simple point system can be employed, where each correct answer earns a predetermined number of points. For example, a correct answer might be worth 10 points.
    • Team Scores: The scores of each team should be kept track of in a clear manner, allowing easy comparison and tracking of progress.
    • Winning Criteria: Establish clear winning criteria, such as the team with the most points at the end of a set number of rounds. This ensures a fair and understandable conclusion to the game.

    Structure of a Typical Round in Family Feud, Make Your Own Family Feud Game at Home

    A typical round in Family Feud involves a set of questions and answers. The round structure should be simple and clear to ensure a smooth flow of the game.

    • Question Presentation: The host presents a question to the teams. The teams then have a set amount of time to discuss and decide on their answers.
    • Answer Submission: Teams submit their answers in writing or verbally to the host.
    • Answer Evaluation: The host evaluates the answers, and the correct answer is revealed.
    • Scoring: The scores are updated based on the answers provided.

    Example of a Family Feud Game Board

    A simple game board can be designed to visually represent the questions and categories.

    Category Question
    Movies What are some popular movie genres?
    Music Name some famous musicians.
    Sports What are some popular sports?

    Question Categories

    Crafting engaging and challenging questions is key to a successful Family Feud game. The variety of topics and difficulty levels within each category significantly impacts the overall experience. This section delves into constructing compelling categories and the importance of balancing them for an enjoyable game.

    Question Category Selection

    Choosing diverse categories is crucial for a balanced and exciting Family Feud experience. Broadening the spectrum of knowledge tested prevents any single area from dominating the game and ensures every player has a chance to shine. The categories should cover a range of interests to cater to different family members.

    • General Knowledge: This category covers a wide range of topics, from history and science to pop culture and geography.
    • Pop Culture: Focusing on popular movies, music, and TV shows, this category caters to contemporary interests and fosters discussions among players.
    • Current Events: Testing knowledge about recent news and events keeps the game relevant and stimulates discussions about the world around us.
    • Food & Drink: This category engages players through culinary knowledge, popular dishes, and related trivia.
    • Science & Nature: This category encourages a deeper understanding of the natural world and the scientific principles that govern it.

    Category Example Questions

    Crafting compelling questions is critical to maintaining interest and fostering interaction within each category. Clear, concise, and thought-provoking questions maximize the game’s engagement. Below are examples for each category.

    Planning a family feud game night? It’s a blast, but sometimes you need a cozy atmosphere. Learning how to light a gas fireplace, like in this helpful guide Light a Gas Fireplace , can create the perfect ambiance for a fun-filled evening. Once the fireplace is crackling, you can really get into the spirit of the game, making memories and having a great time!

    Category Example Questions
    General Knowledge
    • What year did World War II begin?
    • Which planet is known as the “Red Planet”?
    • What is the capital of France?
    • Who painted the Mona Lisa?
    • What is the chemical symbol for gold?
    Pop Culture
    • Which actor played the role of James Bond in “Goldfinger”?
    • What is the name of the main character in the TV series “Friends”?
    • What is the title of the famous movie directed by Steven Spielberg about a young boy who embarks on a journey to save his family?
    • What is the name of the iconic rock band fronted by Freddie Mercury?
    • Who directed the film “The Shawshank Redemption”?
    Current Events
    • Who won the 2023 World Series?
    • What is the name of the current US president?
    • What country recently hosted the FIFA World Cup?
    • What is the name of the latest space mission launched by NASA?
    • Who is the current leader of the Russian Federation?
    Food & Drink
    • What is the primary ingredient in a traditional Caesar Salad?
    • Which country is known for its delicious paella?
    • What is the name of the popular Mexican dish made with corn tortillas?
    • What is the name of a common Italian pasta dish made with tomato sauce?
    • What is the name of a traditional Japanese dish made from thinly sliced beef?
    Science & Nature
    • What is the scientific name for the human species?
    • What is the largest mammal on Earth?
    • What is the name of the process by which plants make their own food?
    • What is the name of the largest mountain range in the world?
    • What is the chemical element that is the primary component of diamonds?

    Ensuring Variety and Difficulty

    Maintaining a balance between challenging and approachable questions is crucial for a compelling game. Creating a range of question difficulty keeps the game interesting for all players, encouraging participation from all members of the family.

    • Question Difficulty: Gradually increase the difficulty of questions within each category. Start with simpler questions and gradually progress to more complex ones.
    • Question Variety: Use different question formats. Some questions might require short answers, while others could be multiple choice. This keeps the game engaging and prevents it from becoming repetitive.

    Optimal Number of Questions Per Category

    The optimal number of questions per category is determined by the length of the game and the depth of knowledge covered in each category. A balanced distribution ensures the game isn’t too long or too short. A good starting point is 10-15 questions per category.

    Balancing Categories for Interest

    A well-balanced game ensures sustained interest throughout. Avoid skewing the game towards any one category, and maintain a variety of difficulty levels and question types within each category.

    Creating the Question Bank

    Building a robust question bank is the heart of a successful Family Feud game. This involves more than just coming up with trivia questions; it requires careful consideration of difficulty, category relevance, and player engagement. A well-crafted question bank ensures a fun and fair experience for all participants.

    Structure of the Question Bank

    A well-organized question bank is essential for smooth gameplay and easy management. Use a spreadsheet or a dedicated database to keep track of your questions. A table format is highly recommended for clarity. This table should contain columns for the question, its answer, the category it falls under, its difficulty level (e.g., easy, medium, hard), and the associated point value.

    Question Answer Category Difficulty Points
    Who painted the Mona Lisa? Leonardo da Vinci Art Easy 100
    What is the capital of France? Paris Geography Easy 50
    What is the chemical symbol for water? H₂O Science Medium 150

    Generating a Large Pool of Questions

    Creating a diverse and extensive question bank requires a systematic approach. Begin by brainstorming a wide range of topics for your categories. Consider incorporating different subject areas to appeal to various players.

    • Brainstorming Categories: Start with general categories (e.g., History, Science, Pop Culture, Sports). Then, break down these categories into more specific sub-categories. For example, History could be further divided into Ancient History, Modern History, or US History.
    • Utilizing Resources: Explore online resources like encyclopedias, educational websites, and reputable news sources to gather information and formulate questions. This helps ensure accuracy and up-to-date content.
    • Drawing from Pop Culture: Include popular movies, TV shows, music, and current events. These categories often generate strong responses and appeal to a broad audience.

    Creating Engaging and Appropriate Questions

    Questions should be phrased in a clear and concise manner, avoiding ambiguity. This clarity ensures everyone understands the question and can provide an accurate response. Consider using different question types, such as multiple-choice or short-answer, to maintain interest and challenge different cognitive skills. It’s crucial to keep the questions appropriate for the age range of your players.

    • Simple Language: Use simple, everyday language that all players can understand. Avoid jargon or overly complex vocabulary.
    • Engaging Format: Frame questions in an engaging way that encourages participation. For example, use a conversational or playful tone. A good question makes the players want to answer.
    • Diverse Question Types: Mix up question formats. Short answer, multiple-choice, and fill-in-the-blank questions can add variety.

    Fact-Checking and Accuracy

    Accuracy is paramount. Before incorporating a question into the bank, thoroughly research and verify the information. This prevents spreading misinformation and maintains the integrity of the game.

    • Double-checking Information: Cross-reference information from multiple reputable sources. Consult encyclopedias, academic journals, and credible online databases.
    • Fact-Checking Experts: If necessary, consult with experts in the relevant field to ensure accuracy. This is especially important for questions that deal with technical or specialized knowledge.
    • Verification Procedures: Establish a clear procedure for verifying information before it is used in the game. This could involve having multiple people review the question and answer.

    Testing the Questions

    Testing questions before implementation is critical for ensuring clarity and appropriateness. This step allows for adjustments and refinements before the final version of the question bank is created.

    • Pilot Testing: Gather a group of people who represent your target audience and have them try out the questions. This will help identify any ambiguities or difficulties in understanding the questions.
    • Feedback Mechanisms: Implement a feedback mechanism to gather player opinions and suggestions. This allows for iterative improvements and fine-tuning.
    • Revisions and Adjustments: Use the feedback to revise questions and refine their clarity and appropriateness. This ensures the questions are engaging and accessible to all players.

    Game Setup and Rules: Make Your Own Family Feud Game At Home

    Make Your Own Family Feud Game at Home

    Getting your family ready for a fun-filled Family Feud game night requires a well-defined setup and clear rules. This section will guide you through the process, ensuring everyone understands their roles and responsibilities. From team division to managing the game clock, we’ll cover everything you need to know to create a memorable and engaging experience for everyone.This section Artikels the essential elements of setting up a successful Family Feud game at home.

    A clear understanding of the rules and procedures will guarantee a smooth and enjoyable gaming experience for the entire family.

    Team Formation

    Proper team division is crucial for a fair and competitive game. Randomization is an effective way to ensure everyone has an equal opportunity. Using a drawing method or a random number generator is a good way to create balanced teams.

    • Random Team Assignment: Place everyone’s names on slips of paper. Have each member draw one slip. Alternatively, use a random number generator online to assign team numbers to each player.
    • Team Size: Equally divide the family members into two teams. If the number of players is odd, consider having one team with one more member. Ensure both teams have a similar number of players to maintain a balanced game.
    • Team Names: Allow the teams to choose catchy names. This adds a fun and personalized touch to the competition. Team names should be creative and easily remembered.

    Optimal Team Selection

    While random assignment is fair, strategic team selection can lead to more engaging gameplay. If possible, consider the strengths of each player. If you have a player known for quick thinking or quick wit, placing them on the team could lead to more successful answers.

    Game Setup Process

    This table Artikels the key steps involved in setting up your Family Feud game.

    Looking for a fun family activity? Making your own Family Feud game at home is a great way to spend quality time together and get everyone engaged. It’s a super simple project, requiring minimal materials and effort, unlike Jack White’s ambitious feat of recording and releasing the world’s fastest record in a single day. Jack White is clearly pushing the boundaries of music production, but a homemade Family Feud game is perfect for bringing some friendly competition and laughter to your household.

    It’s a fantastic way to create lasting memories and encourage friendly rivalry amongst family members.

    Step Action
    1 Gather all necessary materials: game board, question cards, pens, and timer.
    2 Divide the family into two teams using the method of your choice.
    3 Assign a team captain for each team to manage responses and strategize.
    4 Choose a first player for each team to start the game.
    5 Establish the rules of the game, explaining the scoring system, penalty points, and other important guidelines.

    Managing the Game Clock

    Implementing a consistent timer is essential to maintaining the flow of the game. A visual timer (like a digital clock) will work effectively to provide a clear indication of the time remaining for each question.

    • Using a Stopwatch: Use a stopwatch app or physical stopwatch for a precise timekeeping system.
    • Digital Timer: A dedicated timer app on a smartphone or tablet can be set for specific time limits.
    • Analog Clock: An analog clock can be used to visualize the time remaining. However, this method might require more active management.
    • Verbal Cues: Using verbal cues, like “30 seconds remaining,” “15 seconds remaining,” etc., will keep players informed without requiring a physical timer.

    Visual Elements

    Bringing your Family Feud game to life requires a visually engaging design. A well-crafted visual experience enhances the gameplay and makes the game more enjoyable for everyone involved. The right colors, fonts, and layout can significantly impact the overall appeal and make the game memorable.

    Want to spice up family game night? Making your own Family Feud game at home is super fun and easy. Plus, you can tailor it to your family’s interests, like the latest superhero movie, cable deadpool 2 josh brolin first look , for example. Just brainstorm some answers and questions, and you’ve got a personalized game night guaranteed to bring laughter and friendly competition.

    Game Board Design

    A visually appealing game board is crucial for a fun and engaging experience. The board should clearly delineate the different sections of the game, such as the question categories and the spaces for team answers. Consider using a bold, vibrant color scheme that’s easy to read and differentiates between different areas. A simple, yet impactful design will create a clear understanding of the game flow.

    Game Board Section Role
    Question Categories These sections visually represent the various categories of questions (e.g., Movies, Sports, Music). They should be easily identifiable and distinguishable from one another.
    Team Answer Spaces These areas should clearly indicate where each team places their answers. Visually distinct boxes or areas for each team will help differentiate their responses.
    Scoring Area This section will showcase the current score for each team. A prominent display for the scores will keep track of the game’s progress.
    Buzzer Icons Visually represent the buzzer functionality. Small icons or buttons associated with each team will signify when a team is ready to answer.

    Scoring Display Design

    A clear and concise scoring display is essential for tracking the game’s progress. The scoring display should be prominent and easily visible to all players. Consider using a large, bold font for the scores, contrasting it with the background color for maximum visibility. A visual representation of the team’s progress, like a bar graph or a simple numeric display, will further enhance the scoring experience.

    The scoring display could also feature a dynamic visual indicator, like changing colors or animations, to highlight each team’s score as it increases.

    Team Representation and Progress

    Visual representation of teams and their progress is vital for engagement. Use different colors for each team (e.g., red for Team A, blue for Team B) to make it easy to distinguish their scores and answers. A visual representation of the team’s progress, such as a progress bar, can help players easily understand where their team stands in relation to the other team.

    This could be a simple bar graph or even a stylized visual that visually tracks the scores.

    Color and Font Choices

    Choosing appropriate colors and fonts significantly enhances the visual appeal of the game. Bright, contrasting colors should be used to highlight different elements of the game board, like question categories or team areas. Use a clear, legible font for all text, ensuring easy readability from a distance. A visually appealing color scheme that is both energetic and easy on the eyes is key to creating an enjoyable experience.

    Consider the color palette and font selection for the overall theme of the game, like a bright and playful theme or a more sophisticated and elegant theme. For example, a classic Family Feud design might use bold red and blue, while a more modern design might use vibrant colors like teal and orange. A font that is easy to read, like Arial or Helvetica, is a good choice.

    Gameplay Enhancement

    Creating a Family Feud game at home that’s engaging and enjoyable for everyone requires careful consideration of gameplay dynamics. This section delves into strategies for keeping the game exciting, adding unique challenges, adapting for different family sizes, handling disputes, and anticipating potential problems.Adding variety and excitement are crucial for maintaining player interest throughout the game. A static format can quickly become monotonous.

    Implementing different challenges and bonus rounds is key to ensuring continued engagement.

    Strategies for Keeping the Game Exciting

    Adding variety to the game is essential for preventing boredom. Varying the question types, difficulty levels, and point systems keeps the game fresh. For example, incorporating picture rounds, rapid-fire questions, or bonus questions for correct answers on the first attempt can inject new excitement into the game. This allows for a dynamic experience that avoids stagnation.

    Unique Ways to Add Challenges or Bonus Rounds

    Several unique methods can enhance the game’s challenge and reward structure. A “double-dipping” round, where players can answer questions from the opposing team’s previous turn, can create a competitive edge. Another option is to introduce “wildcard” questions that award substantial points but come with greater risk. Consider incorporating a “hot seat” round where the most active or successful players face additional challenges or bonus rounds.

    Adapting the Game for Different Family Sizes

    The game can be adapted to accommodate various family sizes by adjusting the number of players per team and the complexity of the questions. Smaller families can utilize a “team of two” structure, while larger families might create multiple teams. Consider having fewer questions per round or adjusting the time limit to maintain a suitable pace for all participants.

    Managing and Resolving Disputes During Gameplay

    Clear rules and procedures are necessary for addressing disagreements during the game. A designated moderator or impartial judge can help resolve disputes objectively. Pre-established rules regarding disputes, such as time limits for answers or specific procedures for resolving disputes, can maintain a smooth flow of the game.

    Potential Obstacles That May Arise During the Game and Solutions to Overcome Them

    Several potential issues could arise during gameplay. A common problem is players not understanding the rules, leading to confusion and frustration. Providing clear and concise rules before the game begins can prevent misunderstandings. Another issue is player disagreement or arguments. Having a mediator or moderator to address and resolve such issues promptly is essential to maintain a positive and enjoyable gaming experience.

    Consider providing clear guidelines for each round and encouraging respectful discussion. Finally, time management is essential. Establishing clear time limits for each round, including answer time and discussion periods, will prevent the game from dragging on and maintain the pace.

    Variations and Adaptations

    Make Your Own Family Feud Game at Home

    Tailoring your Family Feud game to specific interests and age groups enhances engagement and makes the experience more enjoyable for everyone. This section explores diverse adaptations, allowing you to create a customized game that fits your family’s unique needs and preferences. From themed rounds to bonus questions, we’ll cover various ways to transform the basic format into something truly special.

    Adapting to Specific Topics or Interests

    This approach allows for tailored experiences, focusing on topics of shared interest. For example, a family passionate about history could play a round solely focused on historical events or famous figures. Similarly, a family interested in pop culture could have a round based on movie trivia or popular music. These themed rounds add a layer of engagement and excitement, as participants are challenged on their knowledge within their chosen area of interest.

    Variations and Themed Rounds

    Creating variations expands the game’s possibilities. One way to enhance the game is to introduce themed rounds. These rounds can focus on specific categories such as movies, music, sports, or current events. For example, a “Movie Madness” round could involve questions about movie titles, actors, or plot points, while a “Sports Spectacular” round could test knowledge of sports teams, players, or historical events.

    • Historical Figures: This round focuses on notable historical figures, testing knowledge about their lives, achievements, and impact on history. Examples of questions include: “Who was the first woman to fly solo across the Atlantic?” or “Which US president signed the Emancipation Proclamation?”
    • Pop Culture Icons: This round delves into popular culture icons, asking questions about their careers, contributions, and influence. Questions might be: “Who directed the movie ‘The Shawshank Redemption’?” or “What is the name of Taylor Swift’s hit album released in 2014?”
    • Science and Technology: This round probes knowledge of scientific discoveries and technological advancements. Questions could involve: “Who developed the theory of relativity?” or “What year was the first personal computer released?”

    Bonus Questions

    Bonus questions provide an extra layer of challenge and reward for participants. They can be more complex or require a deeper understanding of the topic. They also encourage strategic thinking and allow for a more in-depth exploration of specific areas. For example, bonus questions in a history round might involve obscure historical facts or the context surrounding significant events.

    Creating Customized Versions

    Customizing the game involves adapting the question bank to reflect specific interests. This might involve researching and compiling questions related to a particular hobby, a favorite movie series, or a specific historical period. You can also incorporate visual elements like pictures or images related to the chosen theme to make the game even more engaging.

    Adjusting for Different Age Groups

    Adjusting the game for different age groups is crucial for ensuring everyone enjoys the experience. For younger children, questions should be simpler and focus on basic knowledge. For older players, the questions can be more complex and require a deeper understanding of the topic.

    Examples of Games with Different Question Types

    • Picture Rounds: Picture rounds can be integrated into any theme. Instead of text-based questions, participants are shown a picture and have to answer a question related to the image. This variation is particularly engaging for visual learners. An example might be a picture of a historical monument, followed by the question: “In which US city is this monument located?”
    • “Who Said It?” Rounds: These rounds present famous quotes and ask participants to identify the speaker. This is a fun and engaging way to test knowledge of famous figures and their associated quotes. An example could be: ““The only way to do great work is to love what you do.”” followed by the question: “Who said this famous quote?”

    Materials and Tools

    Crafting a fun and engaging Family Feud game at home requires careful consideration of the materials. The right tools can elevate the experience, making it a memorable and interactive activity for everyone. From the physical board to the question cards, the choices you make will significantly impact the gameplay.The selection of materials is critical to the overall success and enjoyment of the game.

    Factors such as cost-effectiveness, ease of use, and the desired level of sophistication all play a role in the final product. A well-designed game will be enjoyable for everyone involved.

    Materials for a Physical Game Board

    Careful selection of materials for the physical board will significantly impact the game’s visual appeal and durability. Consider the intended longevity and frequency of use when making your choices.

    • Cardboard: A readily available and affordable option. Corrugated cardboard provides a sturdy base, while cardstock can be used for creating decorative elements or dividers. Custom designs can be printed on the cardboard for visual appeal. The cost is minimal, but durability may be a concern for frequent use.
    • Plywood: A more robust option than cardboard, plywood offers a substantial and lasting game board. It can be painted or stained to match the game’s theme. Plywood is durable but more expensive than cardboard.
    • Foam Core: A lightweight and relatively inexpensive material. Foam core boards can be easily cut and shaped to create a unique game board design. The ease of cutting and shaping is a benefit, but durability might be a concern for heavy use.
    • Wooden planks: A premium choice that offers a classic and sophisticated feel. Wooden planks can be sanded, stained, and painted to create a visually appealing game board. Wooden boards are durable and add a touch of elegance but are the most expensive option.
    • Plastic: Plastic sheets or boards offer a durable and water-resistant option. This is ideal for outdoor games or those that might experience spills. Plastic can be colorful and easily cleaned, but it might not have the same aesthetic appeal as other materials.

    Digital Game Board Creation

    Digital game boards offer flexibility and interactive elements that are not possible with physical boards.

    • Software Programs: Applications like Canva, Microsoft PowerPoint, or Google Slides can be used to create digital game boards. These programs allow for custom designs, animations, and interactive elements. The cost is minimal, and there’s great flexibility for customization.
    • Online Platforms: Several online platforms provide tools to design and host interactive games. These platforms often offer templates and pre-designed elements that can be customized. Ease of use and pre-built features are advantages, but the design options may be limited compared to software programs.
    • Advantages of Digital Boards: Digital boards offer scalability and easy sharing. Players can access the game from anywhere with an internet connection. Updates and revisions are instantaneous, allowing for quick adaptations and modifications.

    Using Readily Available Materials

    Leveraging everyday items can significantly reduce costs while maintaining the game’s functionality.

    • Newspaper or Cardboard Boxes: Use old boxes or newspaper for a base. Decorate with markers, paint, or colored paper to personalize the game board. This is a very economical option.
    • Construction Paper or Colored Paper: Use these to create sections or categories on the board. This allows for visual differentiation and a custom look.
    • Markers, Pens, and Paints: Use these to enhance the game board’s visual appeal and add personal touches. These items can be used to create unique and vibrant designs.

    Cost-Effectiveness of Materials

    The cost of materials can vary significantly depending on the choice of material.

    Material Cost-Effectiveness Durability
    Cardboard Very Low Low
    Plywood Low High
    Foam Core Medium Medium
    Wooden Planks High High
    Plastic Medium High

    Consider the frequency of use and the desired aesthetic when selecting materials.

    Concluding Remarks

    In conclusion, crafting your own Family Feud game at home offers a fantastic opportunity to connect with loved ones and foster friendly competition. This guide provides a complete framework for designing, building, and playing a personalized game tailored to your family’s interests. Whether you’re seeking a fun way to spend quality time together or a unique game night activity, this guide has you covered! Remember to adapt and adjust the game to your family’s needs and preferences for a truly unforgettable experience.

  • Replace Sliding Glass Door Rollers A Comprehensive Guide

    Replace Sliding Glass Door Rollers A Comprehensive Guide

    Replace Sliding Glass Door Rollers is a comprehensive guide to fixing those troublesome sliding glass doors. From identifying the problem to replacement procedures and maintenance, this guide covers every aspect of getting your doors moving smoothly again. Whether your rollers are squeaking, sticking, or just plain broken, this article provides the information you need to tackle the task with confidence.

    This detailed guide will help you diagnose the issue, understand the different types of rollers, and learn how to safely and effectively replace them. You’ll discover the common causes of roller problems, learn troubleshooting techniques, and find out how to maintain your sliding glass doors for optimal performance.

    Identifying the Problem

    Sliding glass doors, while aesthetically pleasing, can become frustratingly difficult to operate if their rollers fail. Understanding the common issues and signs of roller problems is crucial for timely maintenance and preventing more significant damage. Proper diagnosis allows for efficient repairs and ensures the smooth, trouble-free function of your door.Roller problems often stem from a combination of wear and tear, improper installation, or environmental factors.

    Identifying these problems early can save you time and money in the long run.

    Replacing sliding glass door rollers can be a surprisingly satisfying DIY project. It’s a bit like catching a queen ant – Catch a Queen Ant – you need patience and a bit of finesse. But once you get those rollers humming smoothly, you’ll appreciate the quiet efficiency of a well-maintained sliding door system. Just make sure to choose the right rollers for your specific door type for the best results.

    Common Problems with Sliding Glass Door Rollers

    Roller issues often manifest as operational difficulties. These difficulties can range from minor inconveniences to complete inoperability, and the specific symptoms depend on the type and extent of the damage. Early detection is key to preventing costly repairs and potential damage to the door frame.

    • Squeaking or Grinding Sounds: A common indicator of worn-out rollers or misalignment. This sound often accompanies movement, particularly when the door is being pushed or pulled. This is often caused by the rollers rubbing against the track or each other.
    • Sticking or Binding: The door may struggle to slide smoothly or get stuck entirely. This is frequently due to worn-down rollers, debris buildup in the track, or misalignment of the rollers. The door may require significant force to move, and this could damage the door or the track.
    • Uneven Movement: The door may not slide evenly across the track. This can be caused by misaligned rollers or damaged rollers. If the door consistently pulls to one side, there’s a high probability of a roller problem. This can lead to uneven wear on the track.
    • Visible Damage: Look closely at the rollers for signs of rust, breakage, or deformation. Bent or broken rollers will likely cause uneven movement and significantly affect the door’s function. Corrosion and breakage can be caused by moisture and environmental exposure. For example, a door frequently exposed to rain or humidity may show significant rust.

    Signs of Worn-Out or Damaged Rollers

    Observing these symptoms can help pinpoint the source of the problem. A thorough inspection of the rollers, track, and door frame is essential for a correct diagnosis.

    • Uneven Wear on the Track: The track itself can show signs of excessive wear if the rollers are misaligned or damaged. This can be visually inspected by looking for grooves, dents, or other irregularities in the track.
    • Difficulty in Movement: The door may require considerable effort to open or close, indicating significant wear and tear on the rollers or the track. This can lead to stress on the door and track.
    • Excessive Noise During Operation: The sounds during operation provide valuable clues about the condition of the rollers. Grinding, screeching, or squeaking noises indicate a significant issue that needs immediate attention.

    Potential Causes of Roller Failure

    Several factors contribute to roller failure. Understanding these factors helps in preventative maintenance.

    • Environmental Factors: Exposure to moisture, extreme temperatures, and debris can accelerate rust, corrosion, and damage to the rollers. Weather conditions and humidity can have a significant impact.
    • Improper Installation: Incorrect installation can lead to misalignment and premature wear of the rollers. This can lead to the door getting stuck or not moving smoothly.
    • Overuse or Lack of Maintenance: Frequent use and a lack of regular maintenance contribute to wear and tear on the rollers. This can lead to the need for replacement over time.

    Types of Sliding Glass Door Rollers

    Different types of rollers offer varying levels of performance and durability.

    • Ball Bearing Rollers: These offer smooth operation and are generally more expensive. Ball bearing rollers are known for their durability and smooth operation, minimizing friction and maximizing the door’s lifespan.
    • Nylon Rollers: Nylon rollers are less expensive but may not be as durable as ball bearing rollers. Nylon rollers are less prone to rusting, which can be a major advantage in humid environments. They can still be damaged if not maintained.

    Types of Damage to Sliding Glass Door Rollers

    Various types of damage can occur to the rollers, affecting their functionality.

    • Rust and Corrosion: Moisture exposure can cause significant damage, making the rollers stiff and difficult to operate. Rust can also affect the track and the door frame itself.
    • Breakage: Physical impact or excessive wear can cause rollers to break, rendering the door inoperable. This can happen in several ways.
    • Misalignment: Misalignment of the rollers with the track is a common issue that can cause uneven movement and noise. This often stems from incorrect installation or improper maintenance.

    Troubleshooting and Diagnosis: Replace Sliding Glass Door Rollers

    Identifying the source of your sliding glass door woes is crucial for effective repair. A systematic approach to visual inspection, coupled with an understanding of common issues, can pinpoint the problem quickly and efficiently. This section details the steps for diagnosing various roller problems, from simple lubrication issues to more complex track misalignments.A well-maintained sliding glass door system translates to years of smooth operation.

    Troubleshooting involves inspecting the rollers, tracks, and other components for wear, damage, or obstructions. A thorough assessment will reveal the root cause, allowing for targeted repairs and preventing future problems.

    Visual Inspection of Rollers

    Thorough visual inspection is the first step in diagnosing sliding glass door roller problems. Inspect the rollers for any visible damage, such as cracks, dents, or missing parts. Look closely for signs of excessive wear, including flattened or worn-down wheels. Pay attention to the overall condition of the rollers’ mounting points and brackets. Ensure they are securely attached and free from corrosion or rust.

    Assess the roller’s alignment with the track. A misaligned roller may lead to uneven operation or jamming.

    Assessing Roller, Track, and Component Condition

    The condition of the rollers directly impacts the door’s smooth operation. Examine the rollers for signs of damage or excessive wear. Inspect the tracks for any warping, misalignment, or debris buildup. Check the track’s alignment with the rollers. Look for any signs of corrosion or rust, especially at the points where the rollers make contact with the tracks.

    Assess the condition of any other components, such as the door hardware or the frame itself, for any signs of damage or wear that might be contributing to the problem.

    Checking Roller Lubrication and Track Condition

    Proper lubrication of the rollers and maintenance of the tracks are crucial for preventing sticking and squeaking. Inspect the rollers for adequate lubrication. Apply a small amount of white lithium grease to the roller wheels if necessary. Ensure the grease is not excessive. Clean the tracks thoroughly to remove any debris, dust, or dirt.

    This can improve the rollers’ gliding action and prevent noise. Ensure the tracks are free from any obstructions that might be hindering the rollers’ movement.

    Identifying the Source of Sticking or Squeaking Sounds

    Sticking or squeaking noises are often the first signs of problems with sliding glass doors. Carefully identify the specific location and nature of the sound. A squeaking sound might indicate a lack of lubrication, while a sticking sound could point to a misaligned roller or a damaged track. If the sound is coming from a particular area, pinpoint the exact component responsible.

    Listen for the sound while moving the door slowly to identify the precise point of friction.

    Comparing Troubleshooting Methods for Different Roller Issues

    Different types of roller issues necessitate different troubleshooting approaches. For example, if the rollers are sticking, the first step is to check the lubrication and clean the tracks. If the issue persists, consider inspecting the rollers for damage or misalignment. If the rollers are squeaking, focus on lubricating the affected areas. A misaligned track requires adjustments to the track or frame.

    Consider the severity and nature of the problem when choosing the appropriate troubleshooting method.

    Table of Common Roller Problems and Solutions

    Problem Potential Solution
    Sticking Rollers Check lubrication, clean tracks, adjust rollers, replace damaged parts
    Squeaking Rollers Apply lubrication, clean tracks, inspect for obstructions
    Misaligned Rollers Adjust rollers, check track alignment, replace damaged parts
    Damaged Rollers Replace damaged rollers
    Obstructions in Track Remove obstructions, clean tracks, inspect for misalignment

    Replacement Procedures

    Replacing sliding glass door rollers can seem daunting, but with the right steps and safety precautions, it’s a manageable DIY project. Proper replacement ensures smooth operation, extending the life of your door system and preventing future problems. This section provides a comprehensive guide on the replacement procedures, from initial disassembly to final reassembly.Understanding the intricacies of your door system is crucial for a successful replacement.

    This includes identifying the specific roller types and their locations on the door and track. Following these steps carefully minimizes the risk of damage to the door and frame.

    Safety Precautions

    Before starting any replacement work, prioritize safety. Wear appropriate safety glasses to protect your eyes from flying debris. Consider using gloves to prevent cuts and abrasions. Ensure the door is securely supported to prevent it from falling. If working alone, have someone assist with holding the door.

    Always disconnect power to the door system, if applicable, to avoid any electrical hazards. Work in a well-lit area to improve visibility and reduce the risk of accidents.

    Tools Required

    A well-stocked toolbox is essential for a smooth replacement. These tools are necessary for safe and efficient work.

    Replacing sliding glass door rollers can be a real pain, but it’s totally worth it for a smooth operation. Speaking of smooth, I’ve been digging the new music from fever ray alvvays oso oso this week, which Pitchfork just highlighted in their latest selects. fever ray alvvays oso oso this week pitchfork selects It’s got that perfect blend of dreamy vibes, making the whole process of fixing those rollers a little less tedious.

    Hopefully, my new playlist will inspire you to tackle those rollers with renewed vigor!

    • Screwdrivers (Phillips and flathead): Essential for removing and installing screws.
    • Measuring tape: For accurate measurements.
    • Adjustable wrench or pliers: For adjusting nuts and bolts.
    • Hammer (optional): For certain types of roller removal.
    • Lubricant (e.g., white lithium grease): For proper lubrication after replacement.
    • Safety Glasses: Protect your eyes from flying debris.
    • Gloves: Protect your hands from cuts or abrasions.

    Disassembling the Sliding Glass Door System

    Disassembly involves carefully removing components to access the rollers. The exact steps may vary depending on the specific door system. Carefully document the order of components and their positions for reassembly.

    1. Support the door: Securely support the door using a sturdy platform or helper to prevent it from falling during the removal process.
    2. Remove hardware: Carefully detach the hardware, such as screws, bolts, and brackets, holding the door and track together. Note the placement of each part.
    3. Detach the door: Carefully remove the door from the track. Take your time, and ensure the door is adequately supported.
    4. Inspect the track: Inspect the track for any obstructions or damage. Repair or replace as needed.

    Removing and Installing New Rollers, Replace Sliding Glass Door Rollers

    Carefully remove the old rollers and install the new ones. This is a crucial step to ensure smooth operation. Pay close attention to the type of roller and how it fits into the track and door.

    1. Remove old rollers: Carefully remove the old rollers from their respective brackets.
    2. Inspect rollers and tracks: Ensure there are no damage or debris. Repair or replace damaged components.
    3. Install new rollers: Carefully align and insert the new rollers into their brackets.
    4. Secure new rollers: Ensure the rollers are securely fastened using the correct screws or fasteners.

    Alignment and Lubrication

    Precise alignment and lubrication are critical for smooth and efficient operation of the sliding glass door. This ensures longevity and prevents squeaking.

    • Alignment: Verify that the rollers are properly aligned with the track. Ensure the door glides smoothly in both directions.
    • Lubrication: Apply a small amount of lubricant (white lithium grease) to the rollers and track. This will reduce friction and prevent squeaking.

    Reassembling the Sliding Glass Door System

    Reassembly is the reverse of the disassembly process. Carefully follow the documented steps to reassemble the components in their original positions. This ensures the door operates correctly.

    1. Reattach the door: Carefully reattach the door to the track.
    2. Reinstall hardware: Reinstall all hardware, ensuring that screws and bolts are securely fastened.
    3. Final inspection: Check for smooth operation of the door. Ensure the door glides smoothly in both directions.

    Maintenance and Prevention

    Keeping your sliding glass door rollers in tip-top shape is crucial for smooth operation and longevity. Regular maintenance is far less expensive than replacing entire systems, and it prevents small problems from escalating into major repairs. This section Artikels essential maintenance practices and preventive measures to extend the life of your sliding glass door system.

    Importance of Regular Maintenance

    Regular maintenance is key to preventing costly repairs down the line. By addressing minor issues early, you can avoid more significant problems, such as binding, sticking, or complete failure of the rollers. This proactive approach not only saves money but also ensures the smooth and safe operation of your sliding glass door.

    Methods for Preventing Future Roller Problems

    Proactive measures are far more effective than reactive fixes. Preventing future roller problems hinges on consistent maintenance and understanding the factors that contribute to roller wear and tear. Addressing issues promptly can extend the lifespan of your sliding glass door system and avoid costly replacements.

    Common Maintenance Tasks and Frequency

    | Task | Frequency | Description ||—————————————–|———————————————————————————–|————————————————————————————————————————————————————————————————————————————————————————————————————————————————————————————————-|| Inspect rollers for damage or wear | Monthly | Visually check for cracks, dents, or excessive wear on the rollers.

    Look for signs of corrosion or rust. Examine the wheels and axles for damage. || Lubricate rollers | Quarterly | Apply a suitable lubricant (e.g., white lithium grease) to the roller axles and wheels.

    Ensure even distribution, but avoid over-lubrication, which can attract dirt and grime. Follow the manufacturer’s recommendations for specific lubricant types. || Clean the track and rollers | Monthly | Remove debris, dirt, and grime from the track and rollers using a soft brush or cloth.

    Pay close attention to the areas where the rollers make contact with the track. Avoid harsh chemicals that could damage the track or rollers. || Check for proper alignment | Bi-annually | Ensure the door slides smoothly in the track without any binding or sticking.

    Adjust the rollers as needed to maintain proper alignment. If significant misalignment is detected, seek professional assistance to avoid further damage. || Check the door balance | Monthly | Ensure the door remains balanced while sliding.

    Replacing sliding glass door rollers can be a real pain, but it’s definitely doable. Thinking about the smooth, rhythmic movement of those rollers, it got me thinking about the rhythmic energy of music. Learning more about the evolution of urban music genres like hip-hop, funk, and reggaeton, especially from a historical perspective, can be quite insightful, as you can see in this helpful introduction introduccion a la musica urbana.

    Getting those rollers replaced will feel like a victory after that deep dive into musical history. I’m going to tackle this project this weekend!

    A properly balanced door reduces strain on the rollers and track, preventing premature wear. Adjust the door balance weights or counterweights as needed. || Inspect for signs of rust or corrosion | Monthly | Rust and corrosion can weaken rollers and damage the track.

    Early detection is crucial to prevent further damage. If any rust is observed, address the issue promptly to prevent its spread. |

    Impact of Environmental Factors

    Environmental factors play a crucial role in the longevity of sliding glass door rollers. Exposure to extreme temperatures, moisture, and excessive dust can accelerate wear and tear, potentially leading to premature failure. Understanding the local climate and taking preventive measures is essential.

    Preventive Measures

    Implementing preventive measures can significantly extend the lifespan of sliding glass door rollers. Regular maintenance, proper lubrication, and protection from environmental elements are essential. For example, in humid climates, consider using corrosion-resistant lubricants. In areas with heavy dust, consider installing covers or using dust-repelling materials.

    Lubrication Techniques

    Proper lubrication techniques are essential for smooth operation and long-term performance. Apply lubricant sparingly to the designated areas on the rollers. Avoid over-lubrication, as this can attract dirt and grime. Use a suitable lubricant specifically recommended for sliding glass doors. Ensure the lubricant is compatible with the material of the rollers and track.

    Types of Replacement Rollers

    Replace Sliding Glass Door Rollers

    Choosing the right replacement rollers for your sliding glass door is crucial for smooth operation and longevity. Different roller types offer varying levels of performance, depending on factors like the door’s weight, usage frequency, and the overall design of your door system. Understanding the strengths and weaknesses of each type will help you make an informed decision for a successful replacement.The selection of replacement rollers significantly impacts the overall functionality and lifespan of your sliding glass door system.

    Different materials and designs influence the door’s ability to glide effortlessly, withstand wear and tear, and maintain its aesthetic appeal. A poor choice can lead to squeaking, sticking, or even damage to the door frame.

    Metal Rollers

    Metal rollers, typically made of steel or aluminum, are known for their durability and strength. They are often a popular choice for heavier doors or high-traffic areas. The robust construction can handle significant wear and tear.Metal rollers are generally quite strong and long-lasting. They are capable of supporting heavier doors and more frequent use. However, they can be susceptible to rust or corrosion if not properly maintained, and the metallic nature may contribute to more noise compared to some other materials.

    Plastic Rollers

    Plastic rollers, often made from nylon or similar polymers, are known for their smooth operation and quiet performance. They are typically lighter than metal rollers, making them a good option for lighter doors. Their smooth surface reduces friction, contributing to a quieter and more effortless gliding experience.Plastic rollers are excellent for minimizing noise and offering a smooth gliding experience.

    However, they might not be as durable as metal rollers and may not be suitable for heavy-duty applications or high-frequency use. Furthermore, the material can degrade or crack over time if exposed to extreme temperatures or excessive pressure.

    Comparing Roller Types

    Roller Type Pros Cons
    Metal Durable, strong, capable of handling heavier doors, resistant to minor impacts Can be noisy, prone to rust or corrosion, heavier
    Plastic Quiet operation, smooth gliding, relatively light weight Less durable than metal, may not be suitable for heavy doors, can degrade over time

    Impact on Door Performance

    The type of roller directly affects the overall performance of the sliding glass door. Metal rollers, while durable, can create more noise. Plastic rollers, on the other hand, deliver a smoother, quieter operation but may not be as long-lasting. The weight of the door and the frequency of use are crucial factors in determining the best roller type.For instance, a light-weight sliding door used occasionally might benefit from plastic rollers.

    Conversely, a heavy-duty commercial door requiring constant use would likely benefit from the greater durability and load-bearing capacity of metal rollers. Careful consideration of the specific application is essential for selecting the appropriate roller type.

    Roller Selection Guide

    The ideal roller type depends on the specific door’s weight and usage pattern. For heavier doors used frequently, metal rollers are likely the best choice. For lighter doors or doors used less frequently, plastic rollers offer a balance of quiet operation and cost-effectiveness. Always consult the manufacturer’s recommendations for the specific door model to ensure compatibility and optimal performance.

    Cost Considerations

    Replacing sliding glass door rollers can range from a budget-friendly DIY project to a more involved professional job. Understanding the associated costs, influencing factors, and potential long-term savings is crucial for making an informed decision. Careful planning and consideration of various factors will ensure you’re making the best choice for your needs and budget.

    Factors Influencing Roller Replacement Costs

    Several factors influence the price of replacing sliding glass door rollers. The type of roller, the complexity of the installation, the labor rates in your area, and any additional repairs needed all contribute to the overall cost. Furthermore, the size and condition of the door system play a significant role in the overall price.

    Roller Type Cost Breakdown

    Different roller types offer varying levels of durability and performance, which directly impact their cost. Selecting the appropriate roller type for your specific needs is essential to ensure optimal performance and longevity.

    • Basic Plastic Rollers: These are typically the most affordable option, but they may not offer the same level of durability as other types. They are suitable for light-use doors and may require more frequent replacements.
    • Metal Rollers: Metal rollers are more durable and long-lasting compared to plastic ones, resulting in a higher upfront cost. They are a better choice for heavy-use doors or those in high-traffic areas.
    • Heavy-Duty Rollers: These rollers are designed for extremely heavy doors or applications with significant weight and frequent use. They come with a higher price tag but offer the best long-term value.
    • Ball Bearing Rollers: Featuring ball bearings, these rollers provide smooth operation and reduced friction. They offer superior performance but have a higher price point compared to basic plastic or metal rollers.

    Replacement Service Pricing Models

    Pricing models for roller replacements vary depending on the service provider. Some companies offer fixed-price packages, while others base their pricing on an hourly rate. It’s essential to inquire about the specific pricing model before committing to any service.

    • Fixed-Price Packages: These packages offer a pre-determined price for a specific service, including parts and labor. This can be a convenient option, as you know the exact cost upfront.
    • Hourly Rate: Some service providers charge based on the amount of time spent on the job. This model can be unpredictable, as the actual cost depends on the complexity of the installation and potential unforeseen issues.
    • Parts-Only Pricing: In some cases, a service provider may offer parts only, requiring you to handle the installation yourself. This can lead to cost savings, but you must factor in the time and effort needed for the installation.

    Estimated Roller Replacement Costs

    The cost of replacement rollers and associated services can vary considerably. Here’s a table estimating the cost of different roller types and replacement services. Note that these are estimates and actual costs may vary based on the specifics of your door and location.

    Roller Type Estimated Cost (Parts) Estimated Cost (Labor) Estimated Total Cost
    Basic Plastic $10-$30 per roller $50-$150 per hour $60-$200
    Metal $20-$50 per roller $50-$150 per hour $80-$300
    Heavy-Duty $30-$80 per roller $50-$150 per hour $100-$400
    Ball Bearing $40-$100 per roller $50-$150 per hour $120-$500

    Long-Term Cost Savings

    Proper maintenance, including regular lubrication and inspection of your sliding glass door rollers, can significantly reduce the need for costly replacements in the future. Preventing problems early can lead to considerable long-term cost savings. Regular maintenance can extend the lifespan of your door system and prevent more extensive and expensive repairs down the road.

    Quality and Cost Relationship

    Generally, higher-quality rollers tend to have a higher price tag. However, the superior durability and longevity of these rollers often outweigh the higher initial cost. High-quality rollers will last longer and require less frequent replacements, leading to substantial long-term cost savings compared to cheaper, lower-quality options. Investing in quality parts is often a better long-term financial decision, preventing costly repairs and replacements down the line.

    Conclusive Thoughts

    Replace Sliding Glass Door Rollers

    In conclusion, replacing sliding glass door rollers is a task that can be accomplished with the right knowledge and tools. This guide has provided a comprehensive overview of the entire process, from identifying the problem to performing the replacement and maintenance. By following the steps Artikeld, you can ensure your sliding glass doors operate smoothly and reliably for years to come.

  • Make a Panty Hose Sculpture A Creative Guide

    Make a Panty Hose Sculpture A Creative Guide

    Make a Panty Hose Sculpture: Dive into the surprising world of art using everyday pantyhose. This guide explores the history, techniques, and design considerations behind creating these unique sculptures. From simple forms to intricate designs, you’ll discover how pantyhose, a seemingly mundane item, can transform into captivating works of art.

    We’ll explore various types of pantyhose, comparing their materials, textures, and durability. You’ll learn how to prepare the pantyhose, choose the right adhesives, and construct your sculpture. Inspiration for design concepts and examples of existing pantyhose sculptures will be provided.

    Introduction to Panty Hose Sculptures

    Pantyhose, a seemingly mundane garment, has surprisingly found its way into the realm of art. Its use as a sculptural medium has grown in recent years, driven by artists seeking unique textures and materials to express their ideas. This exploration delves into the history, materials, and artistic movements connected to pantyhose sculptures, examining the potential symbolism woven into these often-unexpected creations.The utilization of pantyhose in artistic endeavors is not a recent phenomenon.

    While the exact origin point is hard to pinpoint, its application in sculpture has gained traction in contemporary art circles. Artists have increasingly used this readily available material, often repurposed from discarded garments, to explore themes of femininity, consumerism, and societal norms.

    Ever considered making a panty hose sculpture? It’s surprisingly therapeutic, and a great way to channel your inner artist. Speaking of creative outlets, have you heard about the hilarious incident of a retirement party runaway dog? Check out this story about a canine escape artist at retirement party runaway dog ! The sheer chaos of it all actually inspired me to try a new panty hose sculpture technique, incorporating unexpected shapes and colors.

    It’s a fun, quirky project, perfect for a rainy afternoon.

    History of Pantyhose in Art

    The history of pantyhose in art is intertwined with the evolution of contemporary art movements. Early examples of using pantyhose for sculpture often appeared in installations and performance art, challenging conventional notions of materials and form. As artistic exploration broadened, pantyhose began to be employed in more traditional sculptural formats, highlighting the versatility of the material.

    Pantyhose Materials and Their Impact

    The choice of pantyhose material significantly impacts the sculpture’s texture, durability, and final aesthetic. Different types of nylon, spandex, and blends influence the way the material drapes, holds shape, and ultimately interacts with the artistic vision. The varying levels of stretch and opacity in pantyhose allow for different degrees of manipulation and control in the sculptural process. This wide array of qualities contributes to the diversity and unique characteristics seen in pantyhose-based artworks.

    Artistic Movements Exploring Similar Themes

    Several artistic movements have explored themes relevant to pantyhose sculptures. Conceptual art, for example, often prioritizes the idea behind the artwork over its physical form. The use of seemingly ordinary materials like pantyhose in conceptual works emphasizes the artist’s message and perspective. Similarly, feminist art often explores themes of gender, societal expectations, and the female experience, and pantyhose sculptures can be a powerful medium for these explorations.

    Other movements, such as appropriation art, often incorporate found objects, including discarded pantyhose, further adding layers of meaning and context to the piece.

    Symbolic Meanings of Pantyhose in Art

    The use of pantyhose in art can carry various symbolic meanings. The material’s association with femininity and fashion can be a point of departure for artists exploring these ideas. The repurposing of discarded garments can be a commentary on consumerism and waste. Pantyhose, as a ubiquitous garment, can also serve as a symbol of everyday life, highlighting the mundane and the extraordinary in the artistic context.

    Further, the material’s inherent vulnerability and delicate nature might be used to reflect on the fragility and resilience of human existence.

    Comparison of Pantyhose Types for Sculpture

    Pantyhose Type Material Composition Texture Durability Cost
    Sheer Nylon Mostly nylon Delicate, smooth Low Low
    Opaque Nylon Mostly nylon Smooth, dense Medium Low
    Spandex Blend Nylon, spandex Stretchy, pliable Medium Medium
    Supportive Control Nylon, elastane Firm, smooth High Medium-High

    Different pantyhose types offer distinct characteristics, influencing the final sculpture. The choice of material dictates the sculpture’s form, longevity, and ultimately, the artist’s expression. The cost factor also plays a role in the selection process, especially for artists working with limited budgets.

    Methods and Techniques for Panty Hose Sculptures

    Pantyhose, often dismissed as mere hosiery, offer a surprising versatility. Their unique properties, from their stretchy nature to their ability to hold shape, make them an excellent medium for artistic expression. This exploration dives into the techniques used to transform simple pantyhose into intricate sculptures, exploring the tools, methods, and challenges inherent in this captivating art form.The key to successful pantyhose sculpting lies in understanding the material’s behavior.

    Pantyhose are fundamentally different from other sculpting mediums like clay or plaster. They are stretchy, prone to tearing, and require a delicate touch. Therefore, understanding the techniques and employing appropriate tools is critical to achieving the desired results.

    Shaping and Manipulating Pantyhose

    Pantyhose, unlike more rigid materials, respond best to gentle manipulation. Instead of forceful shaping, the artist should focus on carefully pulling, folding, and layering to create desired forms. Understanding the elasticity of the material is paramount. This requires patience and practice to control the shaping process without damaging the delicate fabric.

    Tools and Equipment for Pantyhose Sculpting

    The equipment needed for pantyhose sculpting is relatively straightforward but crucial for success. Essential tools include safety pins, sewing needles, pins, and scissors for precise cutting and shaping. A variety of weights, like small pebbles or beads, can be strategically placed within the pantyhose to add structure and weight to the sculpture. Additionally, clear packing tape can be employed to adhere and secure elements of the sculpture.

    The choice of tools and weights will depend on the specific sculpture being created.

    Creating a Basic Pantyhose Sculpture

    A fundamental understanding of the steps involved in constructing a basic pantyhose sculpture is essential. This process involves careful consideration of the desired form, selecting the right pantyhose, and employing proper techniques to achieve the desired shape.

    Steps in Creating a Simple Pantyhose Form

    This detailed guide Artikels the steps involved in creating a basic pantyhose form, highlighting the importance of precision and control throughout the process.

    Ever wanted to make a panty hose sculpture? It’s surprisingly fun, and you can create some pretty cool shapes. Plus, inspiration can be found in the work of artists like Lucinda Chua, someone who’s really pushing the boundaries of what’s possible with unconventional materials. Lucinda Chua somebody who definitely has some fascinating approaches to sculpture, which can translate to some creative panty hose projects.

    So, grab some old pantyhose and get sculpting!

    Step Description Materials Tools
    1 Choose a suitable pantyhose and prepare the work area. Pantyhose, scissors Scissors, measuring tape (optional)
    2 Sketch the desired form on paper or a digital platform. Paper, pencil, or digital drawing tablet Pencil, ruler, or drawing tablet
    3 Carefully cut the pantyhose to the desired shape and size. Pantyhose, scissors Scissors
    4 Begin shaping the form using your hands and weights as needed. Pantyhose, weights (optional) Hands, safety pins, or pins
    5 Use safety pins or other tools to secure the shape and add details. Pantyhose, safety pins, weights (optional) Safety pins, pins, sewing needles
    6 Add finishing touches and allow the sculpture to dry completely. Pantyhose, optional finishing touches Scissors, tweezers (optional)

    Common Challenges and Potential Solutions

    Creating pantyhose sculptures presents unique challenges. One common issue is maintaining the shape and preventing the material from stretching or tearing. Using appropriate tools and weights can significantly reduce this problem. Another potential challenge is the time required for the sculpture to dry and set. To mitigate this, use a gentle touch and allow the sculpture to dry completely before handling.

    Patience and a keen eye for detail are crucial in addressing these and other potential issues.

    Design Considerations and Inspiration

    Pantyhose sculptures offer a fascinating realm for creative expression. Beyond the practical considerations of materials and techniques, successful pantyhose art hinges on compelling design concepts. This exploration delves into the diverse world of design inspiration, exploring themes, examples, and approaches to crafting unique and captivating pantyhose creations.

    Design Concepts and Themes

    Understanding the core concepts behind pantyhose sculptures is key to developing original and compelling pieces. The sheer, translucent nature of pantyhose lends itself to a wide range of artistic interpretations. From abstract forms to narrative representations, the possibilities are almost limitless. Exploring different themes can inspire unique perspectives and lead to unexpected artistic outcomes.

    Examples of Existing Pantyhose Sculptures

    Numerous artists have successfully harnessed the unique properties of pantyhose to create striking sculptures. One notable example features a series of cascading, translucent forms evoking a waterfall or a veil of mist. Another example utilizes the material’s strength and drape to construct intricate, architectural structures, reminiscent of delicate, spiderweb-like formations. These examples showcase the potential for transforming seemingly mundane materials into visually arresting works of art.

    Themes for Pantyhose Sculptures, Make a Panty Hose Sculpture

    The thematic diversity of pantyhose sculptures is substantial. A list of potential themes for exploration includes:

    • Nature: Sculptures can represent natural phenomena like waterfalls, clouds, or plants, showcasing the versatility of the material in capturing organic forms.
    • Abstract Forms: Experimenting with geometric shapes, flowing lines, and layered textures allows for a departure from representational art, emphasizing the aesthetic qualities of the material.
    • Narrative Representations: Sculptures can tell stories or evoke emotions through specific forms, compositions, and color combinations.
    • Social Commentary: Pantyhose sculptures can be used as a medium for social commentary, reflecting on issues related to gender, society, or culture through symbolism.

    Design Approaches and Potential Outcomes

    The following table Artikels various design approaches, their corresponding inspiration, potential materials, and anticipated outcomes.

    | Design Approach | Inspiration | Materials | Potential Outcomes | |—|—|—|—| | Abstract Forms | Geometric shapes, flowing lines | Different colors of pantyhose, various textures | Intricate, visually striking sculptures with an emphasis on form and texture. | | Narrative Representations | Specific stories, emotions | Colored pantyhose, accessories like beads or fabric scraps | Sculptures that convey a particular message or evoke a specific emotional response. | | Natural Forms | Waterfalls, plants, clouds | Translucent pantyhose, possibly other fabrics for contrasting textures | Sculptures that capture the fluidity and beauty of natural forms, using the sheerness of pantyhose to convey movement and transparency. | | Social Commentary | Issues related to gender, society | Different colors of pantyhose, possibly other fabrics to represent symbols | Sculptures that act as symbolic statements, using the material’s flexibility to create powerful visual metaphors. |

    Materials and Preparation: Make A Panty Hose Sculpture

    Make a Panty Hose Sculpture

    Transforming sheer pantyhose into captivating sculptures requires meticulous preparation and the right materials. This stage is crucial, as the choice of adhesive and support structure significantly impacts the final outcome and longevity of your creation. Careful selection ensures your vision translates seamlessly into a tangible form.

    Preparing the Pantyhose

    Proper preparation of the pantyhose is fundamental to achieving a smooth, even surface for sculpting. Washing the pantyhose in a gentle cycle with a mild detergent and air-drying is essential. This removes any excess oils or manufacturing residues that might interfere with adhesive bonding. Ironing the pantyhose on a low setting can also help to smooth out any wrinkles or creases, creating a more uniform surface.

    Thorough preparation will significantly enhance the sculpting process.

    Adhesives and Fixatives

    Selecting the right adhesive is paramount for a successful pantyhose sculpture. Various options are available, each with its own set of advantages and disadvantages. The choice depends on the desired outcome, the complexity of the sculpture, and the longevity required.

    Types of Adhesives

    • Fabric Glue: Fabric glue is a versatile option for pantyhose sculptures. It offers good adhesion and is relatively easy to work with. However, it might not be ideal for intricate details or large-scale projects due to its drying time and potential for cracking.
    • Craft Adhesive: Craft adhesives are a common choice for many craft projects, and they are often readily available. Their consistency and drying time are generally well-suited for various pantyhose sculpting techniques, especially for medium-sized or small-scale sculptures.
    • Hot Glue: Hot glue offers fast bonding, making it ideal for quick assembly or fixing small components. Its strong adhesion is perfect for holding details in place, but its heat sensitivity might affect the delicate structure of pantyhose.

    Comparison of Adhesives

    Adhesive Type Pros Cons
    Fabric Glue Good adhesion, relatively easy to use Drying time, may not be suitable for large projects, potential for cracking
    Craft Adhesive Good consistency, drying time appropriate for many projects, readily available May not be as strong as other options, drying time can vary
    Hot Glue Fast bonding, strong adhesion, good for small details Heat sensitivity, potential for damage to delicate materials, not ideal for large-scale projects

    Support Structures

    A robust support structure is crucial for maintaining the shape and integrity of your pantyhose sculpture. The choice of support structure will depend on the size, complexity, and desired aesthetic of the sculpture.

    • Cardboard: Cardboard is an inexpensive and readily available material that provides excellent support for many types of pantyhose sculptures. Its rigidity allows for the creation of intricate forms and shapes.
    • Wire: Wire offers flexibility and can be molded into a variety of shapes, making it ideal for sculpting organic forms or providing support for larger sculptures. Care must be taken to ensure the wire does not damage the pantyhose material.
    • Styrofoam: Styrofoam can be carved and shaped to create lightweight yet sturdy support structures. Its ability to be easily cut and molded makes it an excellent option for complex sculptures.

    Alternative Materials

    Expanding your material palette can unlock new creative possibilities.

    • Beads: Beads can add texture and visual interest to your pantyhose sculptures. Their varying sizes and colors provide endless possibilities for creating unique designs.
    • Fabric scraps: Incorporating fabric scraps can add depth and visual appeal to your sculptures. Consider contrasting colors or patterns for a more striking effect.
    • Other embellishments: Buttons, sequins, ribbons, or other embellishments can enhance the aesthetics and add character to your pantyhose sculptures.

    Sculpting Techniques for Different Forms

    Transforming sheer pantyhose into tangible art requires a keen eye for form and a delicate touch. The possibilities are boundless, from whimsical animals to intricate floral arrangements, all achievable with a little creativity and the right techniques. This section dives deep into the methods for sculpting diverse forms, adding detail and texture, and crafting intricate designs.Sculpting with pantyhose allows for a unique exploration of form and texture.

    The sheer material’s flexibility allows for the creation of delicate details and complex shapes, while its drape lends itself well to organic forms. Understanding the properties of the fabric and employing appropriate techniques is key to achieving the desired results.

    Creating Animal Forms

    Creating animal sculptures requires a combination of shaping and careful manipulation of the pantyhose. Start with a basic form, and then gradually refine details like limbs, ears, and tails. For instance, a simple cone-shaped form can become a cat’s head by adding smaller cones for ears and shaping the base for the face. Employing various folds and gathers can create a sense of volume and depth, mimicking fur or feathers.

    Using different colored pantyhose can also add visual interest and enhance the animal’s appearance.

    Crafting Floral Designs

    Flowers offer a beautiful opportunity to showcase the drape and flow of pantyhose. Begin by creating a simple petal shape using folds and gathers. Combine these petal shapes to form the flower’s structure. Consider the arrangement of petals to create a realistic or abstract floral design. Add stems and leaves using a similar technique.

    Use different shades of pantyhose for a more natural look. Experiment with various folding and twisting techniques to achieve different textures and patterns on the petals.

    Ever wanted to make a panty hose sculpture? It’s surprisingly fun, and I’ve been inspired by the dynamic energy of the recent “moonface city wrecker ep” moonface city wrecker ep to try some new, more abstract shapes. The creativity unleashed by that video is infectious, and I’m excited to see what I can sculpt with these stretchy wonders.

    Sculpting Abstract Forms

    Abstract sculptures provide a chance to explore non-representational forms. Experiment with different shapes, using folds, gathers, and twists to create complex and dynamic compositions. Think about how light and shadow will interact with the form. Incorporate different colors and textures to enhance the visual impact of the sculpture. Consider adding elements like beads, buttons, or other embellishments to create depth and visual interest.

    Adding Detail and Texture

    Detailing is essential to bring life and realism to pantyhose sculptures. Use various techniques like folding, gathering, and twisting to create different textures. Add embellishments like buttons, beads, or sequins to enhance the visual appeal. Careful attention to detail can elevate a simple form into a captivating work of art. Consider using different types of pantyhose for contrast and texture, for example, using a thicker pantyhose for a stem or a leaf, to add visual depth.

    Creating Intricate Patterns and Designs

    Intricate patterns and designs add visual interest and complexity to the sculpture. Using a combination of folds, gathers, and pleats, you can create a wide array of patterns. Experiment with different patterns, like stripes, swirls, or geometric shapes. Use different colored pantyhose to highlight the pattern and create visual contrast. Consider using stencils to create repeated patterns or motifs on the pantyhose.

    Table of Shaping Examples

    Object Technique Materials Notes
    Cat Folding, Gathering, Shaping Different shades of pantyhose Focus on creating distinct features like ears and tail.
    Rose Folding, Gathering, Combining petal shapes Different shades of pantyhose Create layers for a realistic rose.
    Abstract form Folding, twisting, draping Single color or multiple colors Experiment with various shapes and forms.
    Bird Combining shapes, folding, gathering Different shades of pantyhose Create a bird form by using cone shapes for the body and adding smaller shapes for the wings and tail.

    Display and Preservation

    Bringing your pantyhose sculptures to life requires careful consideration of their long-term preservation. Proper display techniques and protective measures are essential to ensure these unique creations maintain their artistry and appeal over time. The goal is to showcase your work while minimizing the risks of damage from environmental factors and handling.Preservation strategies should be tailored to the specific materials and techniques used in each sculpture.

    The environment plays a significant role, with factors like humidity, temperature, and light exposure all potentially impacting the longevity of the piece. The use of appropriate storage materials and display methods is crucial to combat these factors.

    Display Methods

    Displaying pantyhose sculptures requires a thoughtful approach that balances aesthetic appeal with protective measures. Different display methods suit various types of sculptures. For example, freestanding sculptures might be best displayed on a pedestal or a custom-made stand, ensuring they are elevated from potential damage and easily viewed. Suspended sculptures, on the other hand, may require specialized fixtures to maintain their position and avoid stress on the delicate material.

    Preservation Techniques

    Preserving pantyhose sculptures involves a multifaceted approach to minimize deterioration. A crucial aspect is the choice of storage and display environment. Maintaining stable humidity and temperature levels is paramount. Fluctuations in these conditions can lead to shrinkage, warping, and even cracking of the pantyhose material. Similarly, direct sunlight or intense artificial light should be avoided, as these can fade the colours and weaken the fibers.

    Consider using UV-filtering materials to protect the sculpture from these types of light damage.

    Materials for Storage and Display

    Careful selection of materials is essential for the proper storage and display of pantyhose sculptures. Storage containers should be made of non-reactive materials like acid-free cardboard boxes or archival-quality plastic containers. These should be well-ventilated to prevent moisture buildup. For display, consider using acid-free pedestals or stands, ensuring they are sturdy and won’t exert undue pressure on the sculpture.

    Cotton-based fabrics or soft, non-abrasive materials are ideal for handling or supporting the sculptures. Additionally, acid-free tissue paper or archival-quality mats are excellent for protecting the sculptures from dust and scratches.

    Potential Risks and Prevention

    Several factors can negatively impact the longevity of pantyhose sculptures. Exposure to excessive humidity can cause the pantyhose to become brittle and prone to tears. Conversely, low humidity can result in shrinkage and cracking. Temperature fluctuations also contribute to material degradation. Sunlight and strong artificial light sources can cause fading and discoloration.

    Proper environmental control and protective measures are key to preventing these issues.

    Protective Casing Design

    Creating a protective casing for a sculpture requires careful consideration of its design and structural integrity. For example, a simple protective cover, like a clear plastic box with breathable sides, can help regulate humidity and protect against dust and scratches. A more elaborate casing might involve a custom-made frame constructed from non-reactive materials, with a protective layer of archival-quality fabric or clear plastic for optimal protection.

    Closing Notes

    Make a Panty Hose Sculpture

    In conclusion, creating pantyhose sculptures is a journey of creativity and innovation. By understanding the materials, techniques, and design principles, you can craft unique and meaningful works of art. This guide provides a comprehensive overview, equipping you with the knowledge to embark on your own artistic adventure with pantyhose. From simple forms to elaborate creations, the possibilities are endless! Now go forth and sculpt!

  • Cover Up a Bad Wall  A Complete Guide

    Cover Up a Bad Wall A Complete Guide

    Cover Up a Bad Wall: This comprehensive guide delves into the art of transforming unsightly walls into beautiful focal points. Whether your wall suffers from cracks, uneven surfaces, or plumbing nightmares, we’ll equip you with the knowledge and tools to tackle any issue head-on.

    From identifying the problem’s root cause to choosing the perfect cover-up method, we’ll explore the entire process, emphasizing proper preparation, execution, and long-term maintenance. Discover how to create a visually appealing and functional space, even with a challenging starting point.

    Identifying the Problem

    A poorly finished wall can significantly detract from a room’s overall aesthetic appeal and even compromise its structural integrity. Understanding the various types of “bad” walls and the potential consequences of simply covering them up is crucial before embarking on any cosmetic repair project. Ignoring underlying issues can lead to costly and time-consuming problems down the line.Addressing the root cause of a wall’s imperfections is always the best approach, even if it requires more upfront effort.

    A superficial fix will only mask the problem, potentially leading to more extensive repairs later. This section explores different types of problematic walls, the reasons behind their flaws, and the long-term implications of overlooking them.

    Types of Bad Walls

    Various factors can contribute to a wall’s undesirable appearance. These imperfections range from minor cosmetic issues to more significant structural problems.

    • Cracked Plaster: Cracked plaster is a common issue, often caused by settling, temperature fluctuations, or improper application. These cracks can range from hairline fractures to wider fissures, significantly impacting the wall’s aesthetic appeal. If left unaddressed, cracks can widen, allowing moisture penetration and potentially causing further damage.
    • Uneven Surfaces: Uneven surfaces are often a result of inconsistent application of materials like drywall or plaster. The resulting bumps, dips, or irregularities create an unprofessional and unappealing look. Such imperfections can affect the way paint or other finishes are applied, further compromising the wall’s appearance.
    • Visible Plumbing Issues: Exposed pipes, leaks, or poorly installed plumbing fixtures can create significant aesthetic problems. These issues not only detract from the wall’s visual appeal but can also lead to moisture damage and mold growth, posing health risks. In such cases, immediate repairs are necessary to prevent further complications.
    • Poorly Finished Drywall: Drywall imperfections, including visible seams, gaps, or uneven textures, can make a wall appear unfinished and unprofessional. These issues can be corrected with proper techniques, but ignoring them can create a significant visual concern.

    Reasons for Wall Imperfections

    Several factors can contribute to the poor quality of a wall, from simple oversight to more significant issues.

    • Budget Constraints: Limited budgets can sometimes result in the use of inferior materials or rushed workmanship, leading to visible imperfections. However, investing in quality materials and skilled labor can prevent many of these issues from arising in the first place.
    • Rushed Construction: Construction projects that are rushed often lead to corners being cut, resulting in poor quality and visible imperfections in the walls. Prioritizing thorough work processes can minimize these problems.
    • Design Flaws: Sometimes, the design itself might not account for potential issues, leading to problems with the wall’s structure or finish. Careful planning and consideration of construction methods can help mitigate these problems.

    Long-Term Problems of Covering Up Bad Walls

    Ignoring underlying issues can lead to more significant problems down the line.

    • Moisture Damage: Cracked plaster or poorly finished drywall can allow moisture to penetrate the wall, leading to mold growth, rot, and structural damage. This can be a costly and time-consuming issue to resolve.
    • Structural Instability: Uneven surfaces or cracked plaster can compromise the wall’s structural integrity, making it more prone to further damage. Ignoring these problems can result in the wall becoming unstable over time.
    • Increased Repair Costs: Addressing the problem later will likely involve more extensive and costly repairs than a simple fix early on. Early identification and remediation is key to minimizing future expenses.

    Importance of Addressing the Underlying Issue

    Ignoring the underlying issue can lead to a multitude of problems. This is crucial for ensuring a structurally sound and aesthetically pleasing wall.

    • Prevention of Further Damage: Addressing the root cause of the problem is essential to prevent further damage to the wall and the surrounding areas.
    • Maintaining Structural Integrity: Repairing the underlying issue ensures that the wall maintains its structural integrity, preventing future problems and maintenance costs.
    • Long-Term Value: A properly repaired wall contributes to the long-term value of a property by ensuring its structural soundness and visual appeal.

    Choosing the Right Cover-Up Method

    Deciding how to conceal a damaged wall depends heavily on the extent of the damage, your budget, and your aesthetic preferences. A thorough assessment of the problem is crucial, as different materials will handle varying degrees of damage and imperfections differently. The choice isn’t just about covering up the issue, but about creating a lasting and visually appealing solution.Different materials offer varying degrees of practicality, visual appeal, and cost-effectiveness.

    Understanding the strengths and weaknesses of each option is essential to making an informed decision. This section explores the diverse range of cover-up methods, analyzing their suitability for different situations.

    Paint

    Paint is a common and often cost-effective solution for minor imperfections. Its versatility allows for a quick and relatively easy application, making it a popular choice for concealing minor cracks, stains, or uneven textures. The wide variety of colors and finishes available ensures that paint can be used to match existing décor or create a completely new look.

    However, paint’s effectiveness is limited by the severity of the underlying damage. If the damage is significant, multiple coats may be necessary, which can impact the overall cost.

    Wallpaper

    Wallpaper provides a more substantial cover-up than paint, offering a wide range of patterns and textures to create a more dramatic effect. Its ability to mask significant flaws and imperfections makes it an excellent choice for covering more substantial damage. However, wallpaper can be more expensive than paint, and the installation process can be more complex, potentially requiring specialized tools and labor.

    The longevity of wallpaper depends on the quality of the paper and the care taken in its application.

    Paneling

    Paneling is a more substantial cover-up method, providing a more durable and potentially longer-lasting solution. It can effectively conceal significant structural issues, providing a more permanent solution. However, paneling often comes with a higher price tag, both in material and labor costs. The installation process can be more time-consuming than other methods. Paneling can create a more sophisticated and visually appealing effect, adding depth and character to a room.

    Decorative Wall Coverings

    Decorative wall coverings, such as vinyl or fabric, offer a balance between the cost-effectiveness of paint and the visual impact of wallpaper. These coverings come in a wide variety of styles and textures, providing a more dynamic and interesting alternative to standard paint or wallpaper. The cost of decorative wall coverings typically falls between paint and wallpaper, while the installation process is often similar to wallpapering.

    Durability depends heavily on the specific type of material used and the care it receives.

    Comparison Table

    Material Pros Cons Cost Durability
    Paint Cost-effective, versatile, quick application, wide range of colors Limited concealing power for major flaws, may require multiple coats Low Moderate
    Wallpaper Conceals significant flaws, wide range of patterns/textures More expensive than paint, more complex installation, potentially less durable than paneling Medium Moderate
    Paneling Durable, masks substantial structural issues, adds depth and character High cost, complex installation, more time-consuming High High
    Decorative Wall Coverings Good balance of cost and visual impact, wide variety of styles Durability depends on material type, installation similar to wallpaper Medium Moderate-High

    Preparation and Planning

    Cover Up a Bad Wall

    Getting a bad wall looking good again involves more than just slapping on a fresh coat of paint. Thorough preparation is key to a successful cover-up, ensuring a smooth, durable finish that lasts. This crucial step often determines the longevity and quality of the final result. Proper surface preparation prevents issues like peeling paint, uneven surfaces, and premature failure of the cover-up material.A well-prepared surface is a happy surface, and a happy surface is a surface that accepts the cover-up material with enthusiasm.

    This section delves into the essential preparation steps, from cleaning and patching to priming, to help you achieve a flawless transformation.

    Covering up a bad wall can be tricky, requiring careful planning and often a lot of elbow grease. But sometimes, the best way to handle a less-than-stellar wall is to make a bold statement, like the artist Mias, whose album cover, as discussed in this insightful article on mias album cover is not subtle , is anything but subtle.

    It’s a vibrant, attention-grabbing design that certainly makes a statement, which could be a great inspiration for dealing with a less-than-perfect wall, too.

    Cleaning the Wall

    Thorough cleaning is the first step in preparing a wall for a cover-up. Dirt, dust, loose paint, and debris can hinder the adhesion of the new cover-up material, leading to an uneven or short-lived finish. Use a damp sponge or cloth to remove loose debris. For tougher grime, a mild detergent solution can be effective, but avoid harsh chemicals that could damage the wall’s existing surface.

    Patching Wall Damage

    Wall damage, from cracks to holes, needs careful attention to prevent future problems. Imperfections can compromise the integrity of the cover-up, leading to visible flaws or even the failure of the entire project. Appropriate patching is crucial. Different patching techniques are suitable for various types of damage.

    Covering up a bad wall can be tricky, but sometimes a fresh coat of paint is just the ticket. Speaking of creative solutions, did you hear that Jonny Greenwood, the incredible composer known for his haunting scores (like Jonny Greenwood to score Tilda Swinton film ), is working on a new project? Hopefully, his unique musical talents can inspire a similar transformative effect on a dull wall in my house! Maybe I’ll tackle it this weekend.

    Patching Techniques

    • For small holes or cracks, a patching compound is ideal. Apply the compound to the damaged area, smoothing it out with a putty knife. Allow the compound to dry completely before moving on to the next step.
    • For larger holes, use a patching compound mixed with fiberglass mesh or similar reinforcement. This creates a strong, durable patch that can withstand future stress. Ensure the patch is properly embedded and level with the surrounding wall.
    • For significant damage or large gaps, a drywall patch is the recommended approach. Cut a piece of drywall that matches the damaged area, reinforce it with supporting materials, and secure it to the wall with screws or adhesive.

    Priming the Wall

    Priming the wall is a crucial step that often gets overlooked. A primer creates a uniform surface for the cover-up material to adhere to, ensuring a more even finish and preventing the cover-up material from absorbing too much of the paint. It also helps seal any imperfections, preventing them from showing through the cover-up.

    Choosing the Right Tools

    Selecting the right tools is essential for efficient and effective preparation. A good quality putty knife, a variety of brushes, a primer sprayer (if appropriate), and appropriate sandpaper are all necessary. The correct tools will make the process smoother, faster, and produce a better result.

    Step-by-Step Preparation Guide, Cover Up a Bad Wall

    1. Clean the Wall: Remove loose debris, dirt, and dust with a damp cloth or sponge.
    2. Assess the Damage: Identify and assess the extent of wall damage (holes, cracks, etc.).
    3. Patch Wall Damage: Apply appropriate patching compounds or drywall patches as needed. Allow to dry completely.
    4. Prime the Wall: Apply a coat of primer to the entire wall, ensuring complete coverage. Allow to dry according to the primer instructions.
    5. Sand (Optional): If necessary, lightly sand the primed wall to create a smooth surface for the cover-up material.

    Execution and Application

    Transforming a problematic wall into a stunning feature requires careful execution. This phase involves applying the chosen cover-up material with precision and attention to detail. The right techniques can significantly impact the final outcome, ensuring a seamless and professional result. Following a step-by-step approach, combined with understanding the unique characteristics of each material, will lead to a successful and satisfying outcome.Proper execution and application of the chosen material is crucial for a successful wall cover-up project.

    This phase is about transforming a less-than-ideal wall into a stunning feature. Careful consideration of the chosen material’s properties and characteristics, along with meticulous execution, are key to achieving a flawless result.

    Applying Paint

    Applying paint effectively is a fundamental skill for a successful wall cover-up. A smooth and even finish requires preparation, precise application, and attention to detail.

    • Preparation is key. Ensure the surface is clean, free of dust, debris, and imperfections. Patch any holes or cracks before painting. Primer is essential to ensure proper adhesion and a smooth finish. A properly prepped surface will yield superior results.

    • Select the right tools. High-quality brushes, rollers, and sprayers are essential. Choosing the appropriate tool for the paint type and desired coverage is important.
    • Apply the paint in thin, even coats. Avoid applying too much paint in one go, as this can lead to drips and runs. Work in sections, allowing each coat to dry completely before applying the next.
    • Use techniques like feathering and blending for smooth transitions. This helps to eliminate visible brushstrokes and creates a seamless finish. Understanding these techniques is crucial for achieving a professional-looking outcome.
    • Addressing imperfections is vital. If you encounter imperfections or uneven surfaces, use putty or filler to correct them before applying the final coat. Be patient and meticulous in your approach.

    Applying Wallpaper

    Wallpaper application demands precision and patience. Choosing the right adhesive and following the manufacturer’s instructions is paramount.

    • Thorough preparation is crucial. Clean the wall, ensuring it’s free of dirt, dust, and any loose paint. Smooth out any imperfections. Ensure the surface is clean and ready to accept the wallpaper.
    • Prepare the wallpaper according to the manufacturer’s instructions. Unroll the wallpaper and let it acclimate to the room’s temperature and humidity. This prevents wrinkles and ensures even adhesion.
    • Apply the adhesive carefully. Following the manufacturer’s instructions is crucial for successful application. Apply the adhesive evenly to both the wall and the wallpaper.
    • Position the wallpaper carefully. Start at a corner and work your way across the wall, ensuring the wallpaper is aligned and smooth. Avoid stretching or tearing the wallpaper.
    • Use a wallpaper smoother or a damp sponge to remove any air bubbles or wrinkles. Thorough smoothing and removal of bubbles is key to a professional look.

    Applying Paneling

    Paneling adds a distinct visual element to a room. Precision and careful alignment are vital for a successful application.

    • Accurate measurements are essential. Ensure the paneling fits the wall’s dimensions correctly. Carefully measure and cut the panels to fit.
    • Apply adhesive according to the manufacturer’s directions. Proper application of the adhesive is critical for secure and lasting installation.
    • Carefully align the panels. Use a level to ensure the panels are straight and even. Ensure proper alignment for a seamless look.
    • Secure the panels firmly to the wall. Use the appropriate tools and techniques to secure the panels. Pay attention to detail and follow the manufacturer’s instructions.
    • Seal any gaps or seams properly. Use caulk or similar materials to fill any gaps and create a smooth transition between panels. This step is important to maintain the integrity of the paneling.

    Applying Decorative Wall Coverings

    Decorative wall coverings offer diverse styles and textures. Each material requires specific application techniques.

    Covering up a bad wall can feel like a temporary fix, a band-aid on a deeper problem. It’s like trying to mask the underlying feelings of isolation and disconnect, much like the themes explored in the new zine, the presents void emas new zine tackles modern alienation. Ultimately, though, a good paint job or wallpaper can’t truly erase the issue.

    Maybe a new perspective or a fresh approach, like a new zine, is what’s really needed to fix that bad wall for good.

    • Understand the material’s properties. Different materials, such as textured wall coverings or self-adhesive tiles, require different approaches. Knowing the material’s characteristics is important.
    • Follow the manufacturer’s instructions. Each material has specific instructions for preparation and application. Adhering to these guidelines is critical.
    • Apply the material according to the manufacturer’s guidelines. Carefully adhere the covering to the wall. Pay attention to detail.
    • Address any imperfections or irregularities. Correct any irregularities during the application process. This is vital to ensure a smooth finish.
    • Use appropriate tools for different materials. Using the right tools can significantly impact the quality of the finish. Different materials require different tools.

    Maintaining the Cover-Up: Cover Up A Bad Wall

    Cover Up a Bad Wall

    Keeping your wall cover-up looking its best over time requires a proactive approach. Proper maintenance is key to preventing damage and extending the life of your investment. This involves understanding the specific needs of the material you’ve chosen, from paint to wallpaper. A little preventative care goes a long way in ensuring a beautiful, long-lasting result.

    Material-Specific Maintenance Strategies

    Different materials require different maintenance strategies. Understanding these nuances is crucial for preserving the integrity of your cover-up. Paint, wallpaper, and other materials each react to environmental factors differently, demanding specific care. Consistency in care is vital for preventing premature degradation.

    • Paints: Regular cleaning and touch-ups are essential for maintaining the finish of paint-based cover-ups. Avoid harsh chemicals and abrasive cleaners. A gentle soap and water solution is typically sufficient. For minor imperfections, touch-up paint can restore the wall’s uniformity. In cases of larger damage, a complete repaint may be necessary.

      Remember that the quality of the initial paint job significantly impacts the ease of maintenance and long-term appearance.

    • Wallpapers: Wallpaper cleaning methods vary significantly depending on the type of wallpaper. Some wallpapers can be gently wiped down with a damp cloth, while others require specialized cleaning solutions. Always test any cleaning solution in an inconspicuous area first to prevent damage to the wallpaper’s design or texture. Frequent dusting helps to maintain the overall aesthetic and prevent dirt buildup.

    • Other Cover-Ups: Decorative panels, murals, and other unique cover-up materials require specific cleaning and maintenance routines. Manufacturers’ instructions should always be consulted for proper handling and care. Understanding the material’s susceptibility to moisture, UV exposure, or other environmental factors is key to preventing long-term damage.

    Preventative Measures for Damage

    Implementing preventative measures is crucial to maintain the integrity of your cover-up. Proactive strategies will minimize the need for extensive repairs or replacements in the future.

    • Environmental Control: Controlling humidity and temperature fluctuations can significantly reduce the risk of mold growth or warping. Maintaining a stable environment is crucial, especially for wallpaper and other materials sensitive to moisture.
    • Protective Coatings: Applying a protective sealant or varnish to certain cover-ups, like wood panels or painted surfaces, can help to shield them from environmental elements and wear and tear. This is particularly helpful for areas that are frequently exposed to moisture or direct sunlight.
    • Regular Inspections: Routine inspections are crucial for early detection of potential problems. This involves checking for any signs of damage, such as peeling paint, discoloration, or loose wallpaper. Addressing issues promptly can prevent them from escalating into more significant problems.

    Addressing Common Problems

    Recognizing and resolving common issues can help to maintain the aesthetic appeal and integrity of your wall cover-up.

    • Peeling Paint: Peeling paint is often caused by inadequate preparation, poor quality paint, or environmental factors like humidity fluctuations. Removing the loose paint, repairing the surface, and applying a fresh coat of paint is the usual solution.
    • Damaged Wallpaper: Damaged wallpaper can be caused by physical damage, moisture, or improper handling. The appropriate repair strategy depends on the type of damage. Minor tears can often be mended with specialized wallpaper repair kits. More extensive damage may necessitate a complete replacement.
    • Mold and Mildew: Mold and mildew growth is often a result of high humidity. Addressing the moisture issue is critical. Cleaning the affected area with a solution of bleach and water, then addressing the underlying humidity issue, is often the best course of action.

    Cleaning and Repairing Techniques

    Implementing proper cleaning and repair techniques is crucial for preserving the beauty and longevity of your cover-up. Specific cleaning and repair methods vary depending on the type of cover-up.

    • General Cleaning: Use a soft cloth or sponge with a mild soap and water solution for most paint or wallpaper cover-ups. Avoid harsh chemicals or abrasive materials, which could damage the surface. Regular dusting helps prevent buildup and maintain cleanliness.
    • Repairing Tears and Holes: The method for repairing tears and holes depends on the material. For paint, touch-up paint or patching compound can be used. For wallpaper, specialized repair kits or a similar color patch are often effective. Always follow the manufacturer’s instructions for best results.

    Aesthetic Considerations

    Transforming a flawed wall into a captivating focal point hinges on thoughtful aesthetic choices. The right design approach, color palette, and lighting can dramatically enhance the overall ambiance of a room. Careful consideration of the existing room design is essential for a seamless integration of the cover-up.Choosing the right style and color for the cover-up is not merely about aesthetics; it’s about creating a space that feels cohesive and harmonious.

    The selected method must complement the existing furniture, fixtures, and decor, fostering a unified and inviting atmosphere. This is achieved by understanding the interplay between different design elements and how they contribute to the overall visual narrative.

    Different Design Styles

    A variety of design styles can effectively mask imperfections while simultaneously adding character to a room. Modern, traditional, rustic, and eclectic designs each offer unique opportunities for creative expression. A modern approach might involve clean lines, geometric patterns, and a muted color palette. A traditional style could embrace floral patterns, rich colors, and intricate details. Rustic designs often feature natural materials, earthy tones, and textures inspired by nature.

    Eclectic styles, in contrast, blend elements from diverse sources to create a dynamic and personalized look.

    Color and Pattern Selection

    The color and pattern choices play a crucial role in creating a visually appealing and harmonious space. The goal is to select hues and patterns that complement the existing color scheme of the room. For example, if the room is predominantly neutral, incorporating accent colors and patterns into the cover-up can add depth and interest. Conversely, if the room features bold colors, a more subdued cover-up with subtle patterns might be more appropriate.

    The selection of patterns should also be mindful of the scale of the room. Large-scale patterns might overwhelm a small room, while subtle patterns can appear lost in a large space.

    Lighting and Decorative Elements

    Proper lighting can dramatically enhance the aesthetics of a covered wall. Strategically placed lighting fixtures can highlight the texture and patterns of the cover-up. For instance, recessed lighting can subtly illuminate the design, while pendant lights can add a touch of elegance. The addition of mirrors or decorative artwork can further enhance the visual appeal of the wall.

    Incorporating elements that reflect light and draw attention to the cover-up will elevate the overall ambiance of the room.

    Considering the Overall Room Design

    The chosen cover-up method should seamlessly integrate with the existing room design. A traditional-style cover-up would be less suitable in a modern room, as it would disrupt the overall aesthetic. Therefore, carefully analyze the existing room design to select a cover-up method that complements it. Consider factors like the furniture style, existing color scheme, and overall architectural style.

    Table of Design Style Suggestions

    Style Color Palette Material Pattern
    Modern Neutral (greys, whites, blacks), accented with pops of color Smooth, matte paints, textured wallpaper, panels Geometric, stripes, abstract
    Traditional Rich, warm tones (reds, blues, greens), gold accents Paints, wallpapers with floral or damask patterns, wooden paneling Floral, damask, toile
    Rustic Earthy tones (browns, greens, grays), natural wood accents Wood paneling, textured paints, natural fibers Natural elements, stripes, checks
    Eclectic Combination of colors and patterns from various styles Various materials (fabric, wallpaper, wood) Mix-and-match patterns, bold colors

    Closing Summary

    In conclusion, covering up a bad wall isn’t just about masking imperfections; it’s about transforming a space. By understanding the problem, selecting the right materials, and meticulously preparing the surface, you can achieve a beautiful and durable result. Remember, proper preparation is key to a successful outcome. With the right approach, any wall can be transformed into a stunning feature of your home.

    So, dive into the detailed guide, arm yourself with knowledge, and get ready to tackle that bad wall!

  • Fix a Hole in Your Desk A Comprehensive Guide

    Fix a Hole in Your Desk A Comprehensive Guide

    Fix a Hole in Your Desk: This comprehensive guide will walk you through the process of repairing various types of holes in your desk, from small dents to large gouges. We’ll cover different desk materials, the best repair methods, and even preventative measures to keep your workspace looking its best. Whether your desk is made of wood, metal, or laminate, we’ve got you covered!

    Understanding the cause and type of damage is key to successful repair. We’ll delve into common causes like impacts and wear and tear, and explain how the size and location of the hole affect the repair process. The guide includes a helpful table comparing different materials and their ideal repair methods. This ensures you’re choosing the right approach for your specific desk and situation.

    Understanding the Issue

    Fix a Hole in Your Desk

    Fixing a hole in your desk is more than just a cosmetic fix; it’s about understanding the root cause and choosing the right repair method. A small dent can quickly escalate into a major problem if not addressed promptly. Different desk materials react differently to damage, impacting the repair process and cost. Proper identification of the damage type and the desk’s construction is key to a successful repair.A desk hole, regardless of its size, can be traced back to a combination of factors: material properties, the type and force of impact, and the desk’s overall usage history.

    Understanding these factors allows for a more informed approach to repair. For instance, a heavy object dropped on a laminate desk might create a significantly different hole than a small, persistent scratch from a frequently used drawer.

    Types of Desk Holes

    Various types of damage can lead to holes in a desk. Small dents, caused by minor impacts, can be easily overlooked but still require attention to prevent further damage. Gouges, resulting from more forceful impacts or prolonged friction, will require more extensive repair. Cracks, appearing as lines of weakness, might be subtle but indicate underlying structural issues that need careful evaluation.

    Identifying the precise type of hole is crucial for selecting the right repair strategy.

    Fixing a hole in your desk can be surprisingly satisfying. It’s a small project that can make a big difference to your workspace, and a little DIY can really boost your confidence. Plus, think about how your perfectly repaired desk might relate to the manicured perfection of suburban lawns, a fascinating study of aesthetics and design, particularly when you see how they’re meticulously maintained.

    suburban lawns suburban lawns offer a great comparison to the precision of a repaired desk, in the end, both demonstrate the satisfaction of fixing something that’s broken. Ultimately, a fixed desk is a symbol of your commitment to a neat and tidy environment.

    Desk Materials and Their Impact on Repair

    The material from which a desk is constructed significantly affects the repair process. Wood, a common desk material, is relatively easy to repair with wood filler or patching. Metal desks, often featuring sturdy construction, may require welding or patching, which can be more complex and costly. Laminate desks, a popular choice for their durability and aesthetic appeal, can often be repaired using epoxy or patching, offering a balance between ease and effectiveness.

    Common Causes of Desk Holes

    Impacts from objects, like books, stationery, or even a misplaced laptop, are a frequent culprit for desk damage. Wear and tear, caused by constant use and friction, can lead to small holes or gouges, especially on the edges of the desk. Misuse, including placing heavy objects on unstable surfaces or using sharp objects that scratch the surface, can quickly create damage.

    Preventing misuse is crucial in minimizing the need for repairs.

    Significance of Hole Size and Location

    The size and location of the hole directly impact the repair process. Small holes might be easily concealed with filler or patching, while larger gouges require more substantial repairs. Holes near critical areas, such as joints or support structures, require extra attention to ensure the desk’s structural integrity. Understanding the implications of location is vital in preventing future issues.

    Comparison of Repair Methods for Different Desk Materials

    Material Repair Method Difficulty Cost
    Wood Wood filler, patching Medium Low
    Metal Welding, patching High Medium
    Laminate Epoxy, patching Medium Low

    This table provides a general overview of repair methods for common desk materials. The difficulty and cost associated with each repair method can vary based on the specific damage and the expertise of the repair professional. Factors such as the extent of the damage and the availability of specialized tools can influence the overall cost and time required.

    Repair Methods and Tools

    Fixing a hole in your desk is often a DIY project that requires careful consideration of the material and the size of the damage. A well-chosen repair method, along with appropriate tools, can effectively restore the desk’s aesthetic appeal and structural integrity. Understanding the nature of the damage and the desk’s composition is crucial for selecting the right approach.Various methods are available for addressing desk holes, each with its own advantages and disadvantages.

    Careful assessment of the damage is key to determining the most suitable repair strategy.

    Patching

    Patching is a common method for repairing small to medium-sized holes in wooden desks. It involves covering the hole with a patch of matching material. This technique is often preferred for its simplicity and aesthetic appeal.

    • Pros: Relatively straightforward to implement, preserves the original aesthetic of the desk, and is often cost-effective for smaller holes.
    • Cons: May not be suitable for larger holes, and the patch may not perfectly match the surrounding wood if not carefully chosen.

    Filling

    Filling involves using a suitable material to fill the hole, effectively concealing the damage. This method is particularly useful for deeper holes or those that affect the desk’s structural integrity.

    • Pros: Can be used for larger holes and often restores the desk’s structural integrity. A variety of materials are available for filling, accommodating different wood types and finishes.
    • Cons: Requires careful selection of filler material to match the desk’s color and texture. The filling process may require multiple applications to achieve a smooth finish, and may take longer than patching.

    Reinforcing

    Reinforcing is necessary when the hole compromises the desk’s structural integrity. This method involves adding support to the area surrounding the hole to prevent further damage.

    • Pros: Provides long-term structural support for the desk. It is often crucial when the hole is large or located in a high-stress area.
    • Cons: Can be more complex than patching or filling, requiring specialized tools and potentially altering the desk’s original appearance.

    Tools and Materials

    The appropriate tools and materials depend on the chosen repair method and the desk’s material.

    Repair Method Necessary Tools Materials
    Patching Wood glue, wood filler, sandpaper, utility knife, matching wood patch Matching wood, wood glue, filler
    Filling Wood filler, putty knife, sandpaper, wood stain (if necessary) Wood filler, wood stain (if needed)
    Reinforcing Screws, wood glue, wood blocks, clamps Wood blocks, screws, glue

    Choosing the Right Tools and Materials

    The size and depth of the hole, along with the desk’s material (wood type, finish, and construction), significantly influence the selection of repair tools and materials. A small, superficial hole in a solid-wood desk may require a simple patch, whereas a larger, deeper hole in a particleboard desk might need reinforcing with wood blocks.

    Patching a Small Hole in a Wooden Desk – Step-by-Step

    This procedure demonstrates patching a small hole in a wooden desk.

    1. Preparation: Clean the area around the hole with a damp cloth. Ensure the wood is completely dry before proceeding.
    2. Patch Selection: Choose a patch of wood that matches the desk’s color and grain as closely as possible. Cut the patch slightly larger than the hole to allow for shaping.
    3. Patch Application: Apply wood glue to the edges of the hole and the back of the patch. Press the patch firmly into the hole, ensuring it’s flush with the surrounding wood.
    4. Clamping: Use clamps to hold the patch in place for at least 24 hours to allow the glue to dry completely.
    5. Finishing: Once the glue is dry, use sandpaper to smooth any imperfections. Apply wood filler to any remaining gaps. Sand the area smooth, and then finish with wood stain if necessary.

    Materials and Supplies

    Fixing a hole in your desk requires careful selection of materials. Choosing the right material is crucial to ensure a durable and aesthetically pleasing repair. Mismatched materials can lead to a visible repair or a weak spot that fails over time. Understanding the desk’s material and the properties of different filling materials is key to a successful repair.

    Fixing a hole in my desk has been a bit of a project lately. Turns out, finding the right wood filler and avoiding a dust cloud is more challenging than I anticipated. Fortunately, while I was browsing online for tips on the perfect repair, I stumbled across some interesting news in brief about Bruce Springsteen, The Feelies, Saint Etienne, and Deadmau5.

    This article was pretty cool, and I’m already picturing my new, improved desk with its patched-up hole! Now, back to the task at hand – getting this desk repair completed.

    Common Repair Materials

    A variety of materials can be used to repair desk holes. The most common options include wood filler, epoxy putty, and plastic Bondo. Selecting the appropriate material depends heavily on the desk’s construction and the type of hole.

    Matching Repair Material to Desk Material

    A critical aspect of desk repair is matching the repair material to the desk’s material. Using an unsuitable material can lead to a noticeable repair, or worse, a weak spot that may lead to further damage. For instance, using wood filler on a metal desk will not adhere properly and may not fill the hole effectively.

    Properties of Filling Materials

    Different filling materials possess unique properties that influence their suitability for various repair tasks. Wood filler, commonly used for wood desks, is known for its ability to blend seamlessly with the surrounding wood. Epoxy putty, on the other hand, offers excellent adhesion to a wide range of materials, including wood, metal, and laminate. Plastic Bondo is often a good option for laminate surfaces, although it might not provide the same strength as epoxy putty.

    Preparing the Hole for Repair

    Proper preparation of the hole is essential for a successful repair. First, thoroughly clean the hole of any dust, debris, or loose particles. This ensures good adhesion of the repair material. Next, fill the hole with the selected repair material, ensuring a smooth, even surface. Finally, allow the repair material to dry and cure completely, following the manufacturer’s instructions.

    Material Suitability Table

    This table Artikels the suitability of different materials for various desk types:

    Material Desk Type Suitability
    Wood Filler Wood Excellent
    Epoxy Putty Wood, Metal, Laminate Good
    Plastic Bondo Laminate Fair

    Preventative Measures

    A pristine desk is not just aesthetically pleasing; it’s a testament to efficient workflow. Preventing holes in your desk is far more economical and time-saving than repairing them. This section dives into proactive strategies for maintaining your desk’s integrity and avoiding future damage.Proper desk care involves more than just occasional cleaning. It necessitates a mindful approach to usage and placement, coupled with preventative measures to mitigate potential hazards.

    Fixing a hole in my desk is proving surprisingly tricky. It’s definitely a project that deserves a bit of focus, but honestly, I’m more excited about Steely Dan announcing a tour with the Doobie Brothers! This tour is going to be epic. Back to the desk, though – hopefully, some wood glue and patience will solve this problem soon.

    By understanding the common causes of desk damage, you can proactively implement strategies to maintain a functional and attractive workspace.

    Strategies for Maintaining Desk Integrity

    Preventing damage requires a proactive approach. Understanding the potential stressors on your desk is crucial. Heavy objects, sharp objects, or even repeated impacts from items dropped can create weaknesses over time.

    • Strategic Desk Placement: Choosing the right location for your desk can significantly impact its longevity. Avoid placing the desk in high-traffic areas or near sources of potential impact, such as doorways or areas with heavy foot traffic. A well-considered placement minimizes the risk of accidental knocks and bumps. Positioning the desk away from direct sunlight, especially if it’s made of wood, can also reduce the risk of warping or damage.

    • Protective Measures for High-Risk Areas: Certain parts of the desk are more susceptible to damage. A laptop tray, for instance, often bears the brunt of dropped items. Protecting these vulnerable areas with a non-slip mat or a dedicated tray cover can significantly reduce the risk of punctures or dents. Likewise, using desk organizers to manage clutter can reduce the risk of items shifting and potentially impacting other surfaces.

    • Proper Desk Usage: The way you use your desk significantly influences its lifespan. Avoid placing excessively heavy items directly on the desk’s surface, especially in areas not designed for such weight distribution. Distributing weight evenly is crucial to preventing stress on specific points and potential cracking. Using a monitor riser or adjustable keyboard tray can also reduce strain on the desk and promote proper posture.

    • Impact Protection: Consider the possibility of items falling onto the desk. Protecting the surface with a desk pad or cover can significantly reduce the impact of accidental drops or knocks. For instance, a felt or rubber desk mat can cushion the blow and prevent scratches and dents. Similarly, placing protective coverings on frequently used areas of the desk (e.g., the area under the keyboard) can help prevent scratches and spills.

    Dos and Don’ts for Desk Usage

    Consistent, responsible desk usage can significantly extend its lifespan. This section Artikels key dos and don’ts to minimize the risk of future damage.

    • Do: Use desk organizers to keep items in their designated areas. Avoid placing items that could potentially fall and cause damage on the desk’s surface.
    • Do: Utilize desk pads or mats in areas that are frequently subjected to high-impact activities or potential spills.
    • Do: Regularly inspect the desk for signs of wear and tear, such as cracks, warping, or loose parts. Address these issues promptly to prevent further damage.
    • Do: Keep the desk clean and free from debris. Dust and dirt accumulation can contribute to damage over time. Dust buildup can also interfere with the proper function of electronic devices.
    • Don’t: Place extremely heavy objects directly on the desk’s surface, especially in a concentrated area.
    • Don’t: Use the desk as a surface for placing extremely hot or cold items, as these could cause thermal damage.
    • Don’t: Place sharp or pointed objects directly on the desk’s surface without proper protection.
    • Don’t: Drop heavy or sharp items onto the desk’s surface, which can easily cause damage.

    Advanced Techniques: Fix A Hole In Your Desk

    Fix a Hole in Your Desk

    Fixing a complex hole in your desk requires more than just a quick patch. Advanced techniques address the structural integrity and aesthetic appeal of the repair, ensuring the desk retains its functionality and looks its best. These techniques often involve reinforcement, meticulous surface restoration, and specialized materials to achieve a lasting solution.

    Reinforcement Methods for Larger Holes, Fix a Hole in Your Desk

    Reinforcement is crucial for large holes that compromise the desk’s structural integrity. This involves adding support to the weakened area, preventing future damage and ensuring stability. Various methods can be employed, depending on the size and location of the hole. Using wood plugs, strategically placed screws, or even reinforcing strips, will bolster the weakened section. For instance, a large hole near the desk’s edge might require a supplementary support beam or a thicker piece of plywood affixed underneath.

    Careful consideration of the underlying wood structure is essential to prevent further damage.

    Repairing Damaged Edges and Corners

    Damaged edges or corners of a desk often require specialized attention. These areas are prone to chipping and splintering, and restoring them necessitates a nuanced approach. Wood filler or epoxy resin can effectively fill minor cracks and gaps. For more significant damage, veneer repair may be necessary. Veneer, a thin layer of wood, can be carefully applied over the damaged area, matching the existing grain for a seamless repair.

    The application of veneer often requires specific tools and expertise to ensure a smooth, natural-looking finish. A crucial step is shaping and sanding the repair to match the surrounding edges.

    Restoring Aesthetic Appeal

    The final step in any desk repair is restoring its aesthetic appeal. This involves meticulously sanding the repaired area to match the existing surface, ensuring no noticeable difference. Matching the wood grain is critical for a seamless look. A final coat of stain or varnish, carefully applied, will protect the repaired area and enhance its appearance. Professional-grade finishing materials often provide superior results.

    For instance, carefully selecting a matching stain or varnish can help blend the repair seamlessly with the original desk surface.

    Advanced Repair Techniques Comparison

    Technique Description Suitability
    Reinforcement Adding support to the hole area using wood plugs, screws, or strips. Large holes compromising structural integrity, especially near edges.
    Sanding and Refinishing Smoothing and restoring the surface to match the existing finish using sandpaper and appropriate wood fillers. Various hole types, including small to medium-sized holes and surface imperfections.
    Veneer Repair Replacing damaged surface areas with a thin layer of wood (veneer) that matches the existing grain. Significant damage, extensive surface area damage, and holes requiring substantial replacement of the top layer.

    Final Conclusion

    In conclusion, fixing a hole in your desk is a manageable task with the right knowledge and tools. By understanding the different materials, repair methods, and preventative measures, you can effectively restore your desk to its former glory. Whether you opt for simple patching or more advanced techniques, this guide provides a solid foundation for a successful repair.

    Now go forth and fix those holes!

  • Replace a Washing Machine Belt A DIY Guide

    Replace a Washing Machine Belt A DIY Guide

    Replace a Washing Machine Belt is a common household repair that many homeowners can tackle themselves. This guide provides a step-by-step approach to diagnosing and resolving belt issues, from identifying the problem to reassembling the machine. It covers essential safety precautions, tools, and the entire process, ensuring a successful repair.

    This comprehensive guide covers everything from identifying the symptoms of a malfunctioning belt to the exact steps for replacing it. We’ll detail the tools needed, safety measures to take, and the precise steps for disassembling, replacing, and reassembling your washing machine.

    Identifying the Problem

    A malfunctioning washing machine belt can lead to frustrating delays and potential damage. Identifying the problem early can save you time and money. This section details common signs, how to differentiate them from other issues, and steps to diagnose the specific problem.

    Common Signs of a Failing Washing Machine Belt

    Understanding the subtle signs of a failing belt is crucial for prompt repair. A worn or broken belt often manifests in a variety of ways, from subtle noises to complete failure. These signs can be easily missed if you don’t know what to look for.

    • Unusual noises: A squeaking, grinding, or screeching sound during operation is a frequent indicator of a worn or slipping belt. This noise typically increases in intensity as the belt deteriorates further.
    • Lack of rotation: The most obvious symptom is the washing machine’s drum not rotating, either during the spin cycle or the entire wash cycle. If the drum doesn’t spin, the belt is likely the culprit.
    • Reduced washing machine performance: The washing machine might not agitate clothes effectively, resulting in incomplete cleaning. This is often a gradual decline, starting with less vigorous agitation.
    • Wobbly or vibrating drum: A belt that is loose or worn can cause the drum to wobble or vibrate excessively. This is often noticeable during the spin cycle, but may be present during the entire washing process.
    • Strange smells: While not always indicative, a burning or unusual smell, particularly during operation, can suggest a problem with the belt, especially if it is rubbing against something hot.

    Differentiating Belt Problems from Other Issues

    A washing machine has multiple components, each with its own potential failure points. It’s essential to distinguish between belt problems and other possible malfunctions to avoid unnecessary repairs.

    Replacing a washing machine belt can be a surprisingly straightforward task, but sometimes a little extra know-how is needed. This weekend, I was wrestling with a balky machine, and while figuring out the mechanics, I was unexpectedly drawn to the heavy soundscapes of David Kilgour and the Heavy Eights’ latest album, “End Times Undone.” It’s a great listen while you’re troubleshooting the whirring machine parts.

    Hopefully, with a little patience and a listen to some excellent tunes like david kilgour and the heavy eights end times undone , you’ll be back to clean laundry in no time. Back to the washing machine – time to get that belt replaced!

    • Motor issues: A failing motor can cause similar symptoms to a worn belt, such as unusual noises and lack of rotation. However, motor problems often present with additional symptoms, like a burning smell or excessive heat around the motor housing.
    • Timer malfunctions: A malfunctioning timer might prevent the machine from starting or completing cycles correctly, causing the drum not to rotate. However, a timer issue is often accompanied by erratic or no display of the current cycle.
    • Electrical problems: Electrical issues might prevent the machine from functioning at all. These issues are often accompanied by flickering lights, no power to the appliance, or a complete lack of response.
    • Other mechanical problems: Problems with the washing machine’s internal gears or components could cause similar symptoms to a belt issue. However, other mechanical issues typically show other symptoms, like the drum getting stuck or having trouble moving.

    Diagnosing the Specific Belt Issue, Replace a Washing Machine Belt

    To pinpoint the belt problem, a systematic approach is necessary. These steps should be followed carefully.

    1. Visually inspect the belt: Check for any visible damage, fraying, or signs of wear. Look for any gaps or missing sections of the belt itself.
    2. Listen for noises: Carefully observe the sounds produced during different parts of the wash cycle. Pay attention to any changes in the sounds as the washing machine works.
    3. Feel for vibrations: During operation, feel the machine for any unusual vibrations or wobbles, particularly in the drum area.
    4. Check for proper tension: A loose belt is a frequent cause of problems. Make sure the belt is correctly positioned and adequately tensioned. If necessary, consult the washing machine’s user manual for tensioning guidelines.

    Comparison Table

    Symptom Broken Belt Motor Issue Timer Malfunction
    Unusual noises (squeaking, grinding) Yes Yes No
    Lack of rotation Yes Yes Yes
    Reduced washing performance Yes Yes Yes
    Wobbly drum Yes No No
    Burning smell Possible Yes No
    Excessive heat No Yes No

    Tools and Materials Needed

    Replacing a washing machine belt, while often a DIY-friendly task, requires the right tools and materials. Having the necessary equipment on hand will save you time and frustration, ensuring a smooth and successful repair. Improper tools or a lack of the correct belt type can lead to a faulty repair, potentially causing further damage or requiring a professional intervention.

    Essential Tools

    Proper tools are crucial for a safe and effective washing machine belt replacement. These tools will help in accurately measuring, removing, and installing the new belt. Thorough preparation ensures a more efficient and precise repair.

    • Screwdrivers (Phillips and flathead): Essential for removing screws securing the washing machine’s components, like the motor housing.
    • Adjustable wrench or pliers: These tools are necessary for loosening or tightening nuts and bolts, facilitating the removal and installation of the belt.
    • Measuring tape: Precise measurement of the belt’s length is crucial to ensure the correct replacement belt is purchased.
    • Gloves: Protecting your hands during the repair process is vital, especially when working with metal parts or cleaning the area around the machine.
    • Safety glasses: Protecting your eyes from debris or potential hazards during the repair is an essential safety precaution.

    Materials Needed

    A list of materials needed will ensure you have everything required to complete the washing machine belt replacement. This includes not only the new belt but also any necessary parts for a successful repair.

    • New washing machine belt: The correct belt type and size are critical for the washing machine’s operation and lifespan. Incorrect sizing can result in a dysfunctional machine.
    • Lubricant (optional): Applying lubricant to the belt pulley system helps maintain proper operation and reduces friction. This can prolong the belt’s lifespan and improve the machine’s performance.

    Belt Type Comparison

    Different belt types have varying characteristics and are suitable for specific washing machine models. This table provides a comparison of belt types and their applications.

    Replacing a washing machine belt can be a surprisingly straightforward task. While you’re tackling that chore, you might find yourself inspired by the latest installment in the Lil Wayne dedication series, lil wayne dedication 6. The dedication series’ intricate details, just like the intricate workings of a washing machine, can be quite fascinating to study. Once you’ve got the belt replaced, you’ll be ready to tackle any laundry load with ease.

    Belt Type Description Suitability
    V-belt A common type of belt with a V-shaped cross-section, providing good power transmission. Suitable for many standard washing machine models, offering good durability and efficiency.
    Flat belt A simple, flat belt design. Less common in modern washing machines, but may be used in some older models.
    Timing belt Precisely designed belts for specific applications. Usually found in machines with complex mechanisms like timing functions.

    Safety Precautions

    Replace a Washing Machine Belt

    Replacing a washing machine belt, while often a straightforward task, requires careful attention to safety. Improper procedures can lead to electrical shocks, cuts, or other injuries. Understanding the potential hazards and following the right safety measures will ensure a smooth and accident-free repair process.Electrical appliances pose unique safety concerns. Improper disconnection can lead to electrical shocks, potentially causing serious harm.

    Following the steps Artikeld below will ensure you disconnect the machine safely and effectively. Remember, safety should always be your top priority.

    Electrical Safety Procedures

    Properly disconnecting the washing machine’s power source is paramount. Ignoring this step can lead to electric shocks. Incorrect disconnection can also lead to the potential risk of fire.

    • Locate the circuit breaker or fuse box for the washing machine.
    • Identify the specific circuit breaker or fuse associated with the washing machine.
    • Turn off the circuit breaker or remove the corresponding fuse.
    • Verify the power is completely off by checking the washing machine’s power cord and controls.

    These steps ensure the washing machine is completely de-energized, minimizing the risk of electrical shocks. Always double-check the power is off before any work involving electrical components.

    Handling Tools and Materials

    Using the correct tools and handling them safely is crucial to prevent accidents.

    • Inspect all tools for any damage or wear before use.
    • Ensure all tools are properly secured and fitted before starting the repair process.
    • Wear appropriate safety glasses and gloves to protect your eyes and hands from potential hazards.
    • Use appropriate storage methods to keep tools and materials organized and prevent accidents during storage.

    Proper handling of tools and materials minimizes the risk of injury and ensures a safe working environment. Store the tools in a designated area or container to prevent them from becoming misplaced or causing tripping hazards.

    Specific Safety Tips During Replacement

    Implementing specific safety measures during the replacement process will minimize the chance of accidents.

    • Ensure the washing machine is stable and level during the replacement procedure.
    • Take your time and follow each step carefully to avoid mistakes.
    • Be mindful of the surrounding area to prevent any tripping or falling hazards.
    • If you encounter any difficulties, seek assistance from a qualified professional.

    Following these safety tips will help prevent accidents and keep the work environment safe throughout the process.

    Fixing a balky washing machine belt can feel like a minor chore, but sometimes, like tackling a spiritual challenge, it’s a reminder of the practical side of life. Just as maintaining our physical spaces requires consistent effort, so too does maintaining our faith, which is why I encourage you to check out my post on Stay Committed to Your Christian Faith.

    Learning to replace a washing machine belt is a rewarding DIY task that builds confidence, much like finding strength in your faith. The satisfaction of a properly functioning machine is comparable to the peace that comes from staying connected to your beliefs.

    Tool and Material Storage

    Storing tools and materials properly is important for preventing accidents and ensuring easy access.

    • Use designated storage containers to organize tools and materials.
    • Keep tools and materials in a dry and well-ventilated area.
    • Store tools and materials in a safe place that is not accessible to children.

    Safe storage of tools and materials will prevent damage, and ensure the tools and materials are readily available when needed.

    Disassembling the Washing Machine: Replace A Washing Machine Belt

    Replace a Washing Machine Belt

    Taking apart your washing machine safely and effectively is crucial for replacing the belt. This section details the steps involved, from disconnecting utilities to accessing and detaching the old belt. Following these instructions carefully minimizes risks and ensures a smooth replacement process.Before you begin, ensure you have gathered all the necessary tools and materials, and reviewed the safety precautions Artikeld earlier.

    This will greatly enhance the safety and efficiency of the entire process.

    Disconnecting Utilities

    Properly disconnecting the washing machine from the power and water supply is paramount. Improper disconnections can lead to electrical shocks or water damage. Unplug the washing machine from the wall outlet and turn off the water supply valves connected to the machine. Ensure the valves are fully closed to prevent water from entering the machine’s interior.

    Removing the Access Panel

    Locate the access panel or cover on your washing machine. This panel typically covers the belt compartment. The exact location and method for removing the panel vary depending on the specific model. Refer to your washing machine’s user manual for precise instructions. Commonly, screws or clips secure the panel, which should be removed carefully to avoid damage.

    Accessing the Belt Compartment

    Once the access panel is removed, the belt compartment should be visible. Carefully inspect the compartment to identify the belt and its associated pulleys. This is critical to ensure you’re working with the correct belt. The belt may be visible or concealed behind other components. Take your time to ensure you find the belt and associated pulleys.

    Detaching the Old Belt

    Detaching the old belt from the pulleys requires careful handling to avoid damaging the pulleys or the belt itself. First, ensure the washing machine’s drum is stationary. This is essential to prevent injury and damage. Locate the tensioner pulley and use the appropriate tools to release the tension on the belt. Then, carefully guide the belt off the pulleys.

    Use your hands or a suitable tool to gently slide the belt off the pulleys, taking care not to stretch or damage the belt.

    Disassembly Steps

    Step Action
    1 Disconnect the washing machine from the power source and water supply.
    2 Remove the access panel or cover.
    3 Identify the belt and pulleys.
    4 Release the tension on the belt using appropriate tools.
    5 Carefully detach the old belt from the pulleys.

    Installing the New Belt

    Now that you’ve carefully disassembled your washing machine and identified the faulty belt, it’s time to install the new one. This step requires precision and attention to detail to ensure the machine operates smoothly and efficiently. A correctly installed belt avoids potential damage to the machine and provides long-lasting performance.

    Measuring the New Belt

    Proper measurement is crucial to ensure a precise fit. Incorrect sizing can lead to premature wear and tear on the belt or even damage to the machine’s components. Carefully measure the distance between the pulley centers. Use a flexible measuring tape to obtain the most accurate reading. Take multiple measurements, comparing them to ensure consistency and accuracy.

    Installing the Belt onto the Pulleys

    The correct installation procedure is vital for the belt to function properly. Start by carefully placing the new belt over the smaller pulley, ensuring that the belt is oriented correctly. Then, guide the belt over the larger pulley, making sure the belt is smooth and not twisted. The belt should lay flat and straight between the pulleys.

    Ensure the belt is correctly positioned on both pulleys without any kinks or bends.

    Aligning the Belt with the Pulleys

    Precise alignment is critical for smooth operation and to avoid premature wear. Visually inspect the belt’s position on both pulleys. The belt should be centered on each pulley, with no noticeable gaps or misalignment. Ensure the belt runs smoothly without any obstructions. Slight adjustments may be necessary to achieve the correct alignment.

    Checking the Tension of the New Belt

    The correct tension of the belt is essential for efficient operation and longevity. Too loose a belt may slip or not transmit enough power, while too tight a belt may cause damage to the pulleys or other machine components. A properly tensioned belt ensures smooth and continuous operation. Check the tension by gently pressing on the belt.

    It should not sag excessively or feel too rigid. A properly tensioned belt will exhibit a slight give without excessive movement.

    Reattaching the Belt to the Motor

    After installing the belt, carefully reattach the belt to the motor’s pulley, ensuring the proper alignment and tension are maintained. Ensure that the belt is correctly routed around the pulleys and that there are no kinks or twists. Double-check the position of the belt on the motor’s pulley to ensure it’s snug and secure. The belt should fit snugly and securely on the motor’s pulley.

    Take your time and check for proper alignment to prevent damage to the belt or the machine.

    Reassembling the Washing Machine

    Putting your washing machine back together correctly is crucial for its proper functioning and longevity. A careless reassembly can lead to leaks, malfunctions, or even damage to other parts of the appliance. Following the steps Artikeld below will help ensure a safe and successful reinstallation.Reassembling the washing machine involves carefully reversing the disassembly process. This meticulous approach is essential to ensure that all components are correctly aligned and secured.

    It’s also vital to pay close attention to the original placement of each part during the disassembly process to ensure optimal functionality.

    Reconnecting Power and Water Supply

    Before connecting the water supply and power, verify that all electrical connections and water lines are secure and free of any damage. A thorough inspection prevents potential hazards. Ensure all components are properly seated and that no parts are obstructing the flow of water or electricity.

    • Turn off the water supply valve to the washing machine.
    • Disconnect the washing machine from the power source.
    • Carefully reconnect the water supply hoses, ensuring they are properly seated on the machine’s connections.
    • Reconnect the washing machine to the power source. Check the circuit breaker to make sure it is in the ‘on’ position.

    Replacing the Access Panel or Cover

    Replacing the access panel or cover involves precise placement and secure fastening. Improperly installed covers can compromise the washing machine’s structural integrity.

    • Carefully align the access panel with the mounting points on the washing machine.
    • Secure the panel using the appropriate fasteners (screws, clips, etc.).
    • Ensure the panel is snug and fits securely without any gaps or misalignments.

    Reassembling Washing Machine Components

    Reassembling the washing machine components requires precision and attention to detail. Incorrect reassembly can lead to issues with operation and even damage to components. Carefully follow the steps in reverse order to avoid any confusion.

    • Ensure all components are properly aligned and secured before proceeding to the next step.
    • Carefully position and fasten the components, using the original fasteners.
    • Verify that all connections are secure and tight.
    • Inspect all components for any damage or misalignment.

    Ensuring Proper Alignment of Parts

    Proper alignment of washing machine parts is essential for optimal performance. Misalignment can cause vibrations, noise, and even damage to the machine. A thorough check at each stage of reassembly is vital.

    • Visually inspect all components to ensure proper alignment before securing them.
    • Utilize a level or other alignment tools if necessary to verify accurate positioning.
    • Apply even pressure while securing components to prevent stress on any particular area.
    • Ensure all components are positioned in their original location and configuration.

    Reassembly Steps (Reverse Order)

    The table below Artikels the reassembly steps in reverse order of disassembly, providing a clear guide for reconnecting components.

    Step Number (Disassembly) Step Number (Reassembly) Description
    6 1 Reconnect the belt
    5 2 Replace the access panel
    4 3 Reconnect the motor
    3 4 Replace the drum
    2 5 Reconnect the agitator
    1 6 Replace the housing

    Testing the Washing Machine

    After meticulously replacing the washing machine belt and reassembling the appliance, thorough testing is crucial to ensure everything functions correctly. Proper testing verifies the belt’s secure installation and the overall operational efficiency of the machine. This step is critical to avoiding future malfunctions and ensuring the washing machine performs its intended tasks reliably.Correct operation is essential for the longevity of the washing machine and for optimal cleaning results.

    A properly functioning washing machine guarantees effective cleaning, which is critical for maintaining clothes and preventing damage.

    Powering Up and Initial Checks

    To initiate testing, ensure the washing machine is properly plugged into a working power outlet. Check that all connections are secure. Verify that the machine’s power switch is in the “On” position. Observe the control panel for any unusual lights or indicators that might signal a problem. The machine should respond to user input, with the lights on the panel clearly reflecting the selected settings.

    Running a Test Cycle

    Begin with a short, light wash cycle. Use a small load of clean clothes or towels. Monitor the machine’s performance throughout the cycle. Pay close attention to the operation of the agitator or tub. The agitator or tub should rotate smoothly and without any unusual noises or vibrations.

    The drum should turn steadily and evenly, demonstrating the proper functioning of the motor and belt.

    Troubleshooting Common Issues

    • Noisy Operation: If the machine emits unusual or excessive noise during operation, it could indicate a loose belt, a problem with the motor, or a misaligned component. Carefully inspect the belt for proper tension and alignment. If the noise persists, contact a qualified technician.
    • Machine not Starting: If the machine fails to start, check the power supply, the power switch, and any circuit breakers. Verify that the connections are secure and that the belt is not interfering with the motor’s rotation. If the issue persists, consult a qualified repair professional.
    • Uneven Drum Rotation: If the drum rotates unevenly or intermittently, this might indicate a loose or damaged belt, a problem with the motor bearings, or a misalignment in the drive mechanism. Examine the belt for damage or looseness. If the issue continues, seek professional assistance.
    • Vibration: Excessive vibration during operation may suggest a loose belt, misaligned components, or a problem with the machine’s mounting. Check the belt tension and secure all components. If the problem persists, consult a professional.
    • Lack of Water Intake: If the machine doesn’t fill with water, check the water supply connections, hoses, and valves. Ensure the water supply is functioning correctly. Verify that the water inlet valve is functioning correctly and that there are no obstructions in the supply lines. If the issue remains, consult a professional.

    Verification of Correct Functioning

    After the test cycle, inspect the clothes for signs of proper cleaning. If the clothes are clean and the machine operates smoothly throughout the cycle, the belt installation and reassembly are successful. Verify that the machine completes the cycle without any unusual sounds or vibrations. Any issues, like loud noises or the machine not completing a cycle, warrant further investigation.

    Identifying and Resolving Problems

    A thorough inspection is necessary to determine the root cause of any issues that arise. By methodically examining each component, including the belt, the motor, and the drive mechanism, one can identify the specific problem. Once the problem is pinpointed, appropriate troubleshooting and repair measures can be undertaken. If the issue is beyond your capabilities, consult a qualified technician for assistance.

    Outcome Summary

    Successfully replacing a washing machine belt is achievable with careful attention to detail and a methodical approach. This guide provides a roadmap for tackling this common repair, empowering you to resolve the issue and restore your washing machine to its full functionality. Remember to prioritize safety and follow the instructions precisely for optimal results. Happy fixing!