Make Chocolate Chip Cookies: This comprehensive guide dives deep into the art of creating perfect chocolate chip cookies. From selecting the right ingredients to mastering the perfect baking technique, we’ll explore every step to ensure your cookies are irresistible. We’ll cover everything from ingredient ratios and mixing methods to baking procedures and troubleshooting common problems.
Get ready to bake up a storm! This guide will take you through the complete process, providing detailed instructions and helpful tips along the way. We’ll cover everything from ingredient selection and mixing techniques to baking time and temperature adjustments, ensuring you create the best possible cookies.
Ingredients and Measurements
Baking the perfect chocolate chip cookie hinges on precise ingredient measurements and understanding the roles each plays. A slight deviation in flour type, for example, can drastically alter the cookie’s texture. Understanding the importance of each ingredient and their interactions is key to achieving consistently delicious results.
Common Ingredients
A basic chocolate chip cookie recipe typically involves a few key ingredients. Variations abound, including different types of chocolate chips, nuts, or even additions like sprinkles. The precise combination of ingredients determines the unique characteristics of each cookie.
- Flour: All-purpose flour is the most common choice, but other types like bread flour or cake flour can significantly impact the cookie’s structure. Bread flour provides a chewier texture, while cake flour yields a softer, more tender cookie.
- Sugar: Granulated sugar provides sweetness and contributes to the cookie’s crispness. Brown sugar adds moisture and a rich molasses flavor.
- Butter: High-quality butter provides a rich flavor and contributes to the cookie’s texture. The temperature of the butter is critical in achieving the desired outcome.
- Eggs: Eggs bind the ingredients together and add structure to the cookie, affecting the spread and final texture.
- Chocolate Chips: Semisweet, milk chocolate, or dark chocolate chips are common choices. The size and type of chocolate chip will influence the overall flavor profile.
- Nuts: Walnuts, pecans, or other nuts can be added for added texture and flavor. The type of nut will impact the cookie’s flavor profile.
Importance of Precise Measurements
Precise measurements are critical for achieving the desired texture and taste. Even a small deviation in ingredient amounts can affect the final product. A recipe provides a guideline, but understanding the specific recipe’s requirements is vital.
- Consistency: Precise measurements ensure consistent results, avoiding variations in taste and texture from batch to batch.
- Baking Time: Imbalances in ingredients can impact the baking time, potentially leading to underbaked or overbaked cookies.
- Texture: The ratio of ingredients directly affects the final cookie texture, whether it’s crisp, chewy, or crumbly.
Different Types of Flour
The choice of flour significantly influences the cookie’s texture. Each flour type has unique properties that affect the final product.
- All-purpose flour: A versatile choice for most recipes, providing a balance of structure and tenderness.
- Bread flour: High in protein, bread flour produces a chewier cookie with a more substantial texture.
- Cake flour: Low in protein, cake flour results in a softer, more delicate cookie with a tender crumb.
Typical Ingredient Ratios
A basic chocolate chip cookie recipe typically follows a standard ratio of ingredients.
Making chocolate chip cookies is surprisingly therapeutic. It’s a simple process, really, but the satisfying crunch and warm, gooey center are always a reward. Speaking of rewards, the recent news about Jay-Z being a target of an alleged extortion plot over his master recordings here is definitely not the kind of sweet treat you’d want to savor.
Back to the cookies, though, I’m already craving a batch, and hopefully, some peaceful, uncomplicated baking time.
| Ingredient | Quantity | Unit |
|---|---|---|
| All-purpose flour | 2 cups | grams |
| Granulated sugar | 1 cup | grams |
| Brown sugar | ½ cup | grams |
| Butter | ½ cup | grams |
| Eggs | 2 | pieces |
| Chocolate chips | 2 cups | grams |
A standard ratio like this is a good starting point, but adjust as needed for your desired results.
Mixing Methods
Choosing the right mixing method for your chocolate chip cookies is crucial for achieving the perfect texture and flavour. Different techniques yield different results, impacting the final outcome. Understanding the nuances of each method will empower you to create cookies that meet your expectations.
Creaming Method
This method involves combining the fats and sugars together until they are light and fluffy. This process creates air pockets that contribute to a tender, soft cookie. It’s particularly effective for achieving a chewy texture and a rich flavour.
- The creaming method begins by combining softened butter and sugar in a bowl. Using an electric mixer, beat the mixture until it becomes light and fluffy, often a pale yellow colour, and significantly increased in volume. This step is essential for incorporating air into the dough, leading to a tender cookie.
- Next, add the eggs one at a time, beating well after each addition. This helps to emulsify the ingredients and bind the dough together.
- Gradually incorporate the dry ingredients (flour, baking soda, salt) into the wet ingredients. A gentle folding motion is preferred to avoid deflating the air pockets created during the creaming process. Be mindful not to overmix the dough.
- Finally, fold in the chocolate chips. Overmixing at this stage can lead to tough cookies.
The creaming method requires an electric mixer for best results.
Muffin Method
This method is simpler and quicker than the creaming method. It’s ideal for achieving a tender crumb and a good rise in the cookies. It works well for recipes that call for quick results.
- The muffin method starts by whisking together the dry ingredients (flour, baking soda, salt) in a separate bowl. This ensures that the ingredients are evenly distributed.
- In a second bowl, combine the wet ingredients (butter, sugar, eggs). Beat until combined. This step is quicker than the creaming method.
- Gradually add the wet ingredients to the dry ingredients, mixing until just combined. Overmixing should be avoided.
- Finally, stir in the chocolate chips.
This method generally uses a whisk and a spoon for mixing.
Comparison Table
| Method Name | Steps | Advantages | Disadvantages |
|---|---|---|---|
| Creaming Method | Cream butter and sugar, add eggs, incorporate dry ingredients, fold in chocolate chips. | Tender, chewy texture, rich flavour, good rise. | Takes longer, requires an electric mixer. |
| Muffin Method | Whisk dry ingredients, combine wet ingredients, combine wet and dry ingredients, stir in chocolate chips. | Quick and easy, tender crumb. | May not achieve the same level of tenderness or richness as the creaming method. |
The best method for your cookies depends on the desired texture and the time you have available.
Baking Procedures
Transforming a simple dough into perfectly crisp, chewy chocolate chip cookies relies heavily on the baking process. Precise timing and temperature control are critical to achieving the desired texture and preventing common baking pitfalls. Understanding the nuances of baking ensures that your cookies are delightful, not disastrous.Baking chocolate chip cookies is a delicate dance between heat and time.
Proper technique ensures the cookies are golden brown, not burnt, and have a consistent texture. This section will guide you through the essential steps and considerations for achieving those perfect chocolate chip cookies.
Preheating the Oven
A preheated oven ensures even heat distribution, a critical factor in baking uniform cookies. An improperly preheated oven can result in unevenly baked cookies, some too dark, others undercooked. Preheat your oven to the specified temperature, usually 350°F (175°C), and allow it to fully reach that temperature before placing the baking sheets inside. This typically takes 10-15 minutes, depending on the oven’s capacity and previous usage.
Always consult your oven’s manual for specific preheating instructions.
Placing Cookies on Baking Sheets
Proper spacing is crucial for preventing cookies from spreading and sticking together. Ensure the baking sheets are large enough to accommodate the cookies. Place cookies at least 2 inches apart to allow for even browning and prevent them from becoming flattened or overlapping. Use parchment paper on the baking sheets to prevent sticking and make cleanup easier.
This prevents the cookies from becoming overly flat and keeps them separate.
Baking Time
The baking time for chocolate chip cookies varies depending on the oven and the size of the cookies. Generally, baking time ranges from 8 to 12 minutes. Start checking the cookies around the 8-minute mark, adjusting the baking time as needed based on your oven and the desired level of doneness. Overcrowding the baking sheet will result in uneven baking and shorter baking times.
Determining Doneness
A key skill in baking is recognizing when cookies are done. The edges should be golden brown, and the centers should be soft but not gooey. Avoid taking cookies out too early; they will continue to bake slightly as they cool. Use a toothpick to gently check the center of a cookie. If it comes out with moist, barely attached crumbs, the cookie is likely done.
Oven Temperatures and Effects
Different oven temperatures will impact the baking time of cookies. A slightly lower temperature might require a longer baking time, while a higher temperature may reduce baking time. Always monitor your cookies closely when adjusting the temperature. For example, if you are using a convection oven, the baking time might need to be adjusted. Experimentation with different temperatures is essential to understanding your oven’s specific characteristics.
Common Baking Mistakes
Underbaked cookies often remain soft and chewy. Overbaked cookies are dry and hard. These issues often stem from improper baking time and temperature. Overcrowding the baking sheets, using too much batter, and using too little or too much sugar in the recipe can also impact the outcome.
Importance of Baking Time and Temperature
Baking time and temperature are fundamental to achieving the desired texture. The proper combination of heat and time ensures cookies are crisp on the edges, soft in the center, and have the right level of chewiness. Adjusting baking time based on your oven and the cookies’ size is key to achieving the perfect result.
Importance of Spacing Cookies
Spacing cookies prevents them from spreading and sticking together, resulting in a more appealing shape and uniform baking. Proper spacing ensures each cookie has enough room to develop its texture without being influenced by its neighbors. This technique is critical for achieving a visually appealing cookie and prevents them from becoming too flat.
Cooling and Serving
The final steps in making perfect chocolate chip cookies involve cooling and serving them. Proper cooling and storage are essential to maintain the desired texture and prevent cookies from becoming hard or stale. Serving suggestions can elevate the simple cookie into a delightful treat, whether enjoyed on their own or paired with other desserts.Cooling and storing cookies properly are critical for maintaining their texture and preventing them from becoming stale.
This section will guide you through the process of cooling, storing, and serving your delicious chocolate chip cookies in the best possible way, maximizing their enjoyment.
Cooling Procedures
Cooling cookies allows the dough to firm up and prevents the cookies from becoming soft or chewy in the wrong way. Allowing cookies to cool completely on a wire rack before storing helps them maintain their crispness. This cooling period is crucial to prevent the cookies from sticking together during storage.
Storing Cookies
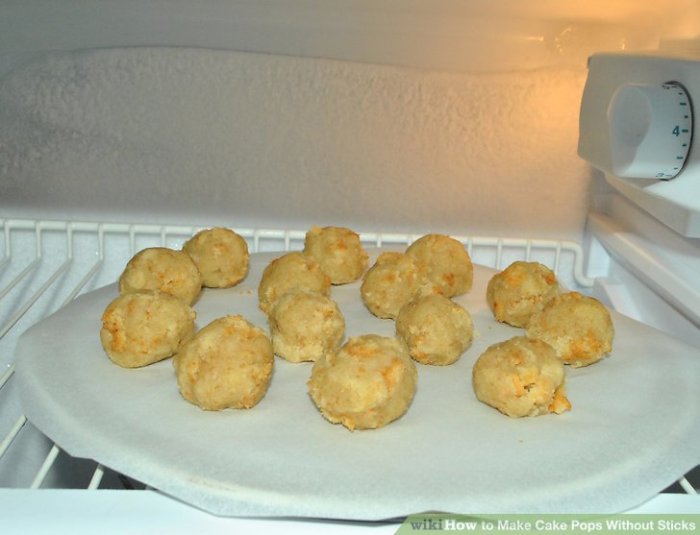
Proper storage is key to preventing cookies from becoming stale. Store cookies in an airtight container at room temperature. This helps maintain the cookies’ texture and prevents them from absorbing moisture from the environment. A cool, dry place is the best option for long-term storage. Freezing cookies is another option, ensuring longer shelf life.
Serving Suggestions
Chocolate chip cookies are versatile and can be enjoyed in various ways. Pairing them with a beverage or dessert can elevate the overall experience.
- Serving with Milk: A classic combination. Milk complements the sweetness of the cookies, creating a balanced and satisfying experience.
- Serving with Ice Cream: A delightful pairing. The cold ice cream contrasts nicely with the warm, soft cookies, providing a textural delight. Vanilla ice cream is a common and delicious option, but feel free to experiment with different flavors.
- Serving with Other Desserts: Chocolate chip cookies can be incorporated into other desserts, such as sundaes, parfaits, or cookie crumbles. This can create unique and delicious dessert combinations.
Preventing Stale Cookies
Stale cookies are a disappointment. Taking steps to prevent them from getting stale can significantly enhance the enjoyment of your cookies. Proper storage and serving temperature play a critical role in keeping your cookies fresh.
Ideal Serving Temperature
Serving cookies at the right temperature is essential for optimal enjoyment. Cookies should be served warm or at room temperature to fully appreciate their flavor and texture. Warming them slightly in a low oven before serving can enhance their taste and aroma.
Serving Table
| Serving Suggestion | Method | Description |
|---|---|---|
| With Milk | Serve warm cookies with a glass of milk. | The warm cookies complement the coolness of the milk. |
| With Ice Cream | Place cookies on top of ice cream. | The contrast in temperature creates a delightful experience. |
| In Parfaits | Layer cookies with other desserts like yogurt and fruit. | Creates a visually appealing and tasty dessert. |
Variations and Additions
Chocolate chip cookies, while simple in their core recipe, offer a vast playground for creativity. Adding variations and ingredients transforms these classic treats into unique culinary experiences, catering to different tastes and dietary needs. From subtle spice infusions to bold additions like nuts and different types of chocolate, the possibilities are nearly endless.
Common Variations and Additions
A plethora of ingredients can enhance the basic chocolate chip cookie. These additions can significantly impact the taste and texture, leading to diverse flavor profiles. Exploring these variations allows bakers to create cookies tailored to individual preferences.
- Different types of chocolate chips:
- Nuts:
- Spices:
- Dried Fruits:
Milk chocolate, semi-sweet chocolate, dark chocolate, white chocolate, butterscotch chips, or even chunks of chocolate bars all offer distinct flavor profiles. Milk chocolate chips provide a classic sweetness, while dark chocolate adds depth and complexity. White chocolate chips offer a contrasting, creamy sweetness. The inclusion of various types alters the overall richness and intensity of the chocolate flavor.
Walnuts, pecans, almonds, or macadamia nuts add a satisfying crunch and a nutty aroma. The addition of nuts elevates the texture and provides a contrasting element to the sweetness of the chocolate. The type of nut impacts the overall flavor and chewiness of the cookie.
Cinnamon, nutmeg, or cardamom can subtly enhance the flavor profile, adding warmth and depth. Spices contribute a unique dimension to the cookie, complementing the sweetness of the chocolate. Cinnamon, for instance, creates a familiar and comforting warmth.
Dried cranberries, raisins, or chopped dates add a chewy texture and tangy flavor to the cookies. The addition of dried fruits introduces a fruity element that can complement the chocolate.
Impact on Taste and Texture
The variations in ingredients directly influence the taste and texture of the cookies. The combination of ingredients affects the overall balance of flavors and the mouthfeel. For instance, adding nuts introduces a satisfying crunch, while spices create a warming sensation. The type of chocolate used significantly alters the intensity of the chocolate flavor. The combination of these additions creates unique flavor profiles, distinguishing one cookie from another.
Adjustments for Dietary Needs
The basic chocolate chip cookie recipe can be adapted to cater to various dietary needs and preferences.
- Gluten-Free:
- Vegan:
Gluten-free flours, such as rice flour, almond flour, or oat flour, can be substituted for all-purpose flour. The substitution of gluten-free flour may slightly alter the texture and chewiness of the cookies.
Vegan butter and eggs can be used as substitutes. Vegan butter and eggs might have slightly different flavor profiles compared to traditional options.
Unique and Unusual Variations
Beyond the common additions, exploring unusual combinations can lead to extraordinary cookie creations.
- Coffee and Espresso Beans:
- Pretzels or Candy Pieces:
- Honey or Maple Syrup:
Adding finely ground coffee or espresso beans creates a unique, caffeinated treat. The addition of coffee beans provides a more complex and robust flavor profile.
Incorporating pretzel pieces or small candy pieces provides a salty-sweet contrast. This combination offers a pleasant textural variation.
Substituting some of the sugar with honey or maple syrup adds a natural sweetness and subtle flavor notes. This offers a healthier alternative to traditional sugar.
Comparing Flavor Profiles
The impact of different additions on the flavor profile of chocolate chip cookies is multifaceted. A cookie with nuts will have a contrasting, satisfying crunch alongside the sweetness. Adding spices creates a warm and comforting flavor, while dried fruits provide a tangy note. The combination of these additions creates a unique flavor profile, making each cookie distinct.
Troubleshooting Chocolate Chip Cookies
Making perfect chocolate chip cookies is a journey of trial and error, and understanding why things sometimes go wrong is key to success. Sometimes, cookies spread too much, become tough, or have uneven textures. By identifying the root causes, we can fine-tune our baking process and achieve those delightful, chewy cookies every time.
Making chocolate chip cookies is surprisingly similar to being a good teaching assistant. You need to carefully measure ingredients, like a good TA needs to carefully understand the course material. A key skill for both is clear communication, ensuring everyone, whether it’s a student or a cookie-lover, understands the process. This requires patience and a knack for explaining things clearly, much like Be a Good Teaching Assistant stresses.
Ultimately, both tasks require a bit of a sweet touch and attention to detail to create a satisfying outcome, whether it’s a batch of delicious cookies or a successful learning experience.
Common Cookie Problems and Solutions
Troubleshooting cookie problems involves understanding the interaction of several factors, including ingredients, baking time, and oven temperature. A systematic approach to identifying and correcting these issues will help you consistently achieve the desired results.
Making chocolate chip cookies is a pretty straightforward process, but sometimes, the best things in life require a little extra something. Like the hypnotic, almost otherworldly quality of Sharon Van Etten’s music in her “Serpents” album, Sharon van Etten serpents evoke a certain depth that elevates the simple act of baking. Ultimately, a good chocolate chip cookie is a testament to both simplicity and subtle artistry, just like the captivating melodies of the album.
| Problem | Cause | Solution |
|---|---|---|
| Cookies spreading too much | Too much fat, too high oven temperature, or under-chilled dough. | Reduce the amount of fat in the recipe, slightly lower the oven temperature, and ensure the dough is thoroughly chilled before baking. |
| Cookies becoming too hard | Insufficient fat, overbaking, or using an excessive amount of flour. | Increase the amount of fat, reduce baking time, and ensure the dough has the correct amount of flour. |
| Cookies burning on the edges | Too high oven temperature, or too close to the heating element. | Reduce oven temperature, move the baking sheet to a lower rack, or use a baking stone for even heat distribution. |
| Cookies unevenly cooked | Uneven heat distribution in the oven, varying thickness of dough, or inadequate baking time. | Ensure even heat distribution by preheating the oven thoroughly, and using a baking sheet. Ensure the dough is of uniform thickness. |
| Cookies are tough and crumbly | Overmixing of dough, using a too-high oven temperature, or insufficient fat content. | Reduce mixing time, ensure the oven temperature is appropriate, and increase the amount of fat to create a more tender texture. |
| Cookies are sticky or soft | Under-baking, too much moisture in the ingredients, or too low of an oven temperature. | Increase the baking time, use properly refrigerated ingredients, and ensure the oven is preheated to the correct temperature. |
Importance of Precise Measurements
Accurate measurements of ingredients are critical in baking. A slight variation in the amount of flour, sugar, or butter can significantly impact the final texture and consistency of the cookies. For example, adding too much flour can result in tough cookies, while too little can cause them to spread excessively. Precise measurements ensure consistent results.
Oven Temperature Control
Maintaining a consistent oven temperature is essential for even baking. Using an oven thermometer can help determine if your oven is running hotter or cooler than indicated, which will help you adjust baking times to prevent under- or over-baking. Consistent oven temperature ensures that cookies bake evenly throughout.
Equipment and Tools

Choosing the right equipment is crucial for achieving perfectly chewy or crisp chocolate chip cookies. Proper tools ensure even mixing, accurate measurements, and consistent baking results. The right tools make a significant difference in the quality of your final product, from a smooth, homogenous batter to a beautifully golden-brown cookie.
Essential Equipment List
The following equipment is essential for making chocolate chip cookies. Each piece plays a specific role in the process, contributing to the overall success of the recipe.
- Mixing Bowls: Different sizes of mixing bowls are necessary for different stages of the process. A large bowl is essential for combining dry ingredients, while smaller bowls are useful for creaming butter and sugar, or mixing wet ingredients. Using appropriate sizes prevents ingredients from overflowing and ensures smooth mixing.
- Electric Mixer: An electric mixer significantly speeds up the creaming process, ensuring the butter and sugar are thoroughly combined, resulting in a light and fluffy texture. This tool is particularly important for achieving a smooth batter. A hand mixer or stand mixer can be used, but the stand mixer provides greater power and convenience for larger batches.
- Measuring Cups and Spoons: Accurate measurements are critical in baking. Using calibrated measuring cups and spoons ensures consistent results. Dry ingredients like flour are best measured by spooning them into the cup and leveling them off with a straight edge. For liquid ingredients, use liquid measuring cups.
- Baking Sheets: These are essential for baking the cookies. Choose baking sheets that are large enough for your cookies, and are ideally made of metal. This ensures even heat distribution and prevents the cookies from sticking. Using a baking sheet that is too small can lead to overcrowding and uneven baking.
- Parchment Paper: Using parchment paper on your baking sheets helps prevent sticking and makes cleanup much easier. This is a crucial step to ensure your cookies don’t stick to the baking sheet, which can lead to uneven baking or a loss of cookie shape.
- Cookie Scoop or Spoon: Using a cookie scoop or spoon creates cookies of uniform size and thickness, resulting in even baking. This ensures consistent cooking times and prevents some cookies from becoming overly browned while others remain undercooked.
- Cooling Rack: A cooling rack allows the cookies to cool completely, preventing them from becoming soggy. This helps them maintain their texture and shape. Cooling on a wire rack allows air to circulate, preventing moisture buildup and ensuring crispiness.
Importance of Correct Equipment
Using the correct equipment for each step in the process is essential for producing high-quality chocolate chip cookies. Each piece of equipment is designed for a specific task, and using the wrong equipment can lead to errors in the mixing, baking, and cooling stages.
| Equipment | Function | Importance |
|---|---|---|
| Mixing Bowls | Combining ingredients | Ensures even mixing and prevents ingredients from spilling or clumping. |
| Electric Mixer | Creaming butter and sugar | Achieves a light and fluffy texture for a better cookie. |
| Measuring Cups and Spoons | Accurate measurements | Crucial for consistent results in baking. |
| Baking Sheets | Baking the cookies | Even heat distribution prevents uneven baking. |
| Parchment Paper | Prevent sticking | Easy cleanup and prevents cookies from sticking to the baking sheet. |
| Cookie Scoop or Spoon | Uniform cookie size | Ensures even cooking and prevents some cookies from being overcooked while others are undercooked. |
| Cooling Rack | Cooling cookies | Maintains texture and prevents sogginess. |
Visual Representation: Make Chocolate Chip Cookies

Chocolate chip cookies, with their irresistible combination of chewy texture and melt-in-your-mouth chocolate chips, are more than just a treat; they’re a sensory experience. This section dives into the visual aspects of making and enjoying these delectable cookies, from ingredient preparation to the final, golden-brown result. We’ll explore the visual steps and the aesthetic appeal of a perfectly baked batch.The visual representation of the ingredients and the process of making chocolate chip cookies provides a clear understanding of each step.
This detailed description, combined with the illustration of the finished product, aims to enhance the overall experience and provide inspiration for baking your own batch.
Ingredients and Tools
A visual representation of the ingredients is crucial to ensure accuracy and efficiency. Before beginning, gather all the necessary ingredients and tools. A well-organized workspace, with clearly visible ingredients, is essential for a smooth baking process.
- Flour, sugar, butter, eggs, vanilla extract, and chocolate chips are typically required. The flour should be a fine consistency, easily measured using a dry measuring cup. The sugar should be granulated or powdered, depending on the recipe. The butter should be softened but not melted, ideally at room temperature. Eggs should be fresh.
Vanilla extract enhances the flavor and provides a pleasant aroma. Chocolate chips should be uniform in size and ready to be added to the dough.
- Essential tools include measuring cups and spoons, a mixing bowl, a spatula or wooden spoon for mixing, a baking sheet, and an oven. The mixing bowl should be large enough to accommodate the ingredients without overflowing during the mixing process. A cookie scoop is beneficial for uniform cookie size. Ensure your baking sheet is sturdy enough to support the cookies without bending.
Mixing Process
Visualizing the mixing process is key to achieving the desired texture. The consistency of the dough is crucial. A visual guide can ensure you’re mixing until the ingredients are well combined.
- First, cream together the softened butter and sugar until light and fluffy. The butter and sugar should be a light color and airy in texture. Visual cues indicate the mixture is ready.
- Then, beat in the eggs one at a time, followed by the vanilla extract. The eggs should be fully incorporated into the mixture. Observe the color and consistency.
- Incorporate the dry ingredients (flour, baking soda, and salt) gradually into the wet ingredients. The mixture should become a soft dough.
- Finally, fold in the chocolate chips. Ensure the chips are evenly distributed throughout the dough. This visual step ensures all the chocolate chips are visible and uniformly dispersed in the dough.
Baking and Cooling
Visualizing the baking process and the cooling stage is essential to achieve the desired outcome. The cookies should be a golden brown color. They should not be overly dark, which could result in burning.
- Place the dough onto a baking sheet, using a cookie scoop for even spacing. The cookies should be spaced evenly on the baking sheet to prevent them from sticking together during baking.
- Bake the cookies in a preheated oven at 375°F (190°C) for 8-10 minutes, or until golden brown. The cookies will be visibly golden brown on the edges and slightly soft in the center. Observe the cookies carefully to prevent burning.
- Let the cookies cool on the baking sheet for a few minutes before transferring them to a wire rack to cool completely. The cookies will firm up as they cool. Observe the cookies as they cool, ensuring they are not sticky.
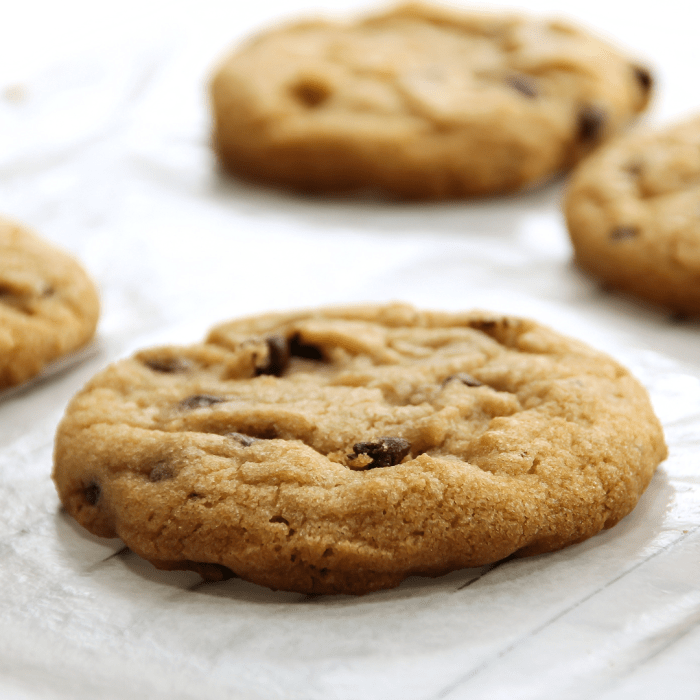
Finished Product
The visual representation of the finished product is essential for appreciating the final result. A beautifully arranged plate of cookies is a delightful visual treat.
Imagine a plate, adorned with a few elegantly placed chocolate chip cookies. Their golden brown color is complemented by the glistening chocolate chips. The cookies appear soft and inviting. The visual appeal is enhanced by a light dusting of powdered sugar, if desired. The cookies are arranged in a way that showcases their individual appeal, rather than being crowded.
Texture and Appearance, Make Chocolate Chip Cookies
The texture and appearance of the cookies are crucial for a positive eating experience. The cookies should have a soft, chewy center, a slightly crisp edge, and the chocolate chips should be visibly distributed throughout.
- The cookies should be slightly soft in the center when warm, gradually firming up as they cool. The ideal texture is chewy, not hard or brittle.
- The edges of the cookies should have a light golden brown color, and the chocolate chips should be clearly visible.
Last Point
From basic recipes to creative variations, this guide equips you with the knowledge to make delicious chocolate chip cookies. We’ve covered everything from ingredients and mixing methods to baking procedures and troubleshooting common problems, ensuring you can confidently create cookies that are perfect in every way. Enjoy the process and the delicious results!
 - wikiHow")
 - wikiHow")