Make Sunny Side Up Eggs: Dive into a world of simple elegance with this delightful guide. From basic preparation methods to ingredient variations and expert tips, we’ll explore everything you need to know to master the art of perfectly cooked sunny-side-up eggs. Discover the secrets behind achieving that golden, runny yolk and learn how to pair this breakfast staple with a variety of delicious sides.
This comprehensive guide covers everything from the essential ingredients and equipment to cooking techniques, troubleshooting common issues, and even the historical context behind this beloved breakfast dish. Get ready to elevate your egg game to a whole new level!
Basic Egg Preparation Methods
Eggs, a culinary staple, offer a diverse range of preparation methods, each yielding a unique texture and flavor profile. From the simple sunny-side-up to the more complex omelets, understanding the fundamental techniques empowers you to create delicious and satisfying egg dishes. Mastering these methods is key to expanding your culinary repertoire.
Sunny-Side-Up Egg Preparation Methods
Different approaches to cooking sunny-side-up eggs lead to variations in texture and presentation. The choice of method often depends on personal preference and desired outcome. The key to a perfect sunny-side-up egg lies in achieving a cooked yolk that remains runny and a crisp white.
Detailed Steps for Sunny-Side-Up Eggs
To prepare a classic sunny-side-up egg, follow these steps:
- Crack the egg into a small bowl. Ensure no shell fragments contaminate the egg white.
- Heat a non-stick skillet over medium heat. Add a small amount of butter or oil to the pan. The fat should coat the bottom of the pan evenly.
- Carefully pour the egg into the hot pan. The heat should cause the egg white to cook quickly. Do not stir the egg.
- Cook until the egg white is set but the yolk remains soft and runny. Adjust the heat as needed to achieve the desired cooking time.
- Remove the egg from the pan and serve immediately. Consider serving with toast, potatoes, or a side salad.
Comparison with Other Egg Preparations
Sunny-side-up eggs contrast with other egg preparations like scrambled eggs, fried eggs, or omelets. The defining characteristic of sunny-side-up eggs is the intact, un-mixed yolk. Scrambled eggs are mixed, while fried eggs have the yolk cooked to varying degrees. Omelets typically involve folded egg mixtures, distinct from the flat presentation of sunny-side-up eggs.
Sunny-Side-Up Egg Preparation Methods Table, Make Sunny Side up Eggs
| Method | Equipment | Steps | Time |
|---|---|---|---|
| Pan-Fried | Non-stick skillet, spatula | Crack egg into pan, cook until white sets, yolk remains runny. | 2-3 minutes |
| Oven-Baked | Baking dish, oven | Place egg in a baking dish, bake at low temperature until desired doneness. | 5-7 minutes |
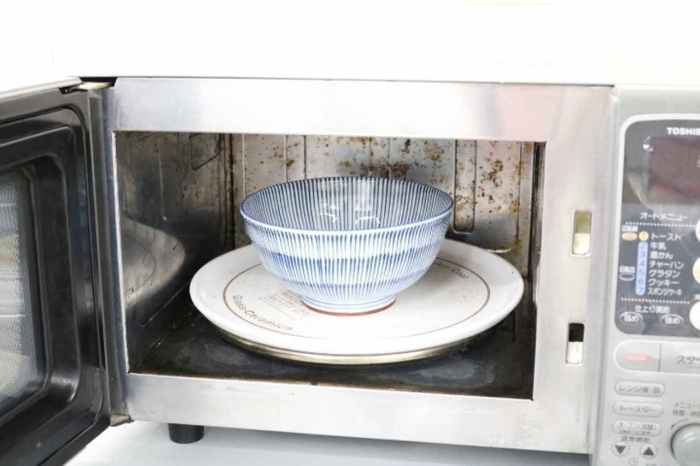
| Microwave | Microwave-safe dish | Crack egg into dish, cook in intervals in microwave until white sets and yolk is desired. | 1-2 minutes |
| Stovetop | Stovetop, saucepan | Place egg in saucepan, cook until white sets, yolk remains runny. | 2-3 minutes |
Ingredient Variations
Beyond the fundamental ingredients, the world of sunny-side-up eggs opens up to a vast array of flavorful and textural possibilities. This exploration delves into the diverse ingredients that can elevate your sunny-side-up experience, from simple additions to complex flavor profiles. The key is to choose ingredients that complement the egg’s natural richness and delicate flavor, rather than overpowering it.Experimenting with different ingredients can significantly alter the dish’s character, creating a wide spectrum of culinary experiences.
This goes beyond simply adding salt and pepper; it’s about carefully selecting ingredients that enhance the overall taste and texture of the egg. By understanding the roles various ingredients play, you can create personalized sunny-side-up masterpieces.
Essential Ingredients for a Classic Sunny-Side-Up
The foundation of a great sunny-side-up egg rests on a few key ingredients. These essential components are crucial to the dish’s structure and flavor profile. Eggs, salt, and pepper form the base, providing a platform for further embellishments.
Alternative Ingredients and Their Impact
A wide range of ingredients can be incorporated into sunny-side-up eggs to customize the dish to individual preferences. These additions can significantly alter the flavor and texture of the final product, adding complexity and depth.
Examples of Alternative Ingredients
- Cheese: Adding shredded cheddar, Gruyère, or even a sharp Parmesan elevates the richness and provides a contrasting texture. Melted cheese creates a delightful pool of flavor, enhancing the overall experience.
- Vegetables: Chopped onions, bell peppers, mushrooms, spinach, or tomatoes can add a burst of freshness and nutrients. Sautéing these vegetables before adding the eggs to the pan enhances their flavor and creates a vibrant medley of tastes.
- Herbs: Fresh herbs like chives, parsley, or thyme add a touch of aromatic complexity. Sprinkling them over the finished egg adds a delightful freshness and complements the richness of the yolk.
- Spices: A pinch of paprika, garlic powder, or onion powder can infuse a subtle warmth and depth of flavor. These spices are effective in enhancing the overall taste profile of the egg.
- Spreads: A smear of avocado or a drizzle of hollandaise sauce creates a creamy contrast to the egg’s texture. These add a richness and complexity that is unmatched.
Ingredient Breakdown
Understanding the function of each ingredient is crucial for creating a balanced and flavorful dish.
| Ingredient | Description | Role in Recipe |
|---|---|---|
| Eggs | Freshly laid hen’s eggs | The primary protein source, providing structure and richness. |
| Salt | Table salt | Enhances the natural flavors of the egg and balances other seasonings. |
| Pepper | Ground black pepper | Adds a subtle warmth and depth of flavor, complementing the egg’s richness. |
| Cheese | Shredded or sliced cheese | Adds a layer of creamy richness and a contrasting texture to the dish. |
| Vegetables | Chopped onions, peppers, mushrooms, spinach, etc. | Adds freshness, nutrients, and a burst of flavor. |
| Herbs | Fresh chives, parsley, thyme, etc. | Provides a touch of aromatic complexity and freshness. |
| Spices | Paprika, garlic powder, onion powder, etc. | Infuses a subtle warmth and depth of flavor. |
| Spreads | Avocado, hollandaise sauce, etc. | Creates a creamy contrast to the egg’s texture and adds richness. |
Equipment and Tools: Make Sunny Side Up Eggs
Beyond the ingredients and methods, the right tools significantly impact the outcome of a perfect sunny-side-up egg. Proper equipment ensures even cooking, prevents sticking, and ultimately leads to a pleasing culinary experience. Careful selection and usage of these tools are crucial to achieving the desired texture and appearance.Selecting the right cookware and utensils is vital in achieving the desired outcome.
The choice of pan, for example, directly influences the cooking process and the final product. Different materials react differently to heat, and the size and shape of the pan can affect the evenness of the egg’s cooking. Likewise, the use of specific utensils can greatly influence the ease and precision of the cooking process.
Essential Cooking Tools
A well-equipped kitchen is a must for any aspiring chef, or anyone looking to elevate their cooking experience. The tools and techniques described here can be used for more than just sunny-side-up eggs.
- Non-stick frying pan: A non-stick surface prevents eggs from sticking, making flipping and removal easier. The even heat distribution of a quality non-stick pan ensures a consistent cooking experience, resulting in a perfectly cooked egg every time. This also reduces the risk of burning the egg white or bottom.
- Spatula: A flexible spatula is essential for gently lifting and flipping eggs without breaking the yolk. A wide spatula is ideal for moving larger amounts of food, while a narrow one is useful for precision. A good spatula is crucial for preventing breakage and maintaining the integrity of the egg during the cooking process.
- Whisk: While not strictly needed for sunny-side-up eggs, a whisk can be helpful for achieving a perfect, even consistency in the egg mixture, especially if variations in ingredients are used. A whisk aids in mixing the ingredients and can assist in achieving a smooth texture if the eggs are mixed prior to cooking.
- Timer: A timer ensures that eggs are cooked for the precise amount of time needed to achieve the desired level of doneness. This helps in preventing overcooking or undercooking, which can affect the texture and overall taste.
- Heat source (stovetop or electric burner): The appropriate heat source is critical for achieving the right temperature for the pan and the eggs. This affects the rate of cooking and the texture of the final product. The right heat setting ensures that the egg cooks evenly, without burning the bottom or overcooking the top.
Comparison of Cooking Tools
Different tools affect the cooking process in different ways. The use of a non-stick pan, for example, significantly reduces the risk of eggs sticking to the pan. The right spatula can ensure the egg is flipped and served with minimal disruption to the delicate yolk.
| Equipment | Description |
|---|---|
| Non-stick frying pan | Provides a smooth cooking surface, preventing sticking and ensuring even heat distribution. |
| Spatula | Used for flipping and serving the eggs without breaking the yolk. |
| Whisk | Optional, but can be helpful for mixing ingredients for consistency, particularly with ingredient variations. |
| Timer | Ensures eggs are cooked for the desired amount of time, preventing overcooking or undercooking. |
| Heat source | Provides the necessary heat for cooking the eggs, influencing cooking time and texture. |
Cooking Techniques and Tips

Mastering the art of sunny-side-up eggs involves more than just cracking an egg and placing it in a pan. Precise temperature control, timing, and technique are crucial for achieving that perfectly cooked, golden yolk nestled within a crisp white. This section delves into the optimal methods for achieving the desired consistency and appearance.Achieving the perfect sunny-side-up egg hinges on understanding the interplay of heat and time.
The delicate balance between a runny, custardy yolk and a perfectly cooked white is a key aspect of the technique. Proper stovetop and oven methods are vital to achieving this balance.
Stovetop Cooking Techniques
Precise control over the heat source is paramount for stovetop sunny-side-up eggs. Overheating can quickly lead to a rubbery or overcooked egg. A moderate, even heat distribution is key to a uniform cooking result.
- Setting the Stage: Use medium-low heat for your stovetop. This ensures even cooking and prevents burning. A non-stick pan is recommended for easy release and cleanup.
- The Egg Placement: Gently place the egg into the pan, ensuring the egg white is fully distributed across the bottom of the pan.
- Initial Cooking: Allow the egg to cook for about 2-3 minutes. This initial stage focuses on cooking the egg white, creating a nice, slightly browned bottom. A visual cue would be the egg white firming around the yolk.
- Yolk Perfection: Continue cooking until the egg white is set to your liking. At this stage, the yolk should be runny and still slightly jiggly. The time will vary depending on the desired level of doneness. An example is if you prefer a more set white but a still runny yolk, then 3-4 minutes is likely sufficient. A slight jiggle in the center of the yolk will indicate it’s still a little raw.
- Finishing Touches: Remove the egg from the heat once the yolk reaches the desired consistency. A visual cue is the appearance of a golden-yellow yolk.
Oven Cooking Techniques
Baking sunny-side-up eggs in the oven offers a unique approach to achieving a perfectly cooked egg. It’s particularly beneficial for maintaining a more consistent temperature, ensuring even cooking, and reducing the chance of overcooking the yolk.
- Preparing the Pan: Preheat the oven to 350°F (175°C). A baking sheet lined with parchment paper helps in easy removal and cleanup.
- Adding the Eggs: Gently place the egg into the prepared pan. Ensure the egg white is evenly spread across the bottom of the pan.
- Baking Time: Bake for approximately 10-12 minutes, or until the egg white is set and the yolk is cooked to your preference. Adjust the baking time based on the thickness of the egg white.
- Monitoring the Yolk: A visual cue for doneness is the color of the yolk. If the yolk is still pale, increase the cooking time by a few minutes.
- Cooling and Serving: Remove the pan from the oven and allow the eggs to cool slightly before serving.
Expert Tips
- Consistent Heat: Maintaining a consistent heat is crucial for evenly cooking the egg. Use a heat diffuser or a pan with a flat bottom for even heat distribution.
- Gentle Handling: Avoid disturbing the egg while it’s cooking. Sudden movements can affect the texture of the egg white and yolk.
- Timing is Key: Pay close attention to the cooking time, as the exact time will depend on your stove and the size of your pan.
- Visual Cues: Use visual cues, such as the color and consistency of the yolk, to determine the appropriate cooking time. For example, a golden-yellow yolk indicates doneness.
Serving Suggestions and Pairings
Sunny-side-up eggs, with their perfectly cooked, golden yolks nestled atop the whites, offer a blank canvas for culinary creativity. Beyond their fundamental deliciousness, their versatility allows for countless serving suggestions and pairings that elevate the breakfast, brunch, or even a light dinner experience. This section explores the myriad ways to enjoy sunny-side-up eggs, from classic presentations to innovative combinations, considering both practical and cultural aspects.Sunny-side-up eggs are a globally recognized breakfast staple, often paired with ingredients that complement their soft, custardy yolks and tender whites.
Different cultures and cuisines have their own unique approaches to serving and pairing this versatile dish. This exploration delves into the diverse ways of presenting and enjoying sunny-side-up eggs, showcasing their role in various culinary traditions.
Different Serving Styles and Plates
Presenting sunny-side-up eggs can transform a simple meal into a culinary experience. Beyond the traditional plate, various serving styles and plates can enhance the aesthetic appeal and overall dining experience. Using a variety of plates, from rustic ceramic to sleek porcelain, and even using serving platters, can create a more visually engaging presentation. The choice of plate and serving style should align with the overall meal and the atmosphere.
Pairing Sunny-Side-Up Eggs with Side Dishes
The success of a sunny-side-up egg dish often depends on the thoughtful selection of side dishes. The ideal pairing balances the richness of the egg with the flavors and textures of the accompaniments. From savory options to refreshing combinations, a wide array of choices are available. Consider using a combination of textures and flavors to create a well-rounded meal.
Flipping sunny-side-up eggs is surprisingly meditative, a small act of creation in the kitchen. It’s a stark contrast to the introspection I found myself wrestling with during the isolation check in week 2, the isolation check in week 2 – a week of quiet reflection and honestly, a lot of scrambled eggs. Still, even in the quiet moments, the simple act of perfectly cooking a sunny-side up egg feels like a small victory.
Culinary Traditions and Cultural Significance
Sunny-side-up eggs, while appearing simple, hold a significant place in various culinary traditions. In some cultures, they symbolize prosperity and new beginnings. For instance, the inclusion of sunny-side-up eggs in traditional brunch menus often reflects a cultural emphasis on wholesome meals. The cultural significance varies, but the common thread is the versatility and appreciation of this classic dish.
Serving Suggestions and Pairings Table
| Dish | Description | Pairings |
|---|---|---|
| Classic American Breakfast | Sunny-side-up eggs atop toasted English muffins, served with butter, bacon, and sausage. | Bacon, sausage, crispy potatoes, toast, fruit salad. |
| Mediterranean Brunch | Sunny-side-up eggs served with a side of feta cheese, olives, and roasted vegetables. | Feta cheese, olives, roasted vegetables (e.g., bell peppers, zucchini), Greek yogurt, whole-wheat pita bread. |
| Mexican Breakfast | Sunny-side-up eggs served on a tortilla, topped with salsa, avocado, and cilantro. | Salsa, avocado, cilantro, sour cream, refried beans, black beans, tortillas. |
| Breakfast Burrito | Scrambled eggs, sunny-side-up eggs, and your favorite fillings wrapped in a warm tortilla. | Beans, cheese, salsa, vegetables, chorizo. |
| French Toast with Sunny-Side-Up Eggs | A combination of French toast and sunny-side-up eggs, providing a blend of textures and flavors. | Maple syrup, whipped cream, fruit compote. |
Troubleshooting Common Issues
Perfect sunny-side-up eggs are a culinary delight, but achieving that perfectly cooked, golden-brown yolk nestled in a tender white can sometimes prove tricky. Understanding the potential pitfalls and their solutions is key to mastering this simple yet satisfying dish. This section delves into common issues encountered while preparing sunny-side-up eggs, providing insights into their causes and effective remedies.
Identifying Undercooked Eggs
Undercooked sunny-side-up eggs, with runny yolks, often stem from insufficient heat or a too-short cooking time. This can lead to a less-than-appealing culinary experience. Lower heat settings, particularly on older or less powerful stoves, can contribute to this issue. Using a pan that’s not hot enough also plays a crucial role. The egg white might appear cooked but the yolk will be uncooked.
Addressing Overcooked Eggs
Overcooked sunny-side-up eggs are characterized by a dry, rubbery texture, often accompanied by a tough, browned white. This usually results from prolonged cooking time or excessive heat. The egg white may cook too quickly and burn while the yolk remains undercooked. The excessive heat in the pan causes the egg white to become hard and the yolk to cook unevenly.
Dealing with Egg Whites that Stick
Sticking egg whites can be frustrating. This usually occurs due to the pan not being hot enough or the egg being added too soon to the pan. The cold egg whites will adhere to the pan and make it difficult to flip or remove the egg. The egg white adheres to the pan because it does not have enough heat to cook it properly.
The result is a stuck, uneven egg.
Troubleshooting Uneven Cooking
Uneven cooking can manifest in various ways, from a partially cooked yolk to a browned white on one side. This is usually due to inconsistent heat distribution within the pan or improper egg placement. Using a pan that is not evenly heated can also cause the egg to cook unevenly.
Table of Common Issues and Solutions
| Problem | Solution |
|---|---|
| Undercooked Eggs | Increase heat slightly or cook for a slightly longer time. Ensure the pan is thoroughly heated before adding the egg. |
| Overcooked Eggs | Reduce heat and shorten the cooking time. Use a lower heat setting and watch carefully. |
| Sticking Egg Whites | Ensure the pan is extremely hot before adding the egg. Avoid overcrowding the pan. Use a non-stick pan if available. |
| Uneven Cooking | Ensure the pan is heated evenly. Add the egg to the center of the pan to allow for more even cooking. |
Nutritional Value
Eggs, a staple in kitchens worldwide, are renowned for their nutritional richness. Their versatility extends beyond culinary delights; they are a powerhouse of essential nutrients vital for a healthy diet. This section delves into the nutritional benefits of eggs, specifically focusing on sunny-side-up versions, exploring their contribution to a balanced and nutritious lifestyle.Sunny-side-up eggs, a simple yet satisfying breakfast or side dish, offer a concentrated dose of nutrients.
Their nutritional profile makes them a valuable addition to any diet, particularly for those seeking a balanced source of protein, vitamins, and minerals.
Making sunny-side up eggs is surprisingly satisfying. The perfect runny yolk is a little bit of culinary magic. Speaking of magic, I’m totally hyped to hear what’s coming next from Kanye West and Odd Future. Expect something groundbreaking, as if they’re about to completely reinvent the breakfast food scene. prepare for the kanye westodd future collaboration.
Anyway, back to the eggs: the golden hue and soft texture are a delicious reward for the few minutes of effort.
Nutritional Content of Sunny-Side-Up Eggs
The nutritional value of sunny-side-up eggs, like other egg preparations, is contingent on the size of the egg. A typical large egg (approximately 50 grams) provides a significant amount of essential nutrients. This section presents a detailed overview of the key nutritional components.
Making sunny-side up eggs is surprisingly satisfying. The perfect runny yolk, the crispy edges – it’s a simple pleasure. Speaking of satisfying experiences, if you’re a fan of experimental music, you should check out the animal collective schedule world tour – it looks like they’re hitting some amazing venues. Hopefully, the next time I make sunny-side up eggs, it will be just before a show!
Nutritional Information Table
| Nutrient | Amount per Serving (Large Egg) | Health Benefits |
|---|---|---|
| Protein | 6-7 grams | Essential for building and repairing tissues, supporting muscle growth, and maintaining satiety. |
| Choline | 147 mg | Crucial for brain health, memory function, and liver health. |
| Vitamins (e.g., Vitamin D, Vitamin B12, Riboflavin) | Varying amounts | Support various bodily functions, including bone health, nerve function, and energy production. |
| Minerals (e.g., Iron, Selenium) | Varying amounts | Contribute to overall health and well-being, playing a role in oxygen transport, antioxidant protection, and more. |
| Fats (e.g., Omega-3 Fatty Acids) | 5 grams | Support brain health, heart health, and overall well-being. Note that the type and amount of fat can vary depending on the cooking method. |
| Fat-Soluble Vitamins (e.g., Vitamin A, Vitamin E) | Varying amounts | Essential for various bodily functions, including vision, immune function, and cell growth. |
Health Advantages of Sunny-Side-Up Eggs
Including sunny-side-up eggs in a balanced diet can offer various health advantages. The high protein content contributes to satiety, aiding in weight management. The presence of essential vitamins and minerals supports overall well-being and can help maintain healthy bodily functions. However, moderation is key, as with any food.
Historical Context and Cultural Significance
The sunny-side-up egg, a seemingly simple dish, boasts a rich history intertwined with culinary traditions and cultural practices across the globe. From its humble beginnings to its current status as a breakfast staple, its journey reveals fascinating insights into societal changes and culinary evolution. Understanding its historical context helps appreciate the dish’s significance in various cultures and its enduring appeal.A key to appreciating the sunny-side-up egg is recognizing its evolution from a basic cooking method to a dish with cultural meaning.
Its widespread adoption reflects its versatility, ease of preparation, and nutritional value.
Origins and Early Culinary Use
The exact origins of sunny-side-up eggs are somewhat shrouded in the mists of culinary history. While precise dates and locations are elusive, it’s reasonable to assume that the method of cooking eggs with the yolk facing up emerged as a practical technique, likely long before written records. Early civilizations, with limited cooking equipment, would have favored methods that minimized time and effort while maximizing food availability.
This method, with its simplicity, would have naturally become integrated into various regional cuisines.
Evolution Over Time
The evolution of sunny-side-up eggs mirrored the broader culinary advancements of the era. As societies became more complex and culinary techniques diversified, so did the way sunny-side-up eggs were prepared and appreciated. The introduction of new ingredients and cooking techniques, alongside the rise of global trade routes, further shaped the dish’s presence in various cultures.
Cultural Significance in Different Regions
The cultural significance of sunny-side-up eggs varies greatly from region to region. In some cultures, it is a traditional breakfast dish, a comforting staple often served with other breakfast fare. In other contexts, it might be associated with specific celebrations or religious events. Variations in cooking styles and accompanying dishes often reflect the unique culinary heritage of a particular region.
For example, the preparation of sunny-side-up eggs might differ in spice usage, or the ingredients paired with the egg.
Timeline of Key Historical Milestones
| Year | Event | Cultural Impact |
|---|---|---|
| Pre-1800s | Likely initial development and adoption as a basic cooking method. | Widely integrated into local cuisines. |
| 1800s | Increased availability of ingredients and tools. | Further development and variation in the dish’s presentation and ingredients used. |
| Early 1900s | Emergence of breakfast as a separate meal. | Sunny-side-up eggs became a popular and frequent breakfast choice. |
| Mid-1900s to Present | Global culinary exchange. | Significant adaptation and integration into diverse culinary traditions worldwide. |
Conclusive Thoughts

In conclusion, mastering the art of Make Sunny Side Up Eggs is a journey that involves understanding various techniques, ingredient choices, and the significance of the perfect cooking temperature. We’ve explored the nuances of preparation, from basic methods to expert tips, and delved into the historical context. Whether you’re a seasoned cook or a novice in the kitchen, this guide empowers you to create a culinary masterpiece, every single time.