Clean a Rusty Razor Blade: This in-depth guide takes you through every step of restoring your rusty razor blade to its former glory. We’ll cover everything from identifying the type of rust to choosing the right cleaning method and preventing future issues. Get ready to tackle that tarnished blade and emerge with a sharp, gleaming tool!
Rust on razor blades isn’t just an aesthetic issue; it can compromise sharpness and performance. This guide will walk you through the process of assessing the damage, selecting the appropriate cleaning technique, and ensuring the blade is properly cared for after the restoration. We’ll look at different rust types, damage levels, and safety precautions to ensure a smooth and successful restoration.
Identifying Rust
Rust on razor blades, while seemingly a minor cosmetic issue, can significantly impact their performance and potentially cause injury. Understanding the various types and causes of rust is crucial for proper blade maintenance and safe use. This section will detail the characteristics of rust, its causes, and how to distinguish between different levels of rust buildup.Rust formation on razor blades is a complex electrochemical process, often accelerated by environmental factors.
This process, involving the oxidation of metal, can lead to blade deterioration. Proper identification and mitigation strategies are essential for maintaining the integrity and safety of your razor blades.
Types of Rust
Rust on razor blades can vary in appearance and severity. Understanding these differences allows for effective preventative measures and repair strategies. Visual inspection is key to determining the extent of the damage.
- Mild Rust: This type is often a thin, flaky layer of rust, typically a reddish-brown color. It might appear as small patches or specks on the blade surface. The affected area is generally localized and doesn’t significantly alter the blade’s overall structure. Mild rust can be easily removed with proper cleaning methods, preserving the blade’s functionality.
Example: A very light coating of rust on the edge of a blade, barely noticeable to the naked eye.
- Moderate Rust: Moderate rust presents a more substantial layer of rust, often a deeper, more saturated reddish-brown or orange color. The affected areas are more extensive, potentially covering a larger portion of the blade’s surface. The rust might appear slightly rough or granular. While still potentially manageable with appropriate cleaning, moderate rust may require more intensive removal methods than mild rust.
Cleaning a rusty razor blade can be a real pain, but it’s definitely doable! While I was researching ways to tackle the rust, I stumbled across some amazing behind-the-scenes pics of Cable in Deadpool 2, starring Josh Brolin, cable deadpool 2 josh brolin first look. Now, back to the razor blade – some elbow grease and a little bit of vinegar should do the trick.
It’s all about getting those rust particles off.
Example: A noticeable rust patch on the blade’s side, slightly affecting the blade’s sharpness.
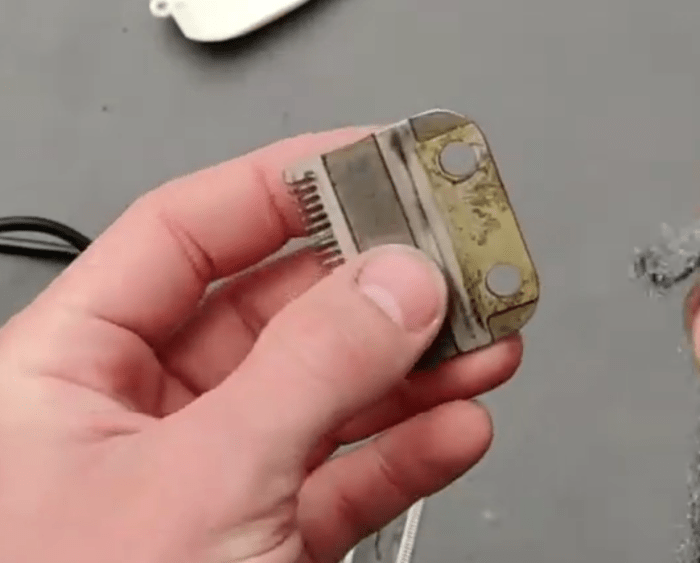
- Severe Rust: This type of rust is characterized by a thick, solid, and often black or dark brown coating. It deeply penetrates the blade’s metal, potentially creating pitting or corrosion. Severe rust can significantly weaken the blade and affect its ability to function properly. Severe rust often necessitates replacement of the blade due to the damage it inflicts.
Example: A heavily rusted razor blade with large, dark patches, where the metal beneath the rust is visibly degraded.
Causes of Rust Formation
Several factors contribute to the development of rust on razor blades. Understanding these causes is vital for prevention.
Cleaning a rusty razor blade can be a real pain, but sometimes a little elbow grease is all it takes. Speaking of elbow grease, have you heard the amazing Disclosure remix of “Usher’s Good Kisser?” This track is seriously infectious, perfect for a late-night clean-up session. Getting that blade gleaming again feels surprisingly satisfying, like a mini-victory after a good listen.
Just remember to be careful when handling sharp objects, though!
- Moisture Exposure: Prolonged exposure to water or moisture is a primary driver of rust formation. This includes leaving blades in humid environments or allowing them to remain wet for extended periods. Moisture provides the necessary environment for the electrochemical reactions that lead to rust.
- Poor Storage Conditions: Improper storage, particularly in poorly ventilated or humid areas, allows moisture to accumulate and facilitate rust development. Failing to store blades in a dry, protective environment can accelerate the rusting process.
- Chemical Reactions: Certain chemicals, even those present in cleaning solutions, can interact with the metal and accelerate rusting. Contact with acidic substances can also trigger the formation of rust.
Visual Distinction Between Mild and Severe Rust
Identifying the severity of rust is essential for determining the appropriate course of action.
- Mild Rust: Characterized by a thin, superficial layer, often appearing as small patches or specks. The rust is typically easily removed with mild cleaning agents.
- Severe Rust: Distinguished by a thick, solid layer that penetrates the metal, often with pitting or corrosion. The rust is typically difficult to remove and may necessitate replacement of the blade.
Rust Appearance Across Different Blade Materials
The appearance of rust can vary based on the blade’s composition.
- Stainless Steel: Stainless steel blades, known for their resistance to corrosion, can still develop rust, but it often manifests as thin, reddish-brown patches. The rate of rust formation is usually slower compared to carbon steel.
- Carbon Steel: Carbon steel blades, while less resistant to rust, exhibit rust in more visible and extensive forms, ranging from mild reddish-brown to dark, heavy patches. Rust development on carbon steel blades can be more rapid.
Rust Type Comparison
The table below summarizes the key characteristics of different rust types.
| Rust Type | Appearance | Severity | Removal Difficulty | Material Impact |
|---|---|---|---|---|
| Mild | Thin, flaky, reddish-brown patches | Low | Easy | Minimal |
| Moderate | More substantial, deeper reddish-brown or orange layer | Medium | Moderate | Potential for performance reduction |
| Severe | Thick, solid, dark brown or black coating with pitting | High | Difficult/Imposible | Significant structural damage |
Assessing the Damage
Rust on a razor blade isn’t just an aesthetic issue; it signifies potential damage to the blade’s critical performance characteristics. Understanding the extent of the rust’s penetration is paramount before attempting any cleaning method. A superficial layer of rust might be easily removed, but deep rust can compromise the blade’s sharpness and structural integrity. A thorough assessment is crucial to avoid further harm or ineffective cleaning efforts.Determining the depth of rust is essential to selecting the appropriate cleaning technique and predicting the outcome.
Ignoring the severity of the damage could lead to irreparable harm. Different assessment techniques provide varying levels of detail, and the choice of method depends on the available resources and the specific characteristics of the rust. Careful observation is the first step towards effective rust removal.
Visual Inspection Techniques
Visual inspection is the initial step in assessing rust damage. The naked eye can often reveal the extent of the problem. By examining the affected area, you can gain valuable insights into the nature of the rust. Careful observation is crucial for determining whether the rust is merely superficial or deeply embedded. Different visual characteristics indicate various degrees of damage.
Determining Rust Depth
Rust’s depth significantly impacts its removal and the blade’s subsequent performance. Superficial rust is typically a thin layer, easily removable with gentle scrubbing. Embedded rust, on the other hand, penetrates the blade’s metal, potentially causing significant structural weakening. The level of discoloration, the presence of pitting, and the texture of the rusted area are crucial visual indicators.
Potential Damage to Sharpness and Performance
Rust can compromise the blade’s sharpness and performance in several ways. Embedded rust can alter the blade’s geometry, creating uneven surfaces that reduce the cutting edge’s precision. The metal’s weakened structure can also affect the blade’s resilience and durability. The extent of the damage directly correlates with the depth of the rust. For instance, a razor blade with significant pitting from deep rust will likely exhibit poor cutting performance and require significant restoration.
Importance of Proper Assessment Before Cleaning
Choosing the right cleaning method hinges on the depth of the rust. Attempting to remove deep rust with inappropriate techniques can worsen the situation. Improper cleaning could cause further damage to the blade’s structure, making it unusable. This is a critical step that can either save or ruin the blade.
Comparison of Assessment Techniques
Various methods exist for assessing the depth of rust. Visual inspection, as mentioned earlier, is a readily available approach. Microscopic examination offers greater precision but is often more complex. A visual inspection using a magnifying glass or a microscope will reveal finer details. Each method has advantages and disadvantages based on the resources available and the required level of detail.
Visual inspection is usually sufficient for most cases.
Rust Damage Severity Table
| Visual Cues | Rust Depth | Potential Severity |
|---|---|---|
| Thin, even layer of discoloration | Superficial | Minimal |
| Discoloration with pitting or small holes | Moderately embedded | Moderate |
| Deep discoloration, significant pitting, or noticeable loss of metal | Deeply embedded | High |
Safe Handling and Preparation: Clean A Rusty Razor Blade
Rusty razor blades, even seemingly innocuous ones, can pose a significant risk if mishandled. Proper safety precautions and preparation are crucial to prevent accidents and ensure a safe cleaning process. This section Artikels the essential steps for handling rusty razor blades with care, from protective gear to workspace setup.Safe handling of rusty razor blades is paramount. Neglecting safety protocols can lead to cuts, infections, and other potential hazards.
This section emphasizes the importance of meticulous preparation to minimize risks and maximize the safety of the cleaning process.
Safety Precautions for Handling
Safe handling involves recognizing and mitigating the inherent risks associated with rusty razor blades. Razor blades, even when rusted, retain sharp edges that can cause serious cuts. Protective measures are essential to avoid accidental injuries.
- Always wear safety glasses or a face shield to protect your eyes from flying debris or accidental blade contact.
- Use sturdy, non-slip gloves to protect your hands from cuts and potential contamination.
- Ensure the work area is well-lit to enhance visibility and minimize the risk of mishaps.
- Choose a stable, flat surface to avoid slippage and blade mishaps.
Preparing the Razor Blade for Cleaning
Thorough preparation is a critical step in the cleaning process. A well-prepared blade ensures a more efficient and safe cleaning procedure. Improper preparation can result in a difficult cleaning task and potential safety risks.
- Secure the blade. Place the blade in a sturdy, well-fitting container to prevent accidental movement or slippage. This could be a blade-specific container or a small, secure box.
- Isolate the blade. The blade should be handled only with specialized tools, like tongs or tweezers, to avoid direct contact.
- Assess the rust. Before attempting to clean, re-evaluate the extent of the rust. This will help you choose the appropriate cleaning method.
- Protect the workspace. Cover the work surface with a protective mat or sheet to prevent damage and contain any potential spills.
Preparing the Work Area
Creating a safe workspace is vital to preventing accidents during the cleaning process. A well-organized workspace minimizes the risk of slips, trips, and other mishaps.
- Clear the area. Remove any unnecessary items that could obstruct movement or pose a tripping hazard.
- Ventilate the area. Ensure good ventilation, especially if using abrasive cleaning solutions or chemicals.
- Gather supplies. Have all necessary cleaning materials, protective gear, and tools readily available.
- Establish a designated disposal area. Establish a designated area for disposing of contaminated materials to avoid cross-contamination.
Potential Risks of Not Following Safety Procedures
Failure to adhere to proper safety procedures can lead to serious consequences. Accidents involving rusty razor blades can result in injuries, infections, and other health issues. Preventive measures are crucial for a safe and successful cleaning procedure.
Ignoring safety precautions can lead to severe cuts, infections, and potentially long-term health problems.
Examples include deep cuts requiring stitches, infections from contaminated blades, and allergic reactions to cleaning solutions. Understanding the potential risks underscores the importance of meticulous safety procedures.
Cleaning Methods
Rusty razor blades pose a safety hazard if not cleaned properly. Choosing the right cleaning method is crucial for restoring the blade’s sharpness and functionality while minimizing risks. This section delves into various approaches, from simple mechanical scrubbing to more complex electrochemical treatments, examining their respective advantages, disadvantages, and potential pitfalls.
Mechanical Cleaning
Mechanical methods primarily involve physical removal of rust through abrasion. This approach is often suitable for mild rust buildup and is relatively inexpensive. However, it can be time-consuming and may not be effective for deeply embedded or extensive rust. Excessive abrasion can also damage the blade’s edge, reducing its sharpness.
- Using a Soft-Bristled Brush: A soft-bristled brush, such as a toothbrush or a small wire brush, can effectively remove loose rust. Carefully scrub the blade in a circular motion, ensuring to avoid excessive pressure. This method is gentle on the blade’s surface.
- Sandpaper: Fine-grit sandpaper can be used for slightly more stubborn rust. Start with a higher grit and progressively move to finer grits to achieve a smoother surface. Ensure the blade is held firmly to prevent slippage during the sanding process.
Chemical Cleaning
Chemical cleaning methods utilize solutions that chemically react with rust to dissolve it. This approach can be faster than mechanical methods for removing substantial rust buildup, but it often involves potentially hazardous chemicals and requires careful handling.
- Vinegar: White vinegar is a common household solution for rust removal. Soak the blade in a solution of vinegar for several hours or overnight, depending on the severity of the rust. The acidity in vinegar helps dissolve the rust. However, vinegar may not be effective for very heavy rust.
- Lemon Juice: Similar to vinegar, lemon juice can also be used to remove rust. Apply lemon juice directly to the blade and let it sit for a while. This method is a gentler option, but less effective for large amounts of rust.
- Commercial Rust Removers: These specialized products contain strong chemicals that effectively remove rust. Always follow the manufacturer’s instructions carefully, as these products can be corrosive and harmful if not handled properly.
Electrochemical Cleaning
Electrochemical cleaning utilizes an electrochemical reaction to dissolve rust. This method is often highly effective, especially for heavy rust, but requires specialized equipment and a good understanding of the process.
- Electrolysis: This method involves using an electric current to accelerate the rust removal process. A container with an electrolyte solution (like salt water) and two electrodes (one connected to the blade and the other to a power source) is used. The current encourages the rust to dissolve. This method requires a good understanding of electrical safety.
Comparison of Cleaning Solutions
| Cleaning Method | Tools/Materials | Advantages | Disadvantages | Potential Risks |
|---|---|---|---|---|
| Mechanical (Soft Brush) | Soft-bristled brush | Gentle on the blade, readily available materials | Time-consuming, less effective for heavy rust | Potential for scratching if not careful |
| Mechanical (Sandpaper) | Sandpaper (various grits) | More effective for moderate rust, good for smoothing | Requires careful handling, potential for blade damage if not careful | Potential for blade damage if not using correct grit |
| Chemical (Vinegar) | Vinegar, container | Readily available, relatively safe | May not be effective for heavy rust, can take time | Avoid contact with eyes and skin |
| Chemical (Lemon Juice) | Lemon juice, container | Gentle, less aggressive than other chemicals | Less effective than other chemicals for heavy rust, may stain | Avoid contact with eyes and skin |
| Chemical (Commercial Rust Removers) | Rust remover, container, gloves, eye protection | Fast, effective for heavy rust | Potentially hazardous chemicals, follow safety precautions | Inhalation, skin and eye contact hazards |
| Electrochemical (Electrolysis) | Electrolyte solution, electrodes, power source, safety equipment | Highly effective for heavy rust, efficient | Requires specialized equipment, understanding of electrical safety | Electrical shock hazard if not careful, electrolyte solution can be corrosive |
Cleaning Procedures
Effectively cleaning a rusty razor blade involves a careful, multi-step process. Each method targets different aspects of the rust, from surface removal to deep penetration. Understanding the appropriate techniques and duration for each step is crucial to preventing damage to the blade’s delicate edge and ensuring a long-lasting, sharp result.
Mechanical Cleaning Methods
Mechanical methods utilize physical abrasion to remove rust. These techniques are generally suitable for surface rust but may not be ideal for deeply embedded corrosion. Proper selection and application are vital to avoiding unnecessary wear on the blade’s metal.
- Using a Soft-Bristled Brush: Employ a soft-bristled brush, such as a toothbrush, to gently scrub the blade. Focus on the rusted areas, applying light pressure to avoid scratching. A soft brush is crucial to preventing damage to the blade’s surface, and it should be used for shorter durations (approximately 1-3 minutes) to maintain the integrity of the razor’s edge.
- Employing a Steel Wool Pad: A fine-grit steel wool pad can be effective in removing surface rust. However, be extremely cautious when using this method, as excessive scrubbing can lead to scratches on the blade. The duration for this method should be kept short (1-2 minutes) to avoid potential damage.
Chemical Cleaning Methods
Chemical methods utilize solutions to dissolve rust. These solutions can be more effective than mechanical methods for deep-seated rust, but safety precautions are paramount. Always use appropriate safety gear (gloves, eye protection) when handling these solutions.
- Utilizing Vinegar: Vinegar’s acidity can help dissolve rust. Soak the blade in a solution of white vinegar for a period of 30 minutes to several hours. The duration depends on the severity of the rust. After soaking, gently scrub the blade with a soft brush to remove any remaining rust particles. Rinse thoroughly with water.
- Employing Lemon Juice: Lemon juice, like vinegar, has acidic properties that can help remove rust. Follow a similar procedure as with vinegar, soaking the blade in lemon juice for a comparable duration. The optimal soaking time may vary based on the extent of rust.
Table of Cleaning Procedures
| Cleaning Method | Step | Duration (approx.) | Precautions |
|---|---|---|---|
| Soft-Bristled Brush | Scrubbing rusted areas | 1-3 minutes | Light pressure, avoid scratching |
| Rinse with water | Instantaneous | Ensure complete removal of cleaning solution | |
| Steel Wool Pad | Scrubbing rusted areas | 1-2 minutes | Extreme caution, avoid excessive scrubbing |
| Rinse with water | Instantaneous | Ensure complete removal of cleaning solution | |
| Vinegar Soak | Soaking in vinegar solution | 30 minutes – several hours | Use gloves and eye protection, check for safety instructions |
| Scrubbing and rinsing | 1-2 minutes (scrubbing) | Thorough rinsing | |
| Lemon Juice Soak | Soaking in lemon juice solution | 30 minutes – several hours | Use gloves and eye protection, check for safety instructions |
| Scrubbing and rinsing | 1-2 minutes (scrubbing) | Thorough rinsing |
Post-Cleaning Care
Once your rusty razor blade gleams, the journey isn’t over. Proper drying, storage, and preventative measures are crucial to maintaining its sharpness and extending its lifespan. Ignoring these steps can lead to frustrating re-rusting and a dull blade. Let’s dive into the details of post-cleaning care.A clean razor blade is a sharp razor blade. Following the correct post-cleaning procedures ensures your hard work pays off and you continue to enjoy a smooth and safe shaving experience.
Drying the Blade
Thorough drying is paramount after cleaning. Water trapped in the blade’s crevices can lead to further rust. Use a soft, lint-free cloth to gently pat the blade dry, ensuring all surfaces are completely free of moisture. Avoid harsh rubbing that could damage the blade’s edge. Avoid using paper towels, as fibers can potentially get stuck in the blade’s grooves, increasing the risk of rust.
Storage Techniques
Proper storage is vital for preventing rust. Store the blade in a dry, cool, and dark environment. A closed container or a dedicated blade storage case can help maintain a constant, dry environment. Avoid storing the blade in a damp or humid area. Consider a storage case designed for razor blades, or a small, airtight container.
Preventing Future Rust Formation
Preventing rust is far easier than removing it. Regular cleaning and proper storage significantly reduce the risk of rust. Keep the blade dry at all times. Consider using a small amount of high-quality mineral oil or a dedicated blade lubricant on the blade’s surface, then storing it in a dry, sealed container to create a protective barrier against moisture.
Cleaning a rusty razor blade can be a real pain, but it’s totally doable! Finding the right technique is key, and sometimes a little elbow grease is necessary. Thankfully, there are some great tips out there for dealing with this common problem. For example, checking out the advice on lauren flax liz and lauren ep might give you some fresh ideas on tackling stubborn rust.
Ultimately, a well-maintained razor blade is a happy razor blade!
This simple step will effectively guard against future rust.
Maintaining Sharpness and Longevity
Maintaining the blade’s sharpness is directly tied to its longevity. Avoid storing the blade in contact with other metallic objects, as this can lead to friction and dulling. Keep the blade away from abrasive surfaces. Use the blade only for its intended purpose – shaving. Never use it to cut other materials, as this will damage the blade’s edge.
Preventative Measures for Rust Build-up
Regular care is key to preventing rust. Regularly inspect the blade for signs of moisture or early rust development. Cleaning and drying the blade after each use will prevent the buildup of moisture, which is the primary cause of rust.
Tips for Preventing Future Rust on Razor Blades
| Preventive Measure | Description |
|---|---|
| Regular Cleaning | Clean the blade thoroughly after each use to remove any remaining moisture. |
| Proper Drying | Use a soft, lint-free cloth to dry the blade completely, ensuring no moisture remains in crevices. |
| Dry Storage | Store the blade in a dry, cool, and dark environment, away from moisture. |
| Protective Coating | Apply a thin layer of mineral oil or a dedicated blade lubricant to create a protective barrier. |
| Avoid Contact with Metals | Do not store the blade in contact with other metallic objects to prevent friction. |
| Dedicated Storage Case | Use a dedicated blade storage case to maintain a dry environment. |
| Inspect Regularly | Check the blade for signs of moisture or early rust to address issues promptly. |
Troubleshooting
Cleaning a rusty razor blade can sometimes present unexpected challenges. Understanding potential issues and their causes is crucial for achieving a successful and safe cleaning process. This section details common problems and provides practical solutions to help you restore your blade to its pristine condition.Troubleshooting involves identifying and resolving problems encountered during the cleaning process. Identifying the root cause of the issue is often the first step towards a successful repair or restoration.
Understanding the steps involved in identifying, analyzing, and resolving problems is critical to achieving the best possible outcome.
Common Cleaning Issues
Troubleshooting involves recognizing and addressing potential problems that may arise during the cleaning process. This section Artikels common issues, their causes, and effective solutions.
- Incomplete Rust Removal: A common issue is the failure to remove all rust. This can be due to inadequate cleaning time, improper cleaning methods, or the stubborn nature of the rust itself. Different types of rust have varying levels of resistance to removal. Hardened or deeply embedded rust may require more aggressive cleaning techniques. Consider using a different cleaning solution or a combination of methods.
- Razor Blade Damage: The cleaning process can potentially damage the razor blade if not handled carefully. Harsh chemicals or abrasive materials can scratch or dull the blade’s edge. Excessive force during cleaning can also cause deformation or breakage. Ensure that the cleaning process is gentle and that the cleaning materials are compatible with the razor blade material. Consider using a soft-bristled brush or a specialized razor blade cleaning solution.
- Chemical Reactions: Using incompatible cleaning agents can lead to unexpected chemical reactions. This may result in corrosion, discoloration, or damage to the blade. Always verify that the cleaning solution is compatible with the razor blade material and avoid mixing incompatible substances. Consult the manufacturer’s instructions or a qualified professional if uncertain.
- Material Compatibility: Some cleaning materials may not be suitable for certain types of razor blades. Using inappropriate materials can damage the blade or cause unwanted reactions. Ensure that the cleaning materials are compatible with the razor blade’s composition and avoid using harsh abrasives. For instance, using steel wool on a stainless steel blade could scratch the surface.
Troubleshooting Incomplete Rust Removal
Addressing incomplete rust removal requires a systematic approach. This involves identifying the cause and implementing appropriate corrective measures. Failure to fully remove rust can lead to future corrosion and compromise the blade’s performance.
- Assess the Rust: Determine the type and extent of rust. Different types of rust require different approaches. Consider using a magnifying glass to examine the rust and determine its severity. Light rust may be easily removed, while heavy rust may require more aggressive methods.
- Adjust Cleaning Methods: If the initial cleaning methods aren’t effective, consider adjusting the cleaning solution, duration, or technique. Experiment with different cleaning solutions or combinations to find one that effectively removes the rust. For example, switching from a mild solution to a stronger one, or adding a gentle abrasive to the mix.
- Increase Cleaning Time: Sometimes, rust requires more time to remove. If the rust is stubborn, increase the soaking time or the duration of the cleaning process. Soaking in the cleaning solution for a longer period can soften the rust and make it easier to remove.
- Consider Specialized Tools: If the rust is particularly resistant, consider using specialized tools or techniques to aid in the removal process. For instance, a specialized razor blade cleaning kit may include tools to effectively remove rust.
Troubleshooting Table, Clean a Rusty Razor Blade
| Problem | Cause | Solution |
|---|---|---|
| Incomplete Rust Removal | Inadequate cleaning time, improper methods, stubborn rust | Increase cleaning time, use different solutions, consider specialized tools |
| Razor Blade Damage | Harsh chemicals, abrasive materials, excessive force | Use gentle cleaning methods, select compatible materials, avoid excessive force |
| Chemical Reactions | Incompatible cleaning agents | Verify compatibility, avoid mixing incompatible substances |
| Material Compatibility | Inappropriate cleaning materials | Use compatible cleaning materials, consult manufacturer’s instructions |
Illustrative Examples
")
Seeing is believing, especially when it comes to cleaning a rusty razor blade. Visual representations make the process significantly easier to understand and follow. This section provides practical examples to solidify your understanding of the steps involved and showcase the effectiveness of various cleaning techniques.
Before and After Image Comparisons
Clear visual representations are crucial for demonstrating the cleaning process. By comparing “before” and “after” images, the transformation is immediately apparent, and the effectiveness of the chosen method is readily observed. This helps in visually assessing the extent of rust removal and the overall improvement in the blade’s condition.
| Before | After | Caption |
|---|---|---|
| A close-up image of a razor blade heavily coated in rust, with visible pitting and discoloration. The rust appears thick and deeply embedded in various areas of the blade. | A close-up image of the same razor blade, but now visibly cleaner. The rust has been effectively removed, revealing the original metal beneath. The blade surface is smoother, and the discoloration is significantly reduced. | This image pair demonstrates the significant improvement possible with the proper cleaning process. The initial rust was substantial, but the cleaning method was successful in restoring the blade’s original condition. |
| A slightly less rusted razor blade, with noticeable surface rust and discoloration. | The same blade, after cleaning. The rust is visibly reduced, with the majority of the surface now reflecting light. | This example shows the effectiveness of the cleaning methods on different degrees of rust. Even a less severe case of rust can be completely addressed. |
Effectiveness of Different Cleaning Techniques
Different cleaning methods have varying degrees of effectiveness depending on the severity and type of rust. Choosing the right method for the specific condition of the blade is paramount for optimal results.
- Mechanical methods, like using a steel wool pad, can effectively remove surface rust. However, for deep or embedded rust, this method might not be sufficient and could damage the blade if not handled carefully.
- Chemical methods, using specific cleaning solutions, can be more effective in removing stubborn rust, but these solutions may require more precautions and disposal procedures.
Tools and Materials
The appropriate tools and materials are essential for a safe and effective cleaning process. The right tools ensure the job is completed efficiently and without damaging the blade.
- A selection of steel wool pads, ranging in grit for different levels of rust removal.
- Various cleaning solutions, including specialized rust removers and household cleaners.
- Safety glasses and gloves are essential for protecting yourself during the cleaning process.
- A soft cloth for wiping away excess solution and cleaning up any debris.
- A small container for holding cleaning solutions and rinsing the blade.
Last Recap
Restoring a rusty razor blade is more than just a cleaning job; it’s about maintaining a crucial tool. This comprehensive guide has equipped you with the knowledge to identify, assess, and effectively clean rust, preserving your blade’s sharpness and longevity. Remember to prioritize safety, choose the right method for the severity of the rust, and follow the post-cleaning care instructions to keep your blade in top condition.
Now you’re ready to confidently tackle any rusty razor blade you encounter!