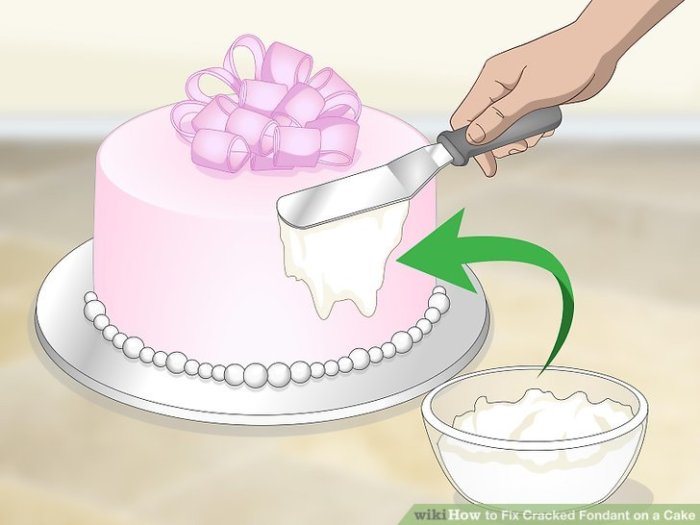
Fix Cracked Fondant on a Cake: This comprehensive guide will walk you through every step of repairing those frustrating fondant cracks on your beautiful cakes. From identifying the different types of cracks to choosing the right repair materials and mastering advanced techniques, we’ll equip you with the knowledge to tackle any fondant fissure with confidence.
We’ll cover everything from initial assessments and material selection to detailed repair techniques, prevention strategies, and troubleshooting common problems. You’ll learn how to fix small hairline cracks, large fissures, and even those cracks that extend into the cake layers. Prepare to elevate your cake decorating skills!
Initial Assessment of Damage
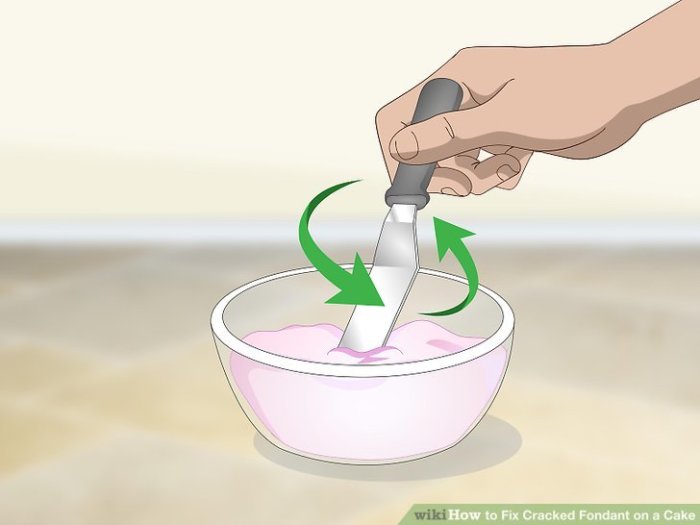
A crucial first step in fixing cracked fondant is accurately assessing the damage. A precise understanding of the crack’s type and extent is vital for selecting the appropriate repair method and ensuring a successful outcome. This initial assessment guides the entire repair process, determining the amount of fondant required, the type of tools needed, and the best approach to achieve a seamless repair.Identifying the precise nature of the damage dictates the repair strategy.
A small hairline crack might be easily concealed, while a large fissure will demand a more extensive repair solution. Careful observation is key to achieving a professional-looking restoration.
Types of Fondant Cracks
Understanding the various types of fondant cracks allows for targeted repair strategies. Different cracks arise from diverse causes, influencing the severity and best approach to restoration. Recognizing these variations ensures a more effective and efficient repair process.
- Hairline Cracks: These are extremely thin, almost invisible lines of breakage in the fondant. They often appear as subtle fissures that are difficult to detect without close inspection. They can occur due to minor handling during decorating, slight temperature fluctuations, or from the cake’s underlying structure settling slightly.
- Small Fissures: These are cracks that are visible but not extensive, allowing some areas of the fondant to remain intact. They can be caused by pressure from the cake’s weight, slight unevenness in the cake’s surface, or from the cake settling over time.
- Large Fissures: These are noticeable breaks in the fondant that extend significantly. They often occur from substantial force or uneven baking. The crack’s depth and width affect the repair method and potential for a flawless result. For example, if the cake is very heavy, or has been placed on an unstable surface, or handled roughly, this could result in a large fissure.
- Extensive Cracks: These are severe breaks that compromise the integrity of the fondant covering a large area. These are usually caused by excessive stress or handling during the decorating process. They can extend through the entire fondant layer, potentially revealing the cake underneath. These will likely require extensive repair, possibly involving additional fondant layers to achieve the desired result.
Fixing cracked fondant on a cake can be tricky, but thankfully there are some easy fixes! While you’re working on your cake masterpiece, you might want to check out some new bangers. Have you heard the new song by Nicki Minaj and Trina? It’s seriously fire! nicki minaj and trina drop new song baps listen.
Once you’re done jamming, get back to smoothing out those cracks for a flawless finish. Just remember to use a little bit of edible glue or a sugar paste to seamlessly mend those cracks and you’ll be all set.
Methods for Inspecting Fondant Damage
Accurate assessment of the damage is essential for successful repair. Different inspection methods provide a comprehensive view of the crack.
- Visual Inspection: A close-up examination is the first step. Use a strong light source to thoroughly examine the fondant surface for any signs of cracks. Employing different angles of observation allows for a more complete view. This should be done before any other manipulation of the cake or fondant.
- Tactile Inspection: Gently run your finger along the surface to detect any subtle variations or irregularities. A hairline crack may not be visible but might be felt. This technique is helpful in identifying cracks that are not immediately obvious to the eye. Caution is important here to avoid further damage to the fondant.
- Magnification: Use a magnifying glass or loupe for a detailed examination of the crack. This allows for a closer view of the crack’s width, depth, and overall extent. This method is especially helpful for identifying small or hairline cracks.
Visual Characteristics of Different Crack Types
This table provides a comparison of the visual characteristics of different fondant crack types, along with potential causes. Accurate identification of the crack type is crucial for choosing the most appropriate repair technique.
| Crack Type | Visual Characteristics | Potential Causes |
|---|---|---|
| Hairline Crack | Extremely thin, almost invisible line of breakage | Minor handling during decorating, slight temperature fluctuations, settling of the cake |
| Small Fissure | Visible but not extensive; some areas of fondant remain intact | Pressure from cake weight, uneven cake surface, cake settling |
| Large Fissure | Noticeable break; significant extent | Excessive force or handling, uneven baking, unstable placement of cake |
| Extensive Crack | Severe break compromising the fondant covering a large area | Excessive stress, rough handling during decorating |
Repair Materials and Tools
Fixing cracked fondant on a cake requires careful selection of tools and materials. A well-stocked kit allows for precise and effective repairs, minimizing the impact of damage and maximizing the visual appeal of the finished product. The choice of materials significantly influences the success of the repair process. Understanding their properties and application methods is crucial for achieving a seamless and aesthetically pleasing result.
Essential Tools for Fondant Repair
A comprehensive set of tools is vital for accurate and efficient fondant repair. A sharp, clean knife is essential for precise cutting of fondant strips or for removing excess fondant. A toothpick or small modeling tool aids in precise application of repair materials, while a small paintbrush can help to apply thin coats of edible glue or dust colorants for blending.
A ruler or measuring tool is also useful for creating even fondant strips. A clean surface, such as a non-stick mat or cutting board, provides a stable work area to avoid sticking and to maintain clean work. Finally, a magnifying glass can be beneficial for working on intricate details or fine cracks.
Fondant Repair Materials
Various materials are available for fondant repair, each with its own set of advantages and disadvantages. Choosing the right material depends on the severity and type of crack, the desired outcome, and the baker’s familiarity with the material.
Comparison of Repair Materials
| Material | Application Method | Advantages | Disadvantages |
|---|---|---|---|
| Edible Glue | Apply a thin layer to the crack and press the pieces together. Allow to dry completely. | Easy to use, widely available, creates a strong bond, blends well. | Can be messy, requires careful application to avoid excess, drying time may vary. |
| Fondant Strips | Cut small strips of fondant matching the color and texture of the cake. Carefully apply edible glue to the edges of the crack and place the strips over it. | Provides a natural-looking repair, matches the cake’s aesthetic. | Can be time-consuming for larger cracks, may not be easily matched for color/texture, requires precise cutting. |
| Modeling Paste | Apply a small amount of modeling paste to the crack, carefully sculpt it to match the surrounding fondant, then smooth out. | Excellent for large cracks or significant damage, allows for shaping and detail. | Requires experience in modeling paste techniques, can be challenging for beginners. |
| Edible Glue with Powdered Sugar | Mix edible glue with a small amount of powdered sugar to create a paste. Apply to the crack and press the pieces together. | Creates a strong bond, can be tinted for a better color match. | Requires careful proportioning, drying time may be longer than plain edible glue. |
Repair Techniques
Fixing cracked fondant can be a delicate process, requiring patience and precision. The success of the repair hinges on careful assessment of the crack’s severity and the appropriate application of repair materials. Different techniques are suited for various crack sizes and types, allowing for a tailored approach to each situation.Understanding the characteristics of the crack, whether small hairline fissures or larger, more extensive breaks, dictates the best approach for restoration.
Careful consideration of the type of fondant used, its elasticity, and the desired outcome of the repair are all critical factors in achieving a successful restoration.
Small Crack Repair
This technique is ideal for hairline cracks that don’t significantly compromise the structural integrity of the fondant. A gentle touch is paramount to avoid widening the existing fissure. Apply a small amount of edible glue directly to the crack, ensuring it fills the gap completely. Use a toothpick or a fine-tipped tool to gently press the fondant together, ensuring the glue adheres evenly.
A thin layer of powdered sugar or a food-safe pigment can be applied over the repair to blend it with the surrounding fondant, making the repair virtually invisible.
Large Crack Repair – Patching
For larger cracks, a patching technique is often more effective. Carefully cut a fondant patch slightly larger than the crack, ensuring the shape and texture match the surrounding area. Apply a generous amount of edible glue to both the crack and the patch. Position the patch over the crack and gently press down to secure it. Use a clean tool or your fingers to smooth out any visible seams or irregularities.
Edible glue will dry to a transparent finish, allowing you to lightly sand or blend the patch for an invisible result.
Large Crack Repair – Reinforcing
For deep cracks, reinforcing the fondant structure is essential. Create a small, narrow strip of fondant and apply glue to one side. Carefully press this strip against the crack to reinforce the area. The added strip strengthens the fondant, making the repair more durable. Repeat this process as needed.
If you need to strengthen a wider area, a layered approach using multiple strips can be implemented.
Using Fondant Strips
Fondant strips provide a robust reinforcement method for large cracks. Cut fondant strips slightly wider than the crack. Apply edible glue to the fondant strip and one side of the crack. Press the strip firmly against the crack, ensuring a good bond. To blend the repair, use a fondant smoother to smooth out the edges of the fondant strip.
If the crack is deep, you might need to add several strips to provide support and strength.
Using Edible Glue
Edible glue is a key component in all repair methods. Ensure the glue is appropriate for food contact and suitable for the type of fondant you’re using. Apply a thin, even layer of glue to the crack and the surrounding areas to enhance adhesion. Allow the glue to dry completely before applying any further pressure or handling the cake.
Proper drying time is crucial for a strong and lasting repair.
Repair Technique Table
| Crack Type | Repair Method | Step-by-Step Instructions |
|---|---|---|
| Small | Direct Glue Application | 1. Apply glue to crack. 2. Press fondant together. 3. Blend repair. |
| Large (Patching) | Patching | 1. Cut patch. 2. Apply glue to patch and crack. 3. Position and press patch. 4. Smooth edges. |
| Large (Reinforcing) | Reinforcing | 1. Cut strip. 2. Apply glue to strip and crack. 3. Press strip against crack. 4. Repeat if necessary. |
Prevention of Future Cracks
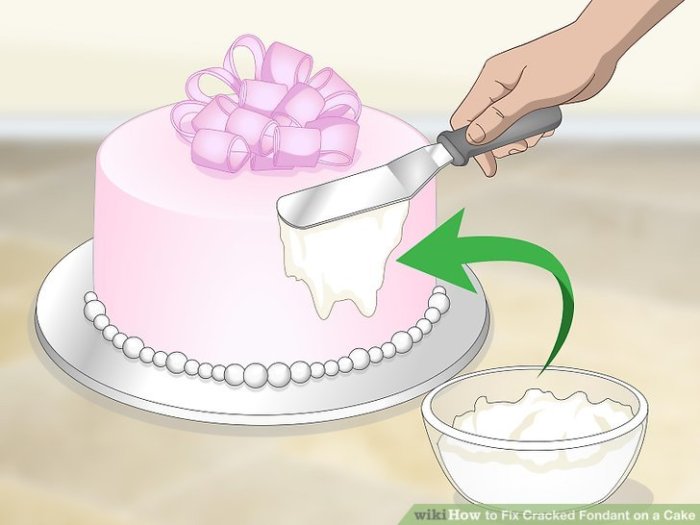
Fondant, while beautiful, is notoriously prone to cracking. Understanding the reasons behind these imperfections is key to achieving a flawless finish on your cakes. This section delves into the causes of fondant cracking, common mistakes, and preventative measures to ensure your future creations are picture-perfect.Fondant cracking is often a result of a complex interplay of factors, including the fondant’s inherent properties, the cake’s structure, and the environment in which the decorating process takes place.
Careful attention to detail and a systematic approach to decorating can significantly reduce the risk of these unsightly imperfections.
Causes of Fondant Cracking
Fondant is a delicate material, susceptible to stress and changes in temperature and humidity. Understanding these factors is crucial for preventing cracks. Incorrect application methods, improper storage, and environmental conditions can all contribute to fondant failure.
Common Mistakes in Fondant Application
Incorrect application techniques often lead to fondant cracking. These errors frequently involve an inadequate understanding of fondant’s behavior and the specific needs of different cake types. Improper layering and handling are critical areas for prevention.
- Insufficient Preparation of the Cake: A crucial step often overlooked is properly preparing the cake’s surface for the fondant. A smooth, even surface minimizes the likelihood of wrinkles and cracks. If the cake’s crumb coat isn’t smooth and even, the fondant will likely adhere poorly, causing cracking.
- Inadequate Crumb Coat: A crucial step often overlooked is properly preparing the cake’s surface for the fondant. A smooth, even surface minimizes the likelihood of wrinkles and cracks. If the cake’s crumb coat isn’t smooth and even, the fondant will likely adhere poorly, causing cracking. A crumb coat creates a smooth, even layer that helps the fondant adhere better.
- Incorrect Fondant Application Method: The method of applying fondant to the cake plays a significant role. Working in sections and using proper pressure and techniques can prevent unnecessary stress on the fondant. Applying fondant in thin layers can also help prevent cracking. Improper handling of the fondant, such as pulling or stretching it too forcefully, can cause stress and lead to cracking.
Fixing cracked fondant on a cake can be a real pain, especially when you’re trying to salvage a beautiful creation. It’s a similar feeling to hearing about the passing of musical talent, like the recent news about the loss of former Lambchop bassist Marc Trovillion. Rip former lambchop bassist marc trovillion was a real loss to the music scene, reminding us that even the most delicate things can sometimes shatter.
Thankfully, with a little patience and the right tools, a cracked fondant can often be repaired and looking fantastic again. Just remember to be gentle and you should be good to go!
Environmental Factors Affecting Fondant
Environmental conditions can significantly impact the success of fondant application. Variations in temperature and humidity can cause the fondant to become brittle or soft, increasing the risk of cracking.
- Temperature Fluctuations: Significant temperature changes during the decorating process can cause the fondant to contract or expand, leading to cracks. Maintaining a stable room temperature is crucial. A sudden drop in temperature after application can cause shrinkage.
- High Humidity: High humidity can make fondant soft and sticky, making it more susceptible to tearing and cracking. Controlling humidity levels in the workspace is essential for maintaining optimal fondant consistency. If the humidity is too high, the fondant will become too soft.
- Direct Sunlight: Direct sunlight can cause the fondant to dry out and become brittle. Ensure your workspace is shielded from direct sunlight.
Proper Handling and Storage of Fondant
Proper handling and storage of fondant are essential for maintaining its integrity and minimizing cracking.
- Fondant Storage: Fondant should be stored in an airtight container, away from direct sunlight and extreme temperatures. Proper storage helps maintain the fondant’s moisture and elasticity.
- Fondant Handling: Avoid touching the fondant surface directly with your hands, as oils from your skin can cause it to become sticky and prone to cracking. Use fondant tools and a lightly dusted surface to avoid sticking.
Advanced Repair Techniques
Taking fondant repairs to the next level involves mastering intricate techniques for seamless integration and durable results. This section delves into advanced methods, focusing on meticulous application of modeling paste for complex repairs and preserving delicate decorations. Careful attention to detail and precise execution are paramount in achieving professional-looking results.
Modeling Paste for Intricate Repairs
Modeling paste, often used in cake decorating, offers a highly versatile approach to intricate fondant repairs. Its malleability allows for precise shaping and seamless blending with existing fondant, creating a virtually invisible repair. This method is particularly effective for complex patterns or intricate designs where a simple crack repair wouldn’t suffice. When working with modeling paste, ensure the consistency is soft enough for easy shaping but firm enough to maintain its form.
Repairing Cracks Around Decorations
Preserving delicate decorations during fondant repair is crucial. Carefully assess the area surrounding the decoration before initiating any repair work. Employing a thin layer of modeling paste, gradually mold it around the decoration to fill the crack. Avoid applying excessive pressure to prevent any damage to the decoration. The modeling paste should be strategically applied to bridge the gap and seamlessly blend with the surrounding fondant.
The key is to work slowly and meticulously, ensuring a smooth transition.
Repairing Cracks Extending into Cake Layers
Fixing cracks that penetrate the cake layers requires a multi-step approach to ensure structural integrity and aesthetic appeal. The technique involves strategically reinforcing the damaged area to prevent future cracks and ensure the cake’s stability.
- Assess the Damage: Carefully evaluate the extent of the crack, noting its depth and any potential weakening of the cake layers. Identify the precise location where the crack extends into the cake.
- Prepare the Cake Layers: Clean the affected area of the cake layers, ensuring any loose fondant or debris is removed. This crucial step allows for a clean and stable surface for the repair. Apply a thin layer of modeling paste around the crack. Carefully and gently mold the paste to create a strong foundation for the repair.
- Reinforcing the Crack: Employ modeling paste to create a supportive framework within the crack. Work in small, controlled sections to avoid applying excessive pressure. The paste should be molded to fill the gap completely and extend beyond the crack’s edges to reinforce the structure.
- Building the Support: Create a small dam of modeling paste that will hold the cake layers together and prevent future cracks. This support structure should be firmly attached to the cake layers and the surrounding fondant. This will prevent further separation.
- Smooth the Transition: Once the paste has set, smooth out the repaired area with a fondant smoother or a clean, sharp knife. This step ensures a seamless transition between the repaired and original fondant. Ensure the repaired area blends seamlessly with the surrounding fondant.
- Additional Support: If necessary, consider reinforcing the repair with a thin layer of edible glue, applying it sparingly and carefully to further secure the repair. A small amount of edible glue is crucial for extra strength and prevents further separation.
Troubleshooting Fondant Cake Repairs: Fix Cracked Fondant On A Cake
Fixing cracked fondant can be tricky, and unexpected problems can arise. Knowing how to troubleshoot these issues is crucial for achieving a successful repair. Understanding common problems and their solutions allows for confident and efficient repairs, minimizing the risk of further damage and maximizing the final aesthetic appeal.
Fixing cracked fondant on a cake can be a real pain, but luckily there are some easy fixes! While you’re working on your masterpiece, you might want to check out some new tunes by The Weeknd and Mike Dean; they just dropped four new songs! the weeknd and mike dean share four new songs listen. A little musical inspiration can go a long way, and then, you can get back to perfecting those fondant details.
A touch of patience and the right techniques are key to a flawless finish.
Common Fondant Repair Problems
Troubleshooting fondant repairs often involves recognizing common pitfalls and adapting techniques. Predicting and addressing potential problems early on can save significant time and effort. Knowing how to adjust your approach based on the specific issue encountered is essential for success.
Glue Drying Too Quickly
Rapid glue drying is a frequent problem, often hindering proper adhesion. This issue can be resolved by employing techniques that slow down the drying process, or by using different types of glue altogether. Faster drying times are typically due to factors such as the type of glue used, ambient temperature, and humidity. Maintaining optimal working conditions and using appropriate tools and materials can minimize this problem.
- Using a slower-drying glue, like a specific type of edible glue or a specialized fondant adhesive, can significantly improve the repair process. This is often a good initial step to prevent the problem altogether.
- Working in a cool, humid environment can help slow the drying time of the glue. If possible, consider using a humidity-controlled workspace, or use a damp cloth or spray bottle to maintain humidity in the immediate area.
- Applying a very thin layer of glue can also help to prevent the glue from drying too quickly, which allows for more controlled application.
- Employing a technique that keeps the fondant in place, like using toothpicks or small pieces of paper, will aid in preventing the glue from drying unevenly before the repair is fully secured.
Fondant Tearing
Fondant tearing during repair is another common challenge. This often occurs due to improper handling or a lack of support during the repair process. Implementing the right techniques and adjusting materials can minimize this risk.
- Employing a technique that avoids pulling or stretching the fondant can greatly improve the integrity of the repair. Using gentle pressure and precise movements during the repair process can significantly reduce the risk of tearing.
- Using a stronger fondant, or a type that is more resilient to tearing, is an alternative solution. If the fondant is particularly delicate, consider using a thicker, more supportive layer.
- Ensuring adequate support for the fondant is crucial. Using toothpicks or small pieces of paper to secure the fondant can reduce the risk of tearing during the repair.
Other Common Issues
Other issues may include uneven drying of the glue, improper fondant preparation, or incompatible materials.
- Uneven drying of the glue can lead to a poorly adhered repair. Applying the glue in thin layers and ensuring consistent pressure during the repair process can minimize this issue. Adjusting the humidity of the work area, if possible, can also prevent uneven drying.
- Improper fondant preparation can also contribute to tearing or other issues. Ensure the fondant is properly softened and pliable before attempting any repair. Check for any existing cracks or imperfections that may affect the outcome.
- Incompatible materials can also cause difficulties. Using an adhesive that is not compatible with the fondant type can lead to poor adhesion. Using materials that are compatible will increase the likelihood of a successful repair.
Troubleshooting Table
| Problem | Potential Causes | Solutions |
|---|---|---|
| Glue drying too quickly | High temperature, low humidity, wrong glue type | Use a slower-drying glue, work in a cool, humid environment, apply thin layers, support fondant with toothpicks |
| Fondant tearing | Improper handling, lack of support, fragile fondant | Gentle handling, use support materials (toothpicks), use a stronger fondant type |
| Uneven glue drying | Uneven pressure during application, poor humidity control | Apply glue in thin layers, ensure consistent pressure, control humidity in the work area |
Illustrative Examples
Fixing fondant cracks on cakes can range from simple touch-ups to more involved repairs, depending on the size and depth of the damage. Understanding the different scenarios and the appropriate techniques is crucial for achieving a professional-looking result. Each repair method requires careful consideration of the cake’s structure and the fondant’s characteristics.
Large Crack in Fondant, Fix Cracked Fondant on a Cake
A significant crack in the fondant, potentially spanning several inches, demands a more substantial repair using modeling paste. First, carefully clean the crack edges with a toothpick or a sharp knife, removing any loose fondant. This ensures proper adhesion of the modeling paste. Next, apply a thin layer of modeling paste along the crack, using a palette knife or a toothpick to smooth it.
Shape the modeling paste to match the surrounding fondant, and use a fondant smoother to refine the contours. Allow the modeling paste to dry completely before proceeding with any further decoration. This meticulous approach ensures a seamless repair that won’t be visible after the final touches.
Small Hairline Crack
Addressing a hairline crack necessitates precision and patience. Begin by gently cleaning the crack edges with a toothpick, ensuring no debris or residue interferes with the repair. Next, carefully apply a tiny amount of modeling paste to the crack. Use a very fine tool, like a toothpick or a small modeling tool, to work the paste into the crack, filling it completely.
The key is to avoid applying too much paste, as this could create a noticeable bump or unevenness. Finally, smooth the repaired area with a fondant smoother, ensuring a seamless transition with the surrounding fondant. This meticulous process guarantees an invisible repair.
Crack Extending Partially Through Frosting
A crack extending partially into the cake’s frosting indicates a structural issue that needs immediate reinforcement. Before applying modeling paste, carefully assess the integrity of the cake. If the crack is significant, a reinforcement layer might be necessary. Apply a thin layer of modeling paste to the crack, filling it completely and smoothing it out. Ensure the modeling paste adheres to the cake’s frosting, providing a sturdy foundation.
A layer of clear or edible glue can help to further secure the paste. This is a critical step to avoid further damage and ensure the cake’s stability. Careful attention to reinforcing the cake structure is paramount.
Outcome Summary
In conclusion, fixing cracked fondant on a cake is achievable with the right knowledge and tools. This guide provides a detailed roadmap for every stage of the repair process, from initial assessment to advanced techniques. Remember, practice makes perfect, and with these tips and tricks, you’ll be a fondant-repairing pro in no time. So, go ahead and tackle those cracked masterpieces with confidence! Happy baking!
