Tag: appliance repair

  • Install a Gas Dryer A Comprehensive Guide

    Install a Gas Dryer A Comprehensive Guide

    Install a Gas Dryer: This guide dives deep into the world of gas dryers, exploring their function, installation, safety precautions, and even their environmental impact. From the initial setup to ongoing maintenance, we’ll cover everything you need to know to confidently install your new gas dryer.

    We’ll detail the various types of gas dryers available, comparing their features, advantages, and disadvantages. Understanding the components and the installation process is crucial. We’ll also address safety concerns and offer troubleshooting tips to ensure smooth operation.

    Introduction to Gas Dryers

    Install a Gas Dryer

    Gas dryers have become a staple in many households, offering a convenient way to dry clothes quickly and efficiently. They are a significant improvement over traditional outdoor drying methods, especially in areas with unpredictable weather patterns. This exploration delves into the workings, history, advantages, disadvantages, and safety considerations associated with gas dryers.Gas dryers utilize the heat generated from burning natural gas to warm the air and evaporate moisture from clothes.

    This process, while seemingly simple, has evolved considerably over time, leading to the advanced condensing models prevalent today.

    Function and Operation of a Gas Dryer

    Gas dryers function by heating air using a gas burner. The heated air then circulates through the dryer’s drum, containing the clothes. The heat evaporates the moisture from the garments, and the dryer’s system extracts and removes the moisture. This process differs from electric dryers, which use resistive heating elements. The efficiency of the gas dryer depends on factors such as the type of gas burner used, the design of the dryer’s ventilation system, and the user’s drying settings.

    Historical Context of Gas Dryers

    Early gas dryers relied on open flames and less sophisticated mechanisms for moisture extraction. The development of more efficient burners and improved ventilation systems led to significant improvements in drying times and energy efficiency. This advancement distinguished gas dryers from their predecessors, particularly when compared to electric dryers, which had a slower drying process in the early stages.

    Advantages of Gas Dryers

    Gas dryers offer several benefits. They are generally faster than electric dryers, especially for large loads, and can provide efficient drying in a shorter timeframe. The higher heat output of gas dryers can be particularly beneficial for drying thick or heavily soiled items. Furthermore, gas dryers are often more cost-effective to operate than electric dryers in regions where natural gas is a cheaper energy source.

    Disadvantages of Gas Dryers

    Gas dryers, while efficient, also have potential drawbacks. They can be more expensive to install than electric models, and the installation process requires a qualified professional to ensure safe gas line connections. Potential safety hazards, such as gas leaks or improper venting, also need careful consideration. Finally, the reliance on natural gas makes gas dryers less environmentally friendly than electric dryers in regions where natural gas production or distribution has environmental concerns.

    Basic Components of a Gas Dryer

    Gas dryers consist of several essential parts working together. The gas burner, responsible for heating the air, is a critical component. The drum, where clothes are placed, is a crucial element in the drying process. The moisture extraction system removes excess moisture, and the ventilation system expels the moisture-laden air. The controls panel allows users to regulate drying settings.

    Installing a gas dryer can seem daunting, but it’s totally manageable with the right steps. Thinking about how much easier laundry day will be is motivating! If you’re a teen with a knack for the spotlight, you might also consider exploring modeling opportunities. It’s a great way to build confidence and learn about the industry, like exploring different looks and styles.

    Check out some tips on Become a Model when You Are a Teen for more ideas. Ultimately, a new gas dryer will streamline your laundry routine, leaving you with more time for other pursuits!

    Different Types of Gas Dryers

    Dryer Type Features Advantages Disadvantages
    Condensing Dryer Utilizes a condenser to collect moisture, rather than venting it directly. More energy-efficient due to reduced venting needs; better for indoor air quality. Can be more expensive to purchase; may require more maintenance.
    Venting Dryer Releases moisture-laden air through a vent system to the outdoors. Generally more affordable to purchase; simpler design. Less energy-efficient; can negatively impact indoor air quality.

    Different types of gas dryers cater to various needs and preferences. Condensing dryers prioritize energy efficiency, while venting dryers often offer a more budget-friendly option.

    Safety Precautions

    Proper installation and operation of a gas dryer are essential for safety. Regular maintenance, including checking for gas leaks and ensuring proper venting, is crucial. Never operate a gas dryer if you suspect a gas leak. The dryer’s vent system must be properly installed and maintained to prevent fires. Always consult a qualified professional for installation and maintenance.

    Following manufacturer instructions is essential for safe operation.

    Installation Process: Install A Gas Dryer

    Installing a gas dryer isn’t a DIY project for everyone. It requires careful attention to safety protocols and proper procedures. This guide provides a comprehensive overview of the process, from gathering the necessary tools to completing the electrical connections. Remember, if you are unsure about any step, it’s crucial to contact a qualified HVAC technician.

    Required Tools and Materials

    Before beginning the installation, ensure you have all the necessary tools and materials readily available. This will help streamline the process and prevent delays. A well-stocked toolbox will include:

    • Gas line wrenches (various sizes)
    • Adjustable wrench
    • Screwdrivers (Phillips and flathead)
    • Wire strippers/cutters
    • Safety glasses and gloves
    • Level
    • Measuring tape
    • Electrical tape
    • Dryer vent kit (including elbows, connectors, and vent pipe)
    • Gas shut-off valve (if not already present)
    • Appropriate sealant for gas connections

    Connecting the Gas Supply Line

    Connecting the gas supply line to the dryer requires extreme caution. Improper connections can lead to gas leaks and safety hazards. Follow these steps carefully:

    1. Turn off the main gas supply valve to the dryer area.
    2. Disconnect the old gas supply line from the dryer, if applicable.
    3. Carefully connect the new gas supply line to the dryer’s gas connection point using the appropriate wrenches and sealant.
    4. Tighten the connections securely, ensuring no leaks.
    5. Turn on the gas supply valve slowly, and check for leaks with soapy water.

    Connecting to the Exhaust Vent System

    The exhaust vent system ensures proper air circulation and prevents moisture buildup in the area. This involves careful routing and sealing:

    1. Measure and cut the vent pipe to the correct length, accounting for turns and clearances.
    2. Connect the dryer vent to the exhaust vent pipe using the appropriate connectors.
    3. Seal all joints with the provided sealant to prevent air leaks and ensure proper ventilation.
    4. Secure the vent pipe to the wall or ceiling using appropriate mounting hardware.
    5. Make sure the vent pipe extends away from the house and is not blocked by anything.

    Electrical Connections

    Correct electrical connections are essential for dryer operation and safety. Follow these steps carefully:

    1. Disconnect the power supply to the dryer area.
    2. Ensure the dryer’s electrical connections match the local electrical codes and the dryer’s specifications.
    3. Connect the wires using appropriate wire connectors and electrical tape.
    4. Verify all connections before turning on the power.
    5. Connect the dryer to the appropriate electrical outlet, ensuring the outlet is properly grounded.

    Installation Steps Table

    The following table summarizes the steps involved in gas dryer installation.

    Step Description Tools/Materials
    1 Turn off gas supply and disconnect old line (if applicable). Gas line wrenches, adjustable wrench, safety glasses, gloves
    2 Connect new gas supply line to dryer, using sealant. Gas line wrenches, sealant, adjustable wrench
    3 Check for gas leaks with soapy water. Soapy water
    4 Install vent pipe, securing with appropriate hardware. Dryer vent kit, measuring tape, level, screws, anchors
    5 Perform electrical connections, ensuring grounding. Wire strippers/cutters, electrical tape, multimeter (optional)

    Common Installation Mistakes and How to Avoid Them

    Common mistakes during gas dryer installation can lead to costly repairs and safety hazards.

    Installing a gas dryer can be a worthwhile upgrade, offering potentially higher efficiency than electric models. While considering that, it’s interesting to see how a recent case, like Desiigner being cleared of all charges in a New York drug and gun arrest here , highlights the complexities of the legal system. Ultimately, installing a gas dryer still requires careful planning and professional installation to ensure safety and optimal performance.

    • Incorrect gas line connections: Ensure all gas connections are tight and leak-free. Using the wrong tools or sealant can lead to dangerous leaks. Always follow the manufacturer’s instructions.
    • Improper vent installation: Incorrectly routed or sealed vents can cause air leaks and damage to the dryer. Proper venting is crucial for efficient operation and safety.
    • Inadequate electrical connections: Ensure proper grounding and wire connections. Incorrect wiring can cause short circuits or electrical shocks.
    • Ignoring safety protocols: Always turn off the gas supply before working on any gas lines. Never attempt any installation without proper safety gear or knowledge.

    Gas Dryer Safety

    Installing a gas dryer is a significant undertaking. Safety must be paramount throughout the process, from initial planning to final inspection. Proper ventilation, safe distances, and meticulous handling of gas lines are crucial for preventing accidents and ensuring the long-term reliability of your appliance.Ensuring a safe installation process involves more than just following instructions; it demands a proactive approach to recognizing and mitigating potential hazards.

    By understanding the specific safety considerations for gas dryers, you can create a secure and efficient installation.

    Importance of Safety During Installation

    Gas dryers, while convenient, use flammable gas. Neglecting safety precautions can lead to serious risks, including fires, explosions, and carbon monoxide poisoning. A meticulous approach to installation, emphasizing proper ventilation, safe distances, and careful handling of gas lines, is essential to prevent these hazards.

    Proper Ventilation for Gas Dryers

    Adequate ventilation is critical to prevent the buildup of potentially harmful gases. Gas dryers, like any appliance that burns fuel, need proper ventilation to safely exhaust combustion byproducts. This ensures the dryer operates efficiently and prevents the accumulation of harmful gases in the surrounding area. Insufficient ventilation can result in incomplete combustion and the release of harmful fumes.

    • Ensure the dryer is installed in a well-ventilated area, away from obstructions that could impede airflow.
    • Verify that the dryer’s exhaust system is properly connected and free of blockages.
    • Check the local building codes and regulations regarding ventilation requirements for gas appliances.

    Maintaining Safe Distances

    To minimize fire risks, maintain a safe distance between the dryer and any flammable materials. This includes combustible fabrics, paper, or other items that could ignite easily. Carefully consider the potential ignition sources and the risk of fire propagation in the surrounding area. Understanding the specific flammability characteristics of nearby materials is crucial.

    • Keep the dryer a safe distance from curtains, drapes, or other combustible materials.
    • Install the dryer away from flammable storage areas.
    • Check the dryer’s exhaust vent to ensure it is not positioned near combustible materials.

    Handling Gas Lines During Installation

    Gas lines require specialized handling. Any work involving gas lines should be performed by qualified professionals. Improper handling of gas lines can lead to leaks, fires, and explosions. Ensuring that gas lines are correctly connected and secured is vital.

    • Do not attempt to connect or disconnect gas lines yourself unless you are a certified gas fitter.
    • Always ensure gas lines are securely fastened and free of leaks.
    • Follow manufacturer instructions meticulously when handling gas lines.

    Safety Procedures for Different Gas Dryer Types

    Different gas dryer types might have slightly different safety procedures. Understanding these variations ensures a tailored and effective installation.

    Installing a gas dryer can be a worthwhile project, but it’s important to factor in the potential for increased energy efficiency. Speaking of efficiency, I’m already looking forward to the fall movie preview horror season, especially with the new releases like those previewed on fall movie preview horror. Ultimately, a well-installed gas dryer can save you money in the long run, especially with the rising energy costs.

    Dryer Type Safety Procedure 1 Safety Procedure 2
    Condensing Dryer Ensure proper condensation drainage is in place. Verify exhaust system is compatible with condensing technology.
    Conventional Gas Dryer Maintain proper clearance from flammable materials. Adhere to local codes for venting and exhaust.

    Safety Checks Before and After Installation

    Comprehensive safety checks are essential to confirm a safe installation. A thorough inspection before and after installation helps identify any potential hazards. This is a critical step in ensuring the dryer operates safely and reliably.

    • Inspect the gas connection for leaks before energizing the gas supply.
    • Verify the dryer’s exhaust system is free of blockages.
    • Check for proper grounding of the dryer.
    • Test the dryer’s operation to ensure it functions correctly.

    Troubleshooting and Maintenance

    Keeping your gas dryer running smoothly and safely requires regular maintenance and troubleshooting. Ignoring potential problems can lead to costly repairs, decreased efficiency, and even safety hazards. This section provides a guide to common gas dryer issues, their potential causes, and effective solutions, along with essential maintenance tips to prolong its lifespan.

    Common Gas Dryer Problems and Solutions

    Understanding the common problems associated with gas dryers and their potential causes is crucial for effective troubleshooting. This section Artikels potential issues and solutions to help you diagnose and fix problems quickly.

    Problem Possible Causes Solutions
    Dryer not heating Faulty heating element, gas valve malfunction, insufficient gas supply, thermostat problems, or a tripped circuit breaker. Check the circuit breaker; if tripped, reset it. Inspect the gas supply; ensure there’s no blockage. Verify the gas valve’s operation. If the heating element is faulty, it needs replacement. If the thermostat is malfunctioning, it must be replaced.
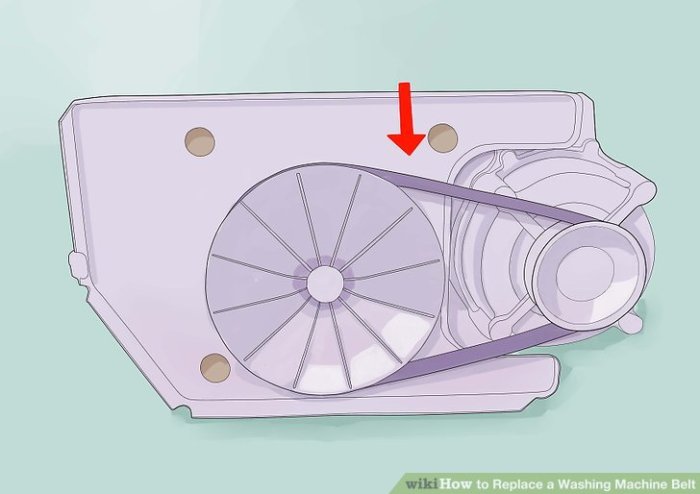
    Dryer is making loud noises Worn-out bearings, loose components, or a build-up of lint or debris. Check for loose screws or parts. Clean lint traps regularly. If the noise persists, the dryer may require a professional repair, particularly if the noise is grinding or screeching.
    Dryer is not drying clothes properly Clogged lint filter, low gas supply, or a faulty heating element. Incorrect temperature setting. Ensure the lint filter is clean. Inspect the gas supply for blockages or low pressure. If the heating element is faulty, it needs replacement. Verify the temperature setting; adjust if needed.
    Dryer is leaking gas Damaged gas lines, a faulty gas valve, or a worn-out hose connection. Immediately shut off the gas supply to the dryer. Do not attempt any repairs yourself. Contact a qualified appliance technician to inspect and repair the gas lines, valve, or hose connection. This is a critical safety issue.

    Troubleshooting Methods, Install a Gas Dryer

    Effective troubleshooting involves systematic checks to identify the root cause of the issue. These methods help you pinpoint the problem and take the necessary steps to resolve it.

    • Visual Inspection: Carefully examine the dryer for any visible signs of damage, leaks, or unusual wear. Look for loose connections, signs of overheating, or blockages in the lint trap. This simple step can often reveal the problem.
    • Checking the Gas Supply: Ensure the gas supply to the dryer is turned on and that there are no blockages or obstructions in the gas lines. Check the gas valve to ensure it’s functioning correctly.
    • Electrical Checks: Verify that the circuit breaker for the dryer is not tripped. Inspect the electrical connections for any signs of damage or loose wiring.
    • Professional Assistance: If you are unable to diagnose or fix the issue yourself, contact a qualified appliance technician. This is particularly important for gas-related problems or any safety concerns.

    Maintenance Requirements

    Regular maintenance is essential for prolonging the lifespan and safety of your gas dryer. This involves simple tasks that can significantly improve its performance and prevent major repairs.

    • Cleaning the Lint Trap: Regularly cleaning the lint trap prevents overheating and ensures efficient drying. A clogged lint trap can lead to reduced drying performance and potential fire hazards. This is a critical maintenance task.
    • Checking the Gas Supply: Regularly checking the gas supply and connections ensures that there are no leaks or blockages. This is crucial for safety.
    • Cleaning the Dryer Vent: The vent system can accumulate lint, which can cause overheating or reduced drying performance. Clean the vent system annually to maintain optimal dryer operation. Hire a professional if the vent is hard to reach.
    • Inspecting Components: Periodically inspecting the dryer’s components, such as the heating element, thermostat, and gas valve, can help detect potential issues before they become major problems. This preventative measure helps to prolong the dryer’s lifespan.

    Frequency of Maintenance Checks

    Regular maintenance intervals can vary based on usage frequency. Frequent use may necessitate more frequent checks, whereas less frequent use might allow for less frequent maintenance. However, adhering to a consistent schedule is crucial for optimal dryer performance and safety. Aim for monthly checks for lint traps and gas supply, and annual cleaning of the vent system.

    Always consult your dryer’s manual for specific maintenance recommendations.

    Environmental Impact

    Gas dryers, while convenient, have a significant environmental footprint. Understanding the trade-offs between convenience and sustainability is crucial for responsible home appliance choices. This section explores the environmental impact of gas dryers compared to other types of dryers, focusing on energy efficiency, carbon footprint, and potential mitigation strategies.The choice between a gas dryer and an electric dryer is not just about convenience; it significantly impacts the environment.

    Factors like energy source, operational efficiency, and emissions all play a role in determining the overall sustainability of a gas dryer. This comparison highlights the environmental trade-offs and offers insights into reducing the impact of dryer use.

    Comparison of Energy Efficiency

    Gas dryers, while potentially more energy-efficient than older electric models, can vary considerably in their energy consumption. The efficiency depends on factors such as the specific model, its design features, and how it’s used. The overall energy consumption of a dryer is affected by the type of fabric being dried, the drying cycle chosen, and the efficiency of the venting system.

    • Different drying cycles (e.g., light, medium, heavy) require varying amounts of energy, influencing the overall consumption. The heavier the load, the more energy is typically required. Proper maintenance of the dryer, including regular cleaning of the lint trap, is vital to maintaining its energy efficiency.
    • Electric dryers often rely on readily available electricity. However, the source of electricity, whether from renewable or non-renewable sources, can influence their environmental impact. This is a factor to consider in regions with a mix of energy sources.

    Carbon Footprint Analysis

    The carbon footprint of a gas dryer depends on the source of the natural gas. Natural gas, when produced and distributed, can release greenhouse gases. The specific carbon footprint of a gas dryer is also affected by its energy efficiency rating and the frequency of use.

    • Natural gas extraction and distribution processes themselves have an environmental impact. This impact can vary depending on the specific methods and infrastructure used.
    • The energy efficiency of a gas dryer directly influences the amount of gas consumed. More efficient dryers lead to a lower carbon footprint compared to less efficient models.
    • A gas dryer’s carbon footprint can be influenced by the amount of use, including factors like drying frequency and the type of laundry loads. Drying a larger load or more frequently will result in a larger carbon footprint.

    Potential for Reducing Environmental Impact

    Several strategies can reduce the environmental impact of gas dryer use. These include improving energy efficiency, promoting sustainable gas sources, and encouraging responsible consumer choices.

    • Using energy-efficient dryer models, those with higher Energy Star ratings, can significantly reduce the energy consumption and, subsequently, the carbon footprint. The use of these models is one of the key factors to consider when choosing a gas dryer.
    • Supporting the use of renewable natural gas sources, or biogas, can lessen the environmental impact associated with natural gas production and distribution. The use of alternative energy sources in dryer manufacturing and use will likely reduce the carbon footprint.
    • Proper maintenance and regular cleaning of the lint trap can prevent significant energy waste. This also ensures optimal dryer function.

    Energy Consumption Comparison

    A detailed comparison of energy consumption across different dryer types reveals varying levels of efficiency. The table below provides a general overview.

    Dryer Type Energy Consumption (kWh/cycle) Environmental Impact
    Gas Dryer (Energy Star qualified) 0.5 – 1.5 kWh/cycle Lower if natural gas source is sustainable.
    Electric Dryer (Energy Star qualified) 1.0 – 2.0 kWh/cycle Lower if electricity source is sustainable.
    Condenser Dryer 0.7 – 1.2 kWh/cycle Lower energy consumption compared to older models.

    Gas Dryer Models and Energy Efficiency

    Gas dryer models come with various energy efficiency ratings, influencing their overall environmental impact. Manufacturers provide energy efficiency ratings for different models.

    • Manufacturers provide energy efficiency ratings (e.g., Energy Star ratings) for their gas dryer models. These ratings are crucial in comparing different models.
    • Choosing a gas dryer with a higher Energy Star rating can significantly reduce energy consumption and the overall environmental impact of its use.

    Cost Considerations

    Install a Gas Dryer

    Investing in a gas dryer might seem appealing, but understanding the total cost of ownership is crucial. This involves not only the initial purchase price but also ongoing expenses like installation, maintenance, and energy consumption. A thorough cost analysis helps in making an informed decision that aligns with your budget and long-term needs.

    Typical Installation Costs

    Gas dryer installation costs vary depending on factors like labor rates in your area, complexity of the installation (e.g., venting requirements), and any necessary modifications to your existing plumbing or venting systems. On average, expect to pay between $300 and $800 for installation. This range considers a standard installation in a typical home setting. However, more complex installations, such as those requiring significant plumbing or venting adjustments, could exceed this amount.

    Gas vs. Electric Dryer Costs

    The cost comparison between gas and electric dryers extends beyond the initial purchase price. Gas dryers often have a higher upfront cost, but their operational expenses can be lower over time, especially in regions with relatively lower gas prices. Electric dryers, conversely, have lower initial costs but incur higher energy bills. A significant factor in the long run is the fluctuating cost of natural gas versus electricity.

    Consider local energy rates and usage patterns when comparing the long-term financial implications.

    Long-Term Cost Implications of Gas Dryers

    The long-term cost of a gas dryer involves more than just energy bills. Gas dryers generally consume less energy than comparable electric models, resulting in lower utility bills, particularly in areas with affordable gas rates. The long-term cost savings can be substantial, offsetting potentially higher initial costs. Furthermore, the efficiency of a gas dryer can impact the lifespan of other appliances in your home, such as your water heater.

    Repair and Maintenance Costs

    Gas dryers, like any appliance, require occasional repairs and maintenance. Potential issues might include burner problems, vent clogs, or issues with the gas supply line. Repair costs can vary widely depending on the specific problem. Routine maintenance, such as cleaning the lint filter and ensuring proper venting, can help prevent major issues and reduce repair costs. Regular maintenance is a key element in extending the lifespan of your gas dryer and reducing unexpected repair bills.

    Total Cost Breakdown

    Cost Category Estimated Cost
    Initial Purchase Price $500 – $1500 (depending on features and brand)
    Installation $300 – $800
    Annual Energy Costs (Gas) $100 – $300 (depending on usage and gas rates)
    Annual Energy Costs (Electric) $200 – $500 (depending on usage and electricity rates)
    Maintenance (every few years) $50 – $200
    Repair Costs (average per incident) $100 – $500

    Note: The estimated costs in the table are general guidelines. Actual costs may vary based on individual circumstances.

    Last Word

    In conclusion, installing a gas dryer is a significant undertaking, but with careful planning and attention to detail, you can successfully navigate the process. This comprehensive guide has provided a detailed roadmap, highlighting safety procedures, installation steps, and potential cost factors. Remember to prioritize safety throughout the entire process, and don’t hesitate to consult professionals when needed. Enjoy your new gas dryer!

  • Troubleshoot a Dryer That Smells Like It Is Burning

    Troubleshoot a Dryer That Smells Like It Is Burning

    With Troubleshoot a Dryer That Smells Like It Is Burning, you’re tackling a potentially serious issue. A burning smell from your dryer could signal a variety of problems, ranging from a simple lint buildup to more serious electrical issues. This guide will walk you through identifying the source of the smell, checking components, and troubleshooting electrical problems, lint accumulation, overheating, and more.

    We’ll also cover essential safety precautions.

    Understanding the potential causes and symptoms is key to effectively troubleshooting the problem. From visual inspections to electrical checks, we’ll cover all the necessary steps in a detailed and easy-to-follow format. Safety is paramount, so we’ll Artikel critical safety measures to prevent accidents. This comprehensive guide equips you to diagnose and fix the problem yourself, saving you time and money.

    Identifying the Source of the Burning Smell

    A burning smell emanating from your dryer is a clear sign that something is amiss. Ignoring this could lead to a more serious problem, potentially causing damage to the appliance or even a fire hazard. Pinpointing the exact source is crucial for effective troubleshooting and repair.

    Potential Causes of a Burning Smell

    Understanding the potential causes of a burning smell in your dryer is essential for effective troubleshooting. A systematic approach, considering the various components, can quickly narrow down the possibilities. This helps determine the specific area requiring attention.

    • Heating Element: The heating element is responsible for drying clothes. A burning smell often indicates a problem with the heating element itself, such as overheating or a short circuit. Signs include a noticeable burning smell, especially when the dryer is on high heat. The smell may be accompanied by a crackling or popping sound. This is a critical issue requiring immediate attention, as overheating can lead to fire hazards.

      Ever have a dryer that smells like it’s on fire? It’s a frustrating problem, often stemming from a simple fix. Sometimes, a loose connection or a blocked vent can cause the smell. For instance, you might need to check the dryer’s exhaust system and ensure proper airflow. Learning how to install a sliding bolt, like the ones used in many dryer components, can be helpful if you’re dealing with a malfunctioning part.

      Install a Sliding Bolt This will help to prevent a recurring smell and keep your dryer running smoothly. Troubleshooting a dryer that smells like it’s burning can often be tackled with some basic maintenance and a bit of DIY know-how.

    • Lint Filter: A clogged lint filter can restrict airflow, causing the dryer’s internal components to overheat. This buildup of lint, especially if it’s flammable, can lead to a burning odor, often described as a smoky or singed smell. The smell might intensify during the drying cycle. Regular lint filter cleaning is crucial to prevent this issue.
    • Motor: A malfunctioning motor can also generate heat and produce a burning smell. This often involves a burning electrical smell, and may be accompanied by unusual noises, like grinding or humming. A motor that’s not functioning correctly is a potential cause of overheating and fire. This issue often occurs in older models or those that have been poorly maintained.

    • Electrical Issues: Electrical problems, like frayed wires, loose connections, or a faulty electrical cord, can cause overheating and a burning smell. The smell might be sharp, acrid, or accompanied by sparks or unusual noises. Safety is paramount; electrical issues should be handled by qualified technicians.
    • Overheating Components: Any component in the dryer, such as the drum, the motor housing, or even a damaged belt, can overheat. The smell may vary, from a mild plastic burning scent to a more intense metallic or burning rubber smell. This is often associated with a problem in the overall heat management system.

    Comparing and Contrasting Smells

    Differentiating the specific smell is key to identifying the root cause. The smell can vary based on the affected component. For instance, a burning plastic smell often points to overheating components or the heating element, while a more metallic or burning rubber smell could indicate issues with the motor or other components. Electrical problems typically generate a sharp, acrid, or burning electrical smell.

    Cause Symptom Smell
    Heating Element Overheating, crackling, popping sounds Burning plastic, intense
    Lint Filter Restricted airflow, high temperatures Smoky, singed, slight
    Motor Unusual noises, grinding, humming Burning electrical, metallic
    Electrical Issues Sparks, unusual noises Sharp, acrid, burning electrical
    Overheating Components Elevated temperatures, abnormal noises Burning plastic, rubber, or metal

    Checking the Dryer’s Components

    Troubleshooting a burning smell in your dryer often involves a methodical approach to inspecting its various components. A thorough visual check is a crucial first step, enabling you to pinpoint the source of the problem. This section details how to visually inspect the key components for signs of damage or wear and tear.

    Visual Inspection of Dryer Components

    The process of visually inspecting the dryer’s internal components involves careful observation of potential damage. Carefully unplug the dryer before any inspection. Safety is paramount. Begin by examining the readily accessible parts, gradually moving towards more complex or concealed ones. Always maintain a safe distance from any electrical components.

    Cleaning the Lint Filter

    A clogged lint filter is a frequent culprit in dryer fires. Regular cleaning of the lint filter is crucial for dryer safety and efficiency. A buildup of lint can restrict airflow, causing the dryer to overheat.

    • Remove the lint filter from the dryer. Inspect it closely for accumulated lint. A significant buildup warrants immediate cleaning.
    • Use a brush or vacuum cleaner to remove any lint. Ensure all traces of lint are cleared from the filter.
    • Replace the lint filter back into the dryer. A properly placed lint filter allows for optimal airflow, preventing overheating.

    Inspecting the Heating Element

    The heating element is a critical component, responsible for drying clothes. Checking for visible damage to the heating element is vital. Look for signs of burning, discoloration, or frayed wires. These signs can indicate a problem with the heating element that needs repair.

    • Carefully examine the heating element for any visible signs of damage. Look for cracks, burns, or any abnormalities in the element’s appearance.
    • If you find any visible damage, immediately discontinue use of the dryer. Contact a qualified technician to address the issue.
    • A properly functioning heating element is crucial for effective drying and should be inspected regularly.

    Tools for Inspecting Dryer Components

    A well-equipped toolbox ensures a thorough and efficient inspection process. Having the necessary tools on hand minimizes downtime and increases the likelihood of a successful diagnosis.

    Tool Use
    Screwdrivers (Phillips and flathead) Removing and reinstalling screws that hold dryer components in place.
    Wire strippers If you need to access wiring, wire strippers are useful.
    Gloves Protecting your hands while handling potentially hot or sharp components.
    Lint brush/Vacuum cleaner Cleaning the lint filter.
    Flashlight Illuminating hard-to-reach areas.

    Electrical Issues

    Troubleshoot a Dryer That Smells Like It Is Burning

    A burning smell emanating from your dryer could stem from electrical problems. These issues often involve components that are essential for the dryer’s operation but can pose a significant safety hazard if not addressed promptly. Understanding the potential electrical problems and how to safely check them is crucial for resolving the issue and preventing further damage.Electrical issues in a clothes dryer often manifest as a burning smell, which can indicate frayed wires, loose connections, or faulty components within the electrical system.

    These problems can result from normal wear and tear, improper installation, or even overloading the dryer circuit. Thorough inspection and proper troubleshooting are essential steps to ensure the safety of the appliance and the home.

    Identifying Potential Electrical Problems

    Electrical problems are often the root cause of a burning smell. Frayed wires, loose connections, and faulty components can all lead to overheating and the production of smoke. Common electrical issues include problems with the heating element, the control panel, or the cord itself.

    Checking for Loose Connections, Troubleshoot a Dryer That Smells Like It Is Burning

    Checking for loose connections is a critical step in troubleshooting electrical issues. A loose wire connection can cause a high resistance, generating heat and the smell of burning. To perform this check:

    • Locate all electrical connections within the dryer, including those on the heating element, the control panel, and the power cord. Visually inspect these connections for any signs of damage or looseness. Look for any exposed wires, frayed insulation, or loose screws. Pay close attention to the terminals and the wire connections. Loose or damaged connections can cause a considerable amount of heat.

    • If you find any loose connections, carefully tighten them using appropriate tools, such as screwdrivers or pliers. Always ensure that the connections are secure and that the wires are properly insulated. If you are unsure about any step, consult a qualified electrician. A qualified professional can ensure that the connections are properly tightened without causing further damage or safety issues.

    • Inspect the power cord for any damage. Look for frayed wires, exposed conductors, or any signs of damage to the plug or the cord itself. A damaged power cord should be replaced immediately to avoid electric shock or fire hazards. Be cautious when inspecting and working on the power cord. Ensure that the dryer is disconnected from the power source before inspecting or working on the cord.

      Troubleshooting a dryer that smells like it’s burning can be a real pain, but thankfully, it’s often a simple fix. One common culprit is a loose belt, and sometimes a clogged lint trap. However, I’ve also been reading up on a fascinating new release, “new release still corners creatures of an hour” new release still corners creatures of an hour , which has some interesting parallels to the frustrating process of diagnosing and fixing a dryer malfunction.

      Hopefully, a little investigation will pinpoint the problem, and get that dryer humming along again!

    Testing Electrical Components

    Testing electrical components is vital for ensuring they are operating within safe parameters. This involves verifying that the voltage and current are within the expected ranges for the components. Incorrect voltage or current can cause overheating and a burning smell.

    Figuring out why your dryer smells like it’s on fire? It could be a simple fix, like a loose belt or a clogged vent. But, sometimes, a little extra attention is needed. Similar to how you might need to file down a sharp tooth to prevent further damage File Down a Sharp Tooth , a dryer with a burning smell requires a thorough check for any potential problems.

    So, take a look at the heating element, the lint trap, and ensure everything is running smoothly. Hopefully, you can quickly diagnose and resolve the issue without calling a repairman!

    • Use a multimeter to measure the voltage and amperage of the components. Consult the dryer’s manual for the expected values. A multimeter is a crucial tool for accurately measuring voltage and current in electrical circuits. The manual will specify the exact values for each component.
    • If the measured values are outside the specified range, it indicates a potential problem with the component. Replace the component with a new, compatible part if necessary. Always consult the dryer’s manual or a qualified technician for the correct replacement parts. Do not attempt to repair or replace any electrical component if you are not sufficiently trained.

    Safely Disconnecting the Dryer from the Power Source

    Disconnecting the dryer from the power source is a crucial safety step before performing any electrical checks. This prevents accidental electric shocks or fires. To safely disconnect the dryer:

    1. Turn off the power switch to the dryer’s circuit breaker in the electrical panel. This is a crucial step to ensure that the dryer is completely disconnected from the power source.
    2. Unplug the dryer from the wall outlet. Ensure that the plug is completely removed from the outlet. This is a crucial step in ensuring that the dryer is not accidentally energized.

    Lint Accumulation

    A burning smell emanating from your dryer could be a serious issue, often stemming from a preventable cause: excessive lint buildup. Lint, the fibrous material shed from clothes during the drying process, can accumulate in the dryer drum, lint filter, and most critically, the dryer vent system. Ignoring this accumulation can lead to a fire hazard.Excessive lint buildup creates a significant fire risk.

    Lint acts as kindling, readily absorbing heat and igniting when exposed to the high temperatures generated within a dryer. This can lead to a rapid fire, posing a serious threat to your home and belongings. The consequences can range from property damage to injuries and even fatalities. Regular maintenance is crucial in mitigating this risk.

    Importance of Regular Maintenance

    Regular cleaning of the lint filter and dryer vent is vital to prevent fire hazards and ensure optimal dryer performance. A clean lint filter allows for efficient airflow, leading to faster drying times and lower energy consumption. Conversely, a clogged lint filter restricts airflow, increasing the risk of overheating and fire.

    Thorough Dryer Vent Cleaning Procedure

    Properly cleaning the dryer vent is essential to maintain its efficiency and safety. A buildup of lint in the vent restricts airflow, causing the dryer to overheat and potentially ignite. Follow these steps for a thorough cleaning:

    • Safety First: Turn off the dryer and disconnect it from the power source before attempting any cleaning. Ensure the vent is completely cooled down to avoid burns.
    • Access the Vent: Locate the exterior vent connection point on the outside of your home. This is typically located near the dryer’s exhaust hose.
    • Remove the Hose: Disconnect the dryer vent hose from the exterior vent. Be prepared for lint to potentially fall out during this step.
    • Inspect and Clean: Carefully inspect the vent duct from the dryer to the exterior vent. Remove any visible lint, debris, or obstructions. Use a brush or vacuum cleaner to remove lint and other material.
    • Use a Lint Removal Tool: A dryer vent cleaning kit, containing a long brush and flexible hose attachment, is highly recommended. These tools can effectively reach all areas of the vent system.
    • Vacuum Thoroughly: Use a vacuum cleaner with a hose attachment to thoroughly clean the interior of the vent duct. Pay particular attention to bends and corners where lint tends to accumulate.
    • Check for Blockages: Inspect the vent duct for any blockages, such as rodents’ nests or other obstructions. Remove them if necessary.
    • Reassemble and Test: Reconnect the vent hose to the dryer and the exterior vent. Ensure a tight seal to prevent leaks and airflow issues.
    • Test the Dryer: Turn the dryer back on and run a short drying cycle to verify the vent is clear and functioning correctly.

    Common Mistakes in Dryer Vent Cleaning

    Improper vent cleaning can negate the effectiveness of the process and even increase the risk of fire. Avoid these common mistakes:

    • Using the Wrong Tools: Using inappropriate tools, such as wire brushes, can damage the vent duct and compromise its structural integrity. This may lead to leaks or cracks that can further accumulate lint.
    • Insufficient Cleaning: Failing to thoroughly clean all areas of the vent, especially bends and corners, can leave behind trapped lint that continues to build up over time. This negates the benefits of cleaning and increases the risk of fire.
    • Ignoring the Interior Vent: Focusing solely on the exterior vent and neglecting the interior duct work can leave significant lint buildup that remains a fire hazard.
    • Using Harsh Chemicals: Avoid using harsh chemicals or abrasive cleaners when cleaning the vent. These can damage the vent’s material and potentially cause unforeseen issues.
    • Forcing Tools: Don’t force cleaning tools into the vent. This can damage the duct work and create more problematic issues.

    Overheating Issues: Troubleshoot A Dryer That Smells Like It Is Burning

    A burning smell emanating from your dryer often points to overheating. This is a serious issue that can lead to potential fire hazards if not addressed promptly. Understanding the causes and how to check for them is crucial for dryer safety. Identifying the source of the problem is the first step in preventing further damage and potential harm.Overheating occurs when the dryer’s internal components, such as the heating element or the motor, generate more heat than they’re designed to handle.

    This excess heat can damage the dryer and cause the characteristic burning smell, posing a significant fire risk. Potential causes include blockages preventing proper airflow and malfunctions in the dryer’s temperature control system.

    Potential Causes of Overheating

    Overheating in a dryer can stem from several factors, ranging from simple blockages to more complex electrical issues. Understanding these causes allows for a more targeted approach to troubleshooting. One key factor is the dryer’s inability to cool down effectively, a problem often due to restricted airflow.

    Checking for Blockages in Air Vents

    Proper airflow is essential for maintaining the dryer’s temperature within safe operating limits. Blockages in the air vents can disrupt this airflow, leading to overheating. Regularly checking for obstructions is crucial for dryer safety.

    • Inspect the dryer’s vent system. Check the vent pipes for any kinks, twists, or blockages, particularly at the exterior connections and the vent’s exit point. Inspect the vent duct itself for any signs of clogs or obstructions. Dust, lint, and debris can accumulate over time and significantly restrict airflow. A blockage at any point in the vent system can create a significant restriction, resulting in overheating and a burning smell.

    • Examine the lint filter. A clogged lint filter impedes airflow and can lead to overheating. Ensure the lint filter is clean and free of debris. A clean lint filter is critical for proper operation. Clogged filters can significantly reduce airflow and lead to overheating.

    • Inspect the area around the dryer. Check the space behind and around the dryer for any obstructions or blockages that may impede the airflow of the dryer’s vent system. Ensure there are no furniture, drapes, or other items that are obstructing the vent. Any blockage in the surrounding area can significantly restrict airflow, contributing to the dryer’s overheating.

    Testing the Dryer’s Thermostat

    The dryer’s thermostat regulates the temperature of the drying cycle. A faulty thermostat can lead to overheating, as it may fail to shut off the heating element when the desired temperature is reached. Testing the thermostat ensures its proper functioning.

    • A faulty thermostat can cause the dryer to overheat, resulting in a burning smell. A malfunctioning thermostat may fail to turn off the heating element when the desired temperature is reached, leading to excessive heat buildup. A simple test can determine if the thermostat is functioning correctly.
    • Use a multimeter to test the thermostat’s resistance. The thermostat should have a specific resistance reading when tested with a multimeter. Consult your dryer’s manual for the expected resistance values. A reading outside the specified range may indicate a faulty thermostat. The proper use of a multimeter is crucial for accurately assessing the thermostat’s function.

    • Refer to your dryer’s manual for specific instructions on testing the thermostat. Following the instructions in the owner’s manual is essential to avoid causing further damage. The manufacturer’s instructions are crucial to ensure safety and accuracy.

    Troubleshooting Guide

    A burning smell emanating from your dryer is a serious concern that requires immediate attention. Ignoring the issue could lead to a fire hazard or costly repairs. This guide provides a step-by-step approach to diagnose and resolve the problem, emphasizing safety precautions throughout the process. Following these steps will help you pinpoint the cause of the odor and take corrective action efficiently.Proper dryer maintenance is crucial to prevent fire risks and maintain optimal performance.

    Early detection and resolution of potential issues can save you time, money, and prevent significant damage to your home.

    Safety Precautions

    Addressing a dryer with a burning smell demands extreme caution. Always disconnect the dryer from the power source before performing any troubleshooting. This is a critical safety step to prevent electrical shocks. Never attempt to repair electrical components yourself if you lack the necessary knowledge and experience. Contact a qualified technician if you are uncertain about any step.

    Unplugging and Inspecting the Dryer

    The initial step involves ensuring the safety of the process. Disconnect the dryer from the power outlet and allow ample time for any residual electricity to dissipate. Visually inspect the dryer for any obvious damage or debris buildup. Look for signs of overheating, such as discoloration or melting on the exterior components. This visual inspection can identify immediate hazards.

    A diagram showing the power cord connection point and the location of the circuit breaker for easy access would be helpful.

    Checking the Lint Filter and Exhaust Vent

    A clogged lint filter is a common cause of dryer malfunctions. A build-up of lint can impede airflow, causing overheating and a burning smell. Regularly cleaning the lint filter is vital. The exhaust vent should also be checked for blockages. A diagram showing the location of the lint filter and the exhaust vent is essential for proper identification.

    A clogged exhaust vent can cause overheating and a burning smell.

    Inspecting the Heating Element

    If the smell persists after checking the filter and vent, the heating element is a likely suspect. The heating element generates the heat needed for drying clothes. A damaged heating element may produce a burning smell and can cause overheating. A diagram showing the location of the heating element and how to access it safely would be useful.

    Electrical Component Check

    Electrical issues, such as a faulty wire or a damaged component, can cause a burning smell. Inspect all visible electrical connections and components for any signs of damage or wear. A diagram illustrating the location of major electrical components in the dryer, including wires, fuses, and circuit breakers, can be invaluable.

    Troubleshooting Summary Table

    Step Action Possible Solution
    1 Unplug the dryer and inspect for visible damage. No damage: proceed to next step; Damage: Contact a technician.
    2 Clean the lint filter and exhaust vent. Smell resolved: Dryer is likely operating normally; Smell persists: Proceed to next step.
    3 Inspect the heating element for damage. Damage: Replace heating element; No damage: Proceed to next step.
    4 Inspect all electrical components for damage. Damage: Repair or replace damaged components; No damage: Dryer likely not an electrical issue.

    Safety Considerations

    Troubleshoot a Dryer That Smells Like It Is Burning

    Troubleshooting a malfunctioning dryer requires careful attention to safety protocols. Ignoring these precautions can lead to severe electrical shocks, fires, or other potentially harmful incidents. This section Artikels crucial safety considerations to ensure a safe and effective troubleshooting process.Electrical appliances, like dryers, pose inherent safety risks if not handled properly. Improper maintenance or repair can expose individuals to electrical hazards, potentially resulting in serious injuries.

    Following the guidelines below can significantly reduce these risks.

    Importance of Electrical Safety

    Electrical systems in appliances can be dangerous if not treated with respect. Understanding the potential dangers of electrical malfunctions is crucial for avoiding accidents. Electrical shocks can lead to severe injuries, ranging from minor burns to cardiac arrest, depending on the voltage and duration of contact. Improperly handled electrical repairs can cause fires, damaging property and potentially endangering lives.

    Proper understanding and adherence to safety procedures are essential.

    Precautions to Prevent Electrical Shocks and Fire Hazards

    Always disconnect the dryer from the power source before attempting any repairs. This simple step prevents accidental electrical shocks. Use insulated tools appropriate for working with electrical components. Always double-check that the dryer is completely disconnected from the power supply before starting any repairs. Inspect the power cord and plug for any damage.

    Damaged cords can cause electrical malfunctions and pose fire risks. Replace damaged cords immediately. Avoid overloading electrical outlets, as this can cause overheating and increase the risk of fires.

    Emergency Contacts for Fires

    Knowing who to contact in case of an emergency is vital. Having a list of emergency contacts readily available can significantly improve response time in case of a fire.

    • Local Fire Department:
    • Contact your local fire department immediately if a fire breaks out. Knowing their emergency number is crucial for swift action. Always dial the emergency number for the appropriate region.

    • Electrical Safety Professionals:
    • If the electrical issue is beyond your skill level, contact a qualified electrician or appliance repair technician. They have the necessary expertise and tools to safely diagnose and resolve electrical problems.

    • Medical Emergency Services:
    • In case of any injuries during the troubleshooting process, call emergency medical services immediately.

    Seeking Professional Help When Necessary

    Some dryer issues are beyond the scope of DIY troubleshooting. For complex electrical problems or if you feel uncomfortable working with electrical components, seeking professional help is essential. A qualified electrician or appliance repair technician can accurately diagnose and repair the issue, preventing further complications and ensuring safety. Don’t hesitate to seek professional assistance if you encounter a problem that you are unable to handle safely or effectively.

    End of Discussion

    In conclusion, troubleshooting a burning smell in your dryer requires a systematic approach. By carefully examining the potential causes, checking components, and understanding electrical issues, lint buildup, and overheating problems, you can effectively diagnose the problem. Always prioritize safety when working with electrical appliances. Remember, if you’re unsure about any step, it’s always best to consult a qualified technician.

    This guide provides a solid foundation for tackling the problem, ensuring a safe and efficient resolution.

  • Replace a Washing Machine Belt A DIY Guide

    Replace a Washing Machine Belt A DIY Guide

    Replace a Washing Machine Belt is a common household repair that many homeowners can tackle themselves. This guide provides a step-by-step approach to diagnosing and resolving belt issues, from identifying the problem to reassembling the machine. It covers essential safety precautions, tools, and the entire process, ensuring a successful repair.

    This comprehensive guide covers everything from identifying the symptoms of a malfunctioning belt to the exact steps for replacing it. We’ll detail the tools needed, safety measures to take, and the precise steps for disassembling, replacing, and reassembling your washing machine.

    Identifying the Problem

    A malfunctioning washing machine belt can lead to frustrating delays and potential damage. Identifying the problem early can save you time and money. This section details common signs, how to differentiate them from other issues, and steps to diagnose the specific problem.

    Common Signs of a Failing Washing Machine Belt

    Understanding the subtle signs of a failing belt is crucial for prompt repair. A worn or broken belt often manifests in a variety of ways, from subtle noises to complete failure. These signs can be easily missed if you don’t know what to look for.

    • Unusual noises: A squeaking, grinding, or screeching sound during operation is a frequent indicator of a worn or slipping belt. This noise typically increases in intensity as the belt deteriorates further.
    • Lack of rotation: The most obvious symptom is the washing machine’s drum not rotating, either during the spin cycle or the entire wash cycle. If the drum doesn’t spin, the belt is likely the culprit.
    • Reduced washing machine performance: The washing machine might not agitate clothes effectively, resulting in incomplete cleaning. This is often a gradual decline, starting with less vigorous agitation.
    • Wobbly or vibrating drum: A belt that is loose or worn can cause the drum to wobble or vibrate excessively. This is often noticeable during the spin cycle, but may be present during the entire washing process.
    • Strange smells: While not always indicative, a burning or unusual smell, particularly during operation, can suggest a problem with the belt, especially if it is rubbing against something hot.

    Differentiating Belt Problems from Other Issues

    A washing machine has multiple components, each with its own potential failure points. It’s essential to distinguish between belt problems and other possible malfunctions to avoid unnecessary repairs.

    Replacing a washing machine belt can be a surprisingly straightforward task, but sometimes a little extra know-how is needed. This weekend, I was wrestling with a balky machine, and while figuring out the mechanics, I was unexpectedly drawn to the heavy soundscapes of David Kilgour and the Heavy Eights’ latest album, “End Times Undone.” It’s a great listen while you’re troubleshooting the whirring machine parts.

    Hopefully, with a little patience and a listen to some excellent tunes like david kilgour and the heavy eights end times undone , you’ll be back to clean laundry in no time. Back to the washing machine – time to get that belt replaced!

    • Motor issues: A failing motor can cause similar symptoms to a worn belt, such as unusual noises and lack of rotation. However, motor problems often present with additional symptoms, like a burning smell or excessive heat around the motor housing.
    • Timer malfunctions: A malfunctioning timer might prevent the machine from starting or completing cycles correctly, causing the drum not to rotate. However, a timer issue is often accompanied by erratic or no display of the current cycle.
    • Electrical problems: Electrical issues might prevent the machine from functioning at all. These issues are often accompanied by flickering lights, no power to the appliance, or a complete lack of response.
    • Other mechanical problems: Problems with the washing machine’s internal gears or components could cause similar symptoms to a belt issue. However, other mechanical issues typically show other symptoms, like the drum getting stuck or having trouble moving.

    Diagnosing the Specific Belt Issue, Replace a Washing Machine Belt

    To pinpoint the belt problem, a systematic approach is necessary. These steps should be followed carefully.

    1. Visually inspect the belt: Check for any visible damage, fraying, or signs of wear. Look for any gaps or missing sections of the belt itself.
    2. Listen for noises: Carefully observe the sounds produced during different parts of the wash cycle. Pay attention to any changes in the sounds as the washing machine works.
    3. Feel for vibrations: During operation, feel the machine for any unusual vibrations or wobbles, particularly in the drum area.
    4. Check for proper tension: A loose belt is a frequent cause of problems. Make sure the belt is correctly positioned and adequately tensioned. If necessary, consult the washing machine’s user manual for tensioning guidelines.

    Comparison Table

    Symptom Broken Belt Motor Issue Timer Malfunction
    Unusual noises (squeaking, grinding) Yes Yes No
    Lack of rotation Yes Yes Yes
    Reduced washing performance Yes Yes Yes
    Wobbly drum Yes No No
    Burning smell Possible Yes No
    Excessive heat No Yes No

    Tools and Materials Needed

    Replacing a washing machine belt, while often a DIY-friendly task, requires the right tools and materials. Having the necessary equipment on hand will save you time and frustration, ensuring a smooth and successful repair. Improper tools or a lack of the correct belt type can lead to a faulty repair, potentially causing further damage or requiring a professional intervention.

    Essential Tools

    Proper tools are crucial for a safe and effective washing machine belt replacement. These tools will help in accurately measuring, removing, and installing the new belt. Thorough preparation ensures a more efficient and precise repair.

    • Screwdrivers (Phillips and flathead): Essential for removing screws securing the washing machine’s components, like the motor housing.
    • Adjustable wrench or pliers: These tools are necessary for loosening or tightening nuts and bolts, facilitating the removal and installation of the belt.
    • Measuring tape: Precise measurement of the belt’s length is crucial to ensure the correct replacement belt is purchased.
    • Gloves: Protecting your hands during the repair process is vital, especially when working with metal parts or cleaning the area around the machine.
    • Safety glasses: Protecting your eyes from debris or potential hazards during the repair is an essential safety precaution.

    Materials Needed

    A list of materials needed will ensure you have everything required to complete the washing machine belt replacement. This includes not only the new belt but also any necessary parts for a successful repair.

    • New washing machine belt: The correct belt type and size are critical for the washing machine’s operation and lifespan. Incorrect sizing can result in a dysfunctional machine.
    • Lubricant (optional): Applying lubricant to the belt pulley system helps maintain proper operation and reduces friction. This can prolong the belt’s lifespan and improve the machine’s performance.

    Belt Type Comparison

    Different belt types have varying characteristics and are suitable for specific washing machine models. This table provides a comparison of belt types and their applications.

    Replacing a washing machine belt can be a surprisingly straightforward task. While you’re tackling that chore, you might find yourself inspired by the latest installment in the Lil Wayne dedication series, lil wayne dedication 6. The dedication series’ intricate details, just like the intricate workings of a washing machine, can be quite fascinating to study. Once you’ve got the belt replaced, you’ll be ready to tackle any laundry load with ease.

    Belt Type Description Suitability
    V-belt A common type of belt with a V-shaped cross-section, providing good power transmission. Suitable for many standard washing machine models, offering good durability and efficiency.
    Flat belt A simple, flat belt design. Less common in modern washing machines, but may be used in some older models.
    Timing belt Precisely designed belts for specific applications. Usually found in machines with complex mechanisms like timing functions.

    Safety Precautions

    Replace a Washing Machine Belt

    Replacing a washing machine belt, while often a straightforward task, requires careful attention to safety. Improper procedures can lead to electrical shocks, cuts, or other injuries. Understanding the potential hazards and following the right safety measures will ensure a smooth and accident-free repair process.Electrical appliances pose unique safety concerns. Improper disconnection can lead to electrical shocks, potentially causing serious harm.

    Following the steps Artikeld below will ensure you disconnect the machine safely and effectively. Remember, safety should always be your top priority.

    Electrical Safety Procedures

    Properly disconnecting the washing machine’s power source is paramount. Ignoring this step can lead to electric shocks. Incorrect disconnection can also lead to the potential risk of fire.

    • Locate the circuit breaker or fuse box for the washing machine.
    • Identify the specific circuit breaker or fuse associated with the washing machine.
    • Turn off the circuit breaker or remove the corresponding fuse.
    • Verify the power is completely off by checking the washing machine’s power cord and controls.

    These steps ensure the washing machine is completely de-energized, minimizing the risk of electrical shocks. Always double-check the power is off before any work involving electrical components.

    Handling Tools and Materials

    Using the correct tools and handling them safely is crucial to prevent accidents.

    • Inspect all tools for any damage or wear before use.
    • Ensure all tools are properly secured and fitted before starting the repair process.
    • Wear appropriate safety glasses and gloves to protect your eyes and hands from potential hazards.
    • Use appropriate storage methods to keep tools and materials organized and prevent accidents during storage.

    Proper handling of tools and materials minimizes the risk of injury and ensures a safe working environment. Store the tools in a designated area or container to prevent them from becoming misplaced or causing tripping hazards.

    Specific Safety Tips During Replacement

    Implementing specific safety measures during the replacement process will minimize the chance of accidents.

    • Ensure the washing machine is stable and level during the replacement procedure.
    • Take your time and follow each step carefully to avoid mistakes.
    • Be mindful of the surrounding area to prevent any tripping or falling hazards.
    • If you encounter any difficulties, seek assistance from a qualified professional.

    Following these safety tips will help prevent accidents and keep the work environment safe throughout the process.

    Fixing a balky washing machine belt can feel like a minor chore, but sometimes, like tackling a spiritual challenge, it’s a reminder of the practical side of life. Just as maintaining our physical spaces requires consistent effort, so too does maintaining our faith, which is why I encourage you to check out my post on Stay Committed to Your Christian Faith.

    Learning to replace a washing machine belt is a rewarding DIY task that builds confidence, much like finding strength in your faith. The satisfaction of a properly functioning machine is comparable to the peace that comes from staying connected to your beliefs.

    Tool and Material Storage

    Storing tools and materials properly is important for preventing accidents and ensuring easy access.

    • Use designated storage containers to organize tools and materials.
    • Keep tools and materials in a dry and well-ventilated area.
    • Store tools and materials in a safe place that is not accessible to children.

    Safe storage of tools and materials will prevent damage, and ensure the tools and materials are readily available when needed.

    Disassembling the Washing Machine: Replace A Washing Machine Belt

    Replace a Washing Machine Belt

    Taking apart your washing machine safely and effectively is crucial for replacing the belt. This section details the steps involved, from disconnecting utilities to accessing and detaching the old belt. Following these instructions carefully minimizes risks and ensures a smooth replacement process.Before you begin, ensure you have gathered all the necessary tools and materials, and reviewed the safety precautions Artikeld earlier.

    This will greatly enhance the safety and efficiency of the entire process.

    Disconnecting Utilities

    Properly disconnecting the washing machine from the power and water supply is paramount. Improper disconnections can lead to electrical shocks or water damage. Unplug the washing machine from the wall outlet and turn off the water supply valves connected to the machine. Ensure the valves are fully closed to prevent water from entering the machine’s interior.

    Removing the Access Panel

    Locate the access panel or cover on your washing machine. This panel typically covers the belt compartment. The exact location and method for removing the panel vary depending on the specific model. Refer to your washing machine’s user manual for precise instructions. Commonly, screws or clips secure the panel, which should be removed carefully to avoid damage.

    Accessing the Belt Compartment

    Once the access panel is removed, the belt compartment should be visible. Carefully inspect the compartment to identify the belt and its associated pulleys. This is critical to ensure you’re working with the correct belt. The belt may be visible or concealed behind other components. Take your time to ensure you find the belt and associated pulleys.

    Detaching the Old Belt

    Detaching the old belt from the pulleys requires careful handling to avoid damaging the pulleys or the belt itself. First, ensure the washing machine’s drum is stationary. This is essential to prevent injury and damage. Locate the tensioner pulley and use the appropriate tools to release the tension on the belt. Then, carefully guide the belt off the pulleys.

    Use your hands or a suitable tool to gently slide the belt off the pulleys, taking care not to stretch or damage the belt.

    Disassembly Steps

    Step Action
    1 Disconnect the washing machine from the power source and water supply.
    2 Remove the access panel or cover.
    3 Identify the belt and pulleys.
    4 Release the tension on the belt using appropriate tools.
    5 Carefully detach the old belt from the pulleys.

    Installing the New Belt

    Now that you’ve carefully disassembled your washing machine and identified the faulty belt, it’s time to install the new one. This step requires precision and attention to detail to ensure the machine operates smoothly and efficiently. A correctly installed belt avoids potential damage to the machine and provides long-lasting performance.

    Measuring the New Belt

    Proper measurement is crucial to ensure a precise fit. Incorrect sizing can lead to premature wear and tear on the belt or even damage to the machine’s components. Carefully measure the distance between the pulley centers. Use a flexible measuring tape to obtain the most accurate reading. Take multiple measurements, comparing them to ensure consistency and accuracy.

    Installing the Belt onto the Pulleys

    The correct installation procedure is vital for the belt to function properly. Start by carefully placing the new belt over the smaller pulley, ensuring that the belt is oriented correctly. Then, guide the belt over the larger pulley, making sure the belt is smooth and not twisted. The belt should lay flat and straight between the pulleys.

    Ensure the belt is correctly positioned on both pulleys without any kinks or bends.

    Aligning the Belt with the Pulleys

    Precise alignment is critical for smooth operation and to avoid premature wear. Visually inspect the belt’s position on both pulleys. The belt should be centered on each pulley, with no noticeable gaps or misalignment. Ensure the belt runs smoothly without any obstructions. Slight adjustments may be necessary to achieve the correct alignment.

    Checking the Tension of the New Belt

    The correct tension of the belt is essential for efficient operation and longevity. Too loose a belt may slip or not transmit enough power, while too tight a belt may cause damage to the pulleys or other machine components. A properly tensioned belt ensures smooth and continuous operation. Check the tension by gently pressing on the belt.

    It should not sag excessively or feel too rigid. A properly tensioned belt will exhibit a slight give without excessive movement.

    Reattaching the Belt to the Motor

    After installing the belt, carefully reattach the belt to the motor’s pulley, ensuring the proper alignment and tension are maintained. Ensure that the belt is correctly routed around the pulleys and that there are no kinks or twists. Double-check the position of the belt on the motor’s pulley to ensure it’s snug and secure. The belt should fit snugly and securely on the motor’s pulley.

    Take your time and check for proper alignment to prevent damage to the belt or the machine.

    Reassembling the Washing Machine

    Putting your washing machine back together correctly is crucial for its proper functioning and longevity. A careless reassembly can lead to leaks, malfunctions, or even damage to other parts of the appliance. Following the steps Artikeld below will help ensure a safe and successful reinstallation.Reassembling the washing machine involves carefully reversing the disassembly process. This meticulous approach is essential to ensure that all components are correctly aligned and secured.

    It’s also vital to pay close attention to the original placement of each part during the disassembly process to ensure optimal functionality.

    Reconnecting Power and Water Supply

    Before connecting the water supply and power, verify that all electrical connections and water lines are secure and free of any damage. A thorough inspection prevents potential hazards. Ensure all components are properly seated and that no parts are obstructing the flow of water or electricity.

    • Turn off the water supply valve to the washing machine.
    • Disconnect the washing machine from the power source.
    • Carefully reconnect the water supply hoses, ensuring they are properly seated on the machine’s connections.
    • Reconnect the washing machine to the power source. Check the circuit breaker to make sure it is in the ‘on’ position.

    Replacing the Access Panel or Cover

    Replacing the access panel or cover involves precise placement and secure fastening. Improperly installed covers can compromise the washing machine’s structural integrity.

    • Carefully align the access panel with the mounting points on the washing machine.
    • Secure the panel using the appropriate fasteners (screws, clips, etc.).
    • Ensure the panel is snug and fits securely without any gaps or misalignments.

    Reassembling Washing Machine Components

    Reassembling the washing machine components requires precision and attention to detail. Incorrect reassembly can lead to issues with operation and even damage to components. Carefully follow the steps in reverse order to avoid any confusion.

    • Ensure all components are properly aligned and secured before proceeding to the next step.
    • Carefully position and fasten the components, using the original fasteners.
    • Verify that all connections are secure and tight.
    • Inspect all components for any damage or misalignment.

    Ensuring Proper Alignment of Parts

    Proper alignment of washing machine parts is essential for optimal performance. Misalignment can cause vibrations, noise, and even damage to the machine. A thorough check at each stage of reassembly is vital.

    • Visually inspect all components to ensure proper alignment before securing them.
    • Utilize a level or other alignment tools if necessary to verify accurate positioning.
    • Apply even pressure while securing components to prevent stress on any particular area.
    • Ensure all components are positioned in their original location and configuration.

    Reassembly Steps (Reverse Order)

    The table below Artikels the reassembly steps in reverse order of disassembly, providing a clear guide for reconnecting components.

    Step Number (Disassembly) Step Number (Reassembly) Description
    6 1 Reconnect the belt
    5 2 Replace the access panel
    4 3 Reconnect the motor
    3 4 Replace the drum
    2 5 Reconnect the agitator
    1 6 Replace the housing

    Testing the Washing Machine

    After meticulously replacing the washing machine belt and reassembling the appliance, thorough testing is crucial to ensure everything functions correctly. Proper testing verifies the belt’s secure installation and the overall operational efficiency of the machine. This step is critical to avoiding future malfunctions and ensuring the washing machine performs its intended tasks reliably.Correct operation is essential for the longevity of the washing machine and for optimal cleaning results.

    A properly functioning washing machine guarantees effective cleaning, which is critical for maintaining clothes and preventing damage.

    Powering Up and Initial Checks

    To initiate testing, ensure the washing machine is properly plugged into a working power outlet. Check that all connections are secure. Verify that the machine’s power switch is in the “On” position. Observe the control panel for any unusual lights or indicators that might signal a problem. The machine should respond to user input, with the lights on the panel clearly reflecting the selected settings.

    Running a Test Cycle

    Begin with a short, light wash cycle. Use a small load of clean clothes or towels. Monitor the machine’s performance throughout the cycle. Pay close attention to the operation of the agitator or tub. The agitator or tub should rotate smoothly and without any unusual noises or vibrations.

    The drum should turn steadily and evenly, demonstrating the proper functioning of the motor and belt.

    Troubleshooting Common Issues

    • Noisy Operation: If the machine emits unusual or excessive noise during operation, it could indicate a loose belt, a problem with the motor, or a misaligned component. Carefully inspect the belt for proper tension and alignment. If the noise persists, contact a qualified technician.
    • Machine not Starting: If the machine fails to start, check the power supply, the power switch, and any circuit breakers. Verify that the connections are secure and that the belt is not interfering with the motor’s rotation. If the issue persists, consult a qualified repair professional.
    • Uneven Drum Rotation: If the drum rotates unevenly or intermittently, this might indicate a loose or damaged belt, a problem with the motor bearings, or a misalignment in the drive mechanism. Examine the belt for damage or looseness. If the issue continues, seek professional assistance.
    • Vibration: Excessive vibration during operation may suggest a loose belt, misaligned components, or a problem with the machine’s mounting. Check the belt tension and secure all components. If the problem persists, consult a professional.
    • Lack of Water Intake: If the machine doesn’t fill with water, check the water supply connections, hoses, and valves. Ensure the water supply is functioning correctly. Verify that the water inlet valve is functioning correctly and that there are no obstructions in the supply lines. If the issue remains, consult a professional.

    Verification of Correct Functioning

    After the test cycle, inspect the clothes for signs of proper cleaning. If the clothes are clean and the machine operates smoothly throughout the cycle, the belt installation and reassembly are successful. Verify that the machine completes the cycle without any unusual sounds or vibrations. Any issues, like loud noises or the machine not completing a cycle, warrant further investigation.

    Identifying and Resolving Problems

    A thorough inspection is necessary to determine the root cause of any issues that arise. By methodically examining each component, including the belt, the motor, and the drive mechanism, one can identify the specific problem. Once the problem is pinpointed, appropriate troubleshooting and repair measures can be undertaken. If the issue is beyond your capabilities, consult a qualified technician for assistance.

    Outcome Summary

    Successfully replacing a washing machine belt is achievable with careful attention to detail and a methodical approach. This guide provides a roadmap for tackling this common repair, empowering you to resolve the issue and restore your washing machine to its full functionality. Remember to prioritize safety and follow the instructions precisely for optimal results. Happy fixing!