Install a Sliding Bolt: This guide dives deep into the world of sliding bolts, from their various types and materials to safe installation methods and troubleshooting. Whether you’re a seasoned DIYer or a novice, this comprehensive guide will equip you with the knowledge and steps to confidently install sliding bolts in furniture, cabinetry, or doors.
We’ll explore surface-mount and concealed options, examine different materials like steel and brass, and highlight the advantages and disadvantages of each. Plus, we’ll cover crucial safety precautions and troubleshooting tips, ensuring a smooth and successful installation. Learn how to choose the right tools and materials, and get ready to master this essential fastening technique.
Introduction to Sliding Bolts
Sliding bolts are a versatile and essential fastening mechanism used in a wide range of applications. Their design allows for secure fastening while enabling easy opening and closing, making them crucial in furniture, cabinetry, and door systems. Understanding their different types, materials, and applications is key to choosing the right solution for a specific task.Sliding bolts offer a practical alternative to traditional fasteners like screws or rivets, providing a secure connection while maintaining the aesthetic appeal and ease of use of the component.
Their smooth action allows for repeated opening and closing without excessive wear or strain.
Installing a sliding bolt is surprisingly straightforward, especially if you’re familiar with the intricate mechanisms of the Imperial government, as detailed in the imperial government guide imperials rogue one. Understanding the different ranks and protocols within the Empire can actually help you visualize the bolt’s operation and ensure a smooth installation. Once you’ve got the hang of it, a sliding bolt is a reliable and effective security solution.
Types of Sliding Bolts
Sliding bolts are broadly categorized into surface mount and concealed types. Surface mount bolts are readily visible, while concealed bolts are integrated into the design, creating a seamless aesthetic. The choice between these two depends heavily on the desired aesthetic and the surrounding environment.
- Surface Mount Bolts: These bolts are affixed directly to the surface of the component, making them readily accessible for installation and maintenance. They are commonly used in furniture where a visible fastener is acceptable, like drawers or cabinets.
- Concealed Bolts: These bolts are designed to be hidden within the component, offering a clean and modern aesthetic. They are particularly useful in applications requiring a minimalist or sophisticated design, such as high-end cabinetry or specialized furniture pieces.
Materials Used in Sliding Bolts
The choice of material significantly impacts the bolt’s strength, durability, and aesthetic appeal. Common materials include steel, brass, and aluminum.
- Steel: Steel sliding bolts are known for their exceptional strength and durability, making them suitable for heavy-duty applications. Their cost-effectiveness also makes them a popular choice for mass-produced furniture.
- Brass: Brass sliding bolts are prized for their corrosion resistance and beautiful finish. They are often used in applications requiring a more decorative or high-end look, such as antique furniture or premium cabinetry.
- Aluminum: Aluminum sliding bolts are lighter than steel or brass, offering a lower overall weight in applications where this is a concern. They are also known for their resistance to corrosion and are often used in outdoor furniture or environments prone to moisture.
Applications of Sliding Bolts
Sliding bolts are employed in various contexts, each with specific design considerations.
- Furniture: In furniture construction, sliding bolts provide secure connections for drawers, cabinets, and other movable components. They contribute to the structural integrity and smooth operation of the furniture piece.
- Cabinets and Drawers: Sliding bolts are essential in cabinetry for connecting drawer fronts to their runners. Their ability to open and close smoothly enhances the user experience and prolongs the lifespan of the cabinet.
- Doors: Sliding bolts are sometimes employed in doors to provide an extra layer of security and prevent forced entry. This is particularly useful in commercial settings or homes where enhanced security is required.
Comparison of Sliding Bolt Types
| Feature | Surface Mount | Concealed |
|---|---|---|
| Aesthetics | Visible, potentially less appealing in some cases | Hidden, clean aesthetic |
| Installation | Relatively straightforward | More complex, requiring precise placement |
| Strength | Generally strong, dependent on material | Strength can vary, dependent on design and material |
| Durability | Durable if made of high-quality materials | Durable if well-designed and constructed |
| Cost | Generally lower | Generally higher |
Installation Methods
Installing a sliding bolt involves precise measurements and careful execution. Proper installation ensures the bolt’s longevity and functionality, enhancing security and aesthetics. Different installation methods exist for surface-mount and concealed bolts, each with its own set of steps and considerations.
Surface-Mount Sliding Bolt Installation
Surface-mount sliding bolts are readily accessible for installation. This straightforward approach offers visibility and easy maintenance. The following steps detail the installation process:
- Preparation: Thoroughly examine the mounting surface for any imperfections. Ensure the area is clean and level for optimal adhesion.
- Marking and Measuring: Use a pencil and measuring tape to accurately mark the bolt’s mounting holes on the door or frame. Double-check measurements to prevent errors.
- Drilling Pilot Holes: Drill pilot holes slightly smaller than the mounting screws to prevent the wood from splitting. Using a drill bit appropriate for the screw type is crucial.
- Installing the Bolt: Align the bolt’s mounting plates with the marked holes and secure them using appropriate screws. Ensure the bolt slides smoothly.
- Finishing Touches: Check the bolt’s functionality. Adjust as needed to ensure proper operation. Apply any necessary sealant or finish to the mounting area.
Concealed Sliding Bolt Installation
Concealed sliding bolts offer a clean aesthetic, integrating seamlessly with the door and frame. This approach requires meticulous planning and execution.
- Planning the Concealment: Determine the best location for the bolt’s mounting plate to minimize visual impact and ensure smooth operation.
- Precise Measurements: Accurately measure the depth and width of the recess required for the mounting plate. Precise measurements are critical to avoid issues.
- Preparing the Recess: Carefully cut out the recess in the door and frame using a router or jigsaw. The precision of the cut will affect the bolt’s operation.
- Mounting the Bolt: Install the mounting plate within the recess. Secure the plate using appropriate screws and ensure alignment with the frame.
- Testing and Adjustment: Verify the bolt’s functionality and smooth operation. Make adjustments as needed for proper alignment.
Measuring and Marking Installation Locations
Accurate measurements are paramount for proper installation. Inaccurate measurements can lead to misalignment and operational issues. Ensure all measurements are precise.
- Using a Measuring Tape: Measure the distance between the desired mounting points on the door and frame using a measuring tape. Take multiple measurements to ensure accuracy.
- Using a Ruler: Use a ruler to measure shorter distances. Ensuring accuracy is crucial.
- Using a Level: Verify the surface’s levelness using a level to avoid uneven mounting. This is essential for proper functionality.
- Transferring Measurements: Use a pencil or marker to transfer the measurements to the door and frame. Ensure the marks are clear and easily visible.
Tools for Installation
Using appropriate tools is vital for efficient and safe installation. Improper tools can lead to damage or complications.
- Drill: A drill is essential for creating pilot holes for screws, ensuring the wood doesn’t split.
- Screwdriver: A screwdriver is used for securing the mounting screws. Using the correct type of screwdriver for the screws is important.
- Measuring Tape: Essential for accurate measurements of distances.
- Level: Ensures a level surface for mounting. Uneven surfaces can affect the bolt’s operation.
- Pencil/Marker: Used for marking installation points on the door and frame.
Installation Methods Comparison
| Installation Method | Pros | Cons |
|---|---|---|
| Surface-Mount | Visible, easy maintenance, readily accessible | Less aesthetically pleasing, may require more space |
| Concealed | Clean aesthetic, seamless integration | More complex installation, less visible maintenance |
Safety Considerations
Installing sliding bolts, while generally straightforward, requires careful attention to safety precautions. Ignoring these precautions can lead to injuries, damage to property, and even more serious consequences. This section Artikels crucial safety considerations to ensure a smooth and safe installation process.Proper safety procedures, combined with the correct tools and equipment, minimize risks and maximize the safety of the installation process.
A well-planned approach, prioritizing safety at every step, is essential for a successful installation.
Potential Hazards
Several hazards can arise during sliding bolt installation. These include the risk of cuts from sharp edges on the bolt or the mounting surface, injuries from falling tools or materials, and potential electric shocks if working near electrical wiring. Improper handling of heavy components can also lead to back injuries. Furthermore, if not stored properly, the sliding bolts themselves can become a tripping hazard.
Safety Precautions
Implementing proper safety precautions is paramount during the installation process. This involves using appropriate personal protective equipment (PPE), such as safety glasses, gloves, and sturdy work boots. Ensuring a clear workspace, free of obstructions, is also crucial. Never work alone when installing large or heavy components. Always have a designated spotter or assistant for safety.
Safety Equipment
Appropriate safety equipment is essential for a safe installation. This includes safety glasses to protect the eyes from flying debris, work gloves to prevent cuts and abrasions, and sturdy work boots for foot protection. If working in a high-risk environment, consider additional PPE such as a hard hat or safety harness.
Tool Selection
Using the correct tools is vital for efficient and safe installation. Incorrect tools can damage the sliding bolt or the mounting surface, increasing the risk of injury or malfunction. Using the appropriate tools, such as screwdrivers, wrenches, and impact drivers, will help prevent accidental damage. For example, using a power drill with the wrong bit can strip the screw head, leading to a dangerous situation.
Handling and Storage
Proper handling and storage of sliding bolts are important for preventing injuries and ensuring their longevity. Sliding bolts should be handled with care, avoiding dropping or throwing them. Store them in a dry, secure location away from moisture and extreme temperatures to maintain their quality and prevent rust. When transporting multiple sliding bolts, use a sturdy container to prevent them from shifting or falling.
Installing a sliding bolt is a straightforward process, but a crucial one for securing your property. The recent box office performance of “Power Rangers: Can’t Kill the Beast,” however, seems to be struggling to make a dent in the movie market. Luckily, the installation of a well-placed sliding bolt is a much simpler and more reliable solution to protect your home, and you won’t find that sort of box office trouble with a secure lock! box office power rangers cant kill the beast highlights the recent box office trends.
Regardless, a sturdy sliding bolt will keep your valuables safe, offering a simple yet effective way to safeguard your home.
Ensure that the container is appropriately labeled with the type and quantity of sliding bolts. For example, if you have multiple sizes of sliding bolts, using separate labeled containers will help prevent confusion.
Troubleshooting Sliding Bolt Installation

Sometimes, despite meticulous preparation, sliding bolt installation can encounter unexpected snags. Understanding potential problems and their solutions is crucial for a smooth and successful installation. This section delves into common issues, diagnostics, and solutions, equipping you with the knowledge to tackle any hurdles that may arise.
Common Installation Problems
Various factors can contribute to difficulties during sliding bolt installation. These range from simple user errors to more complex issues related to the bolt’s components or the mounting surface. Recognizing these problems early on allows for prompt resolution and prevents further complications.
- Incorrect Bolt Size or Type: Using a bolt that’s not compatible with the application or improperly sized for the load can lead to slippage, breakage, or premature wear. Carefully verify the specifications provided by the manufacturer to ensure the correct bolt is being used.
- Improper Mounting Surface: Uneven or damaged surfaces can lead to misalignment, poor grip, and bolt failure. Ensure the mounting surface is clean, stable, and adequately prepared to accommodate the bolt.
- Insufficient Pre-Drilling or Holes: Inadequate pre-drilling or misaligned holes can result in improper bolt seating and subsequent issues. Precise drilling and accurate hole placement are essential.
- Insufficient or Incorrect Fastener: Insufficient or the wrong type of fasteners can compromise the bolt’s integrity. Appropriate fasteners, in the correct size and type, are crucial for the bolt’s proper function.
- Excessive Force or Incorrect Torque: Excessively tightening the bolt can damage the mounting surface or the bolt itself. Employ the correct torque specifications provided by the manufacturer to prevent these issues.
Diagnostic Procedures
Effective troubleshooting begins with careful observation and methodical investigation. Thoroughly examine the installation process and the components involved to identify the root cause of the problem.
- Visual Inspection: Carefully examine the bolt, fasteners, and mounting surface for any signs of damage, misalignment, or improper installation.
- Check for Loose or Damaged Components: Inspect the bolt’s components for any signs of looseness, cracks, or other damage.
- Verify Bolt Size and Type: Ensure the bolt size and type are consistent with the application and manufacturer’s specifications.
- Evaluate Mounting Surface Integrity: Assess the mounting surface for any imperfections, damage, or insufficient preparation.
- Assess Pre-Drilling and Hole Alignment: Verify that the pre-drilled holes are accurately positioned and appropriately sized.
Solutions for Common Problems
Addressing installation problems promptly and correctly is crucial for maintaining the integrity and longevity of the sliding bolt system. Here are some potential solutions.
| Problem | Diagnosis | Solution |
|---|---|---|
| Incorrect Bolt Size/Type | Bolt doesn’t fit the application; mismatched specifications. | Select the correct bolt size and type per manufacturer’s specifications. |
| Improper Mounting Surface | Surface is uneven, damaged, or insufficiently prepared. | Ensure the surface is clean, stable, and adequately prepared before installation. |
| Insufficient Pre-Drilling/Holes | Holes are too small, misaligned, or absent. | Redrill holes to the correct size and ensure proper alignment. |
| Insufficient/Incorrect Fasteners | Fasteners are inadequate or inappropriate. | Use the correct type and size of fasteners per manufacturer’s specifications. |
| Excessive Force/Incorrect Torque | Overtightening damages the bolt or mounting surface. | Use the recommended torque settings and avoid overtightening. |
Preventive Measures
Proactive steps can significantly reduce the likelihood of encountering installation problems. Following these guidelines can save time and resources.
- Thorough Planning: Carefully review the installation instructions and specifications before beginning the process.
- Accurate Measurements: Double-check all measurements to ensure accuracy and precision.
- Proper Surface Preparation: Ensure the mounting surface is clean, stable, and prepared according to specifications.
- Use of Quality Components: Employ high-quality components to minimize the risk of failure.
- Following Manufacturer’s Instructions: Adhere to the manufacturer’s instructions for installation, torque specifications, and safety precautions.
Variations and Alternatives: Install A Sliding Bolt
Sliding bolts offer a practical and versatile fastening solution, but they aren’t always the best choice. Understanding their limitations and exploring alternative methods is crucial for effective project completion. This section explores the nuances of choosing the right fastening mechanism for different scenarios.Sliding bolts excel in applications demanding quick and secure connections, but their suitability hinges on the specific requirements.
Installing a sliding bolt is a pretty straightforward process, but it can sometimes feel a bit fiddly. You know, those little details that can make or break a project. While I was wrestling with the bolt, I found myself listening to Interpol’s Paul Banks cover of Iggy Pop’s “Gimme Danger” and “Sister Midnight” here. The music really helped me focus and get the bolt installed perfectly, making the whole process a bit more enjoyable.
Definitely worth checking out the music if you’re ever stuck on a similar project!
This section examines when sliding bolts shine, where other fastening methods are more appropriate, and offers creative uses for this often-overlooked mechanism.
Comparison with Other Fastening Mechanisms
Sliding bolts provide a unique combination of speed and security, but they differ significantly from other common fastening techniques. Understanding these differences is vital for selecting the optimal method.
- Compared to Screws: Screws offer greater holding power in many situations, particularly when dealing with materials requiring a more permanent attachment. Sliding bolts, on the other hand, are ideal for applications needing frequent adjustments or disconnections. For instance, a cabinet door on a sliding bolt can be quickly removed for cleaning, whereas a screwed-in door typically requires more extensive disassembly.
- Compared to Hinges: Hinges are designed for rotational movement, suitable for doors and gates. Sliding bolts are better for applications requiring linear movement or securing a sliding component, such as a gate latch or a workbench drawer.
Situations Where Sliding Bolts Might Not Be Ideal
Sliding bolts, while practical, have limitations. Recognizing these scenarios is essential for selecting the right fastening method.
- High-Stress Applications: Sliding bolts are less suitable for high-stress applications where a more robust and permanent connection is needed. For example, securing a heavy machine component would likely require stronger fasteners like bolts and nuts.
- Repeated Opening/Closing: While sliding bolts are useful for frequent adjustments, excessive opening and closing cycles can potentially wear down the mechanism over time. Consider alternative methods for high-usage applications.
Alternative Fastening Methods for Specific Applications, Install a Sliding Bolt
Choosing the correct alternative depends heavily on the application. This section provides examples of suitable replacements for sliding bolts.
- For Permanent Connections: When a permanent connection is necessary, consider using screws, rivets, or welds. These methods provide a stronger and more enduring bond, unlike sliding bolts that are designed for more flexible attachment. For example, a workbench permanently attached to a wall is better secured with screws than sliding bolts.
- For Rotational Movement: When rotational movement is required, hinges are the appropriate choice. These mechanisms allow for controlled and smooth pivoting, as seen in doors and gates.
Creative Uses for Sliding Bolts
Sliding bolts can be used in imaginative ways beyond their standard applications. Thinking outside the box can lead to innovative solutions.
- Securing Temporary Structures: Sliding bolts can be used to quickly and securely assemble temporary structures like staging or scaffolding. This provides a flexible method of connection that is faster than welding or riveting.
- Adjustable Workbenches: Adjustable workbenches often benefit from sliding bolts for securing workpieces or tools. This allows for quick and easy adjustments to accommodate different projects or tasks.
Benefits and Drawbacks of Different Fastening Alternatives
Each fastening method comes with its own advantages and disadvantages. A careful evaluation is needed to choose the optimal solution for each project.
| Fastening Method | Benefits | Drawbacks |
|---|---|---|
| Sliding Bolts | Quick assembly, easy adjustment, removable | Lower load-bearing capacity, potential wear over time |
| Screws | High load-bearing capacity, permanent attachment | Slower assembly, less flexibility |
| Hinges | Smooth rotational movement, suitable for doors | Not suitable for linear movement, limited adjustability |
Visual Guide
Sliding bolts, though seemingly simple, offer a range of options for securing doors, gates, and other applications. Understanding the different types and their appropriate installations is crucial for ensuring security and longevity. This visual guide provides a detailed breakdown of various sliding bolt types, installation procedures, troubleshooting, and tool/material requirements.A comprehensive visual guide to sliding bolts aids in the selection of the right bolt for a specific application.
Clear visual demonstrations of installation steps, common problems, and various bolt types help users to understand the process effectively and choose the most suitable solution.
Types of Sliding Bolts
Different sliding bolt designs cater to diverse needs. Understanding these variations is vital for optimal application. The following illustrations depict common sliding bolt types:
- Standard Sliding Bolt: A simple, rectangular-shaped bolt that slides horizontally to secure a door or gate. Ideal for basic security applications.
- Mortise Sliding Bolt: A recessed bolt, installed into a door frame, offering greater security and a clean aesthetic. Often used in high-traffic areas or where aesthetics are a concern.
- Double-Acting Sliding Bolt: Features two sliding bolts that work in tandem for increased security and force. Suitable for heavy-duty applications where extra strength is needed.
Sliding Bolt Installation
Proper installation ensures the bolt’s effectiveness and longevity. The following steps detail the installation process, including necessary tools and materials.
- Preparation: Measure the door opening and select the appropriate bolt size. Ensure the chosen bolt’s length aligns with the application’s security needs. The illustration should display a ruler measuring the doorframe, highlighting the bolt size to be used.
- Marking: Mark the positions for the mounting holes on the door frame using a pencil. Accuracy is critical for a secure fit. A close-up image should show the marked holes on the door frame.
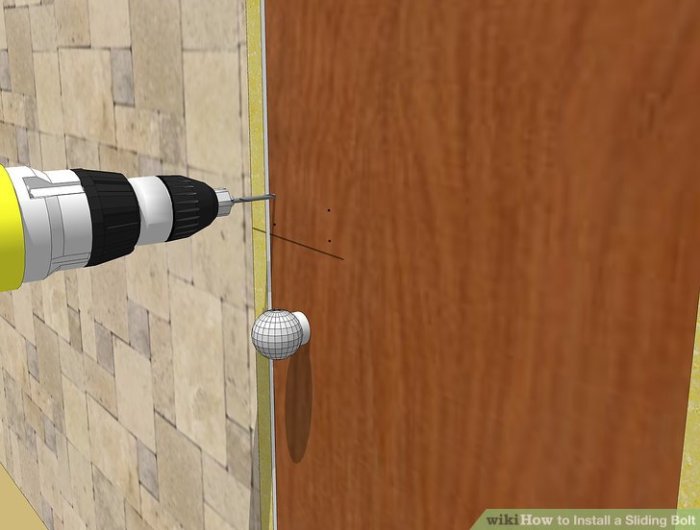
- Drilling: Drill pilot holes at the marked positions. The size of the pilot holes should correspond to the screws used. The image should showcase the use of a drill bit to drill the pilot holes.
- Mounting: Insert the screws and secure the sliding bolt to the door frame. The illustration should show the bolt being secured using screws into the pilot holes. Ensure the bolt slides smoothly in the frame.
- Testing: Test the sliding bolt’s functionality by sliding it in and out of the frame. Check for smooth operation and secure locking. The image should depict the user testing the bolt’s function.
Troubleshooting
Addressing common installation issues promptly prevents costly repairs.
- Bolt Doesn’t Slide Smoothly: Ensure the bolt’s track is free of debris or obstructions. If necessary, lubricate the track with a suitable lubricant. The illustration should depict the track of the bolt and show a person applying lubricant.
- Bolt Doesn’t Lock Securely: Check for proper alignment of the bolt with the strike plate. Adjust the bolt’s position or the strike plate as needed. The illustration should show the bolt’s alignment with the strike plate.
- Bolt Comes Loose: Tighten the mounting screws to ensure a secure hold. The illustration should show the user tightening the screws using a screwdriver.
Tools and Materials
Proper tools and materials are essential for a successful installation.
| Tool | Description | Image |
|---|---|---|
| Drill | Used for creating pilot holes | Illustration of a drill with a drill bit |
| Screwdriver | Used for securing the bolt to the frame | Illustration of a screwdriver |
| Measuring Tape | Used for measuring the door frame | Illustration of a measuring tape |
| Pencil | Used for marking positions on the door frame | Illustration of a pencil |
Bolt Type Comparison
Evaluating the pros and cons of different sliding bolt types helps in making informed choices.
- Standard Bolt: Simple to install, affordable, but offers limited security. Suitable for basic security needs.
- Mortise Bolt: Offers enhanced security and a clean aesthetic, but installation can be more complex. Ideal for high-security applications.
- Double-Acting Bolt: Provides superior security and strength, but installation is more challenging. Suitable for high-security or heavy-duty applications.
Material Selection
Choosing the right material for your sliding bolt is crucial for its longevity, performance, and overall effectiveness. A poorly chosen material can lead to premature failure, increased maintenance costs, and potential safety hazards. Understanding the factors influencing material selection, such as durability, corrosion resistance, and cost, is essential for making informed decisions.Selecting the correct material for a sliding bolt involves careful consideration of various factors, including the environment in which the bolt will operate, the expected load, and the desired lifespan.
Factors such as temperature fluctuations, exposure to moisture, and the presence of corrosive substances all play significant roles in determining the ideal material.
Factors to Consider in Material Selection
Understanding the operating environment is paramount. Exposure to harsh weather conditions, chemicals, or excessive moisture necessitates the selection of materials with superior corrosion resistance. Similarly, the anticipated load and frequency of use influence the material’s strength and durability requirements. Cost is also a significant factor, as different materials vary in price, impacting the overall budget for the project.
Durability and Longevity of Different Materials
The durability and longevity of a sliding bolt material depend on its ability to withstand repeated cycles of movement, stress, and environmental factors. Steel, often used for its strength, can exhibit excellent durability if properly treated and maintained. Stainless steel, a corrosion-resistant variant, offers extended longevity in corrosive environments. Aluminum, while lighter and less expensive, might have a shorter lifespan in demanding applications compared to steel or stainless steel.
Corrosion Resistance of Different Materials
Corrosion resistance is a critical factor, particularly for sliding bolts exposed to moisture or corrosive substances. Stainless steel, due to its chromium content, exhibits superior corrosion resistance compared to regular steel. Aluminum, while generally resistant to corrosion in some environments, might be less effective in highly corrosive conditions. Zinc-plated steel can provide a protective layer against corrosion but may not be as durable as stainless steel in severe conditions.
Summary Table of Sliding Bolt Materials
| Material | Strength | Corrosion Resistance | Cost | Applications |
|---|---|---|---|---|
| Steel (Carbon Steel) | High | Moderate | Low | General-purpose applications where corrosion isn’t a major concern. |
| Stainless Steel (304, 316) | High | Excellent | Medium to High | Applications requiring high corrosion resistance, such as marine environments or chemical plants. |
| Aluminum | Moderate | Good (in some environments) | Low | Applications where weight is a concern and corrosion isn’t severe. Good for exterior applications in dry climates. |
| Zinc-plated Steel | High | Good (initial protection) | Medium | Applications requiring moderate corrosion resistance and cost-effectiveness. Suitable for exterior applications in mild environments. |
Conclusion
 - wikiHow")
In conclusion, installing a sliding bolt, whether surface-mount or concealed, is a manageable task with careful planning and attention to detail. This guide has provided a detailed overview of the process, from initial measurements to final adjustments. Remember to prioritize safety, select the right materials, and follow the step-by-step instructions for a flawless installation. By understanding the variations and alternatives to sliding bolts, you’ll be able to make informed decisions for your specific project needs.
Ultimately, this guide empowers you to confidently tackle sliding bolt installations, from simple to complex projects.
Leave a Reply