Category: Troubleshooting

  • Why Does My Apple Music Keep Pausing?

    Why Does My Apple Music Keep Pausing?

    Why Does My Apple Music Keep Pausing? This frustrating issue plagues many Apple Music users, disrupting the enjoyment of their favorite tunes. From sudden stops to endless buffering, the problem can range from minor annoyances to major disruptions. This in-depth guide dives into the various causes behind this common problem, providing practical solutions to get your music flowing smoothly again.

    This comprehensive guide will explore potential causes ranging from your device’s storage and network connection to the Apple Music app itself. We’ll cover everything from checking your internet speed to ensuring sufficient free space on your device. Get ready to troubleshoot and reclaim your uninterrupted listening experience.

    Troubleshooting the Issue

    Apple Music’s tendency to pause unexpectedly can stem from various sources, impacting the listening experience. This section dives into common causes and provides actionable steps to diagnose and resolve the problem. Identifying the root cause is crucial for a smooth and uninterrupted music journey.

    Potential Sources of Pausing

    Several factors can contribute to Apple Music pauses. These are categorized to aid in pinpointing the source of the disruption. Understanding the source is the first step in resolving the issue.

    • Device Issues: Problems with the device’s hardware or software, like insufficient storage space, overheating, or outdated operating system versions, can trigger pauses.
    • Network Problems: Intermittent or unstable internet connections are a frequent culprit. Poor signal strength, network congestion, or DNS resolution errors can disrupt playback.
    • App Issues: Bugs or glitches within the Apple Music app itself can lead to unexpected pauses. Corrupted cache files or incompatible app versions are possibilities.

    Identifying Network Connection Issues

    A weak or unstable Wi-Fi or cellular connection is a common cause of playback interruptions. To determine if this is the problem, try these steps:

    • Check Signal Strength: Ensure your device has a strong signal from the Wi-Fi network or cellular tower. A weak signal often results in buffering or playback interruptions.
    • Test Other Apps: Try using other internet-dependent apps (like browsing the web) to see if they experience similar issues. If other apps function smoothly, the problem is likely isolated to Apple Music.
    • Switch Networks: If possible, try switching to a different Wi-Fi network or cellular data connection to see if the issue resolves. This helps pinpoint the specific network as the source of the problem.

    Checking for Software Updates

    Outdated software, whether on your device or in the Apple Music app, can sometimes cause unexpected issues. Checking for and installing updates can resolve compatibility problems.

    Ever wondered why your Apple Music keeps pausing? It might not be a glitch in the system, but rather a problem with your device’s settings. Sometimes, a simple refresh or checking your internet connection can help. But if the issue persists, consider whether you’ve recently changed your account name – like when choosing a Name when Changing It Choose a Name when Changing It.

    A change in your account settings could inadvertently affect the streaming service. Try troubleshooting these areas to get your music playing smoothly again.

    • Device Software Update: Verify that your device’s operating system is up to date. Go to Settings > General > Software Update to check for any available updates.
    • Apple Music App Update: In the App Store, look for updates for the Apple Music app. Ensure you’re running the latest version, as this often fixes bugs that could cause playback issues.

    Symptom Comparison Table

    Potential Cause Symptoms
    Network Issues Frequent buffering, intermittent playback, abrupt stops, noticeable delays, and unstable audio quality.
    Device Issues Random pauses, skipping, or freezing, especially during peak usage or when the device is under heavy load.
    App Issues Abrupt stops during playback, frequent buffering, or the app crashing while playing music. Also, inconsistent playback quality.

    Device-Specific Problems

    Sometimes, the culprit behind your Apple Music playback issues isn’t a software glitch, but a problem with your device itself. From storage space constraints to hardware limitations, various device-related factors can cause interruptions in your music streaming experience. Understanding these potential problems and how to address them can significantly improve your Apple Music enjoyment.

    Storage Capacity and Playback Stability

    Device storage capacity plays a crucial role in the stability of music playback. When storage space is low, the device might struggle to manage the resources required for smooth streaming. This can lead to frequent pauses, buffering issues, and even app crashes. Insufficient free space can cause problems beyond just music playback, impacting overall device performance.

    Checking for Sufficient Free Space

    To ensure enough space for Apple Music and other apps to function optimally, regularly check your device’s free storage space. This is easily done through the device’s settings. Open Settings, navigate to General, and select Storage. The displayed information will show the available space on your device. If the free space is significantly low, consider deleting unnecessary files, apps, or media to free up more storage.

    Device-Related Issues Affecting Playback

    Several device-related issues can disrupt Apple Music playback. Overheating, for example, can lead to performance throttling, resulting in pauses and glitches. Similarly, a low battery level can cause the device to prioritize essential functions, leading to interrupted playback. These issues aren’t always easily noticeable, but their impact on music playback can be significant.

    Solutions for Device-Related Playback Problems

    If overheating is a concern, ensure proper ventilation for your device. Avoid using it in direct sunlight or in environments that generate excessive heat. For low battery issues, use a power bank or ensure the device is plugged in when possible. In extreme cases, contacting Apple Support might be necessary to diagnose more complex device problems.

    Impact of iOS Versions on Apple Music Playback, Why Does My Apple Music Keep Pausing

    Different iOS versions can affect Apple Music playback in various ways. Some updates might introduce bugs that impact app stability, while others might resolve previous issues. For a more detailed understanding of how different iOS versions might affect your Apple Music experience, consider consulting Apple’s support documentation or checking online forums for discussions about specific iOS versions and playback issues.

    This information will help you anticipate and address potential problems related to your iOS version.

    iOS Version Potential Impact on Apple Music
    Older versions (e.g., iOS 12) May experience compatibility issues with newer Apple Music features, leading to playback problems.
    Newer versions (e.g., iOS 16) May introduce improvements in playback stability, but occasionally some users report new bugs or compatibility issues with specific features.
    Beta versions Potential for instability and unexpected playback issues.

    Network Connectivity Issues

    Your Apple Music keeps pausing? A shaky internet connection is often the culprit. A poor connection can lead to buffering, skipping, and frequent pauses in your music stream. Understanding how network types, speeds, and congestion affect playback is crucial for troubleshooting. This section delves into the relationship between your internet and your Apple Music experience.A strong and stable internet connection is paramount for seamless Apple Music playback.

    Interruptions and instability, whether due to Wi-Fi dropouts or cellular data fluctuations, can severely impact the streaming experience. This often manifests as frustrating pauses, requiring a deeper look at your network setup.

    My Apple Music keeps pausing, driving me crazy! It’s so frustrating, especially when I’m trying to focus on something else. Perhaps it’s a similar kind of disruption to the artistic process, as seen in the case of Brian Eno, who is protesting the Israeli dance company’s use of his music here. Maybe there’s a technical glitch, or maybe it’s just a bad day for the streaming service.

    Either way, I’m still trying to figure out why my Apple Music keeps stopping! Hopefully, a quick fix is on the way.

    Impact of Poor Internet Connectivity

    Poor internet connectivity directly translates to a poor Apple Music experience. Slow loading times, frequent buffering, and abrupt pauses are common issues. The quality of the audio stream suffers significantly, impacting the overall enjoyment of listening. The experience degrades from a smooth, continuous listening experience to a choppy, interrupted one.

    Network Types and Their Influence

    The type of network connection, whether Wi-Fi or cellular data, plays a significant role in the stability of the Apple Music stream.

    • Wi-Fi: Wi-Fi connections, while often convenient, can be susceptible to interference from other devices or physical obstacles. Signal strength and distance from the router greatly affect the reliability of the connection. This is especially noticeable when the router is overloaded with other devices, causing congestion and slower speeds.
    • Cellular Data: Cellular data, although portable, can experience fluctuations in speed depending on the signal strength. Areas with weak or congested cellular towers can lead to significant playback interruptions. Cellular data is often less reliable than a strong Wi-Fi connection.

    Checking Network Connection

    Troubleshooting connectivity issues starts with verifying the network connection.

    • Check Wi-Fi Signal Strength: A weak Wi-Fi signal directly translates to a poor streaming experience. Move closer to the router, or try a different Wi-Fi network. If the problem persists, consider upgrading the router or troubleshooting interference.
    • Cellular Data Connection: Ensure that cellular data is enabled and functioning properly. If on a data plan, monitor data usage to avoid unexpected overages. Ensure the network connection is not limited or restricted.
    • Network Diagnostics: Use network diagnostics tools provided by your internet service provider (ISP) to pinpoint specific connectivity problems.

    Comparing Wi-Fi Settings

    Different Wi-Fi settings can influence the streaming quality.

    • Channel Selection: Overlapping Wi-Fi channels can lead to interference, affecting streaming stability. Using a less congested channel can enhance the playback experience.
    • Security Protocols: Stronger security protocols, while beneficial for privacy, might slightly impact performance. Switching to a less secure protocol might be beneficial for streaming.
    • Network Bandwidth: High bandwidth allocation for Wi-Fi can lead to a more stable connection for streaming.

    Network Congestion and Interference

    Network congestion and interference from other devices can cause playback interruptions.

    • Congestion: Many devices simultaneously using the same network can lead to congestion, resulting in slower speeds and playback issues. Minimizing the number of devices connected to the network can improve streaming quality.
    • Interference: Other electronic devices or physical obstructions can interfere with the Wi-Fi signal. Move the router away from potential sources of interference, like microwaves or cordless phones, to improve the signal.

    Internet Speed and Playback

    Different internet speeds impact the Apple Music experience in various ways.

    Internet Speed (Mbps) Playback Experience
    < 5 Mbps Significant buffering and pauses, low audio quality
    5-10 Mbps Buffering, occasional pauses, noticeable degradation in audio quality
    10-20 Mbps Moderate buffering, occasional pauses, acceptable audio quality
    > 20 Mbps Minimal buffering, smooth playback, high audio quality

    Apple Music App Issues

    Your Apple Music app keeps pausing? Sometimes, the culprit isn’t a network hiccup or a device glitch, but rather issues directly within the app itself. Let’s delve into potential problems arising from the Apple Music application.The Apple Music app, while generally reliable, can occasionally encounter problems that lead to playback interruptions. These problems often stem from factors like corrupted caches, outdated versions, or conflicts with other applications.

    Understanding these potential issues and how to resolve them can significantly improve your Apple Music experience.

    Force Quitting and Relaunching the App

    A simple yet effective troubleshooting step is to force quit and relaunch the Apple Music app. This can clear up temporary glitches and refresh the application’s resources.

    • Locate the Apple Music app icon on your device’s home screen or app switcher.
    • Press and hold the Apple Music app icon until it begins to wiggle.
    • Tap the “X” (or equivalent close button) that appears next to the app icon.
    • Return to the home screen or app switcher.
    • Locate and relaunch the Apple Music app icon.

    Corrupted Music Caches

    Corrupted music caches can cause various playback problems, including unexpected pauses. Clearing these caches can resolve these issues.

    Clearing the Apple Music App Cache and Data

    Clearing the Apple Music app’s cache and data is another way to resolve potential issues stemming from corrupted data.

    • Open your device’s “Settings” app.
    • Navigate to “General” > “iPhone Storage” (or equivalent on your device).
    • Locate the Apple Music app in the list of apps.
    • Tap on the Apple Music app.
    • Select “Delete App” or “Clear Data”. (Be mindful that clearing data will remove personalized settings.)

    Importance of App Updates

    Keeping your Apple Music app updated is crucial for optimal performance. Updates often include bug fixes and performance enhancements that address issues like playback pauses.

    App Conflicts

    Background processes from other apps can sometimes interfere with the Apple Music app, leading to playback problems. Identifying and resolving such conflicts can often resolve the issue.

    • Monitor your device’s background processes. Observe if any other apps are consuming significant resources.
    • Identify any apps that might be competing with Apple Music for system resources.
    • Consider temporarily disabling or closing these potentially conflicting apps.
    • If problems persist, contact Apple Support for further assistance.

    Known Apple Music App Bugs and Fixes

    The table below lists some known Apple Music app bugs and their potential solutions. It is important to note that this is not an exhaustive list and that new bugs may emerge. Regularly checking online forums for the latest reports is advisable.

    Bug Potential Fix
    Frequent playback pauses Force quit and relaunch the app, clear app cache and data, update the app.
    Audio crackling Check for network connectivity issues, update the app, or try using a different audio codec.
    Music skipping Force quit and relaunch the app, check for background app conflicts, and ensure sufficient storage space.

    Other Potential Causes

    Apple Music playback issues aren’t always due to obvious problems like network connectivity or app glitches. Sometimes, the culprit lies within the background processes and interactions of your device itself. Understanding these potential causes can help you pinpoint the root of the problem and resolve it effectively.Background tasks and processes on your device can sometimes interfere with Apple Music playback.

    These tasks, ranging from syncing data to running updates, consume system resources, which might lead to temporary pauses or interruptions in the music stream. Proper management of these tasks can often alleviate these issues.

    My Apple Music keeps pausing, driving me absolutely bonkers. It’s so frustrating, like a bad song stuck on repeat. Maybe it’s a connection issue, or perhaps a problem with the device itself. Recently, I was listening to some music and thinking about how some artists’ stories can be so captivating, like the story of Roc Marciano’s “I Shot the King.” roc marciano i shot the king It’s a really interesting look at the history of hip-hop, and made me think about how music can be so full of emotion.

    Regardless, I’m still trying to figure out why my Apple Music keeps cutting out. Hopefully a simple fix is around the corner!

    Managing Background Tasks

    Background tasks are crucial for a smooth user experience, but excessive or conflicting tasks can impact performance. Understanding how to manage these tasks can help prevent interruptions in your music playback. iOS offers various settings to control background activity. Adjusting these settings can free up system resources, potentially resolving playback problems. It is important to find a balance that allows essential background processes to run while minimizing the impact on your music streaming.

    Checking for Conflicts with Other Apps

    Other apps running in the background can sometimes clash with Apple Music, causing playback issues. Conflicts arise when apps compete for system resources, particularly during intensive tasks or high-demand operations. Identifying and resolving these conflicts is a crucial step in troubleshooting Apple Music playback problems.

    Third-Party App Impact

    Third-party apps, while often beneficial, can sometimes impact the stability and quality of music playback. These apps, particularly those with intensive audio processing requirements, might use significant CPU and memory resources. The strain on the system could cause issues such as delays, interruptions, or complete playback failures.

    Examples of Problematic Third-Party Apps

    Several third-party apps can potentially cause playback issues for Apple Music. For instance, a video editing app with complex audio processing features might struggle with the background operations of Apple Music. Likewise, applications using intensive background data transfer could also negatively affect the music playback experience.

    Impact of Audio Codecs

    Different audio codecs, the digital methods used to compress and decompress audio, can influence both the playback quality and stability of Apple Music. Some codecs might demand more system resources, potentially causing playback interruptions, while others offer better compression at the cost of playback stability. Understanding these differences can be helpful in identifying potential conflicts.

    Troubleshooting Steps

    Why Does My Apple Music Keep Pausing

    Uninterrupted music streaming is crucial for a satisfying listening experience. However, playback interruptions, such as frequent pausing in Apple Music, can be frustrating. This section provides a systematic approach to diagnose and resolve these issues. A step-by-step troubleshooting guide, along with specific tips for various potential causes, will help you restore seamless music playback.Troubleshooting playback problems requires a methodical approach.

    Starting with basic checks and progressively investigating more complex factors is key. By following the steps Artikeld below, you can effectively pinpoint the cause of the pausing issue and implement appropriate solutions.

    Basic Checks

    Identifying the root cause of the pausing issue often involves verifying the most fundamental aspects of the system. These basic checks are crucial for ruling out straightforward explanations.

    • Check Device Battery Level: A low battery can significantly impact app performance, potentially causing playback interruptions. Ensure the device has a sufficient charge to prevent unexpected pauses.
    • Check Network Connectivity: A weak or unstable Wi-Fi or cellular connection can disrupt streaming. Ensure a strong, reliable connection is established.
    • Check for Background Processes: Running multiple apps in the background can strain resources and cause playback problems. Close any unnecessary applications to free up system memory.

    Device-Specific Troubleshooting

    Addressing device-specific issues is essential for resolving playback problems. Different devices may exhibit varying symptoms.

    • iOS Device Issues: An outdated or corrupted iOS version can negatively affect app performance, potentially leading to playback interruptions. Update the iOS version to the latest available release for optimal functionality. Refer to the official Apple support resources for instructions.
    • Hardware Issues: Physical damage to the device’s components, such as the audio system or storage, can disrupt playback. If you suspect hardware problems, consult an authorized Apple service provider for diagnosis and repair.

    Apple Music App Troubleshooting

    Maintaining the Apple Music app’s health and stability is crucial for a smooth listening experience.

    • App Updates: Outdated versions of the Apple Music app might contain bugs that cause playback interruptions. Check for and install any available updates to ensure the latest bug fixes and improvements.
    • App Cache and Data: Accumulated cache and app data can sometimes lead to playback problems. Clearing the app cache and data might resolve these issues.

    Network Connectivity Checks

    Reliable network connectivity is essential for seamless music streaming.

    • Wi-Fi Connection Stability: Intermittent or unstable Wi-Fi connections can cause playback interruptions. Ensure the Wi-Fi connection is stable and reliable.
    • Cellular Data Usage: High data usage or poor cellular signal can lead to playback issues. Consider using Wi-Fi for streaming when possible, especially if you’re on a data plan with limited allowances.
    • Network Interference: Interference from other devices or networks might disrupt the connection. Try moving the device away from potential sources of interference.

    Other Potential Causes

    Other factors can sometimes contribute to playback problems.

    • Storage Space: Low storage space on the device can affect app performance. Free up space to ensure the Apple Music app operates efficiently.
    • Third-Party App Conflicts: Certain third-party apps might interfere with the Apple Music app, potentially causing playback issues. Try temporarily disabling or uninstalling third-party apps to see if the problem resolves.

    Troubleshooting Flowchart

    This flowchart guides you through the troubleshooting process. Start at the top and follow the arrows based on your observations.

    (Illustrative Flowchart: A visual representation is recommended here, but I cannot create images. The flowchart would show a branching structure with steps like:

    1. Check Battery Level. If low, charge.

    2.

    Check Network. If unstable, try different networks.

    3. Check for App Updates. If needed, update.

    …and so on. Each path would lead to either a resolution or further steps.)

    Final Thoughts: Why Does My Apple Music Keep Pausing

    Why Does My Apple Music Keep Pausing

    So, why is your Apple Music keeping you from enjoying your favorite tunes? Hopefully, this guide has provided you with valuable insights into the various culprits behind the pausing issue. By systematically addressing device-related problems, network connectivity issues, Apple Music app conflicts, and other potential causes, you’ll be well-equipped to diagnose and resolve this common problem. Remember to check for updates, manage background tasks, and troubleshoot step-by-step.

    Happy listening!

  • Fix YouTube Offline Problem on PC – A Comprehensive Guide

    Fix YouTube Offline Problem on PC – A Comprehensive Guide

    Fix YouTube Offline Problem on PC sets the stage for this guide, which dives deep into troubleshooting common issues preventing you from enjoying your favorite YouTube videos offline on your computer. We’ll explore everything from download problems to playback issues, and even address potential system conflicts. Whether you’re struggling to download videos, encounter playback errors, or suspect a software conflict, this comprehensive guide will equip you with the tools to resolve them.

    From identifying the root cause of your offline video woes to clearing cache and cookies, this guide will walk you through each step, providing clear explanations and actionable solutions. We’ll cover a range of possibilities, including examining your system’s compatibility, checking download settings, and even reinstalling the YouTube application if needed. No matter the source of your problem, you’ll find the fix you need here.

    Identifying the Problem

    YouTube’s offline feature, while convenient, can sometimes encounter issues that prevent users from accessing downloaded videos. These problems can stem from various sources, ranging from simple download errors to more complex account-related issues. Understanding these potential problems is crucial for effective troubleshooting.

    Common Downloading Issues

    YouTube’s offline download process relies on several factors. Issues during the download phase can manifest in various ways. Problems include insufficient storage space on your PC, network connectivity problems, or even temporary glitches in YouTube’s servers.

    So, you’re having trouble watching YouTube videos offline on your PC? Don’t worry, it’s a common issue! While you’re troubleshooting that, did you hear about the awesome news? Lykke Li is hitting the road this fall! Check out lykke li announces fall tour for dates and locations. Hopefully, once you’ve got YouTube working smoothly again, you’ll have some great music to listen to during your offline viewing sessions.

    Just remember to keep those caching settings optimal for the best offline viewing experience.

    • Insufficient storage space on your PC: A common reason for download failure is a lack of free space on your hard drive. YouTube requires sufficient storage to complete the download. If you have insufficient storage, the download will either fail or become incomplete.
    • Network connectivity problems: Interruptions in your internet connection during the download process can lead to incomplete downloads. Poor network speed can also slow the download to an unusable rate.
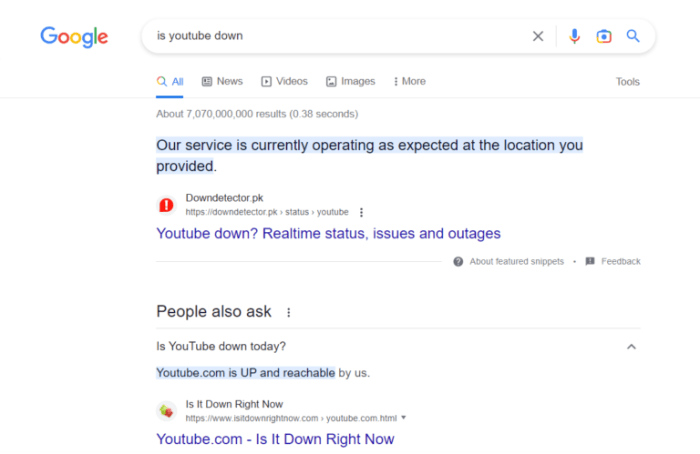
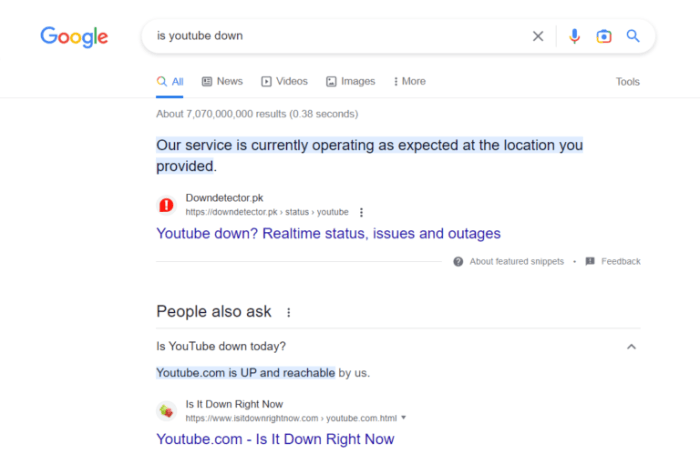
    • Temporary YouTube server issues: Occasionally, YouTube’s servers may experience temporary outages or glitches. This can cause download problems, even with a stable internet connection.
    • Corrupted download files: If the download process is interrupted or corrupted, the downloaded video file might become unusable. This can happen due to sudden power outages, network fluctuations, or issues with the file system itself.

    Common Playback Issues

    Even if a video downloads successfully, playback issues can arise. These are often linked to the downloaded file’s integrity or your PC’s settings.

    • Corrupted video files: If the download is corrupted, the video may not play at all or may display errors. This issue can stem from various causes, including network problems, system conflicts, or software glitches.
    • Incorrect playback settings: In some cases, the playback settings on your PC might not be compatible with the video format. Issues with codecs or video/audio drivers can also lead to problems.
    • Incompatible video format: YouTube downloads videos in various formats. If your PC’s media player cannot handle the specific format of the downloaded video, playback will fail.
    • Insufficient PC resources: If your computer does not have enough processing power, RAM, or GPU resources, playback might be jerky or even freeze.

    Common Account Issues

    Account-related problems can sometimes affect the ability to access offline videos.

    • Incorrect account credentials: Using the wrong account credentials can lead to problems accessing downloaded content. Ensuring the correct login details are used is crucial for smooth playback.
    • Account suspension: If your YouTube account is suspended, you will likely be unable to access any downloaded videos.
    • YouTube subscription issues: There are no known problems that stem from a user’s YouTube subscription affecting their access to downloaded videos. Access is granted to all users who have downloaded the content, regardless of their subscription status.

    Troubleshooting Table

    Problem Type Potential Causes
    Downloading Issues Insufficient storage space, network connectivity problems, temporary YouTube server issues, corrupted download files
    Playback Issues Corrupted video files, incorrect playback settings, incompatible video format, insufficient PC resources
    Account Issues Incorrect account credentials, account suspension

    Troubleshooting Playback Issues

    Offline video playback issues can be frustrating, but they’re often resolvable. This section will guide you through common problems and their solutions, ensuring you can enjoy your downloaded videos without interruption. Understanding these steps is crucial for smooth and uninterrupted offline viewing experiences.

    Checking Video File Integrity

    Ensuring the video file’s integrity is paramount to successful playback. A corrupted or damaged file can lead to various playback problems. The first step is to verify the file’s structure and content.

    To check the file’s integrity, you need to verify its size and structure against the original downloaded file. Differences in file size or discrepancies in file structure can indicate potential corruption. Using tools designed for file integrity checks is highly recommended.

    Trying to fix YouTube offline issues on your PC? Sometimes, a simple cache refresh is all it takes. However, if you’re still having problems, check out this amazing new song by Cocteau Twins and Elizabeth Fraser joining forces with Oneohtrix Point Never here. It might be the perfect distraction while you troubleshoot the YouTube offline issue further.

    Just remember to clear your browser’s cache and cookies after you’re done listening!

    Ensuring the Video File Isn’t Corrupted

    Corrupted video files are a frequent source of playback problems. Several factors can lead to corruption, including network issues during download, insufficient storage space, or issues with the device’s storage. Recognizing the symptoms of a corrupted file is crucial for effective troubleshooting.

    Signs of corruption often manifest as unexpected playback errors, freezing, or skipping during playback. These errors can range from simple buffering issues to complete failure to load the video. If you encounter such issues, it’s vital to attempt the integrity check procedures Artikeld in the previous section. If the file is indeed corrupted, re-downloading the video is the recommended course of action.

    Troubleshooting Playback Issues: A Practical Guide

    Identifying the root cause of playback issues is essential for effective troubleshooting. A systematic approach, including checking file integrity and ensuring the file’s absence of corruption, can help isolate the problem. The table below summarizes potential playback issues and corresponding solutions.

    Issue Possible Fix
    Video not playing Verify the video file exists and is not corrupted. Check if the correct file is selected and if the file path is correct. Check for any related errors on your device or operating system. If the problem persists, re-download the video.
    Buffering issues Ensure a stable internet connection. Try a different internet connection. Check for any background processes or applications consuming excessive bandwidth. Check your device’s storage space and free up memory.
    Video is corrupted Verify file integrity. If the file is corrupted, re-download the video. If re-downloading isn’t possible, contact YouTube support for assistance.

    Checking System Requirements and Settings

    Fix YouTube Offline Problem on PC

    YouTube’s offline feature relies on your PC meeting specific criteria. Proper setup and compatibility are essential for seamless downloading and playback. Understanding these requirements helps ensure a smooth experience.

    Verifying PC Compatibility

    YouTube’s offline functionality isn’t universally supported across all operating systems and browsers. To ensure compatibility, you need to check if your current setup aligns with the necessary standards. This involves confirming the version of your operating system and web browser.

    Figuring out YouTube offline issues on your PC can be a real pain, but sometimes the solution lies in unexpected places. It’s like when a seemingly unrelated concept, like the blank realm falling down the stairs in this fascinating piece , can offer a fresh perspective. A deep dive into cache files or browser settings might be the key to fixing those pesky offline problems on YouTube after all.

    System Storage Space

    Sufficient storage space is crucial for downloading videos. A low storage capacity can lead to incomplete downloads or failure to save videos. It’s important to check the available space on your hard drive before initiating any downloads. Before downloading, assess the size of the video and compare it to your available storage space. Insufficient space can lead to download errors or interruption, resulting in a partial or incomplete download.

    Software Component Verification

    Correct installation and functioning of essential software components are vital for YouTube’s offline feature to work properly. Issues with the installation or corrupted files can hinder the functionality of the feature. Check for any updates or errors in the installed components. Ensuring the proper installation and configuration of the necessary software is critical. If any errors or issues are detected, resolve them immediately to avoid conflicts.

    Potential Software Conflicts, Fix YouTube Offline Problem on PC

    Several software programs can potentially conflict with YouTube’s offline feature, hindering its smooth operation. These conflicts might manifest as download errors, playback issues, or incompatibility problems. Antivirus software, browser extensions, or other background processes can sometimes interfere with the download or playback. Be aware of any potential conflicts and adjust the settings accordingly.

    Summary of System Requirements

    Requirement Details
    Operating System Supported operating systems are generally the most recent versions of Windows, macOS, and Chrome OS. Check the YouTube Help Center for the latest compatible versions.
    Browser Google Chrome is often the recommended browser for optimal performance. Other browsers might have limitations or require specific configurations.
    Storage Space Sufficient storage space is essential for downloading videos. Ensure there is enough free space on your hard drive to accommodate the video size and potential future downloads.

    Clearing Cache and Cookies

    Fix YouTube Offline Problem on PC

    Clearing your browser’s cache and cookies can often resolve persistent YouTube playback issues. These files, while helpful for faster loading, can sometimes become corrupted or outdated, leading to glitches. A simple clearing process can refresh the connection between your browser and YouTube’s servers, potentially fixing issues like buffering, playback errors, or incorrect video display.Outdated or corrupted cached data can sometimes interfere with the smooth functioning of YouTube.

    By removing this data, you effectively reset the connection, allowing your browser to download the necessary resources directly from YouTube’s servers. This fresh start can resolve a range of issues that might stem from outdated or incompatible cached content.

    Significance of Clearing Browser Cache and Cookies

    The browser cache stores temporary files and data from websites you visit, including YouTube. This stored data speeds up subsequent visits by avoiding repeated downloads. However, outdated or corrupted cached files can lead to incorrect display, malfunctions, and issues like playback errors. Clearing the cache ensures that your browser fetches the most up-to-date versions of these files from YouTube’s servers.

    Similarly, cookies store user preferences and session data. While useful for personalized experiences, outdated or corrupted cookies can disrupt your interactions with YouTube. Clearing cookies refreshes your session data, enabling a fresh start and resolving potential conflicts.

    Clearing Cache and Cookies for Specific Browsers

    This section provides step-by-step instructions for clearing cache and cookies in different web browsers. Following these procedures ensures you remove unnecessary data without causing further issues.

    | Browser | Clearing Steps ||—|—|| Chrome | 1. Open Chrome. 2. Click on the three vertical dots (More tools) in the top right corner. 3. Select “More tools” > “Clear browsing data.” 4. In the “Clear browsing data” window, check the boxes for “Cached images and files” and “Cookies and other site data.” 5. Select a time range (e.g., “Last hour,” “Last 24 hours,” “All time”). 6. Click “Clear data.” || Firefox | 1. Open Firefox. 2. Click on the three horizontal lines (Menu) in the top right corner. 3. Select “Options.” 4. Click on “Privacy & Security.” 5. Under “Cookies and Site Data,” click “Clear Data.” 6. Check the boxes for “Cookies and Site Data” and “Cached Web Content.” 7. Select a time range (e.g., “Last hour,” “Last 24 hours,” “All time”). 8. Click “Clear.” || Edge | 1. Open Edge. 2. Click on the three dots (More actions) in the top right corner. 3. Select “Settings.” 4. In the left-hand menu, select “Privacy, search, and services.” 5. Click “Clear browsing data.” 6. Check the boxes for “Cached data and files” and “Cookies and other site data.” 7. Select a time range (e.g., “Last hour,” “Last 24 hours,” “All time”). 8. Click “Clear now.” |

    Potential Benefits for Other YouTube Issues

    Clearing cache and cookies isn’t limited to YouTube playback issues. It can resolve various problems across different websites, including incorrect display of content, login issues, and unexpected behavior. Clearing these files can often refresh the interaction between your browser and the websites you visit, potentially solving a wider array of problems beyond just YouTube.

    Reinstalling YouTube and Browser

    Sometimes, a fresh start can resolve persistent issues. Reinstalling the YouTube application or your web browser can often resolve problems stemming from corrupted files or outdated software. This approach, while seemingly drastic, can be surprisingly effective in restoring functionality. A clean installation can resolve compatibility issues, fix bugs, and improve performance.

    Reinstalling the YouTube Application

    Before diving into the process, remember to back up any important data you might have saved within the YouTube application. This includes playlists, subscriptions, and saved videos. Consider exporting these items to a local folder or cloud storage service before proceeding. This precaution safeguards against data loss during the reinstallation process.

    • To uninstall the application, follow the steps provided in the previous troubleshooting section, as the process varies depending on the operating system and the application’s installation method.
    • After successfully uninstalling the application, proceed with the reinstallation process using the official YouTube installer or the app store, ensuring you download the most recent version available. This ensures compatibility with the current operating system.

    Reinstalling the Web Browser

    Similar to the YouTube application, reinstalling your web browser can resolve problems caused by corrupted files, outdated software, or conflicting extensions. It’s a crucial step when dealing with consistent YouTube playback issues that might stem from browser incompatibility. Backing up your browser data (bookmarks, saved passwords, etc.) is highly recommended. Various methods exist for backing up your browser data, and specific procedures are available for different browsers.

    • To uninstall the browser, use the standard uninstall process provided by the operating system or the browser itself. Follow the instructions provided within the browser’s settings menu.
    • Proceed with downloading the latest version of the browser from the official website and installing it. Always ensure that the installer you’re using is authentic to prevent malware or other unwanted software.

    Potential Problems During Reinstallation

    Several issues could arise during the reinstallation process. These include compatibility problems with other installed software, insufficient storage space on your device, or corrupted installation files. Verify that your device meets the minimum system requirements for the software being installed. Corrupted installation files could lead to errors or incomplete installations. Furthermore, ensuring that your system has enough storage space for the installation is essential.

    Reinstalling YouTube App – Step-by-Step Guide

    Step Action
    Uninstall Locate the YouTube application in your applications list or the app store. Follow the uninstall procedure for your specific operating system.
    Reinstall Download the latest version of the YouTube application from the official source (website or app store). Run the installer and follow the on-screen instructions to complete the installation.

    Contacting Support

    Troubleshooting YouTube playback issues on your PC can sometimes lead you down a rabbit hole. When all else fails, contacting YouTube support can be a crucial step in resolving your problem. This section Artikels the various methods available for getting assistance and the information to include in your requests.

    Support Channels

    Several channels provide access to YouTube support. Understanding these options and their procedures can help you find the most effective method for your specific issue.

    • Help Center: The YouTube Help Center is a comprehensive resource with articles, FAQs, and troubleshooting guides for a wide range of issues. It’s often the first place to look, as it frequently contains solutions to common problems.
    • Community Forums: YouTube’s community forums offer a platform for users to connect and share solutions to problems. These forums can be a valuable resource, as users often post solutions to problems they’ve encountered and found resolutions for.
    • Support Email: For more complex issues or situations not covered in the Help Center or forums, contacting YouTube support via email might be necessary. This direct channel allows for detailed explanations of your problem.

    Contacting YouTube Support via Different Channels

    This section details the procedures for contacting YouTube support through various channels, along with essential information to provide.

    Channel Details
    Help Center Search for solutions to your issue within the vast collection of articles, FAQs, and tutorials. This resource is often the first step in resolving problems.
    Community Forums If your issue isn’t addressed in the Help Center, the community forums might offer solutions from other users. Clearly and concisely describe your issue, providing as much detail as possible.
    Support Email If you’re still unable to find a solution, direct contact with YouTube support via email might be necessary. Provide a clear and concise description of your issue, including relevant details, such as error messages, specific steps you’ve taken, and system specifications. Include screenshots or recordings if applicable to help illustrate the problem. A concise summary of the issue is essential for prompt and efficient support.

    Information to Include in Support Requests

    Providing clear and accurate information is crucial for effectively communicating your problem to YouTube support. When contacting support, include the following:

    • Detailed Description of the Issue: Clearly describe the problem you’re experiencing with YouTube playback. Be specific about what isn’t working, including any error messages you see.
    • Steps to Reproduce the Issue: Detail the steps required to reproduce the problem, ensuring support staff can accurately replicate the issue.
    • Relevant System Information: Include details about your operating system, browser version, and any other relevant software or hardware information.
    • Screenshots or Recordings: If applicable, provide screenshots or recordings of error messages or the issue occurring to aid support staff in understanding the problem.

    Last Word: Fix YouTube Offline Problem On PC

    This guide to fixing YouTube offline problems on PC provides a robust troubleshooting approach. We’ve covered everything from common download errors to system compatibility checks, offering a comprehensive solution to the various issues users face. By understanding the potential causes, applying the troubleshooting steps, and even exploring the option of reinstalling your browser or YouTube application, you’ll have the knowledge and resources necessary to resolve any offline playback problems.

    Hopefully, this guide has been helpful in resolving your YouTube offline playback woes. Now go enjoy those videos!

  • Calling Restrictions Explained The Number You Have Dialed

    Calling Restrictions Explained The Number You Have Dialed

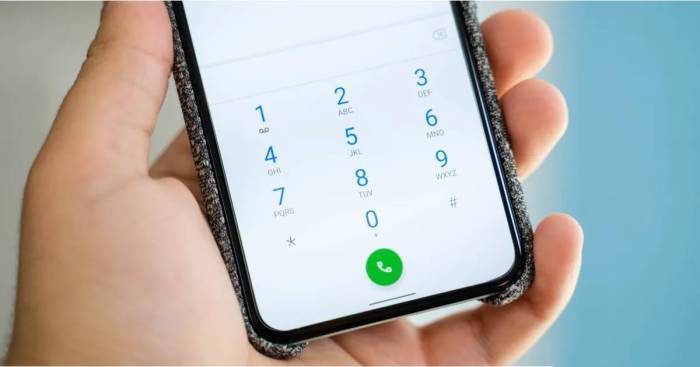
    The Number You Have Dialed Has Calling Restrictions – this frustrating message can pop up for various reasons, from simple geographic limitations to more complex business strategies. This guide delves into the meaning behind this message, exploring its technical aspects, user experience, business implications, and potential solutions. We’ll cover everything from troubleshooting steps to legal considerations, ensuring you’re well-equipped to navigate these common calling restrictions.

    Understanding the message itself is crucial. It’s not just a generic error, but a specific indication that your call is blocked due to certain parameters. Different types of restrictions exist, including location-based limitations, time-based access, or even restrictions against specific numbers. This article unpacks these different scenarios, providing clarity on the “why” behind the message.

    Understanding the Message

    That dreaded message, “The Number You Have Dialed Has Calling Restrictions,” can be a frustrating experience. It signifies that you’re trying to reach a number that has limitations on who can call it. This could be due to various reasons, from simple privacy measures to more complex security protocols. Understanding the nuances of this message can help you better navigate these situations.

    Possible Phrasings and Variations

    The message “The Number You Have Dialed Has Calling Restrictions” isn’t always presented identically. Variations in wording and potential abbreviations are common. For example, similar messages might include: “Restricted Number,” “Calling Restrictions in Effect,” or even abbreviated versions like “Call Blocked.” These subtle differences in phrasing all convey the same core concept: the recipient’s number has limitations on incoming calls.

    Reasons for Calling Restrictions

    Several factors can lead to a phone number having calling restrictions. These restrictions often aim to protect the recipient’s privacy, security, or prevent unwanted calls. Some potential reasons include:

    • Privacy Protection: Individuals might restrict their numbers to prevent spam calls, telemarketing, or unwanted solicitations.
    • Security Measures: In certain situations, like fraudulent activities or security breaches, a phone number might be temporarily or permanently restricted to safeguard against abuse or misuse.
    • Business Practices: Businesses may implement restrictions to control inbound calls, such as limiting calls from specific geographic areas or during particular hours.
    • Technical Issues: Sometimes, technical issues or network problems might temporarily block or restrict calls to a specific number.

    Common Scenarios

    This message is encountered in a variety of everyday situations. It’s important to understand the context to properly interpret the message and its potential implications.

    • Personal Numbers: You might receive this message when trying to call a friend or family member whose number has been restricted for privacy reasons.
    • Business Numbers: Companies often restrict their numbers to manage call volume, prevent spam, or maintain control over inbound communications.
    • Service Numbers: Technical support lines, or customer service numbers might be restricted to ensure calls are routed correctly.
    • Mobile Numbers: Temporary or permanent restrictions might be imposed on mobile numbers for various reasons.

    Interpretations and Potential Solutions

    This table summarizes different scenarios, their interpretations, and possible solutions.

    Scenario Interpretation Potential Solutions
    Trying to call a friend whose number is private. The number has been restricted for privacy reasons. Consider alternative contact methods like email or messaging apps.
    Calling a business and getting the restricted message. The business has implemented restrictions to manage inbound calls. Check the business’s website or social media for contact alternatives or hours.
    Attempting to call a service number and getting a restricted message. The service number is restricted for technical or security reasons. Refer to the service provider’s contact information for alternative support channels.
    Calling a mobile number and getting a restricted message. The mobile number has a temporary or permanent restriction. Try contacting the number owner through other methods or wait for a resolution.

    Technical Aspects

    Implementing calling restrictions on a phone number involves intricate technical processes. These restrictions, crucial for managing calls and maintaining network integrity, are designed to control the flow of calls based on various criteria. From preventing unwanted calls to managing access within specific geographical regions, these mechanisms are essential components of modern telecommunication systems.

    Ugh, that “The Number You Have Dialed Has Calling Restrictions” message again. Seriously, is my phone trying to be a gatekeeper? Speaking of restrictions, have you heard about how Nekocas did the Squidbillies theme song? neko case does the squidbillies theme song It’s pretty wild, and honestly, it’s got me thinking that maybe these calling restrictions are just a tiny bit of a joke.

    Back to the frustration of my phone, though – this needs to stop!

    Methods of Implementing Calling Restrictions

    Various methods are employed to enforce calling restrictions. These techniques range from simple blocking mechanisms to more complex, sophisticated systems capable of dynamically adjusting restrictions. The choice of method often depends on the specific type of restriction and the desired level of control.

    • Geographic Restrictions: These restrictions limit calls originating from or destined for specific geographical areas. This is often achieved through routing tables that direct calls based on the caller’s and recipient’s location. For instance, a business might restrict calls from certain countries to prevent fraud or manage costs. This approach is frequently used in international calling plans and often integrated with databases holding location information for mobile and fixed-line numbers.

    • Number-Specific Restrictions: Blocking specific phone numbers is another common method. This can be used to prevent unwanted calls from spammers, telemarketers, or individuals with malicious intent. The blocking mechanism often involves maintaining a blacklist of restricted numbers. This list is continuously updated to accommodate new spam numbers. The implementation involves sophisticated filtering processes that match incoming and outgoing calls against the blacklist.

    • Time-Based Restrictions: These restrictions control calls based on the time of day or specific time periods. Businesses might restrict calls during off-peak hours to manage staffing or operational costs. This can be implemented using time-of-day-based filters within the network infrastructure. The system will automatically block calls outside of the permitted time frame, similar to how call centers regulate call volume and operator availability.

    • Calling-Party Restrictions: These restrictions are enforced based on the identity of the calling party. This includes restricting calls from particular numbers, users, or groups. The system checks the calling party’s identity against a list of approved or blocked entities. This method is frequently used in enterprise settings to manage internal communication or control access to certain services.

    Enforcement Mechanisms

    Calling restrictions are enforced using various mechanisms, including:

    • Routing Tables: These tables guide calls based on the caller’s and recipient’s location. They determine the appropriate path for a call based on the predetermined restrictions. Errors are handled by routing the call to a designated system, typically an error message or a voicemail.
    • Blacklists and Whitelists: These lists contain numbers to block or allow calls, respectively. The system compares incoming or outgoing calls against these lists. This method is particularly effective for spam or telemarketing calls.
    • Time-of-Day Filters: These filters analyze the time of the call and match it against the configured restrictions. This method allows for scheduled access to specific services or departments.

    Comparative Analysis of Restriction Methods

    Restriction Type Implementation Method Potential Impact
    Geographic Routing tables, location databases Limits calls based on origin/destination locations; reduces international call costs, manages local call volume.
    Number-Specific Blacklists, whitelists Prevents unwanted calls from specific numbers; protects against spam, telemarketing.
    Time-Based Time-of-day filters Manages call volume during peak/off-peak hours; optimizes service delivery.
    Calling-Party Identity verification systems Controls access to specific services or resources based on caller identity; improves security and management.

    User Experience

    The Number You Have Dialed Has Calling Restrictions: Fixes

    Receiving a “The Number You Have Dialed Has Calling Restrictions” message can be a frustrating experience for users. This message signifies a blocked or restricted call, often leaving the user wondering why they cannot reach the intended recipient. Understanding the user’s perspective is crucial for designing a system that minimizes confusion and maintains user trust.

    User Perspective on Receiving the Message

    Users encountering this message typically experience a sense of bewilderment and often feel a loss of control. They might question the reason behind the restriction, particularly if they have a legitimate need to contact the number. This uncertainty can lead to a feeling of inconvenience or even annoyance. It’s important to consider the potential impact on the user’s overall experience and satisfaction.

    Common User Frustrations

    Users often express frustration when the message lacks specific information about the restriction. A general message without any context or explanation can lead to wasted time and effort. For example, a user trying to reach a friend might receive this message without any information on why the call is blocked, forcing them to contact the friend through another means.

    Another frustration is the lack of an option for alternative contact methods. A user might be left with no way to resolve the issue or find a different means of communication. Furthermore, the user may feel like their communication needs are not being met, or that the system is not designed to address their specific situation.

    Common User Reactions

    Users typically react in several ways. Some might try calling again, assuming the problem is temporary. Others might seek alternative contact methods, such as sending a text message or an email. A significant portion of users might become frustrated and abandon the call attempt altogether. Some might feel annoyed or even angry at the lack of clarity or options provided.

    These reactions underscore the importance of providing clear and helpful information to the user.

    Improving User Experience

    To improve the user experience, the message should provide more context. Including a brief explanation of the reason for the restriction (e.g., “The number you dialed has been temporarily unavailable due to high call volume”) can help the user understand the situation. Furthermore, offering alternative contact methods (e.g., a link to the recipient’s website or social media profile) can help users find other ways to communicate.

    Providing a clear and concise explanation of the issue can prevent unnecessary frustration and increase user satisfaction.

    User Scenarios and Reactions

    User Scenario Message Provided User Reaction Improved Message Example
    User attempts to call a friend, receives the message. No further information is provided. The Number You Have Dialed Has Calling Restrictions Frustration, attempts multiple calls, abandons the call. The Number You Have Dialed Has Calling Restrictions. Please try again later, or contact [friend’s email address] for alternative communication.
    User calls a customer service number, receives the message. No alternative contact is suggested. The Number You Have Dialed Has Calling Restrictions Frustration, abandonment of call, searching for another support channel. The Number You Have Dialed Has Calling Restrictions. Please try again later. For immediate assistance, please visit [company website] or call [alternative number].
    User tries to call a business during peak hours, receives the message. No mention of peak hours. The Number You Have Dialed Has Calling Restrictions Frustration, annoyance, feeling of inefficiency. The Number You Have Dialed Has Calling Restrictions. Due to high call volume during peak hours, please try again later.

    Business Implications

    Phone numbers with calling restrictions, while often a necessary security measure, can significantly impact businesses. Understanding the potential ramifications is crucial for proactive risk management. A thorough assessment of these implications allows businesses to anticipate challenges and strategize appropriate responses.Businesses reliant on inbound calls, such as customer service centers, appointment scheduling, or sales, face particular difficulties. Restricted numbers can disrupt vital operations, leading to missed opportunities and potential revenue loss.

    It’s important to recognize that such restrictions can stem from a variety of causes and necessitate tailored solutions.

    Causes of Calling Restrictions

    Calling restrictions on business numbers can arise from various sources. Malicious activity, such as attempts to use the number for fraudulent purposes, is a common cause. These restrictions can also be implemented by telecommunication providers in response to detected spam, robocalls, or other unwanted activity. Furthermore, changes in a business’s reputation or history of misuse can result in such restrictions.

    This can be due to past violations of terms of service or patterns of inappropriate use.

    Solutions for Restricted Numbers

    Addressing calling restrictions requires a multifaceted approach. Businesses should first investigate the reason for the restrictions. This may involve contacting the telecommunications provider to understand the specific violation or misuse that triggered the restriction. Next, implement strategies to prevent future issues, such as robust call filtering systems and enhanced security protocols. Implementing these measures can prevent future restrictions.

    Finally, businesses must consider alternative communication methods to mitigate disruption during the restriction period. This could involve utilizing alternative phone numbers, email, or online messaging platforms.

    Potential Problems for Businesses with Restricted Numbers

    Businesses with restricted numbers encounter various challenges. These include missed customer calls, decreased sales, and negative impacts on customer service reputation. Furthermore, restricted numbers can result in lost opportunities and a potential decline in brand image. Reduced customer engagement and difficulty in reaching key stakeholders are also important considerations.

    Impact on Different Business Types

    Business Type Impact of Calling Restrictions
    Customer Service Centers Significant disruption in operations, missed customer calls, potential loss of revenue, damaged customer satisfaction.
    Appointment Scheduling Services Inability to schedule appointments, missed opportunities, potential loss of revenue, negative impact on customer experience.
    Sales Teams Inability to reach potential clients, missed sales opportunities, potential loss of revenue, negative impact on sales targets.
    E-commerce Businesses Difficulty in receiving customer support calls, missed orders, potential negative impact on customer satisfaction, delayed resolution of issues.
    Healthcare Providers Delayed patient communication, missed appointments, potential patient safety concerns, negative impact on patient satisfaction.

    Troubleshooting and Solutions

    Navigating the frustrating “The Number You Have Dialed Has Calling Restrictions” message can feel like a maze. This section provides a clear roadmap for users to troubleshoot and resolve these restrictions, offering a step-by-step guide and possible solutions. Understanding the common causes of these restrictions is also crucial for effective problem-solving.This guide details common issues and their solutions, equipping users with the tools to confidently manage their calling needs.

    It’s important to remember that the specific solution may vary based on the provider or service.

    Troubleshooting Steps

    The following steps provide a systematic approach to troubleshooting the “Calling Restrictions” message. Careful consideration of each step will significantly increase the chances of resolving the issue quickly and efficiently.

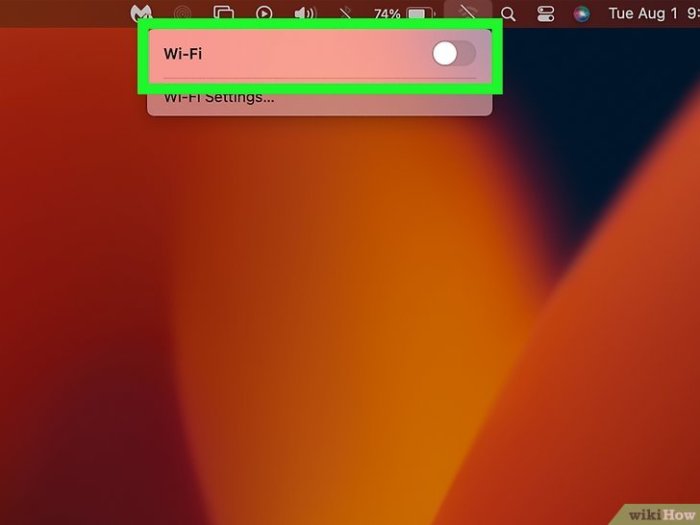
    1. Verify Network Connectivity: Ensure your device has a stable internet connection. Check for any network interruptions or outages in your area. If you’re using Wi-Fi, try switching to a different network or restarting your router. If you’re on cellular data, ensure your data plan is active and your device has sufficient mobile data. Network problems are a frequent cause of these issues.

    2. Check Account Status: Review your account balance and any potential temporary or permanent account restrictions imposed by the service provider. Verify that there are no outstanding payments or issues with your account. Sometimes, temporary service suspensions are put in place for maintenance or other reasons.
    3. Review Blocked Numbers/Contacts: Ensure the number you’re trying to call isn’t blocked on your device or within your account settings. If you’ve blocked the number, you’ll need to remove the block. This is important for preventing unwanted calls and also for resolving any unexpected restrictions on your calls.
    4. Restart Your Device: A simple restart can resolve temporary software glitches or conflicts that might be preventing the call from connecting. A restart can also resolve unexpected conflicts that may have occurred due to the use of the device.
    5. Contact the Service Provider: If the above steps don’t resolve the issue, contact your service provider’s support team. They can provide specific guidance tailored to your account and the nature of the restriction.

    Possible Solutions

    Addressing the “Calling Restrictions” message requires a multi-faceted approach. Solutions may vary depending on the underlying cause.

    • Network Connectivity Issues: Ensure a stable internet connection. Try switching to a different Wi-Fi network, restarting your router, or checking for network outages.
    • Account Restrictions: Verify account balance and any imposed restrictions by the service provider. Potential issues include outstanding payments or account suspensions.
    • Blocked Numbers: Check if the number you’re trying to call is blocked on your device or within your account settings. Remove the block if necessary.
    • Software Glitches: A simple device restart might resolve temporary software conflicts preventing the call from connecting.
    • Service Provider Issues: Contact your service provider’s support team for specific account-related guidance or technical assistance.

    Common Problems Leading to Calling Restrictions

    Several factors can lead to calling restrictions. Identifying these common causes is crucial for efficient troubleshooting.

    • Insufficient Funds: Insufficient funds in your account can trigger calling restrictions, especially for pre-paid or pay-as-you-go services.
    • Blocked Numbers: You might have inadvertently blocked the number you’re trying to call, preventing the call from connecting.
    • Network Outages: Temporary or permanent network outages in your area can lead to service interruptions, including calling restrictions.
    • Account Suspensions: Service providers may temporarily suspend accounts for various reasons, such as outstanding payments or security breaches. This may also result in calling restrictions.
    • Technical Glitches: Software or hardware problems in your device or the service provider’s network can also cause the “Calling Restrictions” message.

    Troubleshooting Summary Table

    This table summarizes the troubleshooting steps and potential solutions for the “Calling Restrictions” message.

    Troubleshooting Step Potential Solution
    Verify Network Connectivity Check internet connection, switch Wi-Fi networks, restart router/modem
    Check Account Status Review account balance, look for restrictions, resolve payment issues
    Review Blocked Numbers/Contacts Ensure the number isn’t blocked, remove block if necessary
    Restart Device Restart phone or device to resolve temporary software conflicts
    Contact Service Provider Get account-specific guidance and technical assistance

    Resources

    Here are some helpful resources to further assist you in resolving the “Calling Restrictions” message.

    That dreaded message, “The Number You Have Dialed Has Calling Restrictions,” can be frustrating. Sometimes, it’s just a simple block, but other times, it might be a more complex issue. Understanding the different reasons behind this message is a bit like finding the equation of a line; Find the Equation of a Line involves several variables, and figuring out the specific reason for the restriction is key to getting back in touch.

    Ultimately, resolving the “calling restrictions” situation requires a bit of detective work, just like in any good mystery!

    • Service Provider Website: The service provider’s website often contains FAQs and troubleshooting guides. These guides provide detailed information to resolve the issue.
    • Support Forums: Search online forums for similar issues and see if others have found solutions. This provides a great resource for resolving the issue.
    • Social Media Support: Look for support channels on social media platforms for immediate help.

    Legal and Regulatory Considerations

    Implementing calling restrictions, while offering numerous benefits, necessitates careful consideration of legal and regulatory frameworks. These restrictions, whether designed to prevent unwanted calls or manage business communications, must comply with existing laws and regulations to avoid potential penalties and maintain a robust legal posture. Failure to comply can lead to significant financial and reputational damage.

    Legal Implications of Calling Restrictions

    Calling restrictions, often implemented to protect consumers or manage business operations, must align with consumer protection laws, telecommunications regulations, and privacy standards. These regulations vary significantly across jurisdictions. For instance, regulations regarding robocalls, spam, and unwanted marketing communications differ substantially between the US, EU, and other regions.

    Ugh, that “The Number You Have Dialed Has Calling Restrictions” message again. Seriously, is it always some obscure number? Maybe I should try watching some hip-hop battles instead. Check out this epic freestyle session featuring aap rocky meets aesop rock, watch aap rocky meets aesop rock. It’s way more engaging than waiting for a dial-up connection to actually work! At least then I can actually listen to something other than static.

    Still, I’m not sure if the calling restrictions will ever be resolved.

    Regulations and Restrictions Alignment, The Number You Have Dialed Has Calling Restrictions

    Businesses implementing calling restrictions must ensure their practices conform to applicable regulations. This includes understanding the specific laws governing telemarketing, unsolicited calls, and the handling of customer data. Failure to comply with these regulations can result in substantial penalties, including fines and legal action. For example, a business that uses automated systems to block calls from specific numbers without adhering to the specific regulations regarding such systems might face legal challenges.

    Legal Considerations for Businesses

    Businesses implementing calling restrictions must meticulously document their policies and procedures. This includes detailing the reasons for the restrictions, the criteria used to determine permissible calls, and the mechanisms for handling exceptions. Transparent and well-documented procedures are crucial for demonstrating compliance and mitigating potential legal challenges. Thorough documentation can be a crucial defense mechanism in case of disputes.

    Consequences of Violating Calling Restriction Regulations

    Violating calling restriction regulations can have serious consequences, including hefty fines, legal action, and damage to the business’s reputation. For instance, a company failing to adhere to anti-spam laws regarding marketing calls could face significant penalties and negative publicity. This could lead to loss of customers and reputational harm, impacting the bottom line and long-term sustainability.

    Table of Legal Aspects

    Aspect Description Example
    Compliance Adhering to relevant laws and regulations. A telemarketing company must comply with the Telephone Consumer Protection Act (TCPA) in the US.
    Documentation Maintaining detailed records of restrictions and exceptions. A business implementing a caller ID-based restriction system should keep logs of blocked calls and the criteria used for blocking.
    Transparency Clearly communicating restrictions to customers. A company should clearly state its calling restrictions in its terms and conditions or customer service policies.
    Privacy Protecting customer data and complying with privacy laws. A business must ensure that the data used to implement calling restrictions is collected, used, and protected in accordance with applicable privacy regulations, such as GDPR.
    Enforcement Awareness of potential legal actions and remedies. Understanding the legal recourse available to customers who feel their rights have been violated by the calling restrictions.

    Future Trends

    The landscape of calling restrictions is constantly evolving, driven by technological advancements and shifting regulatory priorities. Understanding these future trends is crucial for businesses and individuals alike to adapt and navigate the changing landscape of communication. Predicting the precise trajectory of these developments is challenging, but analyzing current trends and potential impacts provides valuable insight.

    Potential Developments in Handling Calling Restrictions

    Future developments in handling calling restrictions will likely focus on enhanced user control and personalized experiences. Expect to see more sophisticated algorithms for identifying and classifying potentially harmful calls, enabling users to customize their blocking parameters based on their specific needs and preferences. This might involve integrating real-time risk assessment models, learning from user interactions to improve the accuracy of call classification.

    AI-powered systems could also proactively block calls based on predictive risk factors, reducing the chance of unwanted or potentially dangerous interactions.

    Evolution of Calling Restrictions Over Time

    Calling restrictions have undergone significant transformations. Initially, they were primarily focused on blocking unwanted calls from specific numbers. Over time, the methods and reasons for implementing restrictions have broadened, incorporating factors like call volume, call duration, and the potential for fraud or harassment. The inclusion of caller ID and other identifying information has also played a key role in the evolution of these restrictions.

    This evolution reflects a growing need to address the complexities of modern communication and maintain user safety.

    Impact of Future Technological Changes

    The impact of new technologies on calling restrictions is multifaceted. The rise of VoIP and other communication platforms necessitates adaptations in restriction mechanisms. New technologies will need to account for the increasing anonymity and obfuscation tactics used by malicious actors. Furthermore, the growing use of automated systems for generating and sending calls will require more robust screening procedures.

    This requires careful consideration of how new technologies will affect both legitimate communication and the ability to identify and prevent harmful calls.

    Impact of New Regulations

    New regulations, such as those related to data privacy and security, will have a significant impact on how calling restrictions are handled. Regulations requiring transparency in data handling and user consent for specific call types will reshape the way providers handle call restrictions. Compliance with these regulations will be crucial for maintaining user trust and avoiding legal challenges.

    Influence on Handling Calling Restrictions

    These trends will significantly influence the handling of calling restrictions. The shift towards user-centric control will demand more intuitive interfaces and options for users to manage their calling restrictions. Enhanced AI-powered tools will automate many of the processes, ensuring greater efficiency and accuracy. The integration of these factors will lead to a more proactive and personalized approach to call management, prioritizing user safety and satisfaction.

    Conclusion: The Number You Have Dialed Has Calling Restrictions

    The Number You Have Dialed Has Calling Restrictions

    In conclusion, The Number You Have Dialed Has Calling Restrictions isn’t a mystery. It stems from a complex interplay of technical processes, user needs, business objectives, and legal considerations. This article has hopefully shed light on the diverse facets of calling restrictions, offering insights into potential causes, practical solutions, and the potential future trends in this area. Understanding these nuances empowers users and businesses to navigate these restrictions effectively.

  • Fix Sound Delay on TV A Comprehensive Guide

    Fix Sound Delay on TV A Comprehensive Guide

    Fix Sound Delay on TV: Troubleshooting a frustrating audio issue can be tricky, but this guide will help you diagnose and resolve sound lag, echo, or phasing on your TV. We’ll cover everything from checking connections to updating software, and even examining external audio devices.

    Understanding the root cause of the sound delay is crucial. Outdated hardware, faulty connections, or even software glitches can all contribute to this problem. This detailed analysis will walk you through potential causes, and offer actionable troubleshooting steps to restore clear, synchronized audio to your TV experience.

    Identifying the Problem

    Sound delay on a television, a frustrating experience, often arises from a mismatch between the audio and video streams. It’s a common issue that can stem from various hardware, software, and connection problems. Understanding the underlying causes is crucial for effective troubleshooting and resolution.Sound delay, in essence, is the difference in time between when a visual event appears on screen and when the corresponding audio plays.

    This discrepancy can manifest in several ways, from a subtle lag to noticeable echoes or phasing. Proper synchronization is vital for an immersive viewing experience.

    Sound Delay Concepts

    Sound delay on a TV can manifest in different forms, each with distinct characteristics. Lag is a common issue where the audio trails behind the video, creating a noticeable gap in synchronization. Echo, on the other hand, occurs when the audio signal is reflected, producing repeated or delayed sound effects. Phasing involves variations in the audio’s volume and clarity over time, leading to an uneven listening experience.

    Causes of Sound Delay

    Several factors can contribute to sound delay on a television. Outdated hardware components, like the audio decoder or the video card, can struggle to process the audio and video streams at the same rate. Faulty connections, whether they are HDMI, component, or composite cables, can introduce signal degradation, causing timing issues. Software glitches in the TV’s operating system or in connected devices, such as a Blu-ray player or streaming box, can also disrupt the synchronization.

    Common Symptoms

    Recognizing the symptoms of sound delay is the first step toward diagnosing the problem. A noticeable gap between the video and audio is a telltale sign. Other symptoms include distorted audio, repeating or echoing sounds, or a noticeable delay that varies in length depending on the content being played.

    Troubleshooting Table

    Scenario Potential Causes
    Sound lags significantly behind the video Outdated hardware, poor signal quality, faulty connections, or a slow processing rate on the device. For example, an older TV might struggle to keep up with the audio stream from a high-resolution video.
    Echoing sound Faulty audio cables, speakers, or audio settings on the TV. Improper speaker configuration can lead to echo. For instance, if the TV speakers are set to a wider sound stage, reflections from the walls might be interpreted as an echo.
    Sound cutting in and out, or phasing Software glitches, signal interference from other devices, or weak Wi-Fi connections for streaming. For example, a sudden drop in Wi-Fi signal while streaming a movie can lead to audio disruptions.

    Troubleshooting Techniques

    Unveiling the source of sound delay on your TV requires a systematic approach. This section delves into various methods for identifying and resolving audio synchronization issues, guiding you through practical steps and considerations. A thorough diagnosis is key to a swift and effective solution.

    Checking Connections

    Proper connections are fundamental to a seamless audio experience. Loose or damaged connections can introduce delays or distortions. Carefully inspect all cables connecting the TV to the source device (e.g., Blu-ray player, streaming box). Ensure that all cables are securely plugged into both the TV and the source device.

    • Inspect the HDMI cable connections. Check for any signs of damage, such as fraying or broken wires. A damaged cable can cause signal degradation, leading to sound delay.
    • Verify the optical audio cable (if used) for proper insertion. Ensure the cable is firmly connected to both the TV and the source device. Loose connections can lead to intermittent audio issues, including delay.
    • Examine the power cables of both the TV and the source device. A malfunctioning power supply can also impact audio signals. Check for any loose connections or damaged wiring.

    Verifying Audio Settings

    The TV’s audio settings can significantly influence the sound quality and synchronization. Incorrect settings can contribute to delays or other audio issues. Experiment with different options to identify the best configuration for optimal sound.

    • Adjust the audio delay settings on your TV, if available. Some TVs allow for a small adjustment in the audio delay, which can correct minor synchronization issues. This option is usually in the advanced audio settings menu.
    • Ensure that the audio output mode is compatible with the source device. Incompatibility can sometimes cause issues. Try changing the output mode to match the device’s output type (e.g., PCM, Dolby Digital).
    • Check the audio format settings on the source device. Some devices support different audio formats. Confirm that the format being outputted by the source device matches the TV’s input capabilities.

    Updating Firmware

    Outdated firmware on your TV can sometimes lead to compatibility issues and glitches, including audio synchronization problems. Regular firmware updates often include bug fixes and performance improvements.

    • Consult your TV’s user manual or the manufacturer’s website to learn how to update the TV’s firmware. This usually involves downloading a firmware update file and following a set of instructions to install it.
    • Ensure you have a stable internet connection during the update process. An unstable connection might interrupt the update, leading to incomplete installation and further problems.
    • Always back up any important data before updating the firmware, just in case. This precaution safeguards against potential data loss during the update process.

    Using Audio Diagnostic Tools

    Dedicated audio diagnostic tools can be helpful in identifying the source of the problem. These tools provide detailed information about the audio signal path, pinpointing potential sources of delay.

    • Some audio diagnostic tools are available for download. These tools are usually available as apps or software, and they can provide detailed information on the audio signal path.
    • These tools can analyze the audio signal, helping to identify any issues with the signal quality, timing, or synchronization.

    Troubleshooting Step Comparison

    Troubleshooting Step Description Effectiveness
    Check connections Ensure all cables are securely connected. High
    Verify audio settings Adjust audio settings to optimize sound. Medium
    Update firmware Update TV’s firmware for possible bug fixes. Medium

    Software Solutions

    Often, sound delay on your TV isn’t a hardware problem, but a software configuration issue. Adjusting audio settings and updating the TV’s software can resolve many delay problems. Understanding these options is crucial for optimizing your viewing experience.

    Audio Setting Adjustments

    Adjusting audio settings on your TV can significantly impact sound delay. Different audio modes process sound differently, leading to variations in perceived delay. Experimenting with these options can lead to a more satisfactory viewing experience.

    Trying to fix sound delay on your TV? Sometimes, the problem isn’t just with the TV itself. It might be a hidden conflict between your audio settings and something like a complex audio-video configuration, especially if you’re using a sophisticated setup like star tiger star ariel. Double-checking your cables and connections is crucial, and if that doesn’t work, consider adjusting the audio sync settings on your device.

    Hopefully, one of these simple steps will resolve the sound delay issue on your TV!

    • Adjusting Audio Settings: Navigating the TV’s menu to find audio settings is a critical first step. This often involves accessing the “Sound” or “Audio” section within the TV’s settings menu. Look for options like “Audio Mode,” “Sound Enhancement,” or similar labels. These options can impact the processing of sound, leading to variations in the perceived delay.
    • Comparing Audio Modes: Different audio modes, like Dolby Digital, Surround Sound, and others, process audio differently. Dolby Digital, for instance, often enhances the audio experience, potentially adding or removing delay depending on the content. Surround Sound, designed to create a more immersive soundstage, might also impact delay in a similar fashion. Refer to your TV’s manual for specific details on how different audio modes may affect the audio delay.

      Experimentation is key to determining the mode that provides the least delay for your content.

    TV Software Updates

    Keeping your TV’s software up-to-date is essential for optimal performance, including resolving sound delay issues. Manufacturers often release updates that include bug fixes and performance improvements.

    • Checking for Updates: Access the TV’s settings menu and locate the “System,” “Software,” or “About” section. Within this area, you’ll find a section for checking for updates. Regularly checking for updates can help prevent potential issues.
    • Performing a Software Update: Follow the on-screen instructions for updating your TV’s software. This usually involves downloading the update, restarting the TV, and confirming the installation. Carefully follow the prompts provided by your TV to avoid errors during the update process.

    Audio Settings and Their Effects

    Understanding how various audio settings affect sound delay can help in choosing the best configuration.

    Audio Setting Effect on Sound Delay
    Dolby Digital May enhance or reduce delay depending on the content. The processing of Dolby Digital may sometimes introduce or mitigate delay depending on the specifics of the audio track.
    Surround Sound May increase delay or improve sound quality depending on the content. The complexity of surround sound processing can lead to variations in delay depending on the source material.
    Stereo Typically provides the least amount of delay, as it does not involve significant audio processing.
    Auto The TV automatically selects the best audio mode based on the input signal. This might result in different delays depending on the audio content.

    Hardware Considerations

    Fix Sound Delay on TV

    Sound delay on your TV can stem from a variety of hardware issues. Identifying these problems often requires a methodical approach, from checking cables to inspecting internal components. This section will explore potential hardware problems, guide you through troubleshooting steps, and equip you with knowledge to resolve them yourself or determine when professional help is necessary.

    Potential Hardware Problems

    Various hardware components can contribute to sound delay. These range from seemingly simple issues like a loose connection to more complex problems within the TV’s internal circuitry. Understanding these possibilities is crucial to diagnosing the problem accurately.

    Checking Audio Cables

    Audio cables are a common source of sound delay issues. A damaged or poorly connected cable can introduce significant signal degradation. Inspecting these cables is a fundamental troubleshooting step. Ensure the cable connections are secure and free of kinks or breaks. A visual inspection alone may not be enough.

    Use a multimeter to test the cable’s continuity and resistance to ensure the signal is not being interrupted.

    Replacing or Repairing Faulty Cables or Components

    Replacing a faulty audio cable is a relatively straightforward process. Carefully disconnect the old cable and connect the new one, ensuring a secure connection. If the issue lies within the TV’s audio circuitry, replacing or repairing the components is usually beyond the scope of a typical user. In such cases, seeking professional assistance is recommended to prevent further damage.

    Using External Audio Devices

    External audio devices, such as soundbars or external speakers, can introduce delay if not properly configured. Mismatched audio formats or conflicting settings can contribute to the delay. Ensure the external device is compatible with your TV’s audio output and that the connection settings are correct. A proper connection with appropriate audio formats and settings will ensure a smooth, uninterrupted audio experience.

    Identifying and Addressing TV Speaker Issues

    TV speakers can malfunction, causing sound delay or distortion. Test the speakers by playing different audio sources, paying attention to any noticeable delays or inconsistencies. If a specific speaker is failing, it may be necessary to replace it. Some TVs have internal speaker configurations that can be tested and adjusted. Consult the TV’s manual for specific troubleshooting steps.

    Summary of Common Hardware Problems and Potential Solutions

    Hardware Problem Potential Solution
    Faulty audio cable Replace the cable. Verify proper connections.
    Speaker malfunction Test speakers for proper functionality. Replace if necessary.
    Damaged TV audio circuit Consult a qualified technician. Do not attempt to repair yourself.
    External audio device incompatibility Ensure proper configuration and compatibility between the external device and the TV.

    External Device Analysis

    Fix Sound Delay on TV

    External audio devices, such as soundbars and home theater systems, can significantly impact the sound delay experienced on a television. Understanding their potential effects and comparing different systems is crucial for accurate troubleshooting. Proper configuration and connection are key to minimizing delays and ensuring a seamless audio experience.External sound systems often introduce processing steps and signal routing that can add latency, or delay.

    Trying to fix sound delay on my TV? It’s a real pain, but sometimes the solution is surprisingly simple. Speaking of sound, I was just watching a great performance by Modest Mouse on Seth Meyers, specifically their rendition of “Pups to Dust” modest mouse perform pups to dust on seth meyers. Hopefully, this will inspire me to troubleshoot my TV’s audio further, because I need to hear the music properly! I’m going to try adjusting the audio settings again.

    Maybe it’s just a minor configuration issue!

    This delay is often imperceptible with simple devices, but it can become noticeable when combined with other sources of delay or when demanding audio content is played.

    Impact of External Audio Devices, Fix Sound Delay on TV

    External audio devices can introduce various levels of sound delay, depending on their design and implementation. A poorly configured soundbar or home theater system can add noticeable lag, whereas a well-designed and properly connected system might minimize or even eliminate it. This variation stems from the differing signal processing techniques and hardware components used in various systems. The complexity of signal processing within these systems can directly affect the overall delay experienced.

    Comparison of External Sound Systems

    The performance of different external sound systems varies considerably. Some systems are designed with sophisticated signal processing algorithms to minimize delay, while others might not prioritize low latency. The quality of the digital-to-analog conversion (DAC) and the audio amplifier circuits also play a role in the overall audio performance and delay.

    External Device Potential Impact on Sound Delay
    Soundbar May reduce delay if properly connected and configured, but may add delay if the soundbar’s internal processing is not optimized for low latency.
    Home Theater System May introduce delay if not configured correctly or if the system has complex signal processing, but some high-end systems can have low latency.
    AV Receiver AV receivers often have more configurable options for delay compensation, allowing for better control over audio synchronization. The specific model and its configuration significantly impact the delay experienced.
    Wireless Speakers Wireless speakers introduce a variable delay due to the wireless transmission. The signal strength, distance to the transmitter, and interference from other wireless devices can affect the delay. This is a significant concern in a wireless system.

    Testing Sound Delay with Different External Sources

    To isolate the source of the sound delay, it’s essential to test with various external audio sources. This will allow you to identify if the delay is inherent to a particular device or if it’s an issue with the TV-external device connection. A simple test using different music tracks or movie clips will help to pinpoint the problem. Specific instructions for this process are presented in the troubleshooting guide.

    Types of External Audio Devices and Their Impact

    Different external audio devices have varying degrees of impact on sound delay. A simple soundbar might have minimal delay, whereas a complex home theater system with multiple components, such as a receiver, multiple speakers, and a subwoofer, could introduce noticeable delays if not configured correctly.

    Ever frustrated with sound delay on your TV? It’s a common issue, but luckily, there are solutions! While you’re waiting for the perfect fix, check out the exciting news – Africa Hitech have announced a massive tour! africa hitech announce tour promises a fantastic experience, but for now, let’s get back to those pesky sound delays and find a way to enjoy our favorite shows without the lag.

    Hopefully, this will be a temporary fix until I can finally get my TV’s audio working correctly.

    Interference between External Devices and the TV

    Interference between external devices and the TV can manifest as audio delay. Wireless signals, such as those from Wi-Fi routers, Bluetooth devices, or other wireless audio systems, can potentially interfere with the audio signal, leading to distortion or delays. Troubleshooting this interference involves identifying and minimizing the potential sources of wireless interference.

    Advanced Troubleshooting: Fix Sound Delay On TV

    Persistent sound delay on your TV can stem from a variety of complex issues, often requiring advanced techniques to pinpoint the source. This section delves into advanced troubleshooting steps, focusing on network diagnostics, signal interference analysis, and specialized tool usage to effectively resolve the problem.

    Network Diagnostics

    Network-related problems are a frequent culprit in sound delay issues. Identifying these problems involves systematically checking various network components. This includes verifying the stability of your internet connection. Network congestion, particularly during peak hours, can cause delays in audio streaming. Verify the internet speed using online speed tests to confirm adequate bandwidth for your streaming needs.

    Signal Interference Analysis

    Signal interference, often stemming from electronic devices operating near the TV, can cause intermittent or consistent audio delays. Identifying these sources involves systematically evaluating potential sources like microwaves, cordless phones, or other wireless devices. These devices emit electromagnetic waves that might interfere with the TV’s signal, causing audio issues. Experimentally turning off or moving these devices to observe if the problem persists.

    Using Specialized Tools

    Specialized tools, such as network analyzers and signal analyzers, can pinpoint the source of the delay with greater accuracy. These tools can measure signal strength, identify interference patterns, and pinpoint specific frequencies causing the problem. For example, a network analyzer can detect packet loss or latency issues in your network connection.

    Step-by-Step Advanced Troubleshooting Procedure

    1. Verify internet connection stability and bandwidth using online speed tests.
    2. Identify and potentially relocate potential sources of electromagnetic interference, such as microwaves or cordless phones.
    3. Use network analyzers or signal analyzers to pinpoint potential network or signal interference issues.
    4. Check for firmware updates for your TV, streaming devices, and network equipment. Out-of-date firmware can sometimes lead to compatibility issues that cause sound delays.
    5. If the problem persists, contact your internet service provider to troubleshoot network connectivity problems.

    Troubleshooting Techniques Summary

    Advanced Technique Potential Outcome
    Network diagnostics Identify network-related problems, such as packet loss, latency, or congestion.
    Signal interference analysis Identify and address interference issues, such as electromagnetic interference from other devices.
    Specialized tool usage Pinpoint specific frequencies or network problems causing the delay, potentially leading to a more precise solution.

    Final Thoughts

    In conclusion, resolving sound delay on your TV is often a combination of checking connections, adjusting settings, and potentially updating software or hardware. Remember to systematically approach each troubleshooting step, from simple checks to more advanced diagnostics. This comprehensive guide equips you with the knowledge to tackle sound delay issues effectively, ensuring a smooth and enjoyable viewing experience. Hopefully, you’ve found this guide helpful in fixing your TV’s sound delay!

  • Clear the RAM on an iPad or iPhone A Guide

    Clear the RAM on an iPad or iPhone A Guide

    Clear the RAM on an iPad or iPhone: This guide delves into the often-misunderstood world of RAM management on Apple devices. We’ll explore what RAM is, how it affects your iPad or iPhone’s performance, and how to effectively clear it when needed. Understanding these concepts is crucial for maintaining a smooth and responsive mobile experience.

    From identifying signs of RAM issues to troubleshooting common problems, this comprehensive guide covers all the bases. We’ll discuss various methods for clearing RAM, including force restarts and app management, and offer tips for preventing future issues. We’ll also touch on advanced techniques for optimizing RAM usage and when it’s appropriate to seek professional help.

    Understanding iPad/iPhone RAM

    Clear the RAM on an iPad or iPhone

    RAM, or Random Access Memory, is crucial for the smooth operation of your iPad or iPhone. Think of it as the device’s short-term memory. It’s where the operating system and active apps reside while you’re using them. Unlike storage, which holds your files permanently, RAM is temporary and is emptied when the device is powered off or when apps are closed.

    Understanding RAM’s role is key to optimizing your mobile experience.RAM is vital for multitasking and app performance. When you have multiple apps open, the device needs RAM to quickly switch between them. A sufficient amount of RAM ensures smooth transitions and prevents lag or freezing. If RAM is low, the device might struggle to handle multiple apps simultaneously, leading to a less responsive experience.

    RAM vs. Storage

    RAM and storage are distinct components on your iPad or iPhone. Storage holds your files, music, photos, and apps permanently. RAM, on the other hand, is temporary memory used to run the operating system and currently active apps. This means you can save a large video file to your storage, but it will not run in the background unless it is an active app.

    This temporary nature of RAM is what allows your device to switch between different tasks quickly. Storing data on your device’s storage doesn’t impact how much RAM your device has available.

    Clearing the RAM on an iPad or iPhone can sometimes feel like a digital deep breath, especially when things are feeling sluggish. It’s a simple process that can often revitalize your device, but sometimes a little music can help you focus on the task. Think about those quiet nights, the kind where you find yourself lost in the melodies of nights in the dark.

    Ultimately, clearing the RAM is a straightforward way to boost performance and make your device feel snappy again.

    Common Misconceptions about RAM

    A common misconception is that more RAM always equals better performance. While more RAM generally leads to better multitasking, other factors like the processor speed and operating system optimization also play a significant role. The quality of the apps you’re running can also affect performance. A poorly optimized app can consume a lot of RAM, regardless of the device’s total RAM capacity.

    Another misconception is that low RAM directly leads to device failure. RAM is temporary memory and is not stored in a permanent way on the device. A device will not fail if the RAM is low, but a low RAM capacity will limit multitasking.

    RAM Capacity Comparison

    The table below shows the RAM capacity across different iPad and iPhone models. Note that this information reflects current models. Future models may have different RAM capacities.

    Device RAM (GB)
    iPad Air (5th generation) 8
    iPad Pro (11-inch, 2nd generation) 8
    iPad Pro (12.9-inch, 5th generation) 8
    iPhone 14 Pro 6
    iPhone 14 Pro Max 6
    iPhone 14 6

    Identifying RAM Issues: Clear The RAM On An IPad Or IPhone

    RAM, or Random Access Memory, is crucial for your iPad or iPhone’s performance. Just like a busy highway, if RAM is overloaded or fragmented, your device can slow down, crash, or freeze. Understanding the signs of RAM problems can help you troubleshoot and maintain a smooth user experience.Identifying the specific cause of sluggishness or freezing is vital. It’s not always a RAM issue; other factors, like outdated software, background processes, or even a hardware malfunction, can contribute to similar symptoms.

    A methodical approach to diagnosing the problem is essential to ensure accurate troubleshooting.

    Common Signs of RAM Problems

    RAM issues manifest in various ways, often mimicking problems stemming from other sources. Recognizing these patterns can help you isolate the source of the problem. Sluggish performance, app crashes, and freezing are common symptoms.

    Sluggish Performance

    A noticeable slowdown in responsiveness, like delayed app launches, slow scrolling, or unresponsive controls, can suggest RAM limitations. This might not be a direct RAM issue, but rather a symptom of the device struggling to handle tasks. This is a less obvious indicator compared to more drastic symptoms like crashes.

    App Crashes and Freezes

    Frequent app crashes or freezes, particularly during intensive tasks, are strong indicators of RAM pressure. Apps requiring significant resources, such as games or video editing software, might be the first to exhibit these symptoms when RAM is overloaded. Apps that are frequently opened and closed, also may show signs of crashing if RAM is nearing its limit.

    RAM Fragmentation

    RAM fragmentation, where used memory is scattered across the RAM, can lead to performance issues. Imagine a cluttered desk; it’s harder to find and access items. Similarly, a fragmented RAM space makes it more difficult for the system to allocate memory effectively, resulting in sluggish performance.

    RAM Overload

    When the amount of RAM needed by active apps exceeds the available RAM, the device must use virtual memory (swap space). This process can significantly slow down performance. Think of a computer trying to store a large file on a slow external drive; this results in a similar performance impact. Running multiple demanding apps simultaneously can lead to RAM overload, as can prolonged use of memory-intensive features.

    Distinguishing RAM Problems from Other Issues

    It’s crucial to distinguish RAM problems from other potential software or hardware issues. Before attributing the problem to RAM, consider factors like:

    • Outdated or corrupted software: Older or corrupted software can sometimes cause problems that mimic RAM issues.
    • Background processes: Running unnecessary background processes can consume RAM and slow down performance.
    • Hardware malfunctions: Issues with the device’s internal components can lead to erratic behavior.

    Troubleshooting Steps

    This section Artikels steps to check for RAM-related problems.

    1. Restart your iPad or iPhone: A simple restart can often resolve temporary RAM issues caused by software glitches.
    2. Close unnecessary apps: Closing unused apps can free up RAM and improve performance.
    3. Check for software updates: Ensure your operating system and apps are up-to-date. Updates often include bug fixes and performance improvements.
    4. Review background processes: Identify and disable unnecessary background processes to free up RAM.
    5. Monitor RAM usage: Utilize system tools or third-party apps to monitor RAM usage to identify patterns and high-demand processes.

    Methods to Clear iPad/iPhone RAM

    Keeping your iPad or iPhone’s RAM (Random Access Memory) healthy is crucial for smooth performance. Just like your computer, too many programs running simultaneously can lead to sluggishness and occasional crashes. Understanding how to clear RAM can significantly improve your device’s responsiveness.

    Force Restart

    Force restarting your iPad or iPhone is a simple method to refresh RAM and potentially resolve temporary performance issues. It essentially gives the device a sudden reset, clearing out any processes that might be causing problems.

    Clearing the RAM on an iPad or iPhone can sometimes help speed things up, especially if you’re noticing some lag. It’s a simple process, but sometimes a little confusing. Just like navigating the bustling streets of the street of the love of days , there are often hidden pathways and shortcuts to optimize performance. Ultimately, clearing the RAM can be a quick fix for a sluggish device.

    Procedure:

    • Press and hold the power button (located on the top or side of the device) until the power-off slider appears.
    • Slide the power-off slider to turn off the device.
    • After a few seconds, press and hold the power button again until the Apple logo appears.

    This process is generally effective for clearing minor RAM glitches. It is a fast and straightforward approach to restoring responsiveness.

    Hard Reset

    A hard reset is a more drastic measure used when force restarting doesn’t resolve the issue. It completely clears the device’s memory, deleting any unsaved data, and resetting it to its factory state. Hard resets should only be considered when other troubleshooting steps have failed.

    Procedure:

    • Press and hold both the power button and the volume down button simultaneously until the device restarts.
    • The device will display the Apple logo and then restart normally.

    Using a hard reset will require you to re-enter your passcode and re-configure any settings or applications you’ve previously set up. This is a last resort if you are experiencing significant performance problems.

    Closing Background Apps

    Closing background apps is a crucial step in managing RAM usage. Many apps continue to run in the background, even when not actively used, consuming valuable RAM.

    Procedure:

    • Double-tap the Home button to view all open apps.
    • Swipe up on the app previews to close them.

    By actively closing apps, you can release the RAM they are using and improve the overall performance of your device. This is a simple but effective technique to enhance responsiveness.

    Alternative Optimization Methods

    There are alternative approaches to optimizing RAM usage beyond basic clearing techniques. Managing app installations and performing device maintenance are important for long-term RAM health.

    App Management:

    • Uninstall apps you no longer use to free up space and resources.
    • Regularly update apps to ensure they are running efficiently.
    • Delete unnecessary files and data to minimize the demand on RAM.

    Device Maintenance:

    • Regularly back up your device to avoid data loss in case of severe issues.
    • Keep your device’s software up-to-date to benefit from bug fixes and performance improvements.
    • Use an appropriate charging method and avoid extreme temperatures to maintain device health.

    These steps can help prevent future issues and optimize RAM usage.

    Comparison Table

    Method Procedure When to Use
    Force Restart Hold power button until off, then hold again Minor performance issues
    Hard Reset Hold power and volume down buttons Severe performance problems, when other methods fail
    Close Background Apps Double-tap Home button, swipe up on app previews Managing RAM usage on a daily basis

    Troubleshooting RAM Issues

    Sometimes, despite clearing your iPad or iPhone’s RAM, performance issues persist. This often points to underlying problems within apps or the operating system itself. Effective troubleshooting involves identifying the source of the problem, which could be a faulty app, outdated software, or even a more complex hardware issue. This section will detail steps to diagnose and resolve these issues.Diagnosing and resolving RAM-related problems requires a systematic approach.

    By understanding how apps interact with RAM and how to identify potential culprits, you can efficiently pinpoint and fix performance bottlenecks.

    Investigating App RAM Consumption

    Identifying apps that are consuming excessive RAM is crucial for troubleshooting. Regular monitoring allows you to catch problematic behavior before it impacts overall performance.

    • Observe app behavior. Pay attention to apps that consistently slow down performance or cause noticeable lags. For example, if a game freezes or becomes unresponsive after a prolonged session, that app may be using an excessive amount of RAM. Note the timing and duration of these issues to help narrow down the problem.
    • Utilize the iOS performance metrics. iOS provides built-in tools to monitor app performance. Explore the device’s settings to locate these tools. Look for metrics like memory usage over time to see if certain apps consistently consume high amounts of RAM during operation.

    Identifying and Uninstalling Problematic Apps, Clear the RAM on an iPad or iPhone

    If an app consistently demonstrates high RAM usage, consider uninstalling it or checking for updates.

    • Review app usage data. Look at the app’s activity over a period of time to determine if there are any patterns in its memory consumption. If the app consistently exhibits high memory usage, it might be the source of the problem.
    • Uninstall suspicious apps. If an app is consistently consuming a significant amount of RAM, uninstalling it might resolve the issue. Consider uninstalling recently downloaded or frequently used apps first to rule out these possibilities.
    • Update problematic apps. Sometimes, outdated apps can cause RAM issues. Ensure that all apps are updated to the latest version to benefit from potential bug fixes and performance improvements.

    Importance of iOS Updates

    Regular iOS updates often include fixes for RAM-related issues.

    • Keep your iOS up to date. Updates address various performance and stability issues, including those related to RAM management. Always ensure your device is running the latest version of iOS for optimal performance and stability. Check for updates regularly and install them as soon as possible.

    Checking RAM Usage

    Checking RAM usage is a critical step in identifying performance bottlenecks.

    1. Open the Settings app on your iPad or iPhone.
    2. Tap on “General”.
    3. Select “About”.
    4. Look for “Storage” and “Memory”.
    5. This section provides a visual representation of the current memory usage and can highlight apps that are using significant resources.

    Examples of App Behaviors Suggesting RAM Issues

    Certain app behaviors can point to excessive RAM usage.

    • Frequent app crashes or freezes. If apps repeatedly crash or freeze, high RAM consumption could be a contributing factor.
    • Significant lag or slow performance. A noticeable decrease in app responsiveness might indicate excessive memory use.
    • Unresponsive UI elements. If certain UI elements within an app fail to respond, it may be indicative of high RAM usage.

    Preventing RAM Issues

    Keeping your iPad or iPhone’s RAM healthy is crucial for smooth performance and a longer lifespan. Regular maintenance and mindful app usage are key to avoiding RAM-related problems. This section Artikels strategies to proactively maintain optimal RAM health.Proactive measures are vital to prevent RAM issues, rather than just reacting to problems after they arise. By understanding and implementing these strategies, you can ensure your device operates efficiently and reliably.

    Regular Device Maintenance

    Proper device maintenance is paramount for optimal RAM performance. Regular software updates address potential bugs and inefficiencies that can impact RAM usage. Updates often include optimizations that improve RAM management, freeing up resources and preventing overload. App updates frequently include bug fixes and performance enhancements that indirectly benefit RAM usage.

    Clearing the RAM on your iPad or iPhone can sometimes be a lifesaver for sluggish performance. It’s like giving your device a mental reset. Similar to how quitting smoking and alcohol can revitalize your health, Stop Smoking and Drinking at the Same Time requires a lot of focus and willpower. Ultimately, both practices are about freeing up space – in this case, digital space – for optimal functioning, whether it’s your device or your body.

    So, the next time your iPad feels a little slow, consider clearing the RAM for a smoother experience.

    • Software Updates: Installing the latest iOS or iPadOS updates is essential. These updates often contain crucial bug fixes, performance improvements, and RAM management enhancements that help prevent issues.
    • App Updates: Keeping apps up-to-date is equally important. Developers frequently release updates that address performance problems, potentially resolving RAM-related issues within apps themselves.

    App Management

    Managing your installed apps is critical for efficient RAM utilization. Unnecessary apps consume resources, including RAM. A well-managed app library reduces the likelihood of RAM overload.

    • Uninstall Unnecessary Apps: Regularly review and uninstall apps you no longer use. Unused apps, even if dormant, can still consume a small amount of RAM. Removing them frees up this space, enhancing overall performance.
    • App Usage Pattern Analysis: Observe your app usage patterns. Identify apps you frequently use and those you rarely touch. Prioritize frequently used apps for easy access. This conscious decision helps minimize the need to load and switch between infrequently used apps, thus reducing RAM strain.

    Efficient App Usage

    Minimizing background processes and carefully managing app usage can significantly impact RAM performance. Understanding app behavior and controlling their activity are important.

    • Minimize Background Processes: Avoid running too many apps in the background. Close apps you’re not actively using to prevent them from consuming RAM resources. This proactive measure prevents gradual RAM depletion.
    • Limit App Usage at Once: Avoid opening and using too many apps simultaneously. This can lead to RAM overload, causing sluggish performance or app crashes. This is particularly important when using resource-intensive apps.

    Managing and Prioritizing App Usage

    Prioritizing app usage is key to preventing RAM overload. Understanding app needs and allocating resources accordingly helps prevent problems.

    • Prioritize App Usage: Identify and prioritize the apps you use most frequently. Keep these apps readily accessible to minimize the need to load them from the background. This improves responsiveness and avoids unnecessary background loading.
    • App Usage Scheduling: Consider scheduling the usage of demanding apps. If you know you’ll need a specific app for a certain period, initiate it before you need it to reduce the chance of RAM overload. This is particularly beneficial for demanding games or video editing software.

    Optimizing RAM Utilization

    Optimizing RAM utilization is crucial for extending the lifespan of your device. Conscious decisions about app usage and device maintenance lead to better overall performance.

    • Regular Device Restarts: Regular restarts can clear temporary files and processes that consume RAM. This is an effective way to maintain device performance and prevent accumulation of unnecessary data.
    • Monitor RAM Usage: Using system monitoring tools can help you understand your app’s RAM usage patterns. Identify apps with high RAM consumption and take steps to manage their usage. This proactive approach allows you to fine-tune your app management strategies.

    Advanced RAM Management Techniques

    Clear the RAM on an iPad or iPhone

    Optimizing RAM usage on your iPad or iPhone goes beyond simply clearing the cache. Advanced techniques delve into the nuanced ways iOS manages memory, and understanding these strategies can significantly impact overall performance, especially for demanding tasks like gaming and video editing. This section explores sophisticated approaches to memory management, highlighting the impact on device performance and offering troubleshooting tips for specific models.Advanced memory management techniques involve understanding iOS’s internal mechanisms for handling RAM.

    These techniques can help prevent common performance issues and improve responsiveness for demanding applications. By understanding how RAM allocation works, users can proactively optimize their device’s performance.

    RAM Optimization Tools

    There aren’t dedicated third-party RAM management tools specifically designed for iOS. Apple’s built-in memory management system is highly efficient and often handles resource allocation automatically. However, some users might find that certain apps or tasks persistently consume more RAM than expected. In these situations, reviewing app usage and closing unnecessary applications can be helpful.

    Advanced iOS Memory Management Features

    iOS incorporates sophisticated memory management features to ensure optimal performance. These features automatically manage background app activity and minimize resource consumption, preventing applications from hogging RAM. This proactive management is crucial for overall device stability. Background app refresh settings and app usage monitoring are essential tools for managing RAM allocation.

    Impact of RAM on Performance (Gaming and Video Editing)

    Sufficient RAM is vital for smooth performance in resource-intensive tasks like gaming and video editing. Adequate RAM allows applications to load and process data more quickly, resulting in smoother gameplay and reduced lag. In video editing, large files and complex operations require substantial RAM for efficient processing. Insufficient RAM can lead to stuttering, freezes, and crashes.

    Troubleshooting Specific iPad/iPhone Models

    Different iPad/iPhone models have varying RAM capacities. Troubleshooting RAM-related issues might require specific considerations for each model. For example, an older iPad with limited RAM may experience more frequent performance lags during intensive tasks compared to a newer model with a larger RAM capacity. Diagnosing and addressing specific RAM-related issues for particular models might involve different strategies.

    Comparison of RAM Optimization Methods

    • Closing Unused Apps: This simple method effectively frees up RAM by terminating apps not currently in use. Pros: Easy to implement, requires minimal effort. Cons: Might require frequent execution, does not address the root cause of excessive RAM consumption.
    • Managing Background App Refresh: This feature allows users to control how often apps in the background refresh data. Pros: Helps conserve RAM by limiting background activity. Cons: Might result in delayed updates or notifications, requires user intervention.
    • App Usage Monitoring: Regularly monitoring app usage helps identify applications consuming excessive RAM. Pros: Provides insights into potential issues and allows targeted optimization. Cons: Requires active monitoring, may not always reveal the root cause.

    When to Seek Professional Help

    Knowing when to seek professional help for RAM issues on your iPad or iPhone is crucial. While many problems can be resolved through basic troubleshooting, some situations demand the expertise of a qualified technician. This section details the scenarios where contacting Apple Support or a qualified repair shop is the best course of action.Understanding the limits of your troubleshooting capabilities is key to preventing potential data loss or further hardware damage.

    This section will guide you in recognizing when a problem requires professional intervention.

    Recognizing Hardware Issues Requiring Intervention

    Troubleshooting RAM issues often involves identifying whether the problem stems from software conflicts or hardware malfunctions. Physical damage to the device, such as liquid spills or severe drops, can cause internal RAM damage that requires specialized repair. Issues like these are beyond the scope of typical user troubleshooting and should be addressed by a qualified technician.

    Software Issues Exceeding Troubleshooting Capabilities

    Complex software conflicts can manifest as persistent RAM issues that resist standard troubleshooting techniques. If repeated attempts to clear RAM, update iOS, or reinstall apps fail to resolve the problem, professional assistance is warranted. Specific examples include corrupted system files or malware infections that are difficult to diagnose and rectify without specialized tools and knowledge.

    Diagnosing and Documenting Problems for Support

    Thorough documentation is essential for effective communication with support personnel. When seeking help, gather detailed information about the problem, including specific error messages, steps to reproduce the issue, and the device’s configuration (iOS version, apps installed, etc.). A clear description of the symptoms and the steps taken to resolve them is crucial for accurate diagnosis.

    Backing Up Data Before Advanced Troubleshooting

    Backing up data is paramount before undertaking any potentially disruptive troubleshooting steps. RAM issues can sometimes lead to data loss if not handled with care. Using iCloud or a reliable external backup solution is highly recommended to safeguard your data before attempting any advanced troubleshooting or repair. A backup allows you to restore your device to its previous state if issues arise during the process.

    Potential Damage from Unrecommended Procedures

    Attempting procedures outside the recommended guidelines can potentially cause damage to your iPad or iPhone. Unauthorized modifications or forceful interventions can lead to unexpected and irreversible consequences. Sticking to Apple’s official guidelines and recommended troubleshooting steps is essential to prevent unintended harm. Attempting to open or repair the device yourself can void the warranty and compromise the device’s integrity.

    Final Thoughts

    In conclusion, managing RAM on your iPad or iPhone is a key component of ensuring optimal performance. By understanding how RAM works, recognizing potential issues, and implementing the appropriate solutions, you can keep your device running smoothly. This guide provided a comprehensive overview of RAM management, from basic troubleshooting to advanced techniques. We hope this helps you maintain a speedy and efficient mobile experience!

  • Why Is My New Cart Not Hitting? Troubleshooting Guide

    Why Is My New Cart Not Hitting? Troubleshooting Guide

    Why Is My New Cart Not Hitting? This comprehensive guide dives into the potential culprits behind a malfunctioning e-commerce cart. From network hiccups to coding errors and even hardware snags, we’ll explore a wide range of possibilities to pinpoint the exact issue and get your cart back up and running.

    We’ll examine everything from fundamental cart functionalities and user interactions to the intricate workings of servers, databases, and third-party integrations. Each section provides actionable steps to troubleshoot and resolve the problem, ensuring a smooth and secure online shopping experience.

    Cart Functionality Issues

    A well-functioning shopping cart is crucial for any e-commerce platform. It’s the backbone of the online purchasing experience, enabling customers to easily browse, select, and purchase items. Understanding the expected behaviors and common issues related to cart functionality is essential for troubleshooting and ensuring a seamless customer journey.The shopping cart system acts as an intermediary between a customer’s selection and the final checkout process.

    It must handle various actions efficiently and reliably, ensuring data integrity and a smooth user experience. This involves not only the immediate actions within the cart, but also how that cart data is maintained and accessed during the browsing and return process.

    Typical Shopping Cart Functionalities

    A robust shopping cart system encompasses several key functionalities. It allows users to add items, adjust quantities, and remove items from their cart. These actions are typically handled through user-friendly interfaces like buttons and input fields. The system should also provide clear visual feedback, confirming each action and updating the cart’s contents dynamically. For example, a user clicking “add to cart” should see the item added to the cart with an updated quantity displayed.

    Adding Items to the Cart

    The process of adding an item to the cart typically involves a button click on the product page. This triggers a server-side action that adds the item’s details (product ID, name, price, quantity) to the user’s shopping cart data. The system must correctly handle cases where the item is already in the cart, updating the quantity instead of adding a duplicate entry.

    My new online shopping cart just isn’t working, and I’m starting to wonder if it’s a broader issue. Maybe it’s related to the concept of an “echo chamber,” like the one discussed in Carrie Brownstein’s insightful piece on echo chamber carrie brownstein. If the algorithms aren’t showing me diverse products, then my cart isn’t hitting its target audience.

    Frustrating, right? Now I’m even more curious about why my new cart isn’t hitting the mark.

    Furthermore, it must prevent errors like adding items with invalid quantities or pricing.

    Updating Quantities

    Modifying the quantity of an item already in the cart is another critical functionality. The system should allow users to increment or decrement the quantity via input fields or buttons. The update must reflect immediately in the cart total and the quantity of the item displayed. The system should also have a mechanism to prevent users from entering non-numeric quantities.

    A good example is a user wanting to buy two of an item. The system should allow for this action, and the cart total should be updated accordingly.

    Removing Items

    Removing items from the cart is straightforward but equally important. A simple click on a “remove” button should remove the item and update the cart total. The system should also handle potential issues like removing items that don’t exist in the cart, providing informative error messages instead of crashes. In cases where items are removed, the cart total should be adjusted to reflect the removal.

    Cart Persistence and Navigation

    A crucial aspect of cart functionality is its persistence. When a user navigates away from the page, the cart contents should be stored reliably. This data should be retrieved correctly when the user returns to the shopping cart page, ensuring that the items remain in the cart. If the cart data is lost or corrupted, the user experience will be severely impacted.

    Identifying Cart Functionality Issues

    Troubleshooting cart issues involves methodical steps. First, observe the specific error or unexpected behavior. Is the item not adding to the cart? Is the quantity incorrect? Is the cart data lost when navigating away?

    Document these observations thoroughly. Then, isolate the source of the problem. Is it a problem with the user interface, the database, or the server-side logic? Use testing tools and browser developer tools to analyze network requests and data flows.

    Troubleshooting Table

    Cart Action Expected Outcome Potential Issues
    Add item Item added to cart, cart total updated Item not added, incorrect quantity, invalid data
    Update quantity Quantity updated, cart total updated Non-numeric input, quantity out of stock
    Remove item Item removed, cart total updated Item not found in cart, error message
    Navigation/Return Cart data preserved, cart contents displayed correctly Cart data loss, corrupted data

    Connectivity and Network Problems: Why Is My New Cart Not Hitting

    Why Is My New Cart Not Hitting

    Network connectivity issues are a common hurdle when using online shopping carts. Problems can stem from various factors on both the user’s end and the server’s end, impacting the cart’s ability to load, process orders, or communicate with payment gateways. Understanding these issues and troubleshooting them effectively is crucial for a smooth online shopping experience.A robust online shopping experience relies heavily on a stable network connection.

    If the cart isn’t loading or functioning as expected, it’s essential to first investigate network-related problems to pinpoint the source of the issue. Many factors can affect network performance, including internet speed, DNS resolution, and even proxy server configurations.

    Identifying Potential Network Issues

    Network problems can manifest in various ways, hindering the cart’s functionality. Common issues include slow loading times, error messages related to network connectivity, and complete failure to access the cart. These problems can originate from the user’s internet connection, DNS configurations, or even proxy servers that are misconfigured.

    Troubleshooting Network Connectivity

    Troubleshooting network connectivity issues requires a systematic approach. A step-by-step process will help identify the root cause.

    • Check Internet Connection: Ensure a stable and reliable internet connection is available. Try loading other websites to confirm the issue isn’t with your internet service provider (ISP). If other sites load fine, the problem likely lies within the cart’s network connection.
    • Verify DNS Settings: Incorrect DNS settings can prevent the cart from resolving domain names. Use a reliable DNS service, like Google Public DNS, and check for any configuration errors.
    • Inspect Proxy Servers: If using a proxy server, ensure it’s correctly configured and not blocking access to the shopping cart’s server. Temporarily disabling the proxy server can help determine if it’s the source of the problem.
    • Network Configuration Check: Verify that your network settings are appropriate and match the requirements of the cart. Consider issues with firewalls or other network security measures.

    Determining the Source of the Issue

    Determining whether the problem lies on the user’s end or the server’s end can be crucial for efficient troubleshooting.

    • User-End Problems: Problems on the user’s end often involve issues with the internet connection, network configuration, or proxy server settings. These can be identified by testing the connectivity from a client-side perspective.
    • Server-End Problems: Problems on the server’s end could indicate temporary server outages, database issues, or problems with the application code itself. These are usually more challenging to diagnose without access to server logs or support from the hosting provider.

    Testing Network Connectivity (Client-Side)

    Various methods can be used to test network connectivity from a client-side perspective. These tests help pinpoint the exact location of the issue.

    • Ping Tests: Pinging the cart’s server address helps check if there’s a network path between the user and the server. A successful ping confirms a basic connection.
    • Traceroute: Traceroute displays the route packets take to reach the server. This can help identify network bottlenecks or connectivity issues along the path.
    • Website Loading Speed Tests: Loading other websites on the same network can give insights into internet connection speed and stability. Compare loading times to identify if the issue is specific to the cart.
    • Connectivity Diagnostic Tools: Many diagnostic tools are available online or within operating systems. These tools can provide a comprehensive overview of network performance and connectivity.

    Common Network Errors and Solutions

    Troubleshooting network issues often involves identifying common errors and applying appropriate solutions.

    Error Possible Solution
    Slow loading times Check internet speed, DNS settings, or network congestion.
    Error messages (e.g., “Connection refused”) Verify internet connection, DNS settings, and server availability.
    Timeout errors Check network latency, server response time, and network path.
    Inability to connect Check internet connection, network configuration, and server accessibility.

    Server-Side Issues

    Server-side problems can stem from various sources, impacting the cart’s functionality in unexpected ways. These issues often manifest as intermittent errors or consistent failures, making debugging challenging. Understanding the potential causes and how to troubleshoot them is crucial for maintaining a stable e-commerce platform.Identifying and resolving server-side issues requires a methodical approach. This involves analyzing server logs, understanding potential errors, and systematically isolating the source of the problem.

    By following these steps, you can effectively pinpoint the cause of the cart malfunction and implement appropriate solutions.

    Potential Server Errors, Why Is My New Cart Not Hitting

    Server-side errors can manifest in a multitude of ways, often affecting the cart’s interaction with the database or other critical resources. These errors can range from simple database connection problems to more complex application logic issues. Understanding the potential errors and their corresponding symptoms can aid in the debugging process.

    • Database Connectivity Problems: Issues connecting to the database are common and can result from network issues, incorrect credentials, or database server problems. The inability to query or update the database will directly affect the cart’s functionality. For instance, a failure to retrieve product data will prevent the display of items or processing of orders.
    • Application Logic Errors: Coding errors within the application’s logic can lead to unexpected behavior. Incorrect calculations, improper data validation, or missing error handling can create problems in order processing, product display, or user account management. Examples include calculating incorrect totals, failing to validate user input, or crashing the server due to infinite loops.
    • Resource Exhaustion: Server resources such as memory, CPU, and disk space can become overloaded. This can occur during high-traffic periods or due to inefficient code. Symptoms might include slow response times, timeouts, or crashes.
    • External Service Failures: Dependencies on external services, like payment gateways or shipping APIs, can cause problems if those services are unavailable or malfunctioning. This will affect order processing and fulfillment, resulting in errors and delays.

    Checking Server Logs

    Analyzing server logs is crucial for identifying server-side errors. Logs contain a record of all actions and events that occur on the server, including errors and warnings. The format of server logs can vary significantly between different web servers and application stacks.

    • Log File Location: Locate the server log files. These files are often stored in specific directories, depending on the server configuration. Consult your server documentation for the precise location.
    • Log File Format: Understand the format of the log files. Common log formats include timestamp, event type, and error details. Pay attention to the timestamp, which helps determine when the error occurred.
    • Error Messages: Search the logs for error messages. These messages often contain clues about the specific cause of the problem. Carefully analyze the messages for patterns or recurring errors.

    Identifying and Isolating Server-Side Errors

    To effectively identify and isolate server-side errors related to the cart, follow a structured approach.

    • Reproduce the Error: Attempt to consistently reproduce the error to understand the circumstances under which it occurs. This will help in identifying the necessary steps to recreate the error for further analysis.
    • Analyze Error Messages: Carefully examine error messages to identify the specific error and the potential root cause. Look for details such as file names, line numbers, or database queries to narrow down the source of the problem.
    • Check Server Resources: Monitor server resources (CPU, memory, disk I/O) to ensure they are not overloaded, which can cause intermittent errors.
    • Isolating the Problem: Isolate the problem by testing different components of the system. Disable or temporarily remove sections of the code to see if the error persists. This helps pinpoint the specific module or function causing the problem.

    Typical Server Error Codes

    The following table displays common server error codes and their corresponding meanings. This knowledge will assist in interpreting server log messages and identifying the nature of the error.

    Error Code Meaning
    500 Internal Server Error A generic error indicating a problem on the server’s side.
    404 Not Found The requested resource (e.g., page, file) could not be found on the server.
    503 Service Unavailable The server is temporarily unable to handle requests.
    400 Bad Request The request from the client was invalid or improperly formatted.
    502 Bad Gateway The server received an invalid response from an upstream server.

    Database Problems

    Database issues are a frequent source of problems in e-commerce applications, especially those involving online shopping carts. These issues can manifest as erratic behavior, from simple display glitches to complete system failures. Understanding potential database problems and their impact is crucial for effective troubleshooting and preventing future disruptions.Database errors can significantly impact cart functionality. Problems with data retrieval, updates, or storage can lead to incorrect pricing, missing items, order confirmation failures, and ultimately, a frustrating user experience.

    These issues can also have a negative impact on the business by causing revenue loss and damaging customer trust. Thorough diagnosis and swift resolution are essential to maintain a smooth and reliable online shopping experience.

    Potential Database Errors

    Database errors can manifest in various ways, impacting data retrieval, update processes, and storage integrity. Common issues include data corruption, inconsistent data types, or outdated indexes. Inconsistent data types, for example, could lead to incorrect calculations or data misinterpretation during order processing. Data corruption can cause a loss of crucial information, leading to inaccurate order details or even complete order loss.

    Outdated indexes can slow down query performance, impacting user experience and overall system responsiveness.

    Diagnosing Database Issues

    Diagnosing database issues requires a methodical approach. First, understand the specific error messages. These messages often contain clues about the nature of the problem, and their understanding is the key to identifying the root cause. Next, examine query logs for any unusual patterns or recurring errors. Analyze database performance metrics to identify potential bottlenecks or inefficiencies.

    Finally, review recent database changes or updates, as these can sometimes introduce unexpected errors. A methodical investigation of these aspects can help to pinpoint the source of the problem and initiate the repair process.

    Troubleshooting Techniques

    Troubleshooting database issues involves several techniques. Reviewing database logs is paramount to understanding the sequence of events leading up to the error. Inspecting the data itself is equally important; for instance, checking for missing or incorrect data entries can uncover data integrity issues. Running specific queries to verify data consistency and accuracy can also help identify the root cause of discrepancies.

    Analyzing the database schema can reveal any design flaws or inconsistencies that could lead to errors.

    Methods for Examining Database Tables

    Examining database tables for discrepancies requires a set of specific techniques. Using SQL queries to check for null values, data type mismatches, and constraints violations is essential. Regularly reviewing database statistics to identify unusual trends can help prevent potential problems. Data validation routines, either automated or manual, can help catch data errors before they impact the system.

    Database Error Table

    Database Error Possible Causes
    Data Retrieval Errors Corrupted data, outdated indexes, incorrect queries, network issues
    Data Update Errors Constraints violations, incorrect data types, insufficient permissions
    Data Storage Errors Disk space limitations, hardware failures, database corruption
    Query Performance Issues Slow queries, poorly indexed tables, inefficient queries

    Client-Side Issues

    Client-side issues are problems that originate from the user’s browser or device, affecting the cart’s functionality. These problems are often harder to diagnose on a server because the errors occur on the user’s end, making them less straightforward to replicate and fix. Identifying these problems requires careful investigation of user reports and browser behavior.Often, client-side problems manifest as unexpected behavior or complete failure of the shopping cart interface.

    My new cart isn’t hitting the mark, and I’ve been stumped. Maybe it’s a simple fix, or perhaps a deeper issue. One thing I’ve been thinking about is how to optimize my workflow. Perhaps, a different approach like using an espresso maker Use an Espresso Maker could actually help streamline the process and improve efficiency.

    Regardless, I’m still working on figuring out why my cart isn’t hitting its target. Need more troubleshooting tips?

    This might include issues with adding items, updating quantities, or proceeding to checkout. The nature of the problem can vary, from minor glitches to complete crashes, making thorough investigation essential.

    JavaScript Errors

    JavaScript errors are a common source of client-side issues. These errors can range from syntax mistakes to issues with external libraries. Properly identifying and diagnosing these errors is crucial for troubleshooting.Identifying JavaScript errors typically involves inspecting browser developer tools. These tools provide detailed information about the error, including the line number and file where the error occurred.

    This information is invaluable for pinpointing the source of the problem. For example, a JavaScript error on line 123 of `cart.js` might indicate a syntax error or a problem with a function call in that specific section of the code.

    Browser-Related Issues

    Browser-related problems can significantly impact the cart’s functionality. These problems might include compatibility issues with specific browser versions or plugins, incorrect settings, or corrupted cache.Compatibility issues are common. A newer version of a browser might have different rendering or JavaScript engine behavior that breaks a previously working cart. For instance, a cart that worked fine in Chrome version 98 might malfunction in version 110 due to changes in the rendering engine.

    Similarly, outdated browser versions might not support the latest JavaScript features used in the cart, leading to compatibility issues.

    Troubleshooting Methods

    Troubleshooting client-side issues often involves a systematic approach. Gathering user reports, analyzing error logs, and checking browser settings are key steps.Gathering user reports, including the specific actions taken by the user before the error, are vital for understanding the problem’s context. Detailed reports provide crucial information, helping to pinpoint the cause of the issue. Analyzing browser error logs is another crucial step, as it helps uncover the exact error messages and the context of the error.

    Checking browser settings, such as cache, cookies, and extensions, can also resolve many issues.

    My new cart isn’t hitting the mark, and I’m stumped. Maybe I need to check the alignment, or perhaps the bearings. Speaking of things that need a good “hit,” I’ve been experimenting with cooking in a cast iron skillet lately. It’s seriously amazing. For fantastic results, try out this guide on Cook in a Cast Iron Skillet.

    Regardless, I’m still troubleshooting why my cart isn’t hitting its target. Maybe a little WD-40 will work its magic!

    Common Browser Errors and Solutions

    Troubleshooting client-side issues often involves understanding common browser errors. The table below lists some frequent browser errors and their potential solutions.

    Error Potential Solution
    “Uncaught TypeError: Cannot read properties of undefined (reading ‘add’)” Verify that the `add` function is defined and accessible in the current context. Check if the required variables are properly initialized and accessible within the function.
    “Network Error” Ensure that the website has the correct network access and the server is responding appropriately. Check internet connection and network settings.
    “CORS Error” Verify that the server allows cross-origin requests (CORS) to the resources being used by the cart. Check the server’s CORS configuration.
    “HTTP 404” Verify that the requested resource exists on the server. Check the file paths and URLs being accessed.

    Code Issues (Specific Examples)

    Troubleshooting shopping cart functionality often boils down to identifying and fixing errors within the underlying code. Common pitfalls in e-commerce platforms, particularly concerning the shopping cart, include data handling issues, incorrect calculations, and flawed logic, all of which can lead to unexpected behavior. Understanding these potential problems is crucial for effective debugging and maintaining a reliable shopping cart system.Incorrect data types, missing or incorrect validations, and inefficient database queries can all disrupt the cart’s smooth operation.

    In some cases, seemingly minor code issues can have cascading effects, leading to major malfunctions and frustrating customer experiences. This section delves into specific examples of these coding errors and provides actionable solutions.

    Common Coding Errors in Shopping Cart Applications

    Many issues stem from basic coding errors that can easily be overlooked. Inconsistent data types, particularly when handling currency values or quantities, are a frequent source of problems. Incorrect data types can lead to unexpected calculations, potentially displaying incorrect prices or quantities. Furthermore, missing or inadequate validation rules can allow invalid data to enter the system, creating inaccuracies and ultimately breaking the cart’s functionality.

    Examples of Incorrect Code Snippets

    • Incorrect data type handling:
      “`java
      // Incorrect
      int totalPrice = price
      – quantity; // If price or quantity are doubles
      “`
      This example assumes `price` and `quantity` are integers. If they are doubles, this will lead to potential loss of precision, resulting in inaccurate totals.
    • Missing input validation:
      “`javascript
      // Incorrect
      function calculateTotal(price, quantity)
      return price
      – quantity;

      “`
      This code lacks any validation to check if `price` or `quantity` are positive values. A negative quantity or price would result in an unexpected, and potentially negative, total.

    • Incorrect use of loops or conditional statements:
      “`python
      // Incorrect
      for i in range(0, -1, 1):
      cart_items[i].remove();
      “`
      The for loop in this example iterates backward. This could potentially result in a runtime error or incorrect removal of cart items.

    Isolating and Fixing Errors in Shopping Cart Code

    Identifying the source of errors in a shopping cart application often involves a systematic approach. First, carefully review the code segments related to the cart’s functionality. Next, examine the error messages provided by the system, which can offer clues about the nature of the problem. Use print statements strategically to track the flow of data and variables during execution, observing their values at different points in the process.

    Finally, consider using a debugger to step through the code line by line, inspecting variables and tracing the execution path. This methodical approach allows for a targeted resolution of the error.

    Using Debugging Tools for Error Identification

    Debugging tools provide a powerful way to diagnose and resolve errors in complex code. These tools allow you to step through the code line by line, inspect variable values, and set breakpoints to pause execution at specific points. This capability helps isolate the exact point where an error occurs and allows for focused correction of the issue. For example, in IDEs like VS Code or IntelliJ, debugging tools can pinpoint the specific line of code that’s causing a problem, providing context and allowing for immediate fixes.

    Comparison of Code Error Types and Fixes

    Error Type Description Possible Fixes
    Incorrect Data Types Using inappropriate data types for calculations (e.g., using integers for currency). Use appropriate data types (e.g., doubles for currency). Ensure consistent data types throughout calculations.
    Missing Input Validation Failing to validate user inputs to ensure they are within acceptable ranges. Implement validation rules to check for positive quantities, valid prices, and other constraints.
    Logical Errors Problems with the flow or logic of the code (e.g., incorrect conditional statements). Review the code logic, trace execution flow, and identify areas where the expected behavior differs from the actual behavior.

    Hardware Issues

    Hardware problems are a significant factor in cart malfunction, often overlooked in the diagnostic process. These issues can range from simple component failures to more complex system-level problems, potentially impacting the cart’s responsiveness, reliability, and overall functionality. Identifying and resolving these problems requires a systematic approach, involving both visual inspection and practical testing.Hardware problems can manifest in various ways, affecting the cart’s ability to process orders, update inventory, or communicate with payment gateways.

    The impact can be anything from minor delays to complete system failure, potentially leading to significant revenue loss and customer dissatisfaction. Addressing hardware issues proactively can prevent these problems and maintain the cart’s smooth operation.

    Potential Hardware Problems

    Common hardware issues affecting cart functionality include failing storage devices, malfunctioning network cards, or faulty components within the server itself. Problems with the physical connections between the server and the network infrastructure, such as damaged cables or faulty ports, can also contribute to the problem.

    Troubleshooting Hardware Issues

    Troubleshooting hardware issues requires a methodical approach. First, carefully check the physical components for visible damage, loose connections, or overheating signs. Pay particular attention to the power supply, network cables, and storage drives. Examine the system logs for error messages or warnings related to specific hardware components.

    System Resource Usage

    Monitoring system resource usage is crucial for identifying potential hardware bottlenecks. High CPU or memory usage, for instance, can indicate a problem with the server’s hardware or software. Tools like task manager can provide insights into current resource allocation. Use these tools regularly to track potential problems before they escalate.

    Testing Hardware Components

    Testing hardware components directly can help isolate the source of the issue. For example, if the network is acting up, test the network card with specialized diagnostic tools or by attempting to connect to different networks. If the storage device is showing problems, run diagnostics on the drive. These tests can identify specific hardware failures and facilitate the troubleshooting process.

    Common Hardware Errors and Fixes

    Error Possible Fixes
    Slow or unresponsive cart Check CPU and RAM usage. Consider upgrading RAM or replacing the CPU cooler if usage is consistently high.
    Frequent network disconnections Verify network cables, check for network interference, and ensure the network card is functioning correctly.
    Storage errors (e.g., disk failures) Run diagnostics on the storage device. If the issue persists, replace the drive with a new one. Consider a backup strategy.
    High server temperatures Ensure proper ventilation and cooling for the server. Clean dust and debris from the cooling fans. If the temperature continues to rise, consider upgrading the cooling system.
    Power supply issues Check the power supply for damage or overheating. Consider replacing the power supply if needed.

    Third-Party Integrations

    Why Is My New Cart Not Hitting

    Third-party integrations are crucial for e-commerce platforms, extending functionality beyond core features. However, these integrations can also introduce points of failure. Understanding how these integrations work and the potential pitfalls is essential for maintaining a smooth customer experience.

    Impact on Cart Functionality

    Third-party integrations, such as payment gateways (PayPal, Stripe), shipping services (UPS, FedEx), and analytics platforms, can significantly impact the cart’s functionality. A glitch in a payment gateway can prevent transactions, while an issue with a shipping service can cause order delays or inaccuracies. Furthermore, the complexity of interactions between the cart system and these integrations can lead to unexpected behaviors.

    Problems often arise from incompatibility issues or misconfigurations, leading to errors in order processing or reporting.

    Payment Gateway Issues

    Payment gateways are a primary point of concern in e-commerce. Common problems include gateway downtime, incorrect transaction processing, or issues with authorization. These issues can lead to frustrated customers and lost revenue. Thorough testing and monitoring of the payment gateway are vital for mitigating risks.

    Shipping Service Problems

    Shipping integrations are equally important. Problems can stem from inaccurate shipping costs, delayed updates on shipping status, or issues with order fulfillment. Ensuring the integration is properly configured and real-time tracking is implemented are crucial steps in preventing these issues. Real-time updates are essential for a positive customer experience.

    Other Integration Issues

    Other integrations, like analytics platforms or social media sharing tools, can also present problems. These can include data transfer errors, integration misconfigurations, or issues with API calls. A thorough understanding of the specific integration’s technical requirements is essential for successful implementation.

    Diagnosing Third-Party Issues

    Diagnosing issues with third-party services requires a systematic approach. Reviewing integration logs, checking error messages, and contacting the third-party provider for support are key steps. Monitoring the third-party service’s status and performance is crucial for proactively identifying potential problems. Also, consider checking for compatibility issues between the cart system and the integration’s API.

    Resolving Third-Party Integration Issues

    Addressing issues with third-party integrations often involves a multi-step process. Firstly, identify the exact nature of the problem. Then, consult the third-party provider’s documentation and support resources. If the problem persists, consider contacting their support team for assistance. A thorough understanding of the integration’s specific requirements can be helpful.

    Finally, double-check configurations and settings on both the cart and the third-party service.

    Table of Third-Party Integration Errors and Solutions

    Error Possible Solution
    Payment gateway timeout Verify gateway connection, check server time, or contact payment gateway support.
    Shipping label generation failure Check shipping service API keys, validate order data, or contact shipping provider support.
    Incorrect order status updates Review the integration logs for errors, verify data transfer, and contact the integration provider.
    Data transfer errors (e.g., missing order details) Verify API calls, ensure correct data formatting, or check for data corruption during transfer.
    Integration misconfiguration Review configuration settings, consult integration documentation, or contact integration provider support.

    User Input Errors

    Shopping cart functionality relies heavily on accurate user input. Errors in this input can lead to a variety of problems, from simple display issues to complete transaction failures. Understanding common user input errors and implementing robust validation is crucial for a smooth and reliable shopping cart experience.

    Identifying Potential User Input Errors

    User input errors in an e-commerce context often involve data that is not correctly formatted or falls outside of expected ranges. This can encompass various scenarios, including incorrect product quantity selections, invalid payment information, or issues with shipping address details. Users might accidentally type errors, misinterpret instructions, or provide input beyond the system’s handling capabilities. These errors can manifest in several ways, affecting various aspects of the shopping cart, including product selection, payment processing, and order confirmation.

    Validation Techniques to Prevent Problems

    Thorough validation is key to mitigating the impact of user input errors. Validation should occur at multiple stages, from the initial data entry to the final order confirmation. The validation process should ensure that the data conforms to expected patterns, constraints, and ranges. It’s essential to anticipate potential errors and design the validation process accordingly. This involves using server-side validation to complement client-side validation, as client-side validation can be bypassed by users.

    Implementing Robust Input Validation

    Implementing robust input validation requires a multifaceted approach. First, carefully define the expected data types and formats for each input field. This includes specifying the length, range, and acceptable characters for various fields. Next, use client-side validation to provide immediate feedback to users, allowing them to correct errors before submitting the form. This prevents unnecessary server-side processing of invalid data.

    Finally, use server-side validation to ensure the data is accurate and reliable, as client-side validation alone cannot prevent malicious inputs.

    Example Table of User Input Errors and Prevention Strategies

    Error Type Description Prevention Strategy
    Incorrect Product Quantity User enters a non-numeric value or a quantity exceeding the available stock. Validate input as a positive integer and limit it to the product’s stock availability. Display an error message if the quantity is invalid.
    Invalid Email Address User enters an email address with an invalid format. Use a regular expression to validate the email format. Display an error message if the email is invalid.
    Missing Address Information User omits critical information like street address or city. Mark required fields with asterisks. Use client-side validation to identify and highlight missing information. Implement server-side validation to prevent submission with missing fields.
    Invalid Payment Information User enters incorrect credit card details, or format is wrong. Use secure payment gateways for credit card processing. Validate credit card number format using standard algorithms. Implement client-side validation to prevent obvious errors. Implement server-side validation for more complex checks. Always follow PCI compliance standards.

    Final Wrap-Up

    So, your new cart isn’t hitting the mark? This deep dive into potential problems should equip you with the knowledge needed to identify and fix the issue. From user input errors to server-side snags, we’ve covered a wide spectrum of possible causes. Remember, careful diagnostics and systematic troubleshooting are key to restoring smooth online shopping operations. Hopefully, this guide has provided a helpful starting point for resolving your cart’s difficulties.

  • PS5 HDMI Not Working – Troubleshooting Guide

    PS5 HDMI Not Working – Troubleshooting Guide

    PS5 HDMI Not Working – If your PlayStation 5 isn’t displaying on your TV via HDMI, you’re not alone. This comprehensive guide delves into the various causes and offers a step-by-step troubleshooting process to get your PS5 picture back on the screen. We’ll cover everything from basic cable checks to advanced hardware diagnostics.

    From simple connection issues to more complex software problems, we’ll walk you through a range of solutions. This guide ensures you can pinpoint the problem and resolve it quickly, getting you back to gaming in no time.

    Troubleshooting Steps for PS5 HDMI Issues

    Getting a black screen or no video output from your PS5 when connected via HDMI can be frustrating. This guide provides a comprehensive approach to troubleshooting common HDMI connection problems. Properly diagnosing and resolving these issues ensures a smooth gaming experience.This detailed guide will help you pinpoint the source of the problem and restore your PS5’s HDMI functionality. It Artikels systematic checks, from simple cable inspections to more complex device settings, to resolve various HDMI connection problems.

    Checking the PS5’s HDMI Connection

    A solid HDMI connection is fundamental to video output. This involves confirming the cable’s integrity, the port’s functionality on both the PS5 and the TV, and ensuring proper device settings. Here’s a step-by-step procedure:

    1. Verify the HDMI Cable: Inspect the HDMI cable for any visible damage, such as frayed wires or bent pins. A damaged cable can lead to signal loss or corruption, resulting in no video output. Try a different HDMI cable if you suspect the current one is faulty. Using a known good cable is a quick way to determine if the cable is the problem.

    2. Check the HDMI Ports: Ensure the HDMI ports on both the PS5 and the TV are free of obstructions or debris. A loose or damaged port can also prevent a proper connection. Inspect the ports for any signs of damage like bent pins or cracks. Clean the ports with a soft, dry cloth if necessary.
    3. Test the Connection: Reconnect the HDMI cable securely to both the PS5 and the TV’s HDMI input. Double-check that the connection is firmly seated.

    Common HDMI Cable Issues

    HDMI cables can be susceptible to various problems. Recognizing these issues can help you diagnose the source of the problem more effectively.

    • Loose Connection: A loose connection is one of the most frequent causes of HDMI issues. Double-check that the HDMI cable is firmly seated in both the PS5 and the TV’s ports. A slight shift can disrupt the signal.
    • Faulty Cable: A faulty or damaged HDMI cable can prevent a clear signal transmission. A damaged cable may exhibit a variety of symptoms, from intermittent connection loss to complete signal failure. Replacing the cable is usually the first step to try.
    • Damaged HDMI Port: Physical damage to the HDMI ports on either the PS5 or the TV can hinder signal transmission. Inspect the ports for signs of damage, such as bent pins or cracks. A damaged port requires professional repair.

    Verifying HDMI Ports and Restarting Devices

    Ensuring the correct port selection and restarting both devices is often overlooked but crucial in troubleshooting HDMI issues.

    1. Verify TV Input Settings: Check the TV’s input selection to ensure it’s set to the HDMI input that the PS5 is connected to. Incorrect input selection prevents the TV from receiving the PS5 signal.
    2. Restart the PS5 and TV: Restarting both the PS5 and the TV can resolve minor glitches that might be affecting the HDMI connection. This action can refresh the system and clear temporary glitches.

    Testing with a Different Device

    Using a different device to test the HDMI port can quickly determine if the problem lies with the PS5 or the TV.

    • Laptop or Computer Test: Connect a laptop or computer to the same HDMI port on the TV. If the laptop displays correctly, the issue is likely with the PS5. If the laptop doesn’t display, the problem could be with the TV’s HDMI port or cable.

    Possible Causes and Troubleshooting Steps

    The following table summarizes potential causes and corresponding troubleshooting steps for HDMI connection issues.

    Issue Troubleshooting Steps
    Loose cable connection Check the HDMI connection on both the PS5 and TV. Ensure the cable is firmly seated.
    Faulty HDMI cable Try a different HDMI cable. If a different cable works, replace the faulty one.
    Damaged HDMI port Inspect the ports for damage. If damaged, seek professional repair.

    TV Settings Affecting HDMI Connection

    Various TV settings can impact the HDMI connection. Adjusting these settings might resolve certain issues.

    • HDMI Input Settings: Verify that the HDMI input settings on the TV are correctly configured. This includes the input format and resolution. Confirm the resolution settings match the PS5’s output.

    Software and System Checks

    Ps5 Hdmi Not Working

    The PS5’s internal software and firmware play a crucial role in its functionality. Issues within these areas can manifest as a variety of problems, including the dreaded HDMI connection failure. This section delves into diagnosing and resolving software-related problems.Troubleshooting PS5 issues often requires examining the system’s internal workings. Problems with the operating system, updates, or conflicting software can disrupt the PS5’s ability to function properly, sometimes leading to HDMI display issues.

    Checking for System Updates

    System updates are vital for maintaining optimal PS5 performance. Outdated firmware can cause compatibility problems and stability issues, potentially affecting the HDMI output. Regularly checking for and installing available updates is a crucial troubleshooting step.To check for system updates, navigate to the “System” settings on the PS5’s home screen. Within the “System” settings, look for an option related to “System Software Update”.

    My PS5’s HDMI port is acting up, which is a real bummer. It’s driving me crazy trying to figure out why the image isn’t displaying properly. Maybe it’s a simple fix, but then again, maybe I need to look into how the thanoscopter could be deployed in Avengers 4, a fascinating hypothetical scenario that could definitely distract me from the current HDMI issue.

    Either way, I’m going to have to get this PS5 problem sorted out, so I can enjoy my gaming again. Hopefully, it’s not a catastrophic hardware failure!

    If an update is available, the system will prompt you to download and install it. Follow the on-screen instructions to complete the update process. Remember to have a stable internet connection during the update.

    Verifying System Status

    A comprehensive check of the PS5’s system status is essential for diagnosing potential problems. This includes examining the system’s resources and verifying their proper allocation.The PS5’s system status can be accessed through the “System” settings. Checking for any error messages or warnings is crucial. These messages often provide clues about the specific problem. Pay close attention to any error codes displayed on the PS5 screen, as they can provide valuable information for troubleshooting.

    Troubleshooting Software Conflicts

    Software conflicts can disrupt the PS5’s operation, including its ability to output video via HDMI. Identifying and resolving these conflicts can be critical for restoring proper functionality.To identify potential software conflicts, examine any recently installed or updated applications. Look for any unusual behavior or error messages. Temporarily uninstalling or disabling recently installed software can help isolate the source of the conflict.

    Error Codes and Messages

    The PS5 often displays error codes or messages to help pinpoint the problem. These codes can be found within the system settings or error screens.A list of potential error codes and their corresponding solutions is essential. These error codes provide a specific diagnosis, facilitating a targeted troubleshooting approach.

    Troubleshooting Strategies for Software Conflicts

    • Restarting the PS5: A simple but effective method for resolving many software-related issues. A restart can refresh the system and clear any temporary glitches.
    • Checking for software conflicts: Examine recently installed software for potential conflicts. Temporarily uninstalling or disabling these applications can isolate the source of the problem.
    • Updating drivers: Outdated drivers can lead to compatibility problems. Ensure all connected devices have the latest drivers installed.

    Possible Software/System Problems and Solutions

    Problem Solution
    Update required Download and install the latest system update.
    Software conflict Check for and resolve any software conflicts. Try uninstalling or disabling recently installed software.
    Error code displayed Refer to the PS5 error code guide for a specific solution.

    External Factors and Settings

    Sometimes, the problem isn’t with your PS5, but with your TV. Issues with the TV’s HDMI input, settings, or even firmware updates can prevent a proper connection. Let’s delve into these potential external factors to troubleshoot your PS5 HDMI woes.

    TV’s HDMI Input Issues

    Problems with the TV’s HDMI input can manifest as a lack of video signal, a distorted image, or no picture at all. Ensure the HDMI cable connecting your PS5 to your TV is properly seated in both devices. Try a different HDMI cable, as a faulty cable can be a culprit. If the issue persists, the TV’s HDMI input itself might be malfunctioning.

    TV Settings Affecting HDMI

    Various TV settings can impact the HDMI connection. Incorrect resolution, refresh rate, or audio settings can cause display problems. Check your TV’s menu for settings like HDMI input resolution, output format, and audio options. Ensure these settings match your PS5’s output capabilities. Sometimes, forcing the TV to use a specific input format, like 4K or 1080p, can resolve the issue.

    TV Updates and Firmware, Ps5 Hdmi Not Working

    Outdated TV firmware can cause compatibility problems with modern devices like the PS5. Regularly check for available updates for your TV model. Updating the firmware can often resolve various issues, including those affecting HDMI connections. Follow your TV’s manufacturer instructions to update its firmware.

    Verifying TV’s HDMI Input Settings

    Confirm that the correct HDMI input is selected on your TV. Your TV’s remote likely has buttons or menus to switch between HDMI inputs. If the PS5 is connected to HDMI 2, ensure the TV’s input selection is set to HDMI 2. Double-check the input selection on the TV’s display to confirm the correct input is active.

    TV Error Codes

    Some TVs display error codes when encountering problems. Look for any error messages displayed on the TV screen. Consult your TV’s manual or online resources to understand the meaning of these codes. The error code can provide specific clues about the issue.

    PS5 and TV Compatibility

    While most modern TVs are compatible with the PS5, some older models or specific TV types might not fully support the PS5’s output capabilities. Compatibility can vary based on the HDMI version supported by the TV and the PS5. Ensure your TV supports the HDMI version required by the PS5 for optimal performance.

    TV Type Compatibility with PS5

    The table below summarizes the general compatibility of different TV types with the PS5. This is a general guideline, and specific models may vary.

    My PS5’s HDMI port is acting up, which is seriously frustrating. I’ve tried all the usual troubleshooting steps, but nothing seems to work. Meanwhile, I’m also completely buzzing about the exciting news that Rihanna and ASAP Rocky have welcomed their second child! Rihanna and ASAP Rocky welcome second baby report This definitely takes my mind off things for a bit, but hopefully, a solution to my PS5 HDMI issue will surface soon.

    I’m hoping a firmware update or a simple cable swap will fix it.

    TV Type Compatibility with PS5
    LED TV Compatible
    OLED TV Compatible
    QLED TV Compatible

    Ensuring Proper Signal Reception

    Verify that the PS5 is sending a proper signal to the TV. If the TV isn’t receiving a signal, ensure the HDMI cable is securely connected to both the PS5 and the TV. If the PS5 is displaying a message indicating no signal, this is a crucial step to check. Sometimes, a simple restart of both devices can resolve the issue.

    Advanced Troubleshooting

    When basic troubleshooting steps fail to resolve your PS5 HDMI connection issues, delving into advanced techniques becomes necessary. This section explores more in-depth diagnostic methods, focusing on potential hardware problems and professional repair options. Addressing these more complex issues requires careful attention to detail and a methodical approach.

    HDMI Cable Integrity Check

    Proper HDMI cable functionality is crucial for a stable connection. Inspecting the cable’s integrity can identify any physical damage that might be hindering signal transmission.

    • Visually inspect the cable for any signs of damage, such as frayed wires, broken connectors, or bent pins. Look for any unusual wear and tear along the cable’s length. Damage in these areas could compromise the signal.
    • Test the cable with another device. If the HDMI cable works correctly with other devices, the issue is likely with the PS5 or the TV’s HDMI port, rather than the cable itself.
    • Use a different HDMI cable to test the connection. If the problem persists, the cable is likely the culprit.

    Testing HDMI Ports

    Confirming the functionality of both the PS5’s and the TV’s HDMI ports is critical. This ensures that the ports themselves are not the source of the problem.

    • Use a different HDMI cable with another device (e.g., a Blu-ray player or a streaming device) to test the HDMI port on the TV. If the other device functions correctly, the problem is likely with the PS5’s HDMI port.
    • If the TV’s HDMI port is confirmed functional, use a different HDMI cable with the PS5 to test the PS5’s HDMI port. If another device works with the PS5’s HDMI port, then the TV’s port is likely the source of the problem.

    Power Supply Assessment

    The PS5’s power supply is essential for its operation. Checking the power supply ensures that sufficient power is reaching the console.

    • Verify the power cord is securely connected to the PS5 and the wall outlet.
    • Ensure the power outlet is functional by testing another device at the same outlet. If the outlet is faulty, this could be the source of the problem.
    • Check the PS5’s power supply unit for any physical damage or signs of overheating.

    Potential Hardware Problems

    Possible hardware issues within the PS5’s HDMI port or circuitry can cause connection problems. Identifying these issues might require professional assistance.

    • The HDMI port itself may be damaged internally, preventing a proper connection. This is often the result of physical damage or repeated stress.
    • Internal circuitry issues could prevent the PS5 from sending or receiving the necessary signals through the HDMI port.

    Professional Repair Options

    If the problem persists after thorough troubleshooting, professional repair services may be necessary.

    My PS5 HDMI port’s been acting up lately, which is seriously frustrating. It’s driving me bonkers trying to figure out why the picture keeps cutting out. While searching for solutions, I stumbled across this hilarious video of President Obama and Chance the Rapper singing Jingle Bells. watch president obama and chance the rapper sing jingle bells It was a total mood booster, but I’m still hoping to get my PS5 HDMI sorted out.

    Maybe this festive distraction will inspire a fresh approach to the technical problem.

    • Authorized PlayStation repair centers can diagnose and repair the PS5’s HDMI port or other hardware components.
    • Independent repair shops with experience in electronic device repair can also be a viable option, but it’s crucial to ensure they have the necessary expertise.
    • Consider the cost and warranty implications of each repair option before making a decision.

    PS5 Console Opening Procedure (Safety First!)

    Opening the PS5 console requires careful handling to avoid damaging internal components. Safety precautions should always be prioritized.

    • Consult the official PlayStation troubleshooting guide for precise instructions on safely opening the PS5 console. This will ensure that you are following proper procedure to prevent any potential damage to the console’s delicate components.
    • Always disconnect the power cord from the PS5 before attempting any internal inspection or repair.
    • Work in a well-lit area to avoid making mistakes during the process.

    Troubleshooting Specific Situations

    Ps5 Hdmi Not Working

    Pinpointing the exact cause of your PS5 HDMI issues is crucial for effective troubleshooting. This section dives into specific scenarios, from problems with particular HDMI ports to error messages and distorted images. Understanding these situations will help you isolate the problem and find a tailored solution.

    HDMI Port and Cable-Specific Issues

    Different HDMI ports and cables can lead to varying problems. Some ports may have inherent quality issues, while certain cable types might not be compatible with your PS5 or TV. It’s essential to check both the source (PS5) and destination (TV) HDMI ports. Using a different cable or port might resolve the issue.

    Black Screen Display

    A black screen on your PS5 display can stem from various connectivity problems. First, ensure the HDMI cable is firmly connected to both the PS5 and TV. Check the input selection on your TV to confirm it’s receiving a signal from the PS5’s HDMI output. If the PS5 is in standby mode, power it off and then back on.

    If the problem persists, check the PS5’s settings for any HDMI-related configuration errors.

    Distorted Image or No Picture

    Distorted images or a complete lack of picture on your PS5 display usually point to a connectivity issue. Verify the HDMI cable’s integrity and firmness. A damaged or loose cable can cause these problems. Try a different HDMI cable to rule out cable malfunction. If the problem persists, inspect the HDMI ports on both the PS5 and TV for any visible damage.

    Ensure the correct input source is selected on your TV.

    HDMI Error Messages

    Error messages related to the HDMI connection can provide valuable clues about the problem. Carefully review the error message displayed on your TV or PS5. Consult the troubleshooting guide for your specific PS5 model or your TV’s manual for instructions on how to resolve the issue. Many HDMI error messages are associated with connectivity problems or incorrect settings.

    HDMI Cable Variations

    HDMI cables come in various brands and models. While most modern HDMI cables should work with the PS5, some lower-quality cables might experience compatibility issues or signal degradation. High-quality HDMI cables, especially those designed for high-resolution displays, can help prevent signal problems and improve image quality. Look for cables that are certified and have a reputable manufacturer.

    Troubleshooting Table Based on Error Messages

    Error Message Troubleshooting Steps
    HDMI Input Error Verify HDMI input settings on both the PS5 and TV. Check the HDMI input selection on your TV. Ensure the PS5’s HDMI output settings are correct.
    No Signal Check the HDMI cable connection. Ensure the cable is securely plugged into both the PS5 and the TV. Verify the input selection on your TV. Restart both the PS5 and TV.

    Testing Different HDMI Ports

    If possible, test different HDMI ports on both the PS5 and the TV. If the issue persists across all ports, the problem may lie elsewhere, such as a faulty HDMI cable or a malfunctioning component. Swap the HDMI cable to a different port and test each port in turn on both the PS5 and the TV. Keep a record of the ports that worked.

    Conclusive Thoughts: Ps5 Hdmi Not Working

    In conclusion, troubleshooting PS5 HDMI issues requires a systematic approach. By following the steps Artikeld in this guide, you can effectively diagnose and resolve problems ranging from loose connections to software conflicts. Remember to start with the simplest solutions and progressively move to more advanced techniques if needed. This guide aims to equip you with the knowledge and tools to resolve your PS5 HDMI woes and get back to enjoying your favorite games.