Category: Home Decor

  • Hang an Unframed Canvas A Complete Guide

    Hang an Unframed Canvas A Complete Guide

    Hang an Unframed Canvas: This guide delves into the art of displaying unframed canvases, offering a comprehensive overview of techniques, considerations, and creative applications. We’ll explore various hanging methods, from simple nail placements to sophisticated gallery wall setups.

    From choosing the right tools and materials to understanding the impact of wall types and room decor, this guide covers everything you need to know to confidently hang your unframed canvas masterpieces. We’ll also delve into aesthetic considerations, including color schemes, room types, and creative ways to use multiple canvases.

    Understanding the Action

    Hang an Unframed Canvas

    Hanging an unframed canvas requires careful consideration of the canvas’s weight, the wall’s material, and the desired aesthetic. It’s more than just hammering a nail; it’s about achieving a secure and visually appealing display. This guide will detail the process, highlighting various methods and materials to ensure your artwork is safely and effectively showcased.The act of hanging an unframed canvas involves a crucial balance between aesthetics and practicality.

    A well-executed hanging method ensures the artwork remains stable and prevents damage to the wall or canvas. Understanding the nuances of different hanging techniques is key to achieving this balance.

    Hanging an unframed canvas can be surprisingly impactful, and mastering visual transitions like those in Adobe Premiere Pro can elevate your artistic statement. Think about how smoothly you can blend different elements to create a flow, like you would with Add Transitions in Adobe Premiere Pro. The subtle shift in focus can make a big difference, just like the careful placement of the canvas on the wall, to create a striking visual narrative in your home.

    Different Hanging Methods

    Various methods exist for hanging unframed canvases, each with its own set of advantages and disadvantages. The best approach depends on the canvas’s weight, the wall’s composition, and personal preferences.

    • Using Nails: For lightweight canvases and walls like drywall, nails offer a straightforward solution. Choose nails appropriate for the wall’s material and canvas weight. Larger canvases might require multiple nails for added support. Hammering nails directly into the wall requires precision to avoid damaging the artwork or wall. Ensure the nails are hammered in straight to avoid uneven stress on the canvas.

      This method is often suitable for smaller, lighter artworks.

    • Utilizing Picture Wire: Picture wire is a popular choice for hanging canvases of varying weights. This method allows for easier repositioning of the artwork. Picture wire is typically used with a sawtooth hanger or a similar attachment. The wire is attached to the back of the canvas using small, sturdy tacks or clips, ensuring the wire is taut and the canvas is secure.

      This method offers a versatile way to hang heavier canvases.

    • Employing Hanging Strips: Hanging strips, often made of strong adhesive or wood, provide a quick and clean method. These strips are placed directly onto the wall, and the canvas is then hung using wire or clips. This approach is ideal for renters or those who wish to avoid damaging the wall. This method is suitable for a variety of wall types and canvas weights, providing a simple and secure way to hang artwork.

    Security Considerations

    Securing an unframed canvas is crucial to prevent it from falling or damaging the wall. The weight of the canvas and the wall’s material influence the choice of hanging method.

    • Wall Type Considerations: Different wall materials require different hanging techniques. Drywall, for example, necessitates smaller nails or specialized hanging strips. Stucco or plaster might require heavier-duty hardware or anchors. Ensure the hanging method is compatible with the wall’s structural integrity to prevent damage.
    • Canvas Weight Considerations: Heavier canvases demand more robust hanging solutions. Using multiple nails, picture wire with sturdy hangers, or hanging strips designed for heavier weights is essential for stability. Proper consideration of the canvas’s weight will ensure the artwork remains securely displayed.

    Materials Required, Hang an Unframed Canvas

    The materials required for hanging an unframed canvas vary based on the chosen method.

    Hanging Method Materials
    Nails Nails appropriate for wall material, hammer
    Picture Wire Picture wire, sawtooth hangers, tacks or clips
    Hanging Strips Hanging strips, picture wire or clips

    Always ensure that the chosen materials are strong enough to support the weight of the canvas. Using inadequate materials could lead to the canvas falling or damaging the wall.

    Comparison of Methods

    The pros and cons of different hanging methods are as follows:

    • Nails: Pros – simple, inexpensive. Cons – less versatile, can damage walls if not used carefully.
    • Picture Wire: Pros – versatile, easy to reposition. Cons – requires careful attachment, might not be suitable for extremely heavy canvases.
    • Hanging Strips: Pros – quick, less damaging to walls. Cons – may not be as strong as other methods for very heavy canvases.

    Visualizing the Setup: Hang An Unframed Canvas

    Hanging an unframed canvas requires careful planning and consideration of both functionality and aesthetics. This section dives into the practical aspects of the setup, providing detailed guidance on choosing the right method, tools, and materials, and understanding the impact of different wall types. Proper hanging ensures the artwork is displayed safely and effectively, enhancing the visual appeal of your space.The process of visualizing the setup involves a multifaceted approach.

    From selecting the optimal hanging method to ensuring the safety of the artwork and the wall, each aspect needs careful consideration. This comprehensive guide provides a detailed framework for planning and executing the hanging process effectively.

    Canvas Hanging Methods

    Different hanging methods offer unique visual impacts and varying levels of complexity. A well-considered approach ensures that the artwork complements the surrounding environment, rather than detracting from it. The table below Artikels the various hanging methods, detailing the tools, materials, and steps involved.

    Hanging Method Tools Materials Step-by-Step
    Centered Hanging Level, picture hanging wire, picture hooks, drill (if necessary), hammer Picture hanging wire, nails, screws, saw (if using wood paneling), appropriate wall anchors 1. Measure and mark the center point on the wall.
    2. Securely install picture hooks or use nails/screws.
    3. Attach wire to the canvas, ensuring even tension.
    4. Hang the canvas from the hooks or nails.
    Offset Hanging Level, measuring tape, picture hanging wire, picture hooks, drill (if necessary) Picture hanging wire, nails, screws, appropriate wall anchors 1. Measure and mark the desired offset position.
    2. Securely install picture hooks.
    3. Attach wire to the canvas.
    4. Hang the canvas from the hooks.
    Staggered Hanging Level, measuring tape, picture hanging wire, picture hooks, drill (if necessary), stud finder (if applicable) Picture hanging wire, nails, screws, appropriate wall anchors 1. Determine the spacing and height of each canvas.
    2. Mark the positions of each canvas.
    3. Install picture hooks.
    4. Hang the canvases, ensuring an aesthetically pleasing arrangement.

    Aesthetic Comparisons of Hanging Methods

    The choice of hanging method directly influences the visual impact of the artwork. Different methods evoke various aesthetic qualities, which are discussed in the table below.

    Hanging Method Aesthetic Impact
    Centered Formal, balanced, traditional
    Offset Modern, dynamic, contemporary
    Staggered Visually engaging, layered, artistic

    Canvas Hanging Heights

    The height at which a canvas is hung significantly affects the viewer’s experience. This section illustrates how varying heights can create different perspectives.

    Hanging Height Viewer Perspective Visual Example
    Low (at eye level) Intimate, engaging Imagine a canvas hung at the height of a seated viewer.
    Medium (slightly above eye level) Inviting, balanced Consider a canvas hung at a height slightly above the viewer’s eye level, creating a comfortable viewing angle.
    High (significantly above eye level) Grand, commanding Picture a canvas hung high on a wall, drawing the eye upward and creating a sense of grandeur.

    Risks and Safety Precautions

    Hanging an unframed canvas involves potential risks if not handled carefully. The following table Artikels potential risks and necessary safety precautions.

    Potential Risk Safety Precautions
    Damage to the wall Use appropriate anchors for the wall type. Inspect the wall for structural issues before drilling.
    Damage to the canvas Handle the canvas carefully. Avoid excessive tension on the wire.
    Injury from tools Use tools with care. Ensure proper ventilation when using power tools.

    Impact of Wall Types

    The type of wall significantly influences the appropriate hanging method and materials. Different wall types present varying levels of support and require specific approaches.

    Wall Type Considerations
    Drywall Use appropriate wall anchors and screws. Avoid drilling into studs whenever possible.
    Plaster Carefully assess the plaster’s condition before drilling. Use appropriate anchors.
    Brick Use appropriate anchors designed for brick. Avoid drilling directly into the brick.

    Context and Considerations

    Hanging an unframed canvas isn’t just about nailing it to the wall; it’s about creating a harmonious blend of art and environment. Careful consideration of the room’s aesthetics, the canvas’s dimensions and style, and the overall ambiance is key to achieving a visually pleasing and impactful display. Understanding these factors ensures the piece doesn’t just sit on the wall, but truly becomes a part of the room’s narrative.The success of hanging an unframed canvas hinges on thoughtful consideration of the surrounding environment.

    Different rooms demand different approaches, and the size and style of the canvas play a crucial role in determining the most effective hanging method. Lighting conditions also significantly impact how the canvas is perceived. All these elements work together to create a captivating visual experience.

    Room Decor Harmony

    Careful consideration of existing decor is essential. A bold, patterned wallpaper might call for a more minimalist canvas placement, while a simple, neutral color scheme allows for greater flexibility. Matching the canvas’s color palette to existing furnishings or artwork can create a cohesive and visually appealing space. Conversely, a contrasting color can serve as a focal point, drawing attention to the artwork.

    Canvas Size and Style Influence

    The size of the canvas significantly impacts the hanging method. A large, statement piece deserves more prominent placement, perhaps above a sofa or fireplace. Smaller canvases, on the other hand, can be clustered or grouped, creating a gallery wall effect. The style of the canvas also guides the choice of hanging. A modern, abstract piece might look great centered on a wall, while a more traditional piece could be hung in a gallery-style grouping.

    Room Ambiance and Impact

    The overall ambiance of the room heavily influences the canvas’s presentation. A formal living room might benefit from a more classical-style canvas, hung at a higher point, while a cozy bedroom could feature a smaller, more intimate piece, hung at a slightly lower height. Consider the overall tone and feeling you want to evoke when selecting the hanging method.

    Warm, inviting spaces often benefit from pieces hung lower, while more contemporary settings can accommodate pieces at higher points.

    Hanging an unframed canvas can feel a bit like stepping into a blank, slightly unsettling space. It’s similar to how some of the real-world cults, like the ones that inspired the video game Far Cry 5, the terrifying real world cults that inspired far cry 5 , create a sense of isolation and control. Ultimately, though, both the canvas and the space it occupies are waiting for you to fill them with your own unique vision.

    It’s a blank slate, ready for your personal touch.

    Specific Room Type Considerations

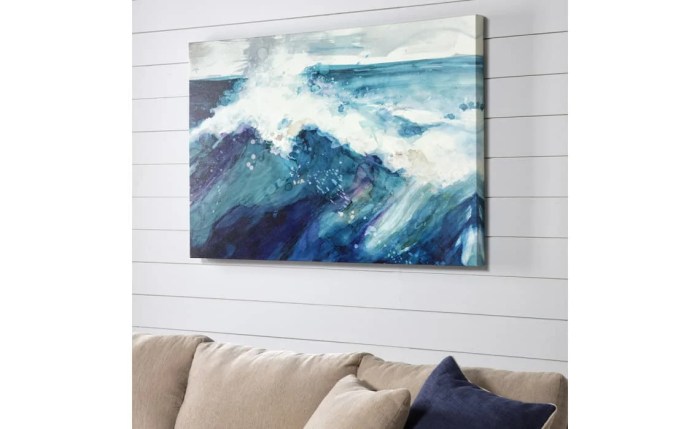
    • Living Room: A living room canvas should complement the room’s function and style. A large, bold piece can serve as a focal point, while a grouping of smaller canvases can create a dynamic gallery wall. Consider the seating arrangements and traffic flow when choosing the hanging height and position.
    • Bedroom: A bedroom canvas should promote relaxation and serenity. Smaller, more intimate pieces hung at a lower height can enhance the sense of intimacy. Avoid overly bold or stimulating artwork, favoring softer hues and calming imagery.
    • Dining Room: A dining room canvas should be proportional to the room’s scale. A piece that’s too large can overwhelm the space, while a small piece might feel lost. Consider the dining table’s size and the surrounding furniture when selecting the hanging method.

    Lighting’s Impact

    Lighting significantly affects how the canvas is perceived. Natural light can enhance the colors and textures, while artificial lighting can cast shadows and alter the piece’s appearance. Consider the direction of light when hanging the canvas, avoiding placement where strong light sources create glare or wash out the colors. Using strategically placed lamps or lighting fixtures can highlight the canvas’s details and enhance its visual appeal.

    Aesthetic Variations

    Unframed canvases offer a unique opportunity to personalize your space. Beyond the practical considerations of hanging, the aesthetic choices you make significantly impact the overall look and feel of a room. Experimentation with different layouts, color palettes, and design themes can transform a simple collection of canvases into a captivating focal point. This section delves into the diverse possibilities for displaying unframed artwork.

    Layout Variations for Multiple Canvases

    Different arrangements can evoke various moods and styles. Careful consideration of the space, the canvases’ sizes and shapes, and the desired visual effect are key.

    Layout Style Description Visual Impression
    Grid/Pattern Canvases arranged in a symmetrical or asymmetrical grid pattern, often using consistent spacing. Organized, structured, and visually appealing.
    Clustered Arrangement Canvases grouped closely together, creating a focal point or a sense of intimacy. Inviting, warm, and emphasizes the artwork’s collective presence.
    Overlapping Arrangement Canvases are layered or slightly overlapping to create depth and visual interest. Modern, dynamic, and visually striking.
    Linear Arrangement Canvases hung in a horizontal or vertical line, creating a continuous visual flow. Clean, sophisticated, and provides a sense of harmony.

    Complementing Existing Artwork and Furniture

    Integrating unframed canvases with existing décor requires careful consideration of color palettes, textures, and styles. Consider how the canvases can enhance or complement the existing pieces without creating visual chaos.

    • Color Harmony: Choose canvases that complement the colors in existing artwork or furniture. A cohesive color scheme creates a unified and visually pleasing space.
    • Texture Contrast: Introduce a different texture to the canvas to create visual interest without disrupting the overall aesthetic. Rough canvas textures paired with smooth furniture can add a touch of contrast.
    • Scale and Proportion: Ensure the size and scale of the canvases are proportionate to the space and existing artwork. Overwhelming or undersized canvases can detract from the overall design.

    Creating a Gallery Wall with Unframed Canvases

    Gallery walls using unframed canvases can be a dynamic and personal way to showcase a collection of artwork.

    • Theme Selection: Establish a theme for the gallery wall, such as a color palette, subject matter, or style, to create a cohesive and impactful display.
    • Canvas Sizing: Consider varying the sizes and shapes of the canvases to add visual interest and avoid a monotonous look. Mixing large and small canvases can be effective.
    • Spacing and Arrangement: Experiment with different spacing and arrangements to achieve the desired visual effect. Consistent or irregular spacing can both work well.

    Color Schemes for Unframed Canvases

    A carefully chosen color scheme can enhance the visual impact of unframed canvases.

    • Monochromatic Scheme: Use variations of a single color for a calm and unified look.
    • Analogous Scheme: Select colors that sit next to each other on the color wheel for a harmonious and balanced display.
    • Complementary Scheme: Use colors that are opposite each other on the color wheel for a striking and vibrant display.

    Incorporating Unframed Canvases into Design Themes

    Unframed canvases can seamlessly integrate into various design themes.

    • Minimalist: Use clean lines, neutral colors, and simple shapes for a streamlined aesthetic.
    • Bohemian: Incorporate a mix of textures, patterns, and colors for a vibrant and eclectic look. Use organic shapes and bold colors.
    • Contemporary: Embrace a mix of modern and traditional elements, incorporating various shapes, sizes, and colors.

    Technical Aspects

    Hanging an unframed canvas requires careful planning and execution to ensure both a visually appealing result and the preservation of your artwork and wall. Understanding the technical aspects of measurement, spacing, leveling, securing, and wall protection is crucial for a successful installation. Proper techniques will prevent damage to the canvas and the wall, while ensuring the piece hangs straight and securely.

    Measuring the Wall and Canvas

    Accurate measurements are paramount to achieving a balanced and aesthetically pleasing arrangement. Measure the wall area where the canvas will hang, ensuring you consider the desired position and the overall room design. Measure the canvas’s dimensions, noting both the height and width. Take precise measurements to avoid any miscalculations that may result in improper spacing or alignment.

    Calculating Appropriate Spacing

    Spacing between canvases is a crucial element in creating a cohesive and visually harmonious gallery wall. Consider the size of the individual canvases, and the desired aesthetic. A general rule of thumb is to leave at least 2-4 inches of space between each canvas, allowing for a visual break and preventing the collection from appearing crowded. For a more dramatic effect, larger spaces might be employed.

    Hanging an unframed canvas can be surprisingly freeing. It’s a chance to experiment with different looks and placements. Thinking about how to best display your artwork, especially when it comes to unframed pieces, is a fun process. Plus, you might discover a whole new perspective on your art after looking at it in a different space or light.

    You’ll need to consider how your display space interacts with the art, but before you hang your masterpiece, make sure you know how to see your blocked contacts on your iPhone to ensure your art isn’t blocked from view by an unwanted contact. See Blocked Contacts on iPhone Then, you can focus on the visual appeal of the piece and the room’s aesthetic.

    The key to a great display is often finding the right balance of elements.

    Leveling the Canvas

    Precise leveling is essential for a straight and professional appearance. Employ a spirit level or a laser level to ensure the canvas is perfectly horizontal. If using multiple canvases, ensure they are all leveled to the same baseline. This will prevent the canvases from tilting or appearing uneven, and will provide a sense of balance.

    Securing the Canvas

    The method for securing the canvas depends largely on its size and weight. Small, lightweight canvases can be hung with picture wire and nails. Larger or heavier canvases may require more substantial support systems, like D-rings and sawtooth hangers, which provide a more secure grip. A good rule of thumb is to use support systems appropriate to the canvas’s weight.

    Consider using multiple points of support for large canvases to prevent sagging.

    Preventing Wall Damage

    Protecting the wall during the hanging process is vital. Use appropriate hanging hardware that is designed to minimize the risk of damage to the wall. Avoid using nails that are too large for the wall surface. For plaster or drywall walls, use specialized drywall anchors or plastic wall plugs to prevent the nails from damaging the wall.

    Protect the wall surface with painter’s tape or masking tape to prevent any accidental paint marks. When using adhesive hooks or strips, always follow the manufacturer’s instructions. Use wall-safe adhesive hooks or strips that are suitable for the weight of the canvas.

    Creative Applications

    Hang an Unframed Canvas

    Unframed canvases offer a unique freedom for artistic expression, moving beyond the traditional framing constraints. This versatility allows for a multitude of creative applications, from personalizing gallery walls to transforming spaces with unique focal points. Their adaptability makes them an excellent choice for showcasing personal mementos, photographs, or even entire collections.This section explores how to leverage the unframed canvas format for a personalized and visually engaging presentation of your creative works and treasured items.

    We’ll delve into various hanging techniques and ideas for using these canvases as backdrops or focal points within a room.

    Personalized Gallery Walls

    Unframed canvases can create a dynamic and personalized gallery wall. By varying sizes, colors, and textures, you can build a visually captivating display. Careful consideration of spacing and arrangement is crucial to achieving a cohesive aesthetic. A grid layout, for example, can add a structured feel, while a more organic arrangement allows for a more spontaneous and artistic display.

    • Employ different sizes and shapes for a visually interesting display.
    • Use varying colors and textures to create a dynamic and layered effect.
    • Create a cohesive aesthetic through consistent color palettes or repeating patterns.
    • Consider the overall size and shape of the space to optimize the arrangement of the canvases.

    Using Unframed Canvases as Backdrops

    Unframed canvases can be utilized as captivating backdrops for photographic displays or other artistic works. This approach transforms a plain wall into a dynamic and engaging space. The canvas’s neutral background allows the displayed artwork or photographs to take center stage.

    • Use the canvas as a backdrop for a series of photographs, creating a cohesive narrative.
    • Showcase artwork or prints, allowing the canvas to serve as a neutral frame.
    • Create a focal point in the room by using a large unframed canvas as a backdrop for a dramatic display.
    • Experiment with different lighting techniques to highlight the displayed artwork or photographs.

    Showcasing Personal Mementos or Collections

    Unframed canvases provide a unique platform for showcasing cherished mementos or collections. From family photos to decorative objects, these canvases can transform ordinary items into visually compelling displays. The flexibility of the unframed format allows for the display of items of varying sizes and shapes.

    • Arrange family photos in a timeline or themed manner on the canvas.
    • Display decorative objects like figurines or pottery, creating a curated vignette.
    • Organize a collection of stamps or coins, creating a miniature museum-like display.
    • Create a custom display for items that have sentimental value, turning them into a personalized focal point.

    Creating a Unique Focal Point

    Unframed canvases can be strategically positioned to become a unique focal point in a room. Their versatility allows for creative hanging methods that add visual interest and personalize the space. The choice of hanging method should complement the canvas’s design and the overall room’s aesthetic.

    • Hang the canvas at an unexpected angle for a bold and dramatic effect.
    • Use multiple canvases in various sizes to create a dynamic focal point.
    • Hang the canvas above a piece of furniture or a significant architectural feature to draw attention to it.
    • Experiment with different hanging techniques, such as using picture wires or decorative hooks, to create visual interest.

    Accentuating Design Elements with Hanging Techniques

    Various hanging techniques can highlight the unique design elements of an unframed canvas. The technique chosen should enhance the canvas’s aesthetic qualities and create a harmonious visual effect. For instance, using a wire and a simple hook will achieve a different visual effect compared to a custom-made hanger.

    • Use picture wire and simple hooks to achieve a clean and contemporary look.
    • Employ decorative hooks or brackets to add a touch of elegance and visual interest.
    • Consider using floating shelves or wall-mounted displays to showcase multiple unframed canvases.
    • Experiment with varying heights and arrangements to create visual depth and interest in the space.

    End of Discussion

    In conclusion, hanging an unframed canvas is a surprisingly versatile process. By carefully considering your wall type, canvas size, and room ambiance, you can achieve a truly stunning and personalized display. Whether you’re aiming for a minimalist look or a bold gallery wall, this guide equips you with the knowledge and inspiration to bring your unframed canvases to life.

  • Hang Christmas Lights Inside Windows A Sparkling Guide

    Hang Christmas Lights Inside Windows A Sparkling Guide

    Hang Christmas Lights Inside Windows: Transform your home into a winter wonderland with dazzling displays. From a brief history of the tradition to safety precautions, creative design ideas, and detailed installation instructions, this guide provides everything you need to create a breathtaking and memorable Christmas light show. This guide covers various styles of indoor light displays, helping you to choose the perfect lights and create a truly festive atmosphere.

    Learn about different types of Christmas lights, their safety features, and how to choose the right ones for your windows. Discover creative ways to arrange your lights, from classic patterns to unique themes. This comprehensive guide also covers important safety tips to ensure a joyful and hazard-free holiday season.

    Introduction to Indoor Christmas Light Displays

    The tradition of decorating homes with Christmas lights, particularly those placed inside windows, has a rich history intertwined with the celebration of the holiday season. Early displays were modest, often featuring candles or simple string lights. Over time, the displays have evolved into elaborate and intricate creations that reflect contemporary design trends and technological advancements. These displays are more than just decoration; they symbolize the spirit of Christmas and create a warm and welcoming atmosphere for both residents and visitors.The evolution of indoor Christmas light displays reflects broader societal trends in home decor and the increasing availability of lighting technologies.

    From simple electric lights to LED and programmable options, the variety of options available has grown exponentially. This expansion in options has led to more personalized and artistic displays, reflecting individual tastes and styles.

    History of Indoor Christmas Light Displays

    The tradition of Christmas light displays has its roots in the celebration of the holiday. Early decorations included candles, placed strategically to create an inviting and warm ambiance. The introduction of electricity marked a significant shift, allowing for more vibrant and longer-lasting displays. Early electric lights were often simple and not as visually appealing as modern options. Over the years, the complexity and artistry of indoor displays have increased dramatically.

    Evolution of Indoor Light Displays

    The evolution of indoor light displays is tied to advancements in technology. Early displays relied on incandescent bulbs, which were less energy-efficient and produced a warm, incandescent glow. The introduction of LED lights has revolutionized indoor displays, providing brighter, more vibrant colors, and far greater energy efficiency. The programmable aspect of many LED systems allows for dynamic displays that change color and pattern throughout the night, offering greater aesthetic options.

    Hanging Christmas lights inside windows is a festive touch, but have you considered maximizing the space? Taking a radiator off the wall, as suggested in this helpful guide Take a Radiator Off the Wall , could open up a whole new dimension for your decorating. This creates a perfect opportunity to add a dramatic display of lights, making your window decorations truly stand out.

    These innovations have allowed for more complex and creative displays.

    Cultural Significance of Christmas Light Displays

    Christmas light displays, especially those in windows, have a strong cultural significance. They symbolize the spirit of Christmas, often signifying warmth, hospitality, and community spirit. The sight of twinkling lights and festive decorations evokes feelings of joy and wonder, particularly for children. These displays serve as a public statement of the holiday spirit, welcoming neighbors and passersby. Many communities have even adopted light-display competitions, adding a competitive and engaging aspect to the tradition.

    Types of Indoor Christmas Lights for Window Displays

    There are many types of indoor Christmas lights suitable for window displays. Classic string lights, both incandescent and LED, remain popular for their traditional charm. Icicle lights, which hang down like icicles, offer a unique touch, creating a soft, cascading effect. Net lights, with their dense coverage, provide a dramatic, glowing effect. These types of lights offer a range of aesthetic options for homeowners, allowing them to choose the best fit for their style.

    Consider the overall style of your home and the desired effect when choosing lights.

    Styles of Window Decor Complementing Hanging Christmas Lights

    Window displays can be further enhanced by carefully selected decor that complements the hanging Christmas lights. Consider the color scheme of your lights and the overall holiday theme when selecting other decorations. For example, using similar colors in the decorations and lights can create a cohesive and harmonious display. Adding elements such as ornaments, garlands, or festive figurines can create a more complete and welcoming atmosphere.

    The addition of a snow-covered landscape or a charming village scene can enhance the visual impact. Using festive fabrics, such as red or green velvet, can add to the warmth and elegance of the display. These elements can transform a simple window into a festive and inviting focal point.

    Light Type Description Aesthetic Effect
    String Lights Traditional lights, often in warm white or multicolored options. Classic, warm, inviting.
    Icicle Lights Lights that hang in cascading patterns. Soft, flowing, and dramatic.
    Net Lights Densely packed lights that create a glowing effect. Intense, radiant, and vibrant.

    Safety Considerations

    Transforming your home into a winter wonderland with Christmas lights can be a delightful experience, but safety must be paramount. Improper installation or the use of faulty lights can lead to significant risks, including fire hazards. This section will delve into crucial safety precautions for installing and using indoor Christmas lights, focusing on different light types, potential fire risks, and proper fixture selection for window displays.Careful planning and adherence to safety guidelines are essential for a joyous and risk-free holiday season.

    Understanding the inherent risks associated with electrical components and the specific challenges posed by window displays is crucial for minimizing potential hazards.

    Hanging Christmas lights inside windows is a festive touch, but sometimes, you need a little extra sparkle! Just like learning how to light a campfire in Ark, finding the right lighting technique takes a bit of know-how. Check out Ark How to Light Campfire for some helpful tips. Ultimately, though, the best indoor lighting is about creating a warm, inviting atmosphere for your holiday celebrations, and some strategically placed lights can make all the difference.

    Indoor Light Type Comparisons

    Different types of indoor Christmas lights offer varying degrees of safety. Incandescent lights, while warm and traditional, produce more heat than LEDs or CFLs. This increased heat poses a potential fire risk if the lights are inappropriately placed or the surrounding materials are flammable. LED lights, on the other hand, generate significantly less heat, making them a safer option.

    Compact Fluorescent Lights (CFLs) also produce less heat than incandescent lights but contain mercury, which necessitates proper disposal procedures.

    Fire Hazards of Window Displays

    Windows, with their often close proximity to flammable materials like curtains and upholstery, present specific fire hazards. Direct contact of lights with curtains or other flammable fabrics can lead to rapid ignition. Overloaded electrical circuits can also overheat and start fires. The weight of the decorations on the window can also be a safety issue, especially if the lights are improperly attached or the window is not strong enough.

    Careful selection of materials and proper installation procedures are essential to mitigate these risks.

    Hanging Christmas lights inside windows is a great way to add a festive touch to your home, but sometimes a little extra oomph is needed. Check out this new release, “Bomb the Bass Back to Light” new release bomb the bass back to light , to really get your holiday spirit going. The upbeat vibes will inspire you to add some extra sparkle and shine to your window displays, creating a truly magical atmosphere.

    Choosing the Right Light Fixtures for Windows

    Selecting the appropriate light fixtures is crucial for a safe and effective window display. Consider the type of window, its structural integrity, and the proximity to flammable materials. Use lights designed for indoor use, specifically for window displays. Look for fixtures with UL (Underwriters Laboratories) listings to ensure they meet safety standards. Avoid using fixtures with exposed wires or damaged components.

    Step-by-Step Procedure for Safe Window Light Installation

    A meticulous step-by-step procedure for safe window light installation can prevent accidents and ensure a joyful holiday season.

    1. Assessment: Thoroughly inspect the window’s structural integrity and the surrounding area for potential fire hazards. Identify any flammable materials within a reasonable distance. Ensure the window can support the weight of the decorations.
    2. Preparation: Use a non-flammable base or support for the lights. Check the electrical wiring for damage or fraying. Ensure the electrical circuit is not overloaded by other appliances. If using multiple sets of lights, ensure each set is plugged into a separate circuit.
    3. Installation: Connect the lights to a reliable and appropriately rated electrical outlet. Use appropriate clips, hooks, or other fasteners to securely attach the lights to the window frame or other supports without straining the fixtures or wires. Do not place lights directly on or near flammable materials like curtains or drapes. Keep the wires away from sharp edges that might damage them.

      Avoid overstretching the wires. Ensure that the connections are securely fastened to prevent any accidental detachment.

    4. Testing: Turn the lights on to ensure that everything is functioning properly. Look for any signs of overheating, frayed wires, or other problems. Turn off the lights if any problems arise. Ensure that the lights are positioned to avoid direct contact with flammable materials.
    5. Maintenance: Regularly inspect the lights for damage or wear and tear. Replace any faulty components immediately. Disconnect the lights before any maintenance work.

    Methods for Hanging Lights Inside Windows

    Transforming your windows into festive displays can be a rewarding experience, but careful planning and execution are key to a successful installation. Choosing the right hanging method is crucial to ensure the safety and longevity of your lights, as well as the integrity of your window frames. Understanding the various techniques available and the associated tools and materials will empower you to create a dazzling and damage-free display.Different methods for hanging Christmas lights inside windows cater to various window types, light styles, and personal preferences.

    Selecting the appropriate technique ensures a safe and aesthetically pleasing result, allowing you to fully enjoy the holiday season.

    Window Frame Mounting Techniques

    Careful consideration is required when mounting lights directly on window frames. Improper installation can lead to damage to the frame or window itself, potentially voiding warranties or requiring costly repairs.

    • Using Adhesive Hooks: This method involves using strong adhesive hooks specifically designed for exterior or interior use. These hooks are a popular choice for their ease of installation and ability to hold various light types. Ensure the hooks are compatible with the weight of the lights and the surface material of the window frame. Proper preparation of the surface, such as cleaning and drying, is crucial for optimal adhesion.

      Materials needed include adhesive hooks, cleaning solution, and a soft cloth.

    • Employing Command Strips or Adhesive Strips: Similar to adhesive hooks, Command strips or adhesive strips offer a relatively simple way to attach lights to window frames. These strips are generally suitable for lighter weight displays and smooth surfaces. However, their adhesive strength can be affected by environmental factors such as humidity or temperature. Tools and materials required include Command strips, cleaning solution, and a soft cloth.

    • Utilizing Mounting Clips: Mounting clips provide a more secure and permanent mounting solution than adhesive methods. These clips are typically designed for use with specific types of lights and can be fastened directly to the window frame using screws or nails. However, this method may require more effort and precision. Tools and materials needed include mounting clips, screws or nails, a screwdriver, and a drill (if needed).

    Stringing Lights on Window Sills or Shelves

    This method involves hanging lights from window sills or shelves. This allows for a visually appealing display that doesn’t directly attach to the window frame.

    • Using S-Hooks or J-Hooks: These hooks are versatile and can be used to hang lights from shelves or window sills. Select hooks appropriate for the weight of the lights and the type of surface. Ensure that the hooks do not damage the surface they are attached to. Materials needed include S-hooks, J-hooks, and optional string or wire.

    • Employing Fishing Line or String: For a more subtle and elegant approach, fishing line or string can be used to drape lights along the window sill or shelf. This method is particularly well-suited for creating a soft, ambient glow. Materials needed include fishing line or string, and small clips or binder clips to secure the line.

    Safety Considerations for Hanging Lights

    Always prioritize safety when hanging Christmas lights. Ensure that the lights are properly insulated and that the wiring is not exposed. Avoid overloading electrical outlets and never leave lights unattended when plugged in. Follow manufacturer instructions for safe use and maintenance.

    Window Damage Prevention

    Take precautions to avoid damaging your windows during the installation process.

    • Employing Protective Materials: Use soft materials, such as felt or foam pads, to prevent scratches or marks on the window surface when using adhesive hooks or clips.
    • Careful Selection of Mounting Hardware: Select mounting hardware that is compatible with the window frame material. Use screws that are appropriate for the type of wood or other material used.
    • Using Appropriate Mounting Techniques: Avoid using excessive force when attaching lights or mounting hardware. Always check if the weight of the lights and hardware can be safely supported by the window frame.

    Creative Light Display Ideas

    Transforming your windows into dazzling Christmas light displays is a fantastic way to add a touch of magic to your home. Beyond simply stringing lights, innovative designs can truly elevate the experience for you and your neighbors. These ideas offer inspiration for creating captivating displays that reflect your unique style.The key to a successful display lies in careful consideration of light color, intensity, and pattern.

    Choosing the right combination can significantly enhance the visual appeal and create a truly immersive experience. By exploring different designs and themes, you can create a display that tells a story and sets a festive mood.

    Light Color and Intensity

    The color palette you choose profoundly impacts the overall ambiance of your light display. Warm colors like reds, golds, and oranges evoke a cozy and inviting atmosphere, while cool colors like blues, greens, and purples create a more ethereal or whimsical feel. The intensity of the lights also plays a crucial role. Varying the brightness levels can create depth and visual interest, drawing the eye to different parts of the display.

    Using a combination of bright and dimmer lights can create a dynamic and engaging effect.

    Light Patterns and Designs

    Experimenting with different light patterns is key to a captivating display. Simple patterns like straight lines or flowing curves can create a sense of elegance. More intricate patterns, such as starbursts, icicles, or snowflakes, can add a touch of festive whimsy. Consider incorporating multiple patterns in a single display to create a layered and multifaceted effect.

    Design Themes for Hanging Christmas Lights

    Different themes offer a framework for your display, helping you visualize the overall design. Choosing a theme helps guide your color and pattern choices, ensuring a cohesive and visually appealing result.

    Theme Color Palette Light Pattern
    Winter Wonderland Blues, whites, silvers Starbursts, icicles, frosted branches
    Festive Celebration Reds, greens, golds Chandelier-style clusters, garlands, wrapped presents
    Enchanted Forest Greens, purples, blues Twinkling lights, foliage shapes, glowing mushrooms

    A Unique and Elaborate Indoor Christmas Light Display

    Imagine a display themed “A Night in the Forest.” The windows would be adorned with a combination of warm and cool colors. Emerald green and deep purple lights would create the impression of a dense forest canopy. The lights would be strung in a variety of patterns, including flowing curves that resemble tree branches and clusters that mimic the glow of fireflies.

    Smaller, twinkling lights would be strategically placed to highlight the branches and create an enchanting depth. Some areas might be highlighted with brighter, golden lights to simulate the warmth of a campfire. The overall effect would be a magical journey into a fantastical winter forest, drawing viewers into a captivating spectacle.

    Choosing the Right Lights: Hang Christmas Lights Inside Windows

    Selecting the perfect Christmas lights for your indoor window displays is crucial for achieving the desired ambiance and maximizing the impact of your decorations. Choosing the right type of light, considering factors like energy efficiency, lifespan, and window dimensions, ensures a beautiful and long-lasting display. Proper selection ensures your lights are not only visually appealing but also functional and economical in the long run.Different types of Christmas lights offer varying aesthetics, energy consumption, and longevity.

    Understanding the characteristics of each type allows you to make informed choices that align with your preferences and needs. The following sections will delve into the various options available, focusing on hanging applications.

    Types of Indoor Christmas Lights

    Choosing the right light type significantly influences the overall look and feel of your display. Different light types offer unique aesthetic qualities and operational characteristics.

    • LED (Light Emitting Diode) Lights: LED lights have emerged as a popular choice for their exceptional energy efficiency. They consume significantly less energy compared to traditional incandescent bulbs, resulting in lower electricity bills. LEDs also boast a remarkably long lifespan, often lasting many years with minimal maintenance. They are available in a wide array of colors and styles, making them versatile for various indoor window displays.

    • Incandescent Lights: Traditional incandescent lights are still a viable option, offering a warm, classic glow. However, their energy consumption is considerably higher compared to LED lights, and their lifespan is shorter. While they may be cheaper initially, the long-term costs associated with higher energy consumption and frequent bulb replacements can outweigh the initial savings.
    • C7 Lights: C7 lights, a classic incandescent bulb shape, are known for their warm, inviting glow. They are frequently used in outdoor displays, but their indoor application is also viable. While offering a traditional look, their energy efficiency is low, and they need more frequent replacements.

    Lifespan and Energy Efficiency Comparison

    Comparing the lifespan and energy efficiency of different light types is essential for making a financially and environmentally responsible choice.

    Light Type Lifespan (Estimated) Energy Efficiency
    LED 50,000+ hours Very High
    Incandescent 1,000-2,000 hours Low
    C7 1,000-2,000 hours Low

    LED lights significantly outperform incandescent and C7 lights in terms of both lifespan and energy efficiency.

    Window Size and Light Selection

    Considering the dimensions of your window is crucial for determining the appropriate number and length of light strands. Overcrowding a window with too many lights can make the display look cluttered, while insufficient lights might result in a weak, underlit display.

    • Window Dimensions: Measure the width and height of your window to get a clear idea of the space available for your light display. This measurement will help you determine the appropriate length and number of light strands needed.
    • Light Strand Length: Choose light strands that are long enough to adequately cover the window’s expanse without excessive stretching or bunching. Ensure the lights are evenly distributed to avoid dark spots or overly concentrated areas.
    • Number of Strands: Determine the optimal number of light strands by considering the window’s size and desired lighting intensity. Start with a smaller number of strands and add more as needed to achieve the desired effect. This approach will allow you to fine-tune your display and ensure the lights do not obscure the window.

    Maintenance and Troubleshooting

    Hang Christmas Lights Inside Windows

    Keeping your indoor Christmas light displays looking their best requires some attention beyond the initial installation. Regular maintenance prevents premature failures and ensures a festive glow throughout the season. Proper storage techniques also protect your lights for future use, preserving their beauty and longevity.Troubleshooting common issues promptly can save you time and frustration. Knowing how to identify and address problems like flickering lights or complete outages can quickly restore your display to its intended brilliance.

    By understanding potential problems and their solutions, you can enjoy your indoor Christmas light displays without worry.

    Importance of Regular Maintenance

    Regular maintenance is crucial for extending the lifespan of your Christmas lights. Cleaning dust and debris from the lights, checking for frayed wires, and inspecting connections for tightness will prevent issues. This proactive approach can significantly reduce the risk of premature failures and ensure your lights continue to shine brightly throughout the holiday season. Consistent maintenance also reduces the risk of electrical hazards.

    Troubleshooting Common Problems

    Identifying and resolving light malfunctions quickly can save time and frustration. Common problems include flickering lights, complete outages, and issues with specific bulbs. A systematic approach to troubleshooting can pinpoint the source of the problem.

    Troubleshooting Steps for Light Malfunctions, Hang Christmas Lights Inside Windows

    • Check the power source: Ensure the power outlet is functioning correctly. Try another outlet to rule out a faulty outlet. If the problem persists, verify the circuit breaker or fuse is not tripped or blown.
    • Inspect the connections: Carefully examine all connections, ensuring they are secure and undamaged. Look for loose wires or damaged connectors. Tighten connections as needed. If a connector is damaged, replace it with a new one.
    • Examine the bulbs: Check for burned-out bulbs. Replace any defective bulbs with new ones. Make sure the bulb type is correct for the light string.
    • Inspect the wiring: Examine the entire length of the wire for any breaks, kinks, or exposed wires. If you find a break or damage, the light string must be repaired or replaced.
    • Check for short circuits: Look for any signs of short circuits or frayed wires, especially if multiple bulbs or sections of the string are malfunctioning. If a short circuit is suspected, the entire light string must be disconnected and checked by a qualified electrician.

    Preventing Damage from Humidity and Temperature Changes

    Indoor Christmas lights can be susceptible to damage from fluctuating humidity or temperature changes. To minimize damage, consider using lights specifically designed for indoor use, and ensure the display is placed in a location that is reasonably stable in terms of temperature and humidity. Avoid locations prone to excessive moisture or direct sunlight.

    Proper Storage Techniques

    Proper storage is vital to maintaining the longevity of your Christmas lights. Wrap the lights gently in a clean, soft cloth or paper. Store them in a cool, dry place, away from direct sunlight or excessive heat. Avoid placing the lights in airtight containers, as this can cause moisture buildup. If storing for a longer period, consider using silica gel packets to absorb moisture.

    Proper storage techniques protect the lights from damage and extend their life for years to come.

    Visual Inspiration and Examples

    Transforming your windows into captivating Christmas displays is a delightful journey of creativity and visual storytelling. The possibilities are endless, from whimsical fantasies to classic charm. This section provides inspiring examples, highlighting the elements that contribute to a truly captivating display.The key to effective window displays is understanding how different lighting choices and arrangements can evoke specific moods and themes.

    Careful selection of colors, patterns, and sizes of lights will determine the overall visual impact. A well-planned display can enhance the festive spirit of your home and become a cherished tradition.

    Window Wonderland Displays

    A successful window display relies on a thoughtful arrangement of lights and decorations. Consider the overall theme and color palette to create a cohesive and visually appealing scene. The combination of various lighting effects and decorations can transform your windows into a winter wonderland.

    • Winter Wonderland: Imagine a frosted windowpane transformed into a winter wonderland. Icicle-like lights, strategically placed, can mimic the delicate beauty of frozen water. Soft white or light blue lights create a magical ambiance, enhancing the sense of serenity and tranquility associated with winter. Adding miniature snowmen or other winter-themed figurines will further elevate the theme, creating a scene of pure enchantment.

    • Festive Cheer: A vibrant display of red and green lights is a classic choice that evokes the warmth and joy of the Christmas season. Using various sizes and shapes of lights can add visual interest, while keeping the color scheme consistent ensures a harmonious display. Consider incorporating some warm white lights to add a touch of cozy cheer.
    • Enchanted Forest: A display inspired by a mystical forest is a delightful option for a modern Christmas display. Soft, warm-toned lights, like amber or peach, create a cozy and enchanting atmosphere. Incorporate different light shapes, such as string lights and fairy lights, in various colors, and place them in a way that resembles the branches of a tree. Scattered glowing figurines of animals or whimsical characters will add depth to the scene.

    Visual Elements for Appealing Displays

    The elements that contribute to the overall appeal of a window display are not limited to just lights. The composition, the choice of colors, and the overall theme contribute significantly to the final effect.

    Image ID Description
    img1 A winter wonderland scene with icicle-like lights, creating a sense of frozen beauty. The soft white and blue tones evoke a serene and tranquil atmosphere.
    img2 A festive display with red and green lights, utilizing a classic Christmas color scheme. The arrangement of the lights, in different sizes and shapes, creates visual interest.
    img3 An enchanted forest scene with soft-colored lights, creating a mystical and warm ambiance. The different light shapes and colors, combined with figurines, evoke a sense of wonder and fantasy.

    Final Thoughts

    Hang Christmas Lights Inside Windows

    In conclusion, hanging Christmas lights inside windows is a fantastic way to spread holiday cheer and add a touch of magic to your home. By following the safety guidelines and creative ideas presented in this guide, you can create a dazzling display that will delight both you and your guests. Enjoy the festive spirit and the satisfaction of a beautiful light display that lasts for the whole season.