Category: Hair Care

  • Clean Hairbrushes and Combs A Healthy Routine

    Clean Hairbrushes and Combs A Healthy Routine

    Clean Hairbrushes and Combs: A seemingly simple task, yet crucial for maintaining healthy hair and a clean scalp. Unclean brushes and combs harbor bacteria, leading to potential scalp issues and hair problems. This guide dives deep into the importance of regular cleaning, exploring different methods, tools, and frequencies, ensuring your hair care routine is as hygienic as possible.

    From natural bristle brushes to synthetic wonders, we’ll cover it all.

    Maintaining the cleanliness of your hairbrushes and combs is essential for overall hygiene. Bacteria and dirt can build up, leading to issues like scalp irritation, dandruff, and even hair breakage. This comprehensive guide provides practical insights into the best practices for keeping your hair tools sparkling clean and your hair looking its best. It also explores the specifics of cleaning various brush types and materials, offering tailored solutions to your individual needs.

    Importance of Clean Hairbrushes and Combs

    Keeping your hairbrushes and combs clean is more than just a matter of aesthetics; it’s a crucial aspect of hygiene and overall well-being. Regular cleaning prevents the buildup of bacteria, fungi, and dead skin cells, protecting your scalp and hair from potential health risks. Clean tools contribute to healthier hair growth and a more comfortable scalp experience.Regular cleaning is essential to maintain a healthy scalp and hair, and this extends beyond just the visible dirt.

    Unseen contaminants, including bacteria, can accumulate on your hairbrushes and combs, leading to potential scalp issues and impacting hair health. This proactive approach to cleaning safeguards your hair and scalp from potential problems, promoting a healthier and more comfortable experience.

    Hygiene and Health Risks Associated with Unclean Tools

    Maintaining the cleanliness of your hairbrushes and combs is crucial for preventing the spread of bacteria and fungi. Unclean tools can harbor various microorganisms, potentially leading to scalp infections, dandruff, or other skin irritations. The accumulation of dead skin cells, hair products, and environmental pollutants can create a breeding ground for harmful organisms. This can manifest as discomfort, itching, or even more serious conditions if left unaddressed.

    For example, a common issue is scalp irritation from unclean tools, which can lead to persistent itching and flaking.

    Impact on Hair Health and Scalp Condition

    Clean hairbrushes and combs are essential for promoting healthy hair and a comfortable scalp. Using unclean tools can lead to hair breakage, tangles, and scalp dryness. Regular cleaning removes product buildup, debris, and dead skin cells, allowing for better hair distribution and reducing friction. This can improve the overall health and appearance of your hair and scalp, preventing damage and promoting healthy growth.

    Using clean tools also enhances the effectiveness of hair care products, as they can be properly distributed without encountering residue from previous uses.

    Benefits for Overall Well-being

    Maintaining clean hairbrushes and combs extends beyond just hair health; it contributes to overall well-being. A clean scalp and healthy hair contribute to a positive self-image and increased confidence. This can have a significant impact on mental and emotional health, fostering a sense of cleanliness and personal care. Furthermore, clean tools ensure the longevity of your brushes and combs, reducing the need for frequent replacements.

    Importance for Specific Hair Types and Scalp Conditions

    The importance of cleaning hairbrushes and combs is amplified for individuals with specific hair types or scalp conditions. People with oily hair or those prone to dandruff need more frequent cleaning to prevent the buildup of oils and dead skin cells, which can exacerbate these conditions. Individuals with sensitive scalps should also prioritize cleaning to avoid potential irritations.

    This is especially true for those who experience frequent itching or inflammation. Using clean tools helps maintain a healthy environment for the scalp, regardless of hair type or condition. For instance, individuals with eczema or psoriasis may experience worsened symptoms if their hair tools are not properly cleaned and maintained, potentially leading to more frequent flare-ups.

    Methods for Cleaning Hairbrushes and Combs

    Keeping your hairbrushes and combs clean is crucial for maintaining healthy hair and preventing the buildup of product residue, dirt, and bacteria. Regular cleaning helps extend the life of your tools and ensures a hygienic experience. This article explores various cleaning methods for different brush types, from natural bristle to synthetic, offering step-by-step guides and comparisons.A clean brush not only feels better in your hand but also contributes to healthier hair growth by preventing product buildup and minimizing the spread of bacteria.

    Proper cleaning methods are vital for maintaining hygiene and ensuring your hair tools last longer.

    Cleaning Natural Bristle Hairbrushes

    Natural bristle brushes, often made from boar or other animal hair, are prized for their ability to detangle and distribute natural oils. However, their delicate nature requires a gentle approach. A gentle hand wash is the most effective method for these brushes.

    • Gather your supplies: Mild shampoo, a clean basin or sink, lukewarm water, a soft cloth or sponge.
    • Prepare the brush: Carefully remove any large tangles or debris from the bristles. Gently massage the brush head in the basin with lukewarm water.
    • Apply the shampoo: Apply a small amount of mild shampoo directly to the brush bristles.
    • Wash and rinse: Gently work the shampoo into the bristles using your fingers or a soft cloth. Rinse thoroughly under lukewarm water until all traces of shampoo are gone.
    • Dry the brush: Lay the brush head flat on a clean towel and gently pat the bristles dry. Avoid twisting or wringing the brush, as this can damage the bristles.
    • Air dry: Allow the brush to air dry completely in a clean, dust-free area. Avoid direct sunlight or heat.

    Cleaning Synthetic Bristle Hairbrushes

    Synthetic bristle brushes are known for their durability and affordability. They are generally more resilient and can often tolerate more aggressive cleaning methods. One of the easiest methods is using the dishwasher.

    Keeping your hairbrushes and combs clean is crucial for healthy hair. A build-up of product, dirt, and even bacteria can lead to scalp issues. Wondering what all that gunk is? It’s important to understand the proper cleaning methods, as well as what YW might mean in certain contexts. For example, if you’re seeing YW in a chat, checking out What Does YW Mean can help you decipher the shorthand.

    Regularly cleaning your brushes and combs is a small step that makes a big difference for your hair health overall.

    • Check for dishwasher safety: Always check the manufacturer’s instructions to ensure your brush is dishwasher-safe.
    • Remove any large debris: Carefully remove any large tangles or debris from the bristles.
    • Place in a dishwasher-safe container: If the brush is dishwasher-safe, place it in a suitable container or basket in the top rack of the dishwasher.
    • Use dish soap: Add a small amount of dish soap to the dishwasher detergent dispenser.
    • Run the dishwasher: Run the dishwasher on a normal cycle. Avoid using high heat or aggressive drying cycles.
    • Dry thoroughly: Allow the brush to air dry completely after the cycle is complete.

    Cleaning Wooden Hairbrushes

    Wooden hairbrushes are appreciated for their natural feel and potential for promoting healthy hair. They require a delicate cleaning approach.

    • Gather your supplies: Mild dish soap, a clean basin or sink, lukewarm water, a soft cloth or sponge.
    • Prepare the brush: Carefully remove any large tangles or debris from the bristles.
    • Apply the soap: Apply a small amount of mild dish soap to a soft cloth or sponge.
    • Wash gently: Gently clean the wooden part of the brush with the soapy cloth, being careful not to scrub too hard. Avoid getting water directly on the wooden base.
    • Rinse thoroughly: Rinse the brush thoroughly with lukewarm water until all traces of soap are gone.
    • Dry completely: Lay the brush head flat on a clean towel and gently pat the bristles dry. Avoid twisting or wringing the brush. Allow it to air dry in a clean, dry space.

    Comparison of Cleaning Methods

    Hairbrush Material Cleaning Method Cleaning Agent Time Required
    Natural Bristle Gentle hand wash Mild shampoo 5-10 minutes
    Synthetic Bristle Dishwasher safe Dish soap 1-2 minutes
    Wooden Gentle hand wash with a cloth Mild dish soap 5-7 minutes

    Tools and Materials for Cleaning

    Keeping your hairbrushes and combs clean is crucial for maintaining their longevity and preventing the spread of bacteria and fungi. Regular cleaning also ensures a hygienic and pleasant hair styling experience. The right tools and materials play a vital role in this process, ensuring effective and efficient cleaning.Effective cleaning relies on selecting the correct tools and materials, which will depend on the brush or comb type.

    Using the wrong tools can damage the bristles or the comb’s structure, potentially leading to a less effective clean and a shorter lifespan for your tools. Understanding the different materials and the specific needs of each type will lead to optimal cleaning results.

    Keeping my hairbrushes and combs clean is crucial for healthy hair, and honestly, it’s a pretty important part of my self-care routine. Just like I’m really excited about Megan Thee Stallion’s new album Traumazine , I’m equally committed to maintaining a clean and hygienic hair care routine. Plus, clean tools prevent build-up and make styling so much easier.

    It’s a small thing, but it makes a big difference in the long run!

    Essential Tools and Materials

    Proper cleaning requires a range of tools and materials. These tools should be chosen carefully to avoid damaging the brush or comb and ensure effective cleaning. This section details the essential tools and materials.

    • Soft-bristled brushes are ideal for delicate brushes, while stiff-bristled brushes are suitable for those with more durable bristles. Choosing the appropriate brush type ensures that the bristles are not damaged during the cleaning process.
    • Mild dish soap or hairbrush-specific cleaners are effective for removing dirt and product buildup. These are gentler on the bristles and do not damage them. Specific cleaners for hairbrushes are formulated to avoid stripping natural oils from the bristles.
    • Warm water is necessary for dissolving dirt and product buildup. Using hot water can damage the brush’s structure and may strip the bristles of their natural oils.
    • A small bowl or container for mixing the cleaning solution and rinsing the brush.
    • A clean towel or cloth for drying the brush.

    Qualities of Effective Cleaning Agents, Clean Hairbrushes and Combs

    Selecting cleaning agents is critical to achieving a thorough and effective clean without compromising the integrity of the hairbrush or comb. These agents should be gentle, effective, and safe for the materials of the brush or comb.

    • Mildness is crucial to prevent damage to the brush or comb’s materials. Harsh chemicals can damage the bristles, the handle, and the overall structure of the brush or comb.
    • Effectiveness in removing dirt and product buildup is vital. Effective cleaning agents will thoroughly remove dirt, oil, and product buildup.
    • Safety for the hairbrush or comb material is paramount. Some cleaning agents might be too harsh and strip natural oils from the bristles, which are vital for their health and longevity.

    Selecting Appropriate Cleaning Tools

    The type of hairbrush or comb dictates the best cleaning tools. Understanding the type of material and construction of the brush or comb is essential for choosing the appropriate tools.

    • Natural bristle brushes may require a gentler approach to avoid damaging the bristles.
    • Synthetic bristle brushes are more resilient and can withstand a wider range of cleaning methods.
    • Wooden combs are sensitive to moisture and require a delicate cleaning process. Excessive water can cause warping or damage to the wood.

    Recommended Cleaning Products and Their Benefits

    Using the correct cleaning products can significantly enhance the effectiveness and safety of the cleaning process. Choosing the right product ensures a thorough clean without harming the brush or comb.

    Product Benefits
    Mild dish soap Gentle, readily available, and effective at removing dirt and product buildup.
    Hairbrush-specific cleaner Formulated for hairbrushes, often containing ingredients that are gentler on the bristles and do not strip natural oils.
    Baking soda A natural abrasive that can effectively remove stubborn dirt and product buildup.

    Importance of Using Appropriate Tools

    Using the right tools is critical for optimal cleaning results. Choosing the wrong tools can damage the brush or comb and result in an ineffective cleaning. The proper tools ensure a thorough clean while preserving the integrity of the hairbrush or comb.

    Cleaning Frequency and Maintenance

    Keeping your hairbrushes and combs clean is more than just a hygiene practice; it’s crucial for maintaining their longevity and preventing damage to your hair. Regular cleaning and proper maintenance will ensure your styling tools last longer and work efficiently, saving you money in the long run. Ignoring these practices can lead to accumulated product buildup, hair tangles, and even breakage.Regular maintenance is essential for prolonging the life of your hairbrushes and combs.

    By understanding the appropriate cleaning frequency and implementing preventive measures, you can keep your tools in excellent condition. This extends beyond just cleanliness; it involves a proactive approach to preserving the integrity and effectiveness of your styling tools.

    Cleaning Frequency Recommendations

    Understanding the optimal cleaning frequency for your hairbrushes and combs depends on several factors, including the type of bristles, your usage patterns, and your hair type. Daily brushing or combing can lead to faster build-up, requiring more frequent cleaning compared to less frequent use. For example, individuals who use their brushes daily for styling will need to clean them more often than those who only use them occasionally.

    Optimal Cleaning Frequency Table

    This table provides a general guideline for cleaning frequency based on common hairbrush materials and usage patterns. Note that individual needs may vary.

    Keeping your hairbrushes and combs clean is crucial for healthy hair, and a great way to treat yourself after a long day is with some homemade bath salts. Making your own bath salts is a fun and relaxing project, and the soothing aroma can be a wonderful addition to your self-care routine. For example, consider a lavender-infused blend.

    Plus, the natural ingredients in Make Homemade Bath Salts are often gentler on your skin than store-bought options, which further supports the importance of clean hairbrushes and combs in maintaining healthy hair and scalp.

    Hairbrush Material Usage Frequency Cleaning Frequency
    Natural Bristle Daily Weekly
    Synthetic Bristle Daily Bi-weekly
    Natural Bristle 3-4 times a week Bi-weekly
    Synthetic Bristle Less than 3 times a week Monthly

    Preventing Build-up and Damage

    Regular cleaning is essential to prevent build-up of product residue, hair debris, and dirt, which can cause damage to your hairbrushes and combs over time. Proper storage also plays a significant role in preventing damage.Preventing build-up and damage involves proactive steps. For example, storing your brushes in a designated area can prevent them from getting exposed to dust and debris.

    Avoid placing them in humid environments, as moisture can lead to mold or mildew growth.

    Storage Guidelines

    Proper storage of your hairbrushes and combs is just as important as cleaning. Store them in a cool, dry place away from direct sunlight to maintain their shape and prevent damage. Consider using a brush cover or a storage container to protect them from dust and dirt.Storing your brushes upright, or in a designated storage area will help maintain their integrity.

    This will keep them in good condition and ready for use. Also, avoid storing them in areas prone to high humidity or moisture, which can cause damage.

    Troubleshooting and Common Problems

    Clean Hairbrushes and Combs

    Unclean hairbrushes and combs can lead to a cascade of frustrating problems, from tangled hair to scalp issues. Understanding these problems and their causes is key to maintaining healthy hair and a happy head. By addressing these issues proactively, you can prevent further damage and keep your hair looking its best.Addressing problems stemming from unclean brushes and combs is crucial for maintaining healthy hair and a comfortable scalp.

    This section delves into common issues, their underlying reasons, and actionable solutions to keep your hair looking and feeling its best.

    Hair Tangling

    Frequent tangles can be a significant annoyance and a sign of buildup in your brushes and combs. Hair tangles are often exacerbated by product buildup, dead skin cells, and dust particles accumulating on the bristles or teeth. Regular cleaning removes these irritants, making combing and styling smoother and less frustrating. A buildup of product or dirt can cause friction, making the hair more prone to knotting and tangling.

    Using a detangling spray or serum can help to ease tangles, but if the problem persists, it’s important to check for and address the underlying buildup.

    Hair Breakage

    Unclean hairbrushes and combs can contribute to hair breakage. Dirt, product buildup, and debris trapped in the bristles can cause friction and damage the hair cuticle, leading to breakage. The damage may be particularly noticeable in dry or already weakened hair. This friction, when repeated, can lead to split ends and hair loss. Using a wide-tooth comb on wet hair or a brush with soft bristles can help prevent breakage.

    Scalp Issues

    Scalp issues like dandruff, itching, and irritation can also stem from unclean hairbrushes and combs. Accumulated product residue, dead skin cells, and bacteria can contribute to these problems. The bacteria buildup can lead to inflammation and discomfort. Regularly cleaning your brushes and combs can help maintain a healthy scalp environment and prevent these issues.

    Specific Brush Types and Materials

    The cleaning methods vary depending on the brush type and material. Natural bristle brushes, for instance, might require a different approach than synthetic ones. Natural bristle brushes can benefit from a gentler cleaning process to avoid damaging the bristles. For example, using a mild shampoo and a soft cloth will be sufficient for natural bristles. Synthetic brushes might be cleaned with a more vigorous approach, using a mild detergent or soap.

    Troubleshooting Guide for Different Brush Types

    Brush Type Cleaning Method
    Natural Bristle Use a gentle shampoo and a soft cloth, avoiding harsh scrubbing.
    Synthetic Use a mild detergent or soap and lukewarm water, then rinse thoroughly.
    Wooden Clean with a damp cloth, avoiding soaking.
    Metal Clean with a damp cloth or a mild soap solution.

    Common Cleaning Mistakes: Failing to clean regularly, using harsh chemicals, neglecting to check for debris.

    How to avoid: Regular cleaning, gentle cleaning agents, thorough checks.

    Types of Hairbrushes and Combs

    Clean Hairbrushes and Combs

    Choosing the right hairbrush or comb is crucial for healthy hair and a smooth styling experience. Different brush types cater to various hair textures and needs, influencing both the styling process and the overall health of your hair. Understanding the characteristics of each type empowers you to select the perfect tool for your hair type and desired style.Different brush types are designed to address specific hair concerns, such as detangling, styling, or adding volume.

    Selecting the right tool ensures that you’re using the appropriate technique for your hair, minimizing damage and maximizing results. Consider your hair’s thickness, texture, and length when choosing your brush or comb.

    Hairbrush Types and Their Features

    Various hairbrushes and combs are available, each with unique features designed for specific hair types and styling needs. Round brushes are excellent for creating curls and waves, while detangling brushes are ideal for managing thick, tangled hair.

    • Round Brushes: Round brushes are commonly used for styling and adding volume. They are available in various sizes and materials, allowing for versatility in styling. Different diameters provide control over the curl and wave formation. The round shape helps distribute heat evenly during styling, contributing to a smoother and more controlled outcome.
    • Detangling Brushes: These brushes are specifically designed to gently remove tangles from thick or coarse hair. Their unique bristles and design minimize breakage during detangling. They are particularly beneficial for individuals with curly, kinky, or heavily textured hair. They usually feature wide, flexible bristles to glide through knots and tangles smoothly.
    • Wide-Tooth Combs: Wide-tooth combs are ideal for detangling wet or dry hair, particularly for those with long or thick hair. The wide spacing between the teeth prevents pulling and breakage, making them a crucial tool for daily hair maintenance. Their gentle design minimizes damage during the detangling process.
    • Paddle Brushes: Paddle brushes are known for their broad, flat design, ideal for distributing products evenly and styling hair. They can be used for a variety of hair types, but are often favored for thick hair to achieve a smooth, even distribution. They are also effective for adding volume and smoothing out frizz.

    How Different Brush Types Affect Hair Health

    The type of brush or comb you use directly impacts your hair’s health. A brush designed for thick hair will likely be different from one intended for fine hair. Using the wrong brush can lead to breakage, split ends, and even hair loss.

    • Round brushes, when used with heat styling, can potentially cause damage if the heat isn’t distributed evenly or the brush is too harsh. Proper technique and heat protection are essential.
    • Detangling brushes, due to their soft and flexible design, minimize damage during the detangling process, preventing breakage.
    • Wide-tooth combs, with their wide spacing between teeth, are gentler on the hair, reducing breakage, especially for wet hair.
    • Paddle brushes, with their broad surface area, can distribute products evenly and reduce friction, contributing to overall hair health.

    Cleaning Procedures Based on Brush Type

    The cleaning method should always align with the brush type to maintain its functionality and longevity. Different brush materials require varying cleaning approaches.

    • Round brushes with bristles that are prone to tangling should be cleaned thoroughly to remove product buildup and debris.
    • Detangling brushes require gentle cleaning due to their flexible bristles to prevent damage.
    • Wide-tooth combs need thorough cleaning to eliminate any tangles and debris, ensuring they remain effective.
    • Paddle brushes can be cleaned with a brush cleaner or a gentle soap solution. Regular cleaning is essential to maintain their effectiveness in distributing products evenly.

    Suitable Hair Types and Brush/Comb Types

    The table below highlights the optimal brush types for various hair types.

    Hairbrush Type Suitable Hair Type Cleaning Considerations
    Detangling Brush Thick, tangled hair, curly, kinky Gentle cleaning methods
    Wide-tooth Comb All hair types, especially wet hair Thorough cleaning to remove tangles
    Round Brush Straight, medium to thick hair Regular cleaning to prevent product buildup
    Paddle Brush All hair types, especially thick hair Thorough cleaning to maintain even product distribution

    Epilogue: Clean Hairbrushes And Combs

    In conclusion, maintaining clean hairbrushes and combs is a fundamental aspect of good hair care. Regular cleaning not only promotes hygiene but also significantly impacts hair health and scalp condition. By understanding the different cleaning methods, selecting appropriate tools, and establishing a consistent cleaning schedule, you can ensure a healthy and thriving mane. This guide has provided a comprehensive overview, empowering you to create a hair care routine that prioritizes both hygiene and beauty.

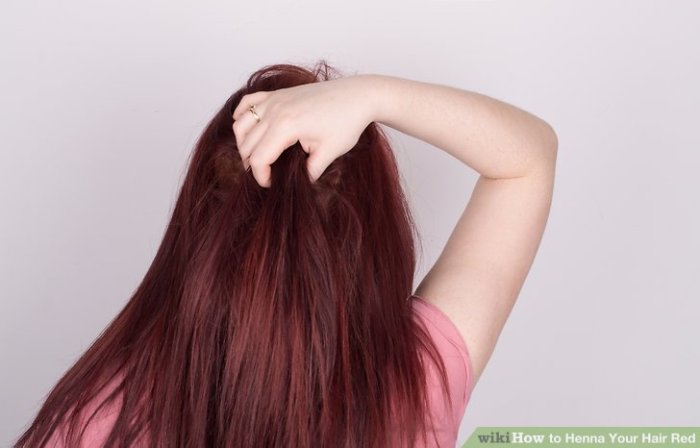
  • Henna Your Hair Red A Complete Guide

    Henna Your Hair Red A Complete Guide

    Henna Your Hair Red is a fascinating journey into natural hair coloring. This guide delves into the process, from preparing henna paste to achieving vibrant red shades. We’ll explore various methods, comparing DIY approaches with professional salon techniques, and highlight the crucial safety precautions to ensure a beautiful and healthy outcome. Learn how to tailor the henna application for diverse hair types and achieve the perfect red tone you’ve always desired.

    Discover the secrets to achieving the perfect red hue with henna. We’ll cover factors influencing the final shade, the natural ingredients that contribute to the vibrant red tone, and how to modify the henna mixture to achieve specific red tones. Plus, we’ll explore pre-treatment procedures and the role they play in getting your desired red hair with henna.

    Henna Hair Coloring Methods

    Henna, a natural dye derived from the henna plant, has been used for centuries to color hair. It’s a popular choice for those seeking a vibrant red hue, often with a reddish-brown tone, though other colors are also possible with variations in the application and ingredients. This process involves more than just applying the paste; careful preparation and technique are crucial for achieving desired results.The application of henna for hair coloring is a multifaceted process, requiring understanding of various techniques and ingredients to achieve the desired shade and outcome.

    From the preparation of the henna paste to the application methods, a comprehensive approach ensures the best possible results.

    Henna Application Process for Red Hair

    The henna application process involves several steps, beginning with the preparation of the paste. This paste is then meticulously applied to the hair, ensuring even coverage. Subsequent steps, like rinsing and conditioning, are essential for maintaining the vibrancy and health of the colored hair. Different application methods and techniques can result in varied shades of red.

    Techniques for Achieving Various Shades of Red

    Achieving different shades of red with henna depends on factors like the quality of the henna powder, the addition of other natural ingredients, and the duration of application. Using different types of henna powder can result in variations in shade. For instance, some henna powders are naturally more reddish than others. The addition of other natural ingredients, like indigo or coffee, can also impact the final color.

    The application time also plays a significant role, as longer application periods can result in a deeper, richer shade.

    Preparing Henna Paste for Hair Coloring

    Proper henna paste preparation is vital for achieving consistent and vibrant results. Firstly, high-quality henna powder is essential. Combine the henna powder with a suitable liquid, such as lemon juice, yogurt, or coffee, to form a smooth paste. The consistency should be thick enough to coat the hair but not so thick that it’s difficult to apply evenly.

    Adjust the consistency of the paste to suit your hair type and desired outcome.

    Henna for vibrant red hair is a popular choice, but sometimes achieving the desired shade can be tricky. Fortunately, new techniques and products like new release s carey all we grow are emerging to help. These new tools might offer a deeper, richer red hue, making the henna application process even more effective for getting that perfect fiery red shade.

    Types of Henna Products for Hair Coloring

    Various henna products are available for hair coloring, each with its own composition and potential results. These include pre-mixed henna kits, which are convenient but may offer less control over the final color. Additionally, there are also individual henna powders, allowing for customization with the addition of other ingredients. The availability of different types of henna products allows individuals to tailor their coloring process to their specific preferences and needs.

    DIY vs. Professional Salon Application

    DIY henna application provides flexibility and cost-effectiveness. However, achieving a uniform color and avoiding potential damage requires practice and attention to detail. Professional salon applications often utilize specialized techniques and products, potentially resulting in a more vibrant and even color. Professional stylists can also offer guidance on the best products and methods to use.

    Comparison of Henna Application Methods

    Method Pros Cons
    DIY Cost-effective, flexible, allows customization May require practice for even application, potential for uneven color, risk of damage if not done correctly
    Professional Salon Expert application, often better color results, reduced risk of damage, potential for customized mixtures Higher cost, less flexibility in customization, limited control over the process

    Achieving Red Shades with Henna

    Henna, a natural dye derived from the henna plant, offers a captivating way to achieve vibrant red hues on hair. However, the final shade isn’t predetermined; several factors influence the outcome. Understanding these nuances empowers you to tailor your henna application for the specific red tone you desire.Achieving the desired red shade with henna is a multi-faceted process, involving the interplay of natural ingredients, pre-treatment procedures, and the henna’s inherent properties.

    The interplay of these elements allows for a wide range of red tones, from subtle auburns to fiery crimson.

    Factors Influencing Final Red Shade

    The final red tone achieved with henna is affected by a variety of elements. These factors include the natural ingredients used in the henna paste, the hair’s initial color and porosity, the length of time the henna is left on the hair, and any pre-treatment procedures used. The hair’s natural melanin content plays a crucial role, as it can either enhance or diminish the intensity of the red tone.

    Natural Ingredients Contributing to Red Tone

    Several natural ingredients contribute to the red tone within henna. Lawsonia inermis, the plant itself, is the primary source of the color. Other ingredients, when combined with henna, can either amplify or modify the final red shade. The quantity and quality of these additives are important in influencing the outcome.

    Modifying Henna for Specific Red Tones

    To achieve specific red tones, one can modify the henna application. Combining henna with other natural ingredients can alter the final result. Certain herbs, spices, and even plant extracts can be incorporated into the henna paste to fine-tune the desired shade. For example, adding a touch of turmeric can warm the red tone, while indigo can create a deeper, more intense shade.

    Role of Pre-Treatment Procedures

    Pre-treatment procedures, such as lightening, can significantly impact the final red shade. Lightening the hair beforehand can open the hair cuticle, allowing the henna to penetrate more effectively and potentially resulting in a richer red tone. However, the choice of lightening agent and the level of lightening must be carefully considered to avoid damaging the hair. The level of lightening is crucial; too much lightening can result in a harsh or uneven red tone.

    Table of Natural Ingredients for Varying Red Shades

    Ingredient Effect on Red Tone Notes
    Turmeric Warms the red tone, creating a reddish-orange hue. Use sparingly; excessive turmeric can result in an overly orange tint.
    Indigo Deepens and intensifies the red tone, creating a more vibrant shade. Indigo can be combined with henna to create deep reds and blues.
    Amla Adds a reddish-brown tone and enhances shine. Amla can contribute to a more balanced red shade.
    Cassia Creates a more reddish-orange tone. Combine with henna to obtain a coppery-red tone.

    Safety and Precautions

    Henna Your Hair Red

    Henna, while a popular and often natural-looking hair dye, can pose risks if not handled carefully. Understanding potential side effects and implementing safety measures is crucial for a positive and safe experience. This section delves into the importance of precautions, including patch testing and managing potential reactions.Applying henna to your hair, though seemingly straightforward, requires awareness of potential issues.

    Skin reactions, ranging from mild irritation to more serious allergic responses, can occur. A thorough understanding of these risks and proactive safety measures are vital for a successful and safe henna application.

    Potential Risks and Side Effects

    Henna, despite its natural origin, can cause allergic reactions in susceptible individuals. These reactions can manifest as skin irritation, itching, redness, or swelling at the application site. In severe cases, a more widespread allergic response, including hives or difficulty breathing, can occur. These reactions are more likely in individuals with a history of allergies or sensitivities to other substances, particularly those with known sensitivities to plants.

    It’s important to note that even those without prior allergies can develop a sensitivity to henna over time.

    Safety Measures During Henna Application

    Proper application techniques are paramount for minimizing risks. Always perform a thorough patch test before applying henna to the entire head. A small amount of henna paste should be applied to a hidden area of skin, such as the inside of the wrist, and monitored for 24-48 hours. If no reaction occurs, application to the hair can proceed.

    It’s critical to use gloves and avoid contact with eyes and mucous membranes during application. If any irritation or discomfort is experienced, discontinue use immediately.

    Importance of Patch Testing

    A patch test is not just a precaution; it’s a critical safety step. It allows you to identify potential allergic reactions before applying henna to your entire scalp. A reaction might appear as redness, itching, or swelling at the test site. This allows for timely intervention and prevents more extensive and potentially harmful reactions. By performing a patch test, you’re proactively managing potential risks associated with henna application.

    Precautions for Henna Use

    Following precautions can significantly reduce the risk of adverse reactions. Avoid using henna on damaged or irritated skin. Always use henna paste as directed, avoiding over-application or prolonged exposure. Keep children and pets away from the area during application to prevent accidental contact. Ensure the henna paste is prepared correctly, using only ingredients indicated for the application.

    If you have a history of allergies or sensitivities, consult a dermatologist before using henna.

    Allergies and Henna

    Individuals with known allergies, particularly to plants, should exercise extreme caution when using henna. Symptoms can vary widely, from mild itching and redness to severe allergic reactions. Always prioritize a thorough patch test and seek professional medical advice if you experience any discomfort or reaction. Thorough research and caution are crucial for those with a history of allergies.

    Henna for vibrant red hair is super cool, right? But did you know you can also make amazing fossils using plaster of Paris? Make Fossils Using Plaster of Paris is a fascinating project that’s a fun way to explore science while you’re experimenting with hair colors. Either way, getting creative with henna on your hair is definitely worth exploring!

    Henna-Related Skin Reactions and Management

    Reaction Symptoms Management
    Mild Irritation Redness, slight itching, mild swelling Cool compresses, over-the-counter hydrocortisone cream
    Allergic Contact Dermatitis Severe itching, redness, blistering, swelling Stop use immediately, consult a dermatologist for treatment
    Anaphylaxis Difficulty breathing, swelling of the face, throat, or tongue, rapid pulse Seek immediate medical attention
    Henna Tattoo Reactions Irritation, redness, and itching around the henna tattoo Use mild soap and water to clean the area, and follow dermatologist recommendations

    Henna Hair Red

    Henna Your Hair Red

    Transforming your hair to a vibrant red hue with henna is a captivating pursuit, offering a natural and sustainable alternative to chemical dyes. This section dives into the captivating world of henna-dyed red hair, showcasing the diverse outcomes achievable across various hair types and colors. We’ll explore the possibilities of achieving stunning red shades using henna, highlighting before-and-after examples that illustrate the beauty and versatility of this ancient art.

    Henna Red Hair: Before and After Examples

    Henna’s ability to deliver a rich spectrum of red tones depends heavily on the initial hair color and texture. This section presents a range of before-and-after examples, showcasing how henna can transform hair. These examples illustrate the diverse outcomes achievable with henna application, emphasizing the significance of hair type and the natural pigments present in the hair. The vibrant shades achieved, from fiery reds to warm copper tones, highlight the beauty of this natural hair coloring method.

    Hair Textures and Initial Colors

    The outcome of henna application varies significantly based on the initial hair color and texture. Darker hair, typically black or brown, often yields more intense red tones compared to lighter shades. Additionally, coarse hair, such as African American hair, tends to take the color more consistently than fine hair. The hair’s natural oils and porosity also play a role.

    Trying out henna to dye your hair red can be a fun experiment, but it’s definitely a process. I’ve been researching different techniques, and honestly, some of the new release lightspeed champion life is sweet nice to meet you games have been giving me some cool ideas about how to approach hair coloring! It’s all about finding the right shade, and the right application method to get that vibrant red you’re aiming for, so keep experimenting! new release lightspeed champion life is sweet nice to meet you Hopefully, these games will help me achieve the perfect red hue with henna.

    This highlights the importance of understanding your hair’s characteristics before embarking on the henna dyeing process.

    Gallery of Henna Hair Transformations

    The following descriptions highlight diverse examples of henna hair transformations, focusing on hair type and initial color. Observe the range of achievable red shades and the overall visual impact of henna on different hair types.

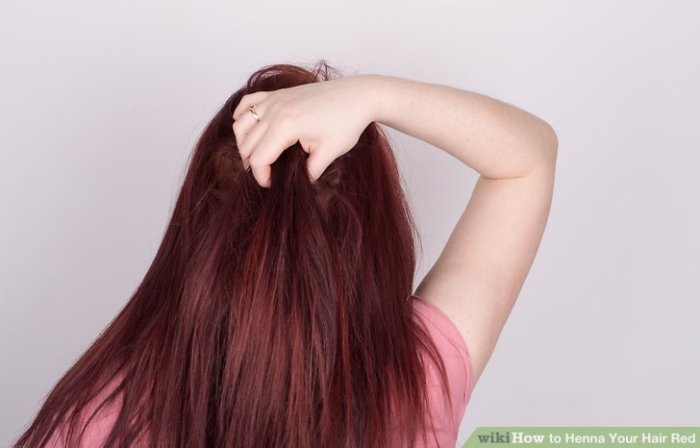
    • Example 1: A client with medium-brown, straight hair. Before henna application, the hair exhibited a subtle brown hue. After the henna treatment, the hair displayed a rich, deep auburn-red, maintaining its straight texture. The color was well-distributed, demonstrating the suitability of henna for medium-brown hair.
    • Example 2: A client with dark brown, wavy hair. The initial hair color was a deep, rich brown, with visible wave patterns. Post-henna, the hair showcased a vibrant copper-red, enhancing the natural wave pattern. The intensity of the red was substantial, indicating the suitability of henna for darker hair colors.
    • Example 3: A client with light brown, curly hair. The initial hair color was a light brown, with noticeable curl patterns. The henna application resulted in a warm, light reddish-brown shade, maintaining the natural curl patterns. The color was subtle, showing the potential for achieving various red shades with henna.

    Achieving Diverse Red Shades, Henna Your Hair Red

    Henna can create a wide array of red shades, from fiery crimson to warm auburn. The intensity and final shade achieved depend on factors like hair porosity, pre-existing hair color, and the specific henna preparation. The variety of red tones achievable with henna highlights the versatility of this natural coloring method.

    Suitability of Hair Types for Henna

    Hair Type Suitability for Henna Notes
    Fine Hair Moderate May require multiple applications for consistent color coverage.
    Medium Hair Good Generally accepts henna color well, with relatively even coverage.
    Coarse Hair Excellent Typically holds color well and produces vibrant results with fewer applications.
    Colored Hair Variable Results may vary depending on the existing color; lighter colors might require multiple applications.

    Alternatives and Comparisons

    Henna hair coloring, while popular for its natural approach, isn’t the only method available for achieving vibrant red hair. Understanding the advantages and disadvantages of different coloring techniques helps individuals make informed decisions about their hair care routines. This section compares henna with other methods, focusing on the practical implications and long-term effects.Chemical hair dyes, temporary hair colors, and other natural alternatives offer varying results and have different impacts on the hair.

    This comparison explores the spectrum of options and highlights the specific strengths and weaknesses of each approach.

    Comparison of Henna with Other Hair Coloring Methods

    Different hair coloring methods provide various results, each with its own set of advantages and disadvantages. Choosing the right method depends on individual preferences, hair health, and desired outcome.

    Method Advantages Disadvantages
    Henna Naturally derived, relatively gentle on the hair, can create a reddish-brown shade, often builds up over time to a deeper red, can be used to repair and strengthen hair, good for those with sensitive scalps. Can take multiple applications to achieve desired shade, requires longer processing time, not suitable for all red tones, does not lift natural hair color, may not be suitable for those with allergies to henna or other natural ingredients.
    Chemical Hair Dyes Wide range of colors available, faster processing time, can lift natural hair color, more likely to achieve vibrant and intense red tones. Can be harsh on the hair, potentially damaging over time, more likely to cause allergic reactions, permanent and can be difficult to remove, may require professional application.
    Temporary Hair Colors Easy application, short-term color, minimal damage, often low cost, readily available. Lighter shades, does not last long, does not permanently alter hair color, not suitable for achieving deep red tones, washes out quickly.
    Natural Hair Colors (e.g., Indigo, Basma) Naturally derived, often gentler than chemical dyes, can provide rich, natural-looking shades, can help repair and strengthen hair, less likely to cause allergic reactions. Can take multiple applications for desired shade, often requires professional guidance, limited color options, may require a longer processing time than chemical dyes.

    Long-Term Effects of Henna on Hair

    Henna’s long-term effects on hair are generally considered more favorable compared to chemical dyes. While henna can cause hair to become drier over time, proper hair care practices and conditioning treatments can mitigate these effects. The use of henna can also lead to some degree of hair strengthening and improvement in overall hair health due to its natural properties.

    Chemical hair dyes, on the other hand, can cause significant damage to hair over time, including dryness, breakage, and reduced elasticity. This damage can lead to more frequent hair damage and hair loss, and the need for more frequent treatments.

    Regular conditioning, moisturizing treatments, and maintaining a healthy hair routine can help to lessen the effects of henna on hair dryness. Conversely, chemical dyes, while offering vibrant results, often require ongoing maintenance to address the damage caused by the chemical processes.

    Comparison of Shades and Longevity

    Henna primarily provides reddish-brown shades, and achieving deeper red tones typically requires multiple applications and careful consideration of the natural hair color. Chemical dyes, however, can achieve a wider range of red tones and more intense colors, although this may come at the cost of increased hair damage.Temporary hair colors provide a short-term solution, with colors that wash out quickly, making them ideal for special occasions or experimentation.

    Natural alternatives, like indigo and basma, offer a range of rich, natural-looking shades but may not be as vibrant as chemical dyes and can be challenging to achieve specific red shades.

    Summary: Henna Your Hair Red

    In conclusion, dyeing your hair red with henna offers a unique and natural approach to hair coloring. This guide has explored various aspects, from application techniques and achieving specific red tones to crucial safety precautions. We’ve compared henna with other methods and analyzed its long-term effects. Ultimately, this guide equips you with the knowledge and confidence to explore the vibrant world of henna hair coloring and achieve your desired red hair goals.

    Remember, careful preparation and adherence to safety guidelines are essential for a successful and enjoyable experience.

  • What Can You Use to Clean Your Clipper Blades?

    What Can You Use to Clean Your Clipper Blades?

    What Can You Use to Clean Your Clipper Blades? This guide dives deep into the essential methods, solutions, and tools for maintaining your clippers. From simple household solutions to specialized cleaning techniques, we’ll explore everything you need to know to keep your blades sharp, clean, and performing at their best.

    We’ll cover a range of topics, from different cleaning methods and solutions to safety precautions and troubleshooting. You’ll learn how to choose the right tools and solutions for your specific clipper type, and understand the importance of regular maintenance to extend the lifespan of your clippers. We’ll even share some illustrative examples, showing you the before-and-after difference in blade cleanliness.

    So, let’s get started!

    Cleaning Methods for Clipper Blades

    Keeping your clippers in top condition is crucial for achieving a clean and precise haircut. Regular cleaning ensures optimal performance, prolongs the life of your blades, and minimizes the risk of spreading germs. Proper cleaning methods are just as important as the clippers themselves.

    Common Cleaning Methods

    Various methods are available for cleaning clipper blades, ranging from simple manual techniques to more sophisticated automated solutions. Choosing the right method depends on your specific needs and preferences.

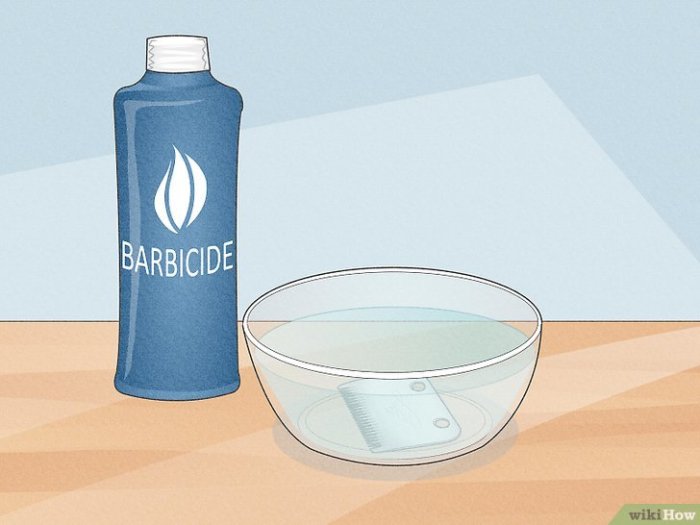
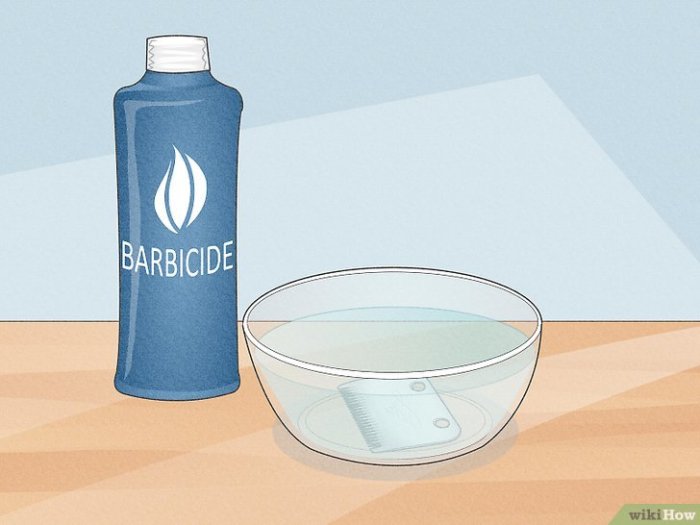
    • Manual Cleaning with Soap and Water: This is a fundamental method for cleaning clipper blades. It’s straightforward, budget-friendly, and effective for removing surface dirt and debris.
    • Manual Cleaning with Isopropyl Alcohol: Isopropyl alcohol, often used in a diluted form, can help to disinfect and clean clipper blades, removing bacteria and other pathogens. It effectively dissolves many substances that accumulate on blades.
    • Automated Cleaning with Specialized Clippers: Some clippers come equipped with a built-in cleaning mechanism. This usually involves a process of rinsing the blades with water, which helps to eliminate debris and dirt.

    Detailed Steps for Manual Cleaning

    Manual cleaning methods offer a degree of control and allow you to inspect the blades thoroughly. Here’s a breakdown of typical steps for both soap and water and isopropyl alcohol methods:

    1. Prepare your workspace: Ensure you have a clean, flat surface and any necessary tools like a small bowl, soft brush, and a clean cloth.
    2. Disassemble the clippers: Carefully follow the manufacturer’s instructions to detach the blades from the clipper housing. Proper disassembly is crucial to ensure complete cleaning.
    3. Clean the blades: Submerge the blades in a solution of warm water and mild soap. Use a soft brush to gently scrub away any visible debris, ensuring you clean both sides of the blades.
    4. Rinse thoroughly: Rinse the blades thoroughly under running water to remove all soap residue.
    5. Dry the blades: Use a clean, lint-free cloth to dry the blades completely, ensuring no water remains on the blades.
    6. Reassemble the clippers: Carefully reassemble the clippers according to the manufacturer’s instructions.

    Comparison of Cleaning Methods

    The effectiveness and efficiency of different cleaning methods vary. This table summarizes the advantages and disadvantages of common methods:

    Method Ease of Use Cost Time Required Effectiveness
    Manual Cleaning (Soap & Water) High Low Moderate Good
    Manual Cleaning (Isopropyl Alcohol) Moderate Low Moderate Very Good
    Automated Cleaning High High Low Excellent

    Cleaning Solutions

    Choosing the right cleaning solution for your clipper blades is crucial for maintaining their sharpness and longevity. A proper cleaning routine prevents the build-up of hair, debris, and product residue, which can dull blades and lead to decreased performance. Using the wrong solution, however, can damage the blade’s surface or even harm the motor. Understanding the properties of various cleaning solutions and their suitability for different blade types is vital for effective and safe blade maintenance.Effective cleaning solutions should be gentle yet potent enough to remove debris without harming the blade’s metal composition.

    The solution’s acidity, alkalinity, or neutrality will determine its effect on the blade. Furthermore, consider the potential risks associated with each solution, and always prioritize safety precautions to avoid accidents.

    Household Cleaning Solutions for Clipper Blades

    Various household solutions can be used to clean clipper blades. Their effectiveness depends on the type of solution and the nature of the buildup.

    • Distilled Water: A simple and generally safe option, distilled water is crucial for removing most debris and residue. It’s often the best choice for blades that have not been exposed to significant amounts of hair product buildup. Its neutral pH makes it a gentle cleaning agent, preventing corrosion and preserving the blade’s sharpness.
    • Mild Dish Soap: A mild dish soap solution can effectively remove hair and product buildup. Dilute a small amount of dish soap in warm water for a gentle cleaning solution. However, avoid using harsh, abrasive dish soaps, as they can potentially scratch the blade’s surface. This is a good option for blades that have a moderate amount of residue.

    • White Vinegar: Known for its acidity, white vinegar can help dissolve hair and product buildup. Dilute white vinegar with water to create a cleaning solution, ensuring not to use undiluted vinegar. It’s important to note that prolonged exposure to vinegar can potentially weaken some metals over time. This is a good option for blades that have a significant amount of hair product residue.

    • Isopropyl Alcohol: Isopropyl alcohol is a powerful solvent that can effectively dissolve hair and oil buildup. Use a diluted solution of isopropyl alcohol in water to clean the blades, taking precautions due to its flammability. It’s generally effective on blades with a buildup of oil or product.

    Safety Precautions and Potential Risks

    When using any cleaning solution, safety should be paramount. Always ensure the clipper is unplugged before cleaning. Additionally, use caution when handling any cleaning solution, and wear protective gloves if necessary.

    Cleaning your clipper blades is crucial for a smooth, efficient cut. A great way to reward yourself for maintaining your tools is by enjoying a wealth of music without limits. Check out Get a Free Trial of Spotify Premium for a fantastic way to enjoy your favorite tunes. A simple solution for cleaning is a mix of warm water and a mild dish soap, perfect for removing hair and debris.

    • Avoid abrasive cleaners: Harsh abrasives can scratch the blade’s surface, reducing its sharpness and lifespan.
    • Do not use bleach: Bleach can severely damage the blade’s metal and potentially create hazardous fumes.
    • Test small areas first: Before applying a cleaning solution to the entire blade, test it on a small, inconspicuous area to ensure it does not cause discoloration or damage.
    • Rinse thoroughly: After cleaning with any solution, rinse the blades thoroughly with water to remove all traces of the cleaning agent. This is vital to prevent residue from interfering with the clipper’s operation.

    Solution Suitability Table, What Can You Use to Clean Your Clipper Blades

    This table provides a general guideline for the suitability of different cleaning solutions for various blade types. Remember that these are general guidelines, and specific results may vary.

    Cleaning Solution Ingredients Suitable Blade Types Potential Risks
    Distilled Water Water All blade types Minimal
    Mild Dish Soap Dish Soap, Water Blades with moderate residue Potential scratching with harsh soaps
    White Vinegar Vinegar, Water Blades with significant residue Potential metal weakening with prolonged use
    Isopropyl Alcohol Isopropyl Alcohol, Water Blades with oil or product buildup Flammability, potential damage with high concentration

    Tools and Equipment

    Beyond the cleaning solutions, the right tools are crucial for effectively and safely cleaning your clipper blades. Proper tools prevent damage to the blades and ensure a thorough cleaning, leading to better performance and longer lifespan. Using the correct tools for different blade types is vital for optimal results.Selecting the right tools and understanding their purpose is paramount to a successful cleaning process.

    Different tools cater to different aspects of blade maintenance, from removing hair and debris to polishing and ensuring a sharp edge. This section will Artikel the essential tools, their functions, and how to choose the best ones for your specific blades.

    Essential Cleaning Tools

    Careful selection of tools is key to achieving a pristine clean. Different tools excel at different stages of the cleaning process, allowing you to address various needs.

    • Tweezers: Tweezers are invaluable for meticulously removing hair and small debris that might be lodged in the blades’ intricate crevices. Their precision helps to eliminate stubborn hair, ensuring a complete clean. Small, pointed tweezers are best for delicate areas.
    • Small Brushes: Soft-bristled brushes are vital for reaching hard-to-reach areas and removing surface dirt. These brushes effectively loosen and remove hair and other particles, ensuring a more thorough clean. Look for brushes with fine bristles to avoid scratching the blades.
    • Cleaning Disks/Pads: Cleaning disks or pads, often made of microfiber or similar materials, provide a gentle yet effective way to polish and remove residue. These materials are designed to clean without scratching the blades, maintaining their sharpness and longevity. Use these after removing the bulk of debris with tweezers and brushes.
    • Ultrasonic Cleaner: An ultrasonic cleaner uses high-frequency sound waves to agitate cleaning solution, effectively removing stubborn particles and residue. This method is particularly useful for deep cleaning and removing built-up mineral deposits. Ultrasonic cleaners are beneficial for thoroughly cleaning all parts of the clipper, not just the blades.
    • Razor Blade Cleaner: A razor blade cleaner, with its specialized design, is essential for thoroughly cleaning the cutting edges of the blades. It’s often equipped with features like a built-in brush or a specific cleaning groove that aids in cleaning and polishing. Use this to maintain the cutting edge of the blade.

    Selecting Appropriate Tools

    Matching the right tools to the specific clipper blade type ensures a proper clean without causing damage. Understanding the blade type’s features allows you to select tools that are best suited to handle the cleaning process without compromising the blade’s performance.

    Tool Purpose Suitability for Blade Types
    Tweezers Removing hair and debris from crevices All blade types
    Small Brushes Removing surface dirt and debris All blade types
    Cleaning Disks/Pads Polishing and removing residue All blade types
    Ultrasonic Cleaner Deep cleaning and removing mineral deposits All blade types (especially those with buildup)
    Razor Blade Cleaner Cleaning and polishing cutting edges All blade types

    Maintenance and Prevention

    Maintaining your clipper blades in pristine condition is crucial for achieving optimal performance and extending their lifespan. Regular maintenance not only ensures smooth, efficient cutting but also prevents potential health risks associated with blade contamination. Proper preventative measures can significantly reduce the need for frequent deep cleans and keep your clippers in top working order.Preventing buildup and clogs in your clipper blades is key to maintaining their sharpness and functionality.

    This proactive approach can save you time and money in the long run. By understanding and implementing the right techniques, you can effectively maintain your clippers, minimizing the risk of costly repairs or replacements.

    Preventative Measures for Blade Cleanliness

    Regular cleaning is essential to prevent the accumulation of hair, debris, and product residue on the blades. This buildup can dull the blades, hinder their performance, and make them more susceptible to clogging. Consistent cleaning will maintain the sharpness and efficiency of your clippers, resulting in better grooming results and a longer lifespan.

    Keeping your clippers clean is crucial for a smooth shave, but what exactly can you use? A good quality cleaning solution is key, and while I’m not an expert, I’ve found that a mixture of warm water and a mild dish soap works wonders. While you’re at it, checking out this awesome new music project featuring Jorge Elbrose, Ariel Pink, and Jorge Elbrecht called “to ring” might just inspire your next clipper cleaning session.

    listen jorge elbrose ariel pink and jorge elbrecht called to ring Ultimately, though, the best cleaning method is one that you find works best for you, and doesn’t damage the blades. So experiment and find your groove!

    • Thorough Cleaning After Each Use: Immediately after each use, remove any visible hair and debris from the blades. This simple step prevents the build-up of dried hair and other substances that can cause clogging and dulling. It also helps prevent the spread of bacteria and germs.
    • Regular Blade Inspections: Periodically inspect your blades for any signs of damage, such as nicks, bends, or significant wear. Early detection allows for prompt replacement and prevents potential accidents during use.
    • Proper Storage: Store your clippers in a clean, dry place, preferably in their original packaging or a designated clipper storage case. This protects the blades from dust and moisture, which can contribute to corrosion and dulling.

    Techniques to Avoid Buildup and Clogs

    Implementing proper techniques can significantly reduce the risk of buildup and clogs in your clipper blades. A proactive approach to blade care will ensure your clippers maintain their peak performance and longevity.

    • Use the Correct Cleaning Solutions: Employ appropriate cleaning solutions that are specifically formulated for clipper blades. Using improper cleaning solutions can damage the blades, leading to premature wear and tear.
    • Avoid Harsh Chemicals: Refrain from using abrasive or harsh chemicals that can damage the blades’ surface and cause them to dull more quickly. Using mild solutions minimizes the risk of damage.
    • Clean the Clippers Regularly: A consistent cleaning routine helps to remove hair, debris, and residue from the blades, preventing buildup and ensuring optimal performance. This routine helps maintain the sharpness of your blades, leading to cleaner cuts and better grooming results.

    Regular Maintenance Routines for Optimal Blade Longevity

    Establishing a regular maintenance routine for your clippers ensures their optimal performance and longevity. A consistent schedule will prevent buildup and keep your blades in top condition.

    1. Daily Wipe-Down: After each use, wipe down the blades and the clipper housing with a soft cloth to remove any visible hair or debris. This simple step prevents the accumulation of dirt and keeps your clippers in good condition.
    2. Weekly Deep Clean: Once a week, perform a more thorough cleaning using a designated cleaning solution and tools. This ensures that any embedded hair or residue is removed, preserving the blade’s sharpness and preventing clogs.
    3. Monthly Blade Inspection: Conduct a monthly inspection of the blades for any signs of wear, damage, or dulling. This proactive approach allows for timely replacement and prevents potential issues during use.

    Impact of Improper Cleaning on Clipper Blade Performance and Lifespan

    Improper cleaning can significantly impact the performance and lifespan of your clipper blades. Ignoring proper maintenance routines can lead to several issues, impacting your cutting experience and increasing repair costs.

    • Reduced Cutting Efficiency: Buildup on the blades reduces their cutting efficiency, leading to more resistance and difficulty during use. This can result in a less precise and less satisfying cutting experience.
    • Premature Dullness: Accumulated hair and debris can dull the blades, requiring more frequent sharpening or replacement. This can lead to costly repairs and replacement costs.
    • Increased Risk of Clogs: Buildup can lead to clogs, hindering the smooth operation of the clippers. Clogs require time-consuming and potentially damaging solutions for removal.

    Cleaning Schedule for Clippers

    This table Artikels a suggested cleaning schedule for your clippers, considering frequency and cleaning solution type. A well-structured cleaning schedule will ensure optimal blade longevity and performance.

    Frequency Cleaning Solution Description
    Daily Soft cloth Wipe down blades and housing to remove visible hair and debris.
    Weekly Designated cleaning solution Thorough cleaning using a cleaning solution to remove embedded hair and residue.
    Monthly Blade inspection Inspect blades for wear, damage, or dulling. Replace if necessary.

    Troubleshooting and Common Issues

    Properly maintaining your clipper blades is crucial for optimal performance and longevity. Neglecting cleaning can lead to a variety of issues, from reduced cutting power to potentially damaging your hair or the clippers themselves. Understanding these problems and their solutions will help you keep your clippers in tip-top shape.Troubleshooting problems with clipper blades often involves a systematic approach.

    Keeping your clipper blades clean is crucial, especially if you’re a regular barber or groomer. While I’m pondering the best cleaning solutions, I stumbled upon some exciting news – cocorosie announce new album plot tour! cocorosie announce new album plot tour is a fantastic album, and I’m definitely looking forward to it. For now, though, I’m back to researching the best ways to keep my clippers pristine.

    A little dish soap and warm water often does the trick.

    Identifying the root cause is key to finding the correct solution. This section will Artikel common issues, their potential causes, and effective troubleshooting methods. Early intervention and preventative measures can often avoid more significant problems.

    Common Signs of Improper Blade Cleaning

    Improper blade cleaning can manifest in several ways, impacting both the clippers’ performance and the user experience. These issues can range from minor annoyances to more serious concerns. Understanding the subtle signs of these problems is essential for prompt intervention.

    • Reduced Cutting Power: If your clippers struggle to cut through hair as efficiently as before, a buildup of hair, debris, and mineral deposits on the blades can be a contributing factor. This buildup creates resistance, hindering the cutting action. A noticeable decrease in the clippers’ cutting power is a clear indication of this problem.
    • Blade Vibration or Noise: Excessive vibration or unusual noises during operation often indicate issues with blade alignment or the presence of foreign objects lodged within the mechanism. These sounds can be disruptive and can lead to blade damage if left unaddressed. A noticeable grinding or rattling sound during operation is a strong indicator of this issue.
    • Uneven Cuts: If your clipper is producing uneven cuts, it could be due to damaged blades or uneven blade alignment. This can also be caused by clogs or foreign objects within the cutting mechanism. Uneven cuts are an indication that the blades may need more than just a simple cleaning.
    • Overheating: Clippers that overheat frequently during use can be a result of poor airflow or significant buildup of debris. This can cause the motor to work harder and potentially lead to damage. A noticeable increase in the temperature of the clippers’ housing is a clear sign of overheating.

    Diagnosing and Resolving Issues

    A systematic approach to diagnosing and resolving problems is crucial. The first step often involves a visual inspection of the blades and the clipper’s internal components.

    1. Visual Inspection: Carefully examine the blades for any visible signs of damage, debris buildup, or misalignment. This includes checking for nicks, bent parts, or any foreign objects that may be interfering with the cutting mechanism.
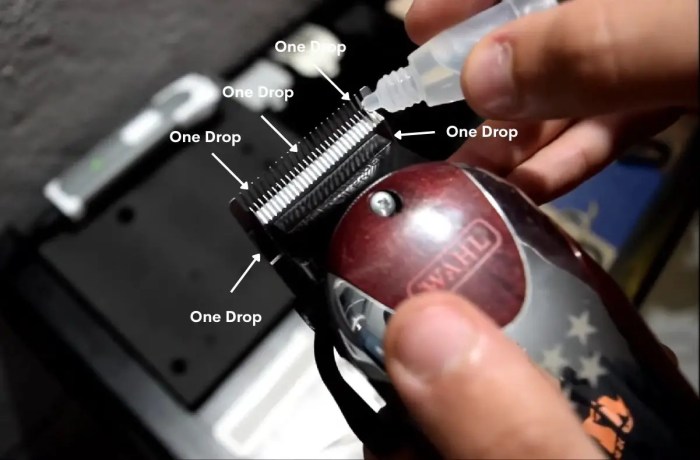
    2. Cleaning and Lubrication: Thorough cleaning and lubrication of the blades, followed by checking for any loose parts or misaligned components, can often resolve many issues. Pay close attention to the lubrication points and use appropriate lubricants.
    3. Professional Service: If the problem persists after attempting these steps, seeking professional service is recommended. A qualified technician can diagnose and repair more complex issues that may require specialized tools or expertise.

    Potential Damage from Neglecting Cleaning

    Neglecting regular blade cleaning can lead to significant damage to your clippers. Accumulated hair and debris can create resistance, causing the motor to work harder. This can lead to overheating, premature wear and tear, and ultimately, damage to the clipper’s motor. Over time, improper cleaning can compromise the cutting efficiency and precision of the blades, leading to uneven cuts and potentially damaging the hair.

    Troubleshooting Table

    Problem Cause Troubleshooting Steps
    Reduced Cutting Power Buildup of hair, debris, mineral deposits Thoroughly clean the blades, lubricate, and check for obstructions.
    Blade Vibration/Noise Misaligned blades, foreign objects Inspect blades for damage, remove any obstructions, realign if necessary.
    Uneven Cuts Damaged blades, misaligned blades, clogs Clean blades, lubricate, inspect for damage, and realign if necessary.
    Overheating Poor airflow, significant debris buildup Clean thoroughly, check airflow, and ensure no obstructions.

    Specific Blade Types

    What Can You Use to Clean Your Clipper Blades

    Different clipper blade types require specific cleaning methods to maintain their performance and longevity. Understanding these differences is crucial for achieving optimal results and preventing damage. Proper cleaning tailored to each blade type prevents premature wear, ensures smooth cutting, and ultimately extends the lifespan of your clippers.Understanding the unique features of each blade type allows for more effective cleaning and maintenance.

    Rotary blades, for example, need a different approach than those found in rotary-style clippers. This section dives deep into the nuances of various blade types, outlining tailored cleaning procedures and emphasizing the critical role of blade type in the overall cleaning process.

    Rotary Clipper Blades

    Rotary clipper blades, known for their precision and speed, feature a circular cutting action. These blades are often made of high-quality stainless steel, which requires careful handling during cleaning. The intricate design of the blades necessitates a gentle but thorough cleaning process to avoid scratching or damaging the cutting edges.

    Rotary-Style Clipper Blades

    Rotary-style clippers, a variation of rotary clippers, also utilize a circular motion. However, these blades might have different geometries or materials compared to traditional rotary blades. The cleaning methods for rotary-style blades will often mirror those of rotary blades, but specific considerations for the blade’s unique design should be observed.

    Fixed-Blade Clippers

    Fixed-blade clippers utilize a series of fixed blades that move against each other. The cleaning process for these blades focuses on removing hair and debris from the cutting surfaces and the space between the blades. Maintaining the smooth contact between the blades is crucial for optimal performance. Proper lubrication may be necessary for some models.

    Shear Blades

    Shear blades, commonly used in pet grooming, have a more pronounced shearing action. The cleaning process for shear blades is often focused on removing hair and debris from the cutting edges and the gaps between the blades. Careful attention to detail is crucial to prevent damage to the fine cutting edges.

    Table of Blade Types and Cleaning Solutions

    Blade Type Features Recommended Cleaning Solutions
    Rotary Circular cutting action, high-quality stainless steel Mild dish soap, warm water, soft brush
    Rotary-Style Circular cutting action, potential variations in geometry or materials Mild dish soap, warm water, soft brush; consult manufacturer guidelines
    Fixed-Blade Fixed blades that move against each other Mild dish soap, warm water, soft brush; potential lubrication
    Shear Shearing action, often used in pet grooming Mild dish soap, warm water, soft brush; meticulous cleaning of cutting edges

    Safety Considerations: What Can You Use To Clean Your Clipper Blades

    Cleaning clipper blades, while essential for maintaining their performance, requires careful attention to safety precautions. Neglecting these precautions can lead to serious injuries. This section details the importance of safety gear, proper handling of cleaning solutions, and general safety procedures to prevent accidents.Proper safety measures are paramount when handling potentially hazardous cleaning solutions and sharp blades. Adhering to these guidelines can significantly reduce the risk of cuts, chemical burns, and other injuries.

    Safety Gear

    Following established safety protocols is crucial to prevent accidents when cleaning clipper blades. Using appropriate safety gear, such as safety glasses and gloves, is essential for minimizing the risk of injuries.

    • Safety Glasses: Protecting your eyes is critical when working with potentially harmful substances and sharp objects. Safety glasses prevent foreign particles, splashes, and flying debris from entering your eyes, thus safeguarding your vision.
    • Gloves: Gloves provide a physical barrier between your skin and cleaning solutions, protecting your hands from chemical exposure. This is especially important with harsh chemicals or solutions that could cause irritation or burns.

    Cleaning Solution Handling

    Safe handling of cleaning solutions is vital to prevent accidents and exposure. Improper handling can result in chemical burns, skin irritation, or inhalation hazards.

    • Ventilation: Ensure adequate ventilation when using cleaning solutions. Open windows or use a fan to circulate air and minimize the concentration of fumes. This precaution helps prevent inhalation of harmful vapors.
    • Proper Storage: Store cleaning solutions in their original containers in a cool, dry place, away from heat sources and direct sunlight. This helps prevent the solution from deteriorating and releasing hazardous fumes.
    • Dilution: Always follow the manufacturer’s instructions regarding the dilution of cleaning solutions. Diluting solutions to the appropriate concentration reduces the risk of chemical burns or other adverse reactions.
    • First Aid: Have a first-aid kit readily available in case of accidental exposure to cleaning solutions or cuts. Knowing what to do in case of an accident is an important safety precaution.

    Safety Procedures

    Following a structured safety procedure is essential for minimizing risks associated with clipper blade cleaning. This involves a series of steps to ensure safety at each stage.

    • Preparation: Gather all necessary cleaning supplies and safety equipment before starting the cleaning process. Having everything readily available minimizes the risk of rushing and mistakes.
    • Work Area: Clean and organize your work area to ensure a safe and clutter-free environment. This prevents tripping hazards and allows for easy access to tools and materials.
    • Proper Disposal: Dispose of used cleaning solutions and materials according to local regulations. This is crucial for environmental protection and preventing potential contamination.

    Important Safety Precautions

    A comprehensive list of safety precautions is crucial for a safe cleaning process. These precautions are essential to prevent accidents and protect users from harm.

    • Safety Glasses: Always wear safety glasses to protect your eyes from splashes or flying debris.
    • Gloves: Use appropriate gloves to protect your hands from chemicals and potential cuts.
    • Ventilation: Ensure proper ventilation in the area to prevent inhalation of fumes or vapors.
    • Read Instructions: Carefully read and understand all instructions provided by the manufacturer of the cleaning solutions and tools.

    Illustrative Examples

    Let’s dive into practical examples to solidify your understanding of clipper blade cleaning. Visualizing the process and its effects will make the entire procedure clearer and more manageable. We’ll examine the differences before and after cleaning, demonstrate various tools, and show how cleaning methods impact the blades’ appearance and performance.

    Before and After Cleaning Comparison

    A crucial aspect of cleaning is the visual comparison. Consider a clipper blade that has accumulated significant amounts of hair and product buildup. The blade will appear dull and coated with a film. The metal surface will have a visibly uneven texture, and the sharpness may be reduced. After a thorough cleaning, the blade will appear much brighter, reflecting light more effectively.

    The buildup will be removed, revealing a clean, uniform metal surface. Sharpness is restored, and the blade’s performance is significantly improved.

    Visual Representation of Cleaning Tools

    To illustrate the variety of cleaning tools available, imagine a set of tools laid out on a surface. A small, soft-bristled brush, perfect for gently removing hair and debris, is positioned near a small, shallow container filled with cleaning solution. A pair of tweezers, specifically designed for removing stubborn hair or particles, are strategically placed next to the brush.

    A microfiber cloth, ideally for drying and preventing water spots, is visible beside the tweezers. This combination represents the basic tools for a comprehensive cleaning process.

    Impact of Cleaning Methods on Blade Appearance

    Different cleaning methods produce varying effects on the blade’s appearance. A simple rinsing method, using warm water, will remove loose hair and surface debris, resulting in a slightly improved appearance. A more thorough cleaning, employing a cleaning solution and a brush, will remove stubborn residue, resulting in a noticeably brighter and clearer blade, eliminating any film. The method of ultrasonic cleaning, though more advanced, will reveal a pristine, gleaming blade with virtually no trace of buildup, demonstrating the highest level of cleanliness.

    Effect of Cleaning on Blade Sharpness and Performance

    Cleaning directly impacts blade sharpness and performance. A dirty blade, clogged with hair and product residue, will experience significant friction during use. This friction dulls the blade, reducing its cutting ability, and causing it to drag, resulting in discomfort and potentially uneven cuts. Conversely, a clean blade will cut hair with less resistance, delivering a smoother and more efficient trimming experience.

    The sharpness is restored, and the performance improves drastically. A sharp blade will also lead to a more comfortable experience for the user.

    Effectiveness of a Specific Cleaning Method: Ultrasonic Cleaning

    Imagine a blade before and after an ultrasonic cleaning process. Before the cleaning, the blade shows signs of significant buildup—a dull, coated surface with hair and product residue clearly visible. After ultrasonic cleaning, the blade is gleaming, reflecting light perfectly. The entire surface is free of any residue, indicating the complete removal of all debris. This visual representation demonstrates the effectiveness of ultrasonic cleaning in restoring the blade to its pristine condition, ensuring optimal performance.

    End of Discussion

    What Can You Use to Clean Your Clipper Blades

    In conclusion, proper clipper blade cleaning is crucial for maintaining performance and extending the life of your tools. We’ve explored various cleaning methods, solutions, and safety considerations. Remember to choose the right approach based on your blade type and follow the safety precautions diligently. By incorporating regular maintenance into your routine, you can keep your clippers in top condition, ensuring smooth and efficient cuts every time.

    Now you’re equipped with the knowledge to keep your blades gleaming and your haircuts perfect!