Make Your Scalp Stop Itching is your guide to understanding and conquering that frustrating scalp itch. From identifying the root causes, whether external irritants or internal imbalances, to exploring a range of soothing remedies and treatments, this comprehensive guide will equip you with the knowledge to finally achieve that itch-free scalp you deserve. We’ll delve into home remedies, over-the-counter solutions, and even prescription options, helping you find the best approach for your specific needs.
Ultimately, we aim to help you understand your scalp health and take control of its well-being.
This post will take you through various aspects, including identifying the specific triggers of your scalp itch, comparing different scalp conditions, exploring effective home remedies, and examining over-the-counter and prescription medications. We’ll also explore lifestyle and dietary factors, providing actionable tips for preventing future issues. Ultimately, we’ll equip you with the knowledge to address your scalp itch effectively and maintain a healthy, happy scalp.
Understanding Scalp Itching: Make Your Scalp Stop Itching

Scalp itching, a common ailment, can range from a mild annoyance to a persistent discomfort. Understanding the various causes and symptoms is crucial for effective management and treatment. This exploration delves into the complexities of scalp itchiness, from external irritants to underlying medical conditions.Scalp itching, or pruritus, is a symptom, not a disease itself. It signals an underlying issue, whether a simple reaction to a new shampoo or a more serious condition like psoriasis.
Pinpointing the root cause is essential for targeted treatment and relief.
Causes of Scalp Itching
Scalp itching can stem from a multitude of factors, broadly categorized as external and internal. External triggers often involve contact with irritants or allergens, while internal factors may point to systemic health conditions.
- External Factors: These often involve direct contact with irritants, such as harsh chemicals in shampoos, hair dyes, or styling products. Environmental factors like dry air or exposure to certain allergens can also trigger itching. Even certain fabrics or materials used in headwear can be irritants.
- Internal Factors: Underlying medical conditions can also contribute to scalp itching. These conditions may include allergies, hormonal imbalances, or autoimmune disorders. Conditions such as seborrheic dermatitis, psoriasis, and fungal infections are common internal causes of scalp itchiness.
Symptoms Associated with Scalp Itching
The symptoms of scalp itching can vary depending on the underlying cause. Some common symptoms include redness, flaking, dryness, and visible patches on the scalp.
- Seborrheic dermatitis often presents with yellowish or white flakes, redness, and significant itching. The flakes can be noticeable on the scalp, behind the ears, or in other areas.
- Psoriasis manifests as red, inflamed patches covered in silvery-white scales. These patches are often itchy and may be accompanied by burning sensations.
- Fungal infections, such as ringworm, may display circular or oval patches with redness, itching, and sometimes blisters or scaling. These infections may extend to other areas of the body.
Comparison of Scalp Conditions
The table below provides a comparative overview of common scalp conditions that cause itching. Accurate diagnosis is vital for appropriate treatment.
| Condition | Symptoms | Causes | Treatment |
|---|---|---|---|
| Seborrheic dermatitis | Flaking, redness, itching, greasy appearance; often found in areas with a high concentration of sebaceous glands | Yeast overgrowth, hormonal fluctuations, stress, certain medications; genetic predisposition can also play a role. | Medicated shampoos, topical antifungals, corticosteroids, and in severe cases, oral medications. |
| Psoriasis | Red, scaly patches, itching, burning, sometimes with cracking or bleeding; often found on the scalp, elbows, knees | Autoimmune disorder; genetic predisposition and environmental triggers can exacerbate symptoms. | Topical medications (corticosteroids, vitamin D analogs), light therapy, systemic medications, and lifestyle modifications. |
| Fungal Infections (e.g., ringworm) | Circular or oval patches with redness, itching, and sometimes blisters or scaling; often accompanied by hair loss; may be accompanied by fever, fatigue, or other systemic symptoms | Infections caused by fungi, often spread through contact. Weakened immune systems can increase susceptibility. | Antifungal creams, shampoos, or oral medications, depending on the severity. Maintaining good hygiene is crucial. |
Importance of Accurate Diagnosis
Accurate diagnosis is crucial for effective treatment of scalp itching. Incorrect diagnoses can lead to ineffective or even harmful treatments. A healthcare professional can evaluate symptoms, conduct physical examinations, and potentially order tests to determine the underlying cause. This personalized approach ensures that the most appropriate treatment is implemented, leading to faster relief and better long-term outcomes.
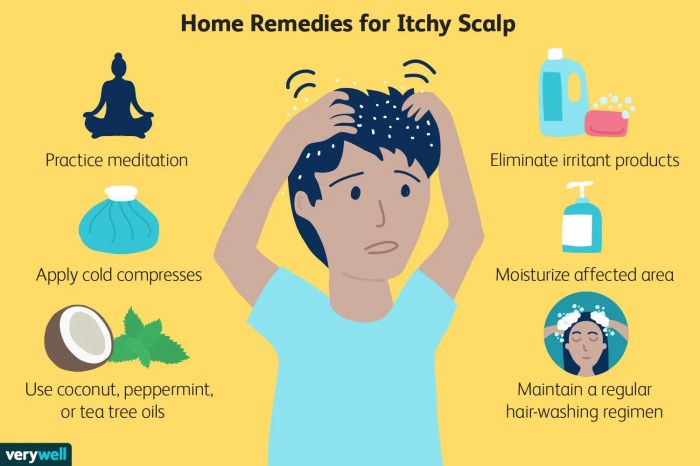
Home Remedies and Natural Treatments
Soothe your itchy scalp naturally! Many people turn to natural remedies before resorting to harsh chemicals. Understanding the potential benefits and drawbacks of these approaches can help you choose the best course of action for your individual needs. This section explores various home remedies and highlights how to use them effectively.Home remedies offer a gentler alternative to over-the-counter or prescription medications for managing scalp itchiness.
By using natural ingredients, you can often find relief without the potential side effects of chemical treatments. However, individual results may vary, and it’s crucial to be aware of potential interactions with other medications or underlying health conditions.
Common Home Remedies for Scalp Itch
A range of natural ingredients can potentially provide relief from scalp itchiness. Understanding their individual properties and how to apply them correctly can lead to more effective results.
| Remedy | Ingredients | Method | Potential Benefits |
|---|---|---|---|
| Apple cider vinegar rinse | Apple cider vinegar, water | Mix equal parts apple cider vinegar and water, rinse hair | Soothes inflammation, balances scalp pH |
| Aloe vera | Aloe vera gel | Apply aloe vera gel directly to the scalp, leave on for 15-20 minutes, then rinse | Known for its soothing and anti-inflammatory properties |
| Coconut oil | Coconut oil | Apply a small amount of coconut oil to the scalp and massage gently, leave on for 30 minutes, then wash out | Moisturizes the scalp, potentially reducing dryness and itchiness |
| Tea tree oil | Tea tree oil, carrier oil (like jojoba or almond oil) | Dilute a few drops of tea tree oil in a carrier oil, apply to the affected areas, avoiding contact with eyes | Anti-inflammatory and antifungal properties, potentially effective against certain types of dandruff |
| Baking soda paste | Baking soda, water | Mix baking soda with water to create a paste, apply to scalp, leave on for 10-15 minutes, then rinse | Can help exfoliate the scalp, potentially reducing flaking and itchiness |
Potential Benefits and Drawbacks of Natural Remedies
Natural remedies often come with fewer side effects than pharmaceutical treatments, but they are not without potential drawbacks.Natural remedies can be beneficial due to their inherent properties. For example, aloe vera is known for its soothing and anti-inflammatory properties, while coconut oil moisturizes the scalp. However, some individuals may experience allergic reactions to certain ingredients. It’s important to perform a patch test before applying a new remedy to a large area of the scalp.
Applying Home Remedies for Optimal Results
Proper application of home remedies is crucial for maximizing their effectiveness.For optimal results with apple cider vinegar rinses, ensure the solution is well-mixed and applied evenly to the scalp. A gentle massage can enhance absorption and promote circulation. Similarly, with aloe vera, apply a generous amount to the affected areas and allow it to sit for at least 15 minutes.
Dealing with an itchy scalp can be a real pain, but sometimes the culprit isn’t what you think. For example, if you’ve recently bleached your hair, the lingering smell might actually be contributing to the irritation. You can tackle that pesky smell by trying some of the tips in this helpful guide on Get Rid of Bleach Smell.
Once you’ve eliminated the bleach smell, you’ll likely find your scalp itching less. So, next time you’re battling an itchy scalp, consider a double-pronged attack—addressing the potential smell source, and you’ll be on the road to a happier, healthier scalp in no time.
For coconut oil treatments, massage the oil into the scalp for better penetration and to improve circulation. Remember to dilute tea tree oil with a carrier oil before application to avoid skin irritation. Baking soda paste should be applied gently and rinsed thoroughly to prevent any irritation or dryness.
Over-the-Counter and Prescription Medications
Dealing with an itchy scalp can be frustrating, and finding the right treatment is crucial. Understanding the different types of medications available, both over-the-counter and prescription, can help you manage your symptoms effectively. This section explores the various options and their potential benefits and drawbacks.
Over-the-Counter Medications for Scalp Itch
Over-the-counter (OTC) medications are often the first line of defense against mild to moderate scalp itch. These readily available treatments can provide relief without requiring a doctor’s visit.
My scalp has been driving me crazy lately! It’s itching like crazy, and I’m desperate to find a solution. While I’m trying various remedies, I stumbled upon some exciting news about a tour featuring Steely Dan and the Doobie Brothers, which has me buzzing. Hopefully, the soothing sounds of those legendary bands will be a distraction from my itchy scalp woes.
I’m hoping a new scalp treatment will finally bring some relief soon!
| Medication | Active Ingredient | Dosage | Potential Side Effects |
|---|---|---|---|
| Hydrocortisone cream (1%) | Hydrocortisone | Apply a thin layer to the affected area 1-2 times daily, as directed. | Skin irritation, thinning (especially with prolonged use), and possible allergic reactions. |
| Antihistamines (e.g., diphenhydramine) | Diphenhydramine, cetirizine, loratadine | Follow the dosage instructions on the package. | Drowsiness, dry mouth, and dizziness, particularly with higher doses. Some people may experience allergic reactions. |
| Coal Tar Shampoo | Coal Tar | Apply to wet hair, leave on for 5-10 minutes, and rinse thoroughly. | Skin irritation, redness, dryness, staining of hair and clothing. Avoid contact with eyes. |
| Selenium Sulfide Shampoo | Selenium Sulfide | Apply to wet hair, leave on for 5-10 minutes, and rinse thoroughly. | Skin irritation, burning, dryness, and possible allergic reactions. Some users experience a temporary hair color change. |
| Salicylic Acid Shampoo | Salicylic Acid | Follow product instructions. | Skin irritation, dryness, and possible allergic reactions. Some users may experience hair loss if used too frequently or in high concentrations. |
Prescription Medications for Severe Scalp Itch
When OTC remedies fail to provide adequate relief, prescription medications may be necessary for severe or persistent scalp itch. These medications often target the underlying cause of the inflammation or infection.
Dealing with an itchy scalp can be a real pain. It’s frustrating, and often distracting, especially when you’re trying to focus on something else. Luckily, there are ways to find relief. And while you’re at it, why not try organizing your trading cards? Checking out this guide on Organize Your Trading Cards might actually help with the scalp itch.
After all, a well-organized mind can lead to a well-organized life, and a well-organized space can create a less chaotic mind – all of which can help in soothing that annoying itch. So, get those trading cards sorted, and then get back to conquering that itchy scalp!
| Medication | Mechanism of Action | Potential Side Effects |
|---|---|---|
| Topical steroids (e.g., clobetasol, betamethasone) | Powerful anti-inflammatory agents that reduce swelling and itching. | Skin thinning, stretch marks, and increased risk of infection. Prolonged use can lead to dependence and withdrawal symptoms. |
| Oral antifungals (e.g., ketoconazole) | Target fungal infections that can sometimes cause scalp itch. | Nausea, vomiting, diarrhea, liver problems. |
| Oral antibiotics (e.g., erythromycin) | Treat bacterial infections that can contribute to scalp itch. | Nausea, vomiting, diarrhea, and allergic reactions. |
Lifestyle and Dietary Considerations

Scalp health is intricately linked to overall well-being. Factors beyond topical treatments, like lifestyle choices and dietary habits, can significantly impact the health of your scalp and the frequency of itching. Understanding these connections can lead to more comprehensive strategies for managing scalp issues.A balanced approach to scalp care often involves addressing not just the immediate symptoms but also the underlying contributing factors.
Dietary choices, stress levels, and even the products you use can all influence the condition of your scalp. This section explores these factors and how they might influence your scalp’s health and the itching you experience.
Lifestyle Factors Affecting Scalp Health
Lifestyle choices play a crucial role in scalp health. Consistent sleep deprivation, for instance, can weaken the body’s natural defenses, potentially making you more susceptible to scalp issues. Stressful situations can also have a negative impact, as the body’s response to stress can affect blood flow and hormone levels, potentially impacting scalp health. The type of physical activity one engages in, while generally beneficial for overall health, can sometimes lead to scalp irritation if not managed appropriately.
Dietary Factors and Scalp Itching
Certain dietary factors can either exacerbate or alleviate scalp itching. A diet deficient in essential nutrients like vitamin D, zinc, and omega-3 fatty acids can potentially weaken the scalp’s protective barrier, making it more prone to irritation and itching. Conversely, a balanced diet rich in these nutrients can support a healthier scalp and reduce the likelihood of itching.
Foods and Nutrients Associated with Healthier Scalps
A variety of foods and nutrients are associated with healthier scalps. Foods rich in omega-3 fatty acids, like salmon, tuna, and flaxseeds, are important for maintaining healthy skin and hair, which often extends to the scalp. Fruits and vegetables, particularly those rich in antioxidants, can support overall health and potentially reduce inflammation, which is sometimes a contributing factor to scalp issues.
Incorporating foods rich in vitamin D, like fatty fish and eggs, can also promote healthy scalp function.
Stress and Scalp Issues
Stress is a significant factor that can contribute to various health problems, including scalp issues. Chronic stress can trigger an overactive immune response, potentially leading to inflammation and itching of the scalp. When under stress, the body releases hormones that can disrupt the balance of the scalp’s natural oils, making it more susceptible to dryness and irritation.
Stress Management Strategies for Scalp Health, Make Your Scalp Stop Itching
Managing stress effectively is crucial for maintaining scalp health. Techniques like mindfulness meditation, deep breathing exercises, and regular physical activity can help regulate stress levels. Prioritizing sufficient sleep and incorporating relaxation techniques into your daily routine can also significantly impact stress levels and, in turn, potentially reduce scalp itching.
Prevention Strategies
Keeping your scalp healthy and itch-free involves proactive measures. Understanding the triggers and implementing preventative strategies is key to managing chronic scalp itching. By addressing potential irritants and maintaining a healthy scalp environment, you can significantly reduce the likelihood of experiencing uncomfortable itching.
Identifying Scalp Itching Triggers
Common triggers for scalp itching include harsh hair products, stress, and underlying medical conditions. Identifying and avoiding these triggers is crucial for preventing future episodes. Recognizing patterns in when itching occurs can help pinpoint the culprit. For example, if itching worsens after using a particular shampoo, it’s a strong indicator that the product is irritating the scalp.
Preventive Measures for Different Scalp Conditions
Various scalp conditions can cause itching. Preventive measures vary depending on the specific condition. For instance, dandruff, a common scalp condition, can be managed by using anti-dandruff shampoos and avoiding overly dry or oily scalp conditions.
Maintaining a Healthy Scalp
Maintaining a healthy scalp involves several practices. A balanced diet rich in vitamins and minerals can support overall scalp health. Regular scalp exfoliation can remove dead skin cells and promote healthy blood circulation. Proper hydration is also crucial for maintaining scalp moisture and preventing dryness.
Choosing Appropriate Hair Products
Selecting the right hair products is vital in preventing scalp irritation. Harsh chemicals, fragrances, and dyes can trigger itching. Opting for gentle, hypoallergenic products specifically formulated for sensitive scalps can make a significant difference. Always perform a patch test before applying new hair products to a small area of the scalp to assess for any allergic reactions.
Consider products that are free from sulfates, parabens, and other potential irritants. Reading product labels carefully is essential for identifying potential irritants and making informed choices.
Avoiding Irritants
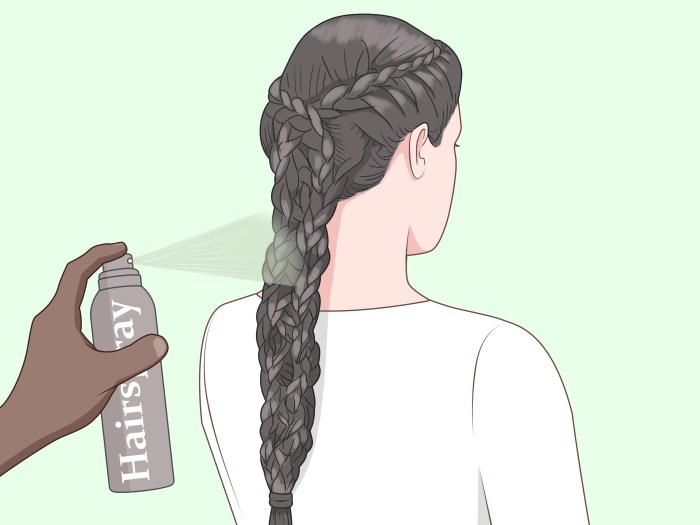
External factors like tight hairstyles and excessive heat styling can also contribute to scalp itching. Avoiding tight hairstyles, such as braids or ponytails, that put pressure on the scalp can help prevent irritation. Limit the use of heat styling tools like hair dryers and curling irons. If heat styling is necessary, use a heat protectant spray to shield the scalp and hair from excessive heat.
Lifestyle and Dietary Considerations
Stress, a common factor in many health issues, can also exacerbate scalp itching. Stress management techniques such as yoga, meditation, or deep breathing exercises can help reduce stress levels. A balanced diet rich in essential nutrients, including vitamins, minerals, and antioxidants, can support overall health and potentially reduce scalp inflammation. Ensure you are getting enough sleep to allow your body to repair and rejuvenate.
When to Seek Professional Help
Persistent or severe scalp itching can significantly impact daily life, making it crucial to understand when professional medical attention is necessary. Ignoring these warning signs can delay proper diagnosis and treatment, potentially leading to more complex issues. This section Artikels the situations where seeking professional help is essential for managing scalp itching effectively.
Identifying Warning Signs Requiring Medical Attention
Chronic scalp itching, particularly if accompanied by other symptoms, demands immediate medical evaluation. These symptoms often indicate underlying conditions beyond simple dryness or dandruff. Significant warning signs include:
- Scalp lesions or sores that don’t heal within a few days.
- Presence of visible bumps, pustules, or crusting on the scalp.
- Scalp redness, swelling, or tenderness that persists despite home remedies.
- Noticeable hair loss or thinning, which might be a symptom of an inflammatory condition.
- Itching accompanied by fever, chills, or body aches, suggesting a possible infection.
- Itching that worsens at night or interferes with sleep.
- Scalp itching that spreads to other parts of the body.
Understanding the Consultation Process
Consulting a dermatologist or other qualified healthcare professional is the next step if home remedies and over-the-counter treatments fail to alleviate the itching. This process involves a structured approach to diagnosis and treatment.
- Scheduling an appointment: Contact your primary care physician or dermatologist to schedule an appointment. Early diagnosis and treatment are crucial in managing chronic conditions.
- Providing a detailed medical history: Thoroughly discuss your medical history, including any pre-existing conditions, medications, allergies, and recent lifestyle changes.
- Describing symptoms: Accurately describe the location, intensity, duration, and characteristics of the scalp itching, as well as any associated symptoms.
- Providing a detailed history of treatments: Be prepared to share information about all treatments, including home remedies, over-the-counter medications, and any other interventions you have tried.
Essential Information to Share with Your Healthcare Provider
Thorough communication with your healthcare provider is key to receiving appropriate care. Be prepared to share detailed information about your scalp condition.
- Specific details about the itching: Note the frequency, intensity, and any triggers that seem to worsen the itching.
- Medications and supplements: Provide a complete list of all medications, including over-the-counter drugs, supplements, and herbal remedies you are currently taking.
- Recent lifestyle changes: Discuss any significant changes in your diet, stress levels, or sleep patterns that might be contributing factors.
- Relevant personal history: Share any relevant personal or family history of skin conditions, allergies, or autoimmune diseases.
Importance of Accurate Information
Providing accurate and detailed information allows your healthcare provider to formulate an accurate diagnosis and develop a personalized treatment plan. Open communication is essential for successful management of scalp itching.
Closing Summary
In conclusion, conquering scalp itching requires a multifaceted approach. Understanding the underlying causes, whether it’s a medical condition or a lifestyle factor, is key. Combining home remedies, over-the-counter treatments, and potentially prescription medications, alongside lifestyle adjustments, can create a comprehensive strategy for managing and preventing scalp itching. Remember, a healthy scalp is a happy scalp! If the itch persists or worsens, consult a healthcare professional for proper diagnosis and treatment.
You’ve got this!


 - wikiHow")
 - wikiHow")