Category: Arts & Crafts

  • Make a Panty Hose Sculpture A Creative Guide

    Make a Panty Hose Sculpture A Creative Guide

    Make a Panty Hose Sculpture: Dive into the surprising world of art using everyday pantyhose. This guide explores the history, techniques, and design considerations behind creating these unique sculptures. From simple forms to intricate designs, you’ll discover how pantyhose, a seemingly mundane item, can transform into captivating works of art.

    We’ll explore various types of pantyhose, comparing their materials, textures, and durability. You’ll learn how to prepare the pantyhose, choose the right adhesives, and construct your sculpture. Inspiration for design concepts and examples of existing pantyhose sculptures will be provided.

    Introduction to Panty Hose Sculptures

    Pantyhose, a seemingly mundane garment, has surprisingly found its way into the realm of art. Its use as a sculptural medium has grown in recent years, driven by artists seeking unique textures and materials to express their ideas. This exploration delves into the history, materials, and artistic movements connected to pantyhose sculptures, examining the potential symbolism woven into these often-unexpected creations.The utilization of pantyhose in artistic endeavors is not a recent phenomenon.

    While the exact origin point is hard to pinpoint, its application in sculpture has gained traction in contemporary art circles. Artists have increasingly used this readily available material, often repurposed from discarded garments, to explore themes of femininity, consumerism, and societal norms.

    Ever considered making a panty hose sculpture? It’s surprisingly therapeutic, and a great way to channel your inner artist. Speaking of creative outlets, have you heard about the hilarious incident of a retirement party runaway dog? Check out this story about a canine escape artist at retirement party runaway dog ! The sheer chaos of it all actually inspired me to try a new panty hose sculpture technique, incorporating unexpected shapes and colors.

    It’s a fun, quirky project, perfect for a rainy afternoon.

    History of Pantyhose in Art

    The history of pantyhose in art is intertwined with the evolution of contemporary art movements. Early examples of using pantyhose for sculpture often appeared in installations and performance art, challenging conventional notions of materials and form. As artistic exploration broadened, pantyhose began to be employed in more traditional sculptural formats, highlighting the versatility of the material.

    Pantyhose Materials and Their Impact

    The choice of pantyhose material significantly impacts the sculpture’s texture, durability, and final aesthetic. Different types of nylon, spandex, and blends influence the way the material drapes, holds shape, and ultimately interacts with the artistic vision. The varying levels of stretch and opacity in pantyhose allow for different degrees of manipulation and control in the sculptural process. This wide array of qualities contributes to the diversity and unique characteristics seen in pantyhose-based artworks.

    Artistic Movements Exploring Similar Themes

    Several artistic movements have explored themes relevant to pantyhose sculptures. Conceptual art, for example, often prioritizes the idea behind the artwork over its physical form. The use of seemingly ordinary materials like pantyhose in conceptual works emphasizes the artist’s message and perspective. Similarly, feminist art often explores themes of gender, societal expectations, and the female experience, and pantyhose sculptures can be a powerful medium for these explorations.

    Other movements, such as appropriation art, often incorporate found objects, including discarded pantyhose, further adding layers of meaning and context to the piece.

    Symbolic Meanings of Pantyhose in Art

    The use of pantyhose in art can carry various symbolic meanings. The material’s association with femininity and fashion can be a point of departure for artists exploring these ideas. The repurposing of discarded garments can be a commentary on consumerism and waste. Pantyhose, as a ubiquitous garment, can also serve as a symbol of everyday life, highlighting the mundane and the extraordinary in the artistic context.

    Further, the material’s inherent vulnerability and delicate nature might be used to reflect on the fragility and resilience of human existence.

    Comparison of Pantyhose Types for Sculpture

    Pantyhose Type Material Composition Texture Durability Cost
    Sheer Nylon Mostly nylon Delicate, smooth Low Low
    Opaque Nylon Mostly nylon Smooth, dense Medium Low
    Spandex Blend Nylon, spandex Stretchy, pliable Medium Medium
    Supportive Control Nylon, elastane Firm, smooth High Medium-High

    Different pantyhose types offer distinct characteristics, influencing the final sculpture. The choice of material dictates the sculpture’s form, longevity, and ultimately, the artist’s expression. The cost factor also plays a role in the selection process, especially for artists working with limited budgets.

    Methods and Techniques for Panty Hose Sculptures

    Pantyhose, often dismissed as mere hosiery, offer a surprising versatility. Their unique properties, from their stretchy nature to their ability to hold shape, make them an excellent medium for artistic expression. This exploration dives into the techniques used to transform simple pantyhose into intricate sculptures, exploring the tools, methods, and challenges inherent in this captivating art form.The key to successful pantyhose sculpting lies in understanding the material’s behavior.

    Pantyhose are fundamentally different from other sculpting mediums like clay or plaster. They are stretchy, prone to tearing, and require a delicate touch. Therefore, understanding the techniques and employing appropriate tools is critical to achieving the desired results.

    Shaping and Manipulating Pantyhose

    Pantyhose, unlike more rigid materials, respond best to gentle manipulation. Instead of forceful shaping, the artist should focus on carefully pulling, folding, and layering to create desired forms. Understanding the elasticity of the material is paramount. This requires patience and practice to control the shaping process without damaging the delicate fabric.

    Tools and Equipment for Pantyhose Sculpting

    The equipment needed for pantyhose sculpting is relatively straightforward but crucial for success. Essential tools include safety pins, sewing needles, pins, and scissors for precise cutting and shaping. A variety of weights, like small pebbles or beads, can be strategically placed within the pantyhose to add structure and weight to the sculpture. Additionally, clear packing tape can be employed to adhere and secure elements of the sculpture.

    The choice of tools and weights will depend on the specific sculpture being created.

    Creating a Basic Pantyhose Sculpture

    A fundamental understanding of the steps involved in constructing a basic pantyhose sculpture is essential. This process involves careful consideration of the desired form, selecting the right pantyhose, and employing proper techniques to achieve the desired shape.

    Steps in Creating a Simple Pantyhose Form

    This detailed guide Artikels the steps involved in creating a basic pantyhose form, highlighting the importance of precision and control throughout the process.

    Ever wanted to make a panty hose sculpture? It’s surprisingly fun, and you can create some pretty cool shapes. Plus, inspiration can be found in the work of artists like Lucinda Chua, someone who’s really pushing the boundaries of what’s possible with unconventional materials. Lucinda Chua somebody who definitely has some fascinating approaches to sculpture, which can translate to some creative panty hose projects.

    So, grab some old pantyhose and get sculpting!

    Step Description Materials Tools
    1 Choose a suitable pantyhose and prepare the work area. Pantyhose, scissors Scissors, measuring tape (optional)
    2 Sketch the desired form on paper or a digital platform. Paper, pencil, or digital drawing tablet Pencil, ruler, or drawing tablet
    3 Carefully cut the pantyhose to the desired shape and size. Pantyhose, scissors Scissors
    4 Begin shaping the form using your hands and weights as needed. Pantyhose, weights (optional) Hands, safety pins, or pins
    5 Use safety pins or other tools to secure the shape and add details. Pantyhose, safety pins, weights (optional) Safety pins, pins, sewing needles
    6 Add finishing touches and allow the sculpture to dry completely. Pantyhose, optional finishing touches Scissors, tweezers (optional)

    Common Challenges and Potential Solutions

    Creating pantyhose sculptures presents unique challenges. One common issue is maintaining the shape and preventing the material from stretching or tearing. Using appropriate tools and weights can significantly reduce this problem. Another potential challenge is the time required for the sculpture to dry and set. To mitigate this, use a gentle touch and allow the sculpture to dry completely before handling.

    Patience and a keen eye for detail are crucial in addressing these and other potential issues.

    Design Considerations and Inspiration

    Pantyhose sculptures offer a fascinating realm for creative expression. Beyond the practical considerations of materials and techniques, successful pantyhose art hinges on compelling design concepts. This exploration delves into the diverse world of design inspiration, exploring themes, examples, and approaches to crafting unique and captivating pantyhose creations.

    Design Concepts and Themes

    Understanding the core concepts behind pantyhose sculptures is key to developing original and compelling pieces. The sheer, translucent nature of pantyhose lends itself to a wide range of artistic interpretations. From abstract forms to narrative representations, the possibilities are almost limitless. Exploring different themes can inspire unique perspectives and lead to unexpected artistic outcomes.

    Examples of Existing Pantyhose Sculptures

    Numerous artists have successfully harnessed the unique properties of pantyhose to create striking sculptures. One notable example features a series of cascading, translucent forms evoking a waterfall or a veil of mist. Another example utilizes the material’s strength and drape to construct intricate, architectural structures, reminiscent of delicate, spiderweb-like formations. These examples showcase the potential for transforming seemingly mundane materials into visually arresting works of art.

    Themes for Pantyhose Sculptures, Make a Panty Hose Sculpture

    The thematic diversity of pantyhose sculptures is substantial. A list of potential themes for exploration includes:

    • Nature: Sculptures can represent natural phenomena like waterfalls, clouds, or plants, showcasing the versatility of the material in capturing organic forms.
    • Abstract Forms: Experimenting with geometric shapes, flowing lines, and layered textures allows for a departure from representational art, emphasizing the aesthetic qualities of the material.
    • Narrative Representations: Sculptures can tell stories or evoke emotions through specific forms, compositions, and color combinations.
    • Social Commentary: Pantyhose sculptures can be used as a medium for social commentary, reflecting on issues related to gender, society, or culture through symbolism.

    Design Approaches and Potential Outcomes

    The following table Artikels various design approaches, their corresponding inspiration, potential materials, and anticipated outcomes.

    | Design Approach | Inspiration | Materials | Potential Outcomes | |—|—|—|—| | Abstract Forms | Geometric shapes, flowing lines | Different colors of pantyhose, various textures | Intricate, visually striking sculptures with an emphasis on form and texture. | | Narrative Representations | Specific stories, emotions | Colored pantyhose, accessories like beads or fabric scraps | Sculptures that convey a particular message or evoke a specific emotional response. | | Natural Forms | Waterfalls, plants, clouds | Translucent pantyhose, possibly other fabrics for contrasting textures | Sculptures that capture the fluidity and beauty of natural forms, using the sheerness of pantyhose to convey movement and transparency. | | Social Commentary | Issues related to gender, society | Different colors of pantyhose, possibly other fabrics to represent symbols | Sculptures that act as symbolic statements, using the material’s flexibility to create powerful visual metaphors. |

    Materials and Preparation: Make A Panty Hose Sculpture

    Make a Panty Hose Sculpture

    Transforming sheer pantyhose into captivating sculptures requires meticulous preparation and the right materials. This stage is crucial, as the choice of adhesive and support structure significantly impacts the final outcome and longevity of your creation. Careful selection ensures your vision translates seamlessly into a tangible form.

    Preparing the Pantyhose

    Proper preparation of the pantyhose is fundamental to achieving a smooth, even surface for sculpting. Washing the pantyhose in a gentle cycle with a mild detergent and air-drying is essential. This removes any excess oils or manufacturing residues that might interfere with adhesive bonding. Ironing the pantyhose on a low setting can also help to smooth out any wrinkles or creases, creating a more uniform surface.

    Thorough preparation will significantly enhance the sculpting process.

    Adhesives and Fixatives

    Selecting the right adhesive is paramount for a successful pantyhose sculpture. Various options are available, each with its own set of advantages and disadvantages. The choice depends on the desired outcome, the complexity of the sculpture, and the longevity required.

    Types of Adhesives

    • Fabric Glue: Fabric glue is a versatile option for pantyhose sculptures. It offers good adhesion and is relatively easy to work with. However, it might not be ideal for intricate details or large-scale projects due to its drying time and potential for cracking.
    • Craft Adhesive: Craft adhesives are a common choice for many craft projects, and they are often readily available. Their consistency and drying time are generally well-suited for various pantyhose sculpting techniques, especially for medium-sized or small-scale sculptures.
    • Hot Glue: Hot glue offers fast bonding, making it ideal for quick assembly or fixing small components. Its strong adhesion is perfect for holding details in place, but its heat sensitivity might affect the delicate structure of pantyhose.

    Comparison of Adhesives

    Adhesive Type Pros Cons
    Fabric Glue Good adhesion, relatively easy to use Drying time, may not be suitable for large projects, potential for cracking
    Craft Adhesive Good consistency, drying time appropriate for many projects, readily available May not be as strong as other options, drying time can vary
    Hot Glue Fast bonding, strong adhesion, good for small details Heat sensitivity, potential for damage to delicate materials, not ideal for large-scale projects

    Support Structures

    A robust support structure is crucial for maintaining the shape and integrity of your pantyhose sculpture. The choice of support structure will depend on the size, complexity, and desired aesthetic of the sculpture.

    • Cardboard: Cardboard is an inexpensive and readily available material that provides excellent support for many types of pantyhose sculptures. Its rigidity allows for the creation of intricate forms and shapes.
    • Wire: Wire offers flexibility and can be molded into a variety of shapes, making it ideal for sculpting organic forms or providing support for larger sculptures. Care must be taken to ensure the wire does not damage the pantyhose material.
    • Styrofoam: Styrofoam can be carved and shaped to create lightweight yet sturdy support structures. Its ability to be easily cut and molded makes it an excellent option for complex sculptures.

    Alternative Materials

    Expanding your material palette can unlock new creative possibilities.

    • Beads: Beads can add texture and visual interest to your pantyhose sculptures. Their varying sizes and colors provide endless possibilities for creating unique designs.
    • Fabric scraps: Incorporating fabric scraps can add depth and visual appeal to your sculptures. Consider contrasting colors or patterns for a more striking effect.
    • Other embellishments: Buttons, sequins, ribbons, or other embellishments can enhance the aesthetics and add character to your pantyhose sculptures.

    Sculpting Techniques for Different Forms

    Transforming sheer pantyhose into tangible art requires a keen eye for form and a delicate touch. The possibilities are boundless, from whimsical animals to intricate floral arrangements, all achievable with a little creativity and the right techniques. This section dives deep into the methods for sculpting diverse forms, adding detail and texture, and crafting intricate designs.Sculpting with pantyhose allows for a unique exploration of form and texture.

    The sheer material’s flexibility allows for the creation of delicate details and complex shapes, while its drape lends itself well to organic forms. Understanding the properties of the fabric and employing appropriate techniques is key to achieving the desired results.

    Creating Animal Forms

    Creating animal sculptures requires a combination of shaping and careful manipulation of the pantyhose. Start with a basic form, and then gradually refine details like limbs, ears, and tails. For instance, a simple cone-shaped form can become a cat’s head by adding smaller cones for ears and shaping the base for the face. Employing various folds and gathers can create a sense of volume and depth, mimicking fur or feathers.

    Using different colored pantyhose can also add visual interest and enhance the animal’s appearance.

    Crafting Floral Designs

    Flowers offer a beautiful opportunity to showcase the drape and flow of pantyhose. Begin by creating a simple petal shape using folds and gathers. Combine these petal shapes to form the flower’s structure. Consider the arrangement of petals to create a realistic or abstract floral design. Add stems and leaves using a similar technique.

    Use different shades of pantyhose for a more natural look. Experiment with various folding and twisting techniques to achieve different textures and patterns on the petals.

    Ever wanted to make a panty hose sculpture? It’s surprisingly fun, and I’ve been inspired by the dynamic energy of the recent “moonface city wrecker ep” moonface city wrecker ep to try some new, more abstract shapes. The creativity unleashed by that video is infectious, and I’m excited to see what I can sculpt with these stretchy wonders.

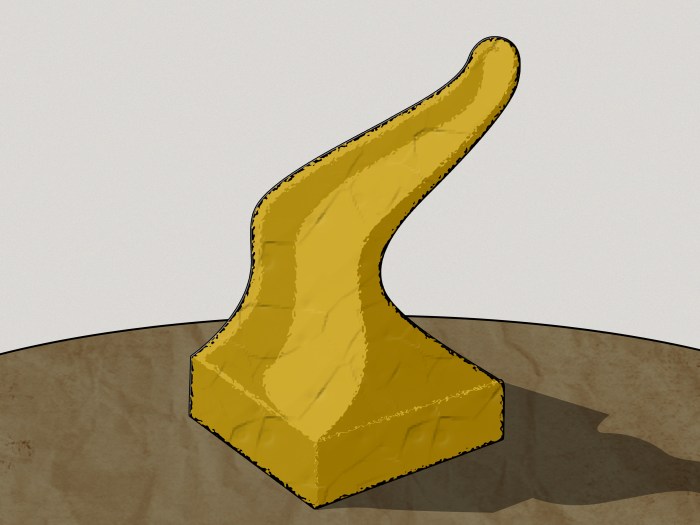
    Sculpting Abstract Forms

    Abstract sculptures provide a chance to explore non-representational forms. Experiment with different shapes, using folds, gathers, and twists to create complex and dynamic compositions. Think about how light and shadow will interact with the form. Incorporate different colors and textures to enhance the visual impact of the sculpture. Consider adding elements like beads, buttons, or other embellishments to create depth and visual interest.

    Adding Detail and Texture

    Detailing is essential to bring life and realism to pantyhose sculptures. Use various techniques like folding, gathering, and twisting to create different textures. Add embellishments like buttons, beads, or sequins to enhance the visual appeal. Careful attention to detail can elevate a simple form into a captivating work of art. Consider using different types of pantyhose for contrast and texture, for example, using a thicker pantyhose for a stem or a leaf, to add visual depth.

    Creating Intricate Patterns and Designs

    Intricate patterns and designs add visual interest and complexity to the sculpture. Using a combination of folds, gathers, and pleats, you can create a wide array of patterns. Experiment with different patterns, like stripes, swirls, or geometric shapes. Use different colored pantyhose to highlight the pattern and create visual contrast. Consider using stencils to create repeated patterns or motifs on the pantyhose.

    Table of Shaping Examples

    Object Technique Materials Notes
    Cat Folding, Gathering, Shaping Different shades of pantyhose Focus on creating distinct features like ears and tail.
    Rose Folding, Gathering, Combining petal shapes Different shades of pantyhose Create layers for a realistic rose.
    Abstract form Folding, twisting, draping Single color or multiple colors Experiment with various shapes and forms.
    Bird Combining shapes, folding, gathering Different shades of pantyhose Create a bird form by using cone shapes for the body and adding smaller shapes for the wings and tail.

    Display and Preservation

    Bringing your pantyhose sculptures to life requires careful consideration of their long-term preservation. Proper display techniques and protective measures are essential to ensure these unique creations maintain their artistry and appeal over time. The goal is to showcase your work while minimizing the risks of damage from environmental factors and handling.Preservation strategies should be tailored to the specific materials and techniques used in each sculpture.

    The environment plays a significant role, with factors like humidity, temperature, and light exposure all potentially impacting the longevity of the piece. The use of appropriate storage materials and display methods is crucial to combat these factors.

    Display Methods

    Displaying pantyhose sculptures requires a thoughtful approach that balances aesthetic appeal with protective measures. Different display methods suit various types of sculptures. For example, freestanding sculptures might be best displayed on a pedestal or a custom-made stand, ensuring they are elevated from potential damage and easily viewed. Suspended sculptures, on the other hand, may require specialized fixtures to maintain their position and avoid stress on the delicate material.

    Preservation Techniques

    Preserving pantyhose sculptures involves a multifaceted approach to minimize deterioration. A crucial aspect is the choice of storage and display environment. Maintaining stable humidity and temperature levels is paramount. Fluctuations in these conditions can lead to shrinkage, warping, and even cracking of the pantyhose material. Similarly, direct sunlight or intense artificial light should be avoided, as these can fade the colours and weaken the fibers.

    Consider using UV-filtering materials to protect the sculpture from these types of light damage.

    Materials for Storage and Display

    Careful selection of materials is essential for the proper storage and display of pantyhose sculptures. Storage containers should be made of non-reactive materials like acid-free cardboard boxes or archival-quality plastic containers. These should be well-ventilated to prevent moisture buildup. For display, consider using acid-free pedestals or stands, ensuring they are sturdy and won’t exert undue pressure on the sculpture.

    Cotton-based fabrics or soft, non-abrasive materials are ideal for handling or supporting the sculptures. Additionally, acid-free tissue paper or archival-quality mats are excellent for protecting the sculptures from dust and scratches.

    Potential Risks and Prevention

    Several factors can negatively impact the longevity of pantyhose sculptures. Exposure to excessive humidity can cause the pantyhose to become brittle and prone to tears. Conversely, low humidity can result in shrinkage and cracking. Temperature fluctuations also contribute to material degradation. Sunlight and strong artificial light sources can cause fading and discoloration.

    Proper environmental control and protective measures are key to preventing these issues.

    Protective Casing Design

    Creating a protective casing for a sculpture requires careful consideration of its design and structural integrity. For example, a simple protective cover, like a clear plastic box with breathable sides, can help regulate humidity and protect against dust and scratches. A more elaborate casing might involve a custom-made frame constructed from non-reactive materials, with a protective layer of archival-quality fabric or clear plastic for optimal protection.

    Closing Notes

    Make a Panty Hose Sculpture

    In conclusion, creating pantyhose sculptures is a journey of creativity and innovation. By understanding the materials, techniques, and design principles, you can craft unique and meaningful works of art. This guide provides a comprehensive overview, equipping you with the knowledge to embark on your own artistic adventure with pantyhose. From simple forms to elaborate creations, the possibilities are endless! Now go forth and sculpt!

  • Make a Plaster Mask A Guide

    Make a Plaster Mask A Guide

    Make a Plaster Mask: Dive into the fascinating world of plaster artistry! From ancient medical applications to modern artistic expression, this guide walks you through the process of crafting your own unique plaster mask. We’ll explore different types of masks, the essential materials and tools, the molding process, and the final finishing touches. Prepare to unleash your creativity and learn the secrets behind bringing a vision to life.

    This detailed guide provides a comprehensive overview of the steps involved in making a plaster mask, covering everything from initial preparation to final finishing. It includes essential information about materials, tools, safety precautions, and troubleshooting common issues. We’ll provide clear explanations, helpful tables, and practical advice to ensure you have a smooth and successful experience.

    Introduction to Plaster Masks

    Make a Plaster Mask

    Plaster masks are molded representations of the human face or other forms, created using a plaster-based material. These casts offer a tangible record of a subject’s appearance, playing crucial roles in various fields, from medical diagnostics to artistic expression. They provide a detailed, lasting impression, offering insights into both the physical and, in some cases, cultural context of the subject.These molds can be used to capture anatomical details, study facial features, or serve as inspiration for artistic creations.

    Making a plaster mask can be surprisingly satisfying, but sometimes things get a little… tricky. Just like when things go wrong with Marta, as seen in marta tricky when its going wrong , a little patience and a good understanding of the process can turn a potential disaster into a delightful DIY project. Luckily, making a plaster mask isn’t too difficult, and the results are always pretty cool.

    Their history is deeply intertwined with the development of artistic and scientific techniques, offering a unique lens through which to understand human history and artistic trends. The materials used, and the methods employed in their creation, vary depending on the specific purpose of the mask.

    Types of Plaster Masks

    Plaster masks are categorized into various types, each with a distinct purpose. Understanding these distinctions helps appreciate the diverse applications of this ancient technique.

    Medical Plaster Masks

    Medical plaster masks serve a vital role in diagnostics and treatment. They are frequently used in dentistry to record dental impressions and in orthopedics to create models of injuries or deformities. Surgical planning often involves the creation of plaster models to allow for precise visualizations of anatomical structures and potential interventions. These models can also aid in the understanding of facial bone structures, aiding in surgical procedures.

    Artistic Plaster Masks

    Artistic plaster masks hold a rich history in sculpting and art. Artists utilize them as a method for capturing the essence of a subject or as a foundation for further creative endeavors. These masks can be detailed replicas of faces or highly stylized interpretations. Famous artists throughout history have used plaster casts to study human anatomy and to inspire their artistic creations.

    They provide a tangible record of artistic inspiration, serving as both a study tool and a source of creative expression.

    Historical Context

    The creation of plaster masks has a rich history, stretching back to ancient civilizations. Early examples highlight the significance of preserving appearances and understanding the human form. As scientific and artistic techniques evolved, plaster masks became increasingly sophisticated and precise. Their application expanded, evolving alongside artistic movements and medical advancements. The development of plaster of Paris, a readily available and versatile material, further contributed to the widespread use of plaster masks.

    Making a plaster mask is a relaxing, creative process, but sometimes I crave a little more heat in my life. That’s where a cast iron skillet comes in handy! Learning to cook in one, like in this helpful guide on Cook in a Cast Iron Skillet , can bring a whole new dimension to your meals. Afterwards, though, nothing beats the soothing feeling of a homemade plaster mask, ready to rejuvenate your skin.

    Materials Used

    Plaster masks are primarily crafted using plaster of Paris, a fine gypsum powder that hardens when mixed with water. This material offers a relatively quick setting time and is relatively inexpensive, making it an accessible choice for various applications. Other materials, such as molds and reinforcing agents, might be included depending on the specific requirements of the mask.

    The precise formulation and composition of the plaster mixture can influence the strength, durability, and overall quality of the finished product.

    Comparison of Plaster Mask Types

    Type Purpose Materials Application
    Medical Diagnostic and treatment planning, dental impressions, orthopedics. Plaster of Paris, reinforcing agents, potentially dental impression materials. Surgical planning, dental record keeping, studying anatomical features.
    Artistic Capturing the essence of a subject, inspiration for sculpting, artistic expression. Plaster of Paris, molding materials, supporting structures. Creating detailed replicas, stylized interpretations, artistic study models.

    Materials and Tools: Make A Plaster Mask

    Creating a plaster mask requires careful selection and preparation of materials and tools. A well-executed process relies on the correct materials and tools, ensuring a successful and safe outcome. Understanding the function of each component is critical to achieving a high-quality mask. This section details the essential elements and their roles in the mask-making process.

    Required Materials

    The primary materials needed for a plaster mask are plaster of Paris, water, and a mold. The mold can be created from various materials, depending on the desired outcome and the complexity of the subject. The choice of mold material will affect the mask’s final texture and durability. Plaster of Paris, a versatile and readily available material, is ideal for its ability to create strong, detailed casts.

    Water is the crucial liquid for mixing with the plaster, determining the consistency and setting time of the final product.

    Essential Tools

    A range of tools will assist in the process of creating and handling the plaster mask. These tools are essential for mixing, pouring, and shaping the plaster. Essential tools include measuring cups and spoons for precise material proportions, a mixing bowl, and a palette knife for distributing and shaping the plaster mixture. Other tools like spatulas, brushes, and a sturdy work surface are beneficial for manipulating the wet plaster and ensuring a clean working environment.

    Safety Precautions

    Working with plaster of Paris and water necessitates safety precautions to prevent potential hazards. Wear protective gloves to prevent skin irritation or allergic reactions. Ensure adequate ventilation in the workspace to avoid inhaling dust particles. Use eye protection to shield your eyes from splashes of plaster or water. Keep the workspace clean and organized to avoid accidents.

    Avoid wearing loose clothing or jewelry that could get entangled with tools or materials.

    Material Preparation

    Proper preparation of the materials is crucial for a successful plaster mask. For instance, measuring the water and plaster of Paris precisely according to the recipe is essential for achieving the desired consistency. This ensures the plaster sets at the correct rate, avoiding over- or under-mixing. Ensure the workspace is clean and dry to prevent the plaster from sticking or clumping.

    Material and Tool Table

    Material Function Quantity Preparation
    Plaster of Paris Forms the cast of the mask. As per the recipe/mold size. Ensure it is dry and free of impurities. Store in an airtight container.
    Water Acts as a binding agent, determining the consistency and setting time of the plaster. As per the recipe/mold size. Use room temperature water. Avoid using cold or hot water.
    Mold Provides the shape for the plaster to follow. One per subject. Ensure the mold is clean and dry.
    Measuring cups/spoons Precisely measures the materials. As needed. Clean and dry before use.
    Mixing bowl Mixes plaster and water. One. Clean and dry before use.
    Palette knife Distributes and shapes the plaster. One. Clean before use.

    Creating the Mold

    Make a Plaster Mask

    Crafting a plaster mask begins with meticulously creating a mold. This mold serves as a negative imprint of the subject or model, ensuring an accurate replica when the plaster is poured. A precise and well-executed mold is fundamental to achieving a high-quality mask. The process requires careful attention to detail and an understanding of the various factors that influence mold quality.

    Molding Methods

    Different methods exist for creating molds, each with its own advantages and applications. The choice of method depends on the nature of the subject and the desired outcome.

    • Using a Clay Model: This method is ideal for creating custom designs or masks that require intricate details. A clay model, meticulously sculpted to the desired form, serves as the template for the mold. The clay model should be robust enough to withstand the pressure of the plaster. It must be structurally sound to prevent breakage during the molding process.

    • Using a Live Subject: This method involves creating a mold directly from a person. It’s vital to use appropriate techniques to ensure the mold accurately captures the subject’s features without causing discomfort or injury. Safety precautions and communication with the subject are paramount during this process. A skilled artisan is essential for this technique.

    Step-by-Step Mold Creation (Clay Model)

    Creating a mold from a clay model involves several key steps, each crucial for a successful outcome. Precise measurements are vital to ensure accuracy.

    Step Description Image Description Notes
    1 Prepare the clay model. Ensure the model is smooth and free of imperfections. This ensures a clean mold impression. A meticulously sculpted clay model, exhibiting a smooth surface, is shown. Any visible seams or crevices are absent, emphasizing a polished finish. Thoroughly inspect the clay model for irregularities.
    2 Apply a release agent to the clay model. This will prevent the plaster from adhering to the clay and allow for easy removal of the mold. The clay model is coated with a thin layer of a release agent, evenly distributed across its surface. A proper amount of release agent is crucial to avoid sticking.
    3 Carefully apply a thin layer of mold material (e.g., Vaseline or similar) to the model. This will help prevent sticking and maintain the surface detail. The mold material is evenly spread on the clay model, creating a uniform layer that covers the entire surface without gaps. Ensure an even layer is crucial to prevent air pockets.
    4 Pour the plaster into the prepared mold cavity. Pour slowly and evenly to avoid air bubbles. Plaster is being poured into the mold cavity in a controlled manner, ensuring a smooth flow and avoiding air pockets. Control the flow of plaster.
    5 Allow the plaster to set completely. This ensures the mold is strong enough to withstand the next steps. The hardened plaster mold is shown, presenting a firm and solid structure. Follow the manufacturer’s instructions for the curing time of the plaster.
    6 Carefully remove the clay model from the set plaster mold. This will reveal the negative mold impression. The clay model is gently removed from the hardened plaster mold, leaving a precise negative imprint of the model. Be gentle to avoid damaging the mold.

    Factors Affecting Mold Quality

    Several factors influence the quality of the mold. These include the type of mold material used, the preparation of the subject or model, and the technique employed during the molding process.

    Pouring the Plaster

    Pouring the plaster into the mold is a critical step, as it determines the final shape and quality of the mask. Careful attention to technique and environmental factors ensures a successful outcome. A smooth, even application of the plaster minimizes the chance of air bubbles and ensures a polished surface.Pouring plaster involves a methodical approach. The consistency of the plaster mixture is crucial; it should be thick enough to maintain its shape, yet fluid enough to flow easily into all parts of the mold.

    Too thick a mixture will result in a lumpy mask, while too thin a mixture may lead to unevenness and pooling.

    Pouring Technique

    The pouring technique directly impacts the quality of the finished mask. Pour the plaster slowly and steadily, avoiding sudden movements that can introduce air bubbles. Use a gentle pouring motion, allowing the plaster to flow evenly into all parts of the mold. A slight tilting motion of the mold can help ensure even distribution. Avoid splashing, as it can create uneven surfaces and introduce imperfections.

    Variables Affecting Setting Time

    Several factors influence the setting time of the plaster. The temperature of the plaster and the surrounding environment significantly impact the setting time. Warmer temperatures generally accelerate the setting process, while cooler temperatures slow it down. The type of plaster used, its water content, and the presence of additives can also affect the setting time. For example, some plaster types contain accelerators that speed up the setting process, while others have retarders that slow it down.

    Achieving a Smooth Surface

    A smooth surface is desirable for aesthetic appeal and preservation of detail. To achieve a smooth surface, ensure that the plaster is mixed evenly. Proper pouring techniques, as described above, are also crucial. Use a small trowel or a spatula to gently smooth the surface of the plaster immediately after pouring. This helps to remove any air bubbles and creates a smoother finish.

    If you encounter significant air pockets after pouring, carefully tap the mold to release trapped air.

    Ventilation

    Proper ventilation is essential during the plaster setting process. Plaster dust can be harmful to your respiratory system, so ensure adequate ventilation in the area where you are working. This is particularly important in enclosed spaces. Open a window or use a fan to circulate air.

    Steps in Pouring Plaster, Make a Plaster Mask

    Step Action Time Considerations
    1 Prepare the mold by ensuring it is clean and dry. 5-10 minutes A clean mold prevents contamination and ensures proper plaster adhesion.
    2 Mix the plaster according to the manufacturer’s instructions. 5-7 minutes Following the instructions ensures a proper consistency for pouring.
    3 Pour the plaster slowly and steadily into the mold. Variable, depending on the size of the mold. Avoid splashing and maintain a consistent pouring motion.
    4 Smooth the surface of the plaster using a small trowel or spatula. Variable, depending on the surface area. Remove air bubbles and achieve a smoother finish.
    5 Allow the plaster to set according to the manufacturer’s instructions. Variable, depending on the type of plaster and environmental conditions. Avoid disturbing the plaster during the setting time.

    Finishing the Mask

    Bringing your plaster mask from a mold to a finished piece of art involves several crucial steps. Careful removal, meticulous cleaning, and thoughtful embellishment are essential for a high-quality final product. The process is satisfying and rewarding, allowing you to transform a raw material into a unique and personalized creation.The final stage of plaster mask creation focuses on the meticulous steps involved in preparing the finished mask for display or use.

    Making a plaster mask can be a relaxing DIY project, but sometimes life throws curveballs. If you’re dealing with a legal issue, like needing to file a motion for default judgment, File a Motion for Default Judgment might be just the thing to get you back on track. No matter the situation, a soothing plaster mask can be a great way to unwind after tackling those legal hurdles.

    It’s a simple way to treat yourself, especially after a long day.

    From carefully extracting the mask from its mold to applying the finishing touches, each stage plays a vital role in achieving a beautiful and well-preserved piece.

    Removing the Mask from the Mold

    Proper removal of the mask from its mold is crucial to prevent damage to the delicate plaster. Gently tapping the mold’s edges and carefully prying it open can help avoid cracking the mask. The removal process should be performed with care and precision to prevent any unnecessary breakage or warping.

    Cleaning and Smoothing the Mask

    Thorough cleaning and smoothing are vital for achieving a pristine and professional finish. Begin by using a damp cloth to remove any excess plaster dust or debris. Subsequently, employ fine-grit sandpaper to gently smooth out any rough edges or imperfections. This process ensures a uniform and polished surface.

    Painting or Decorating the Mask

    The final step often involves adding a personal touch through painting or decoration. Plaster masks can be painted using acrylics, watercolors, or other suitable paints, depending on the desired aesthetic. For decorative elements, consider incorporating beads, sequins, or other embellishments to enhance the mask’s visual appeal. This personalization step allows for endless creativity and unique designs.

    Finishing Steps Summary

    Step Action Materials Tools
    1 Gently remove the mask from the mold. Plaster mask, mold Hands, soft pry tool
    2 Clean the mask with a damp cloth. Damp cloth Cloth
    3 Smooth any rough edges with fine-grit sandpaper. Fine-grit sandpaper Sandpaper block
    4 Paint or decorate the mask (optional). Acrylic paints, watercolors, embellishments Paintbrushes, glue, tweezers

    Troubleshooting Plaster Mask Making

    Creating a plaster mask is a rewarding process, but occasional issues can arise. Understanding common problems and their solutions is crucial for a successful outcome. Careful attention to detail and a methodical approach will significantly reduce the chances of encountering these difficulties.

    Common Plaster Mask Problems and Solutions

    Troubleshooting plaster mask issues often stems from a lack of precision in the molding and casting process. Consistent adherence to techniques is key to avoiding these common problems.

    Problem Cause Solution
    Cracks in the Plaster Mask Insufficient support or drying time, improper mixing ratio, uneven plaster application, or excessive pressure during the molding process. Ensure the mold is adequately supported. Allow for sufficient drying time. Maintain a consistent mixing ratio as per instructions. Apply plaster evenly to avoid pressure points. Use appropriate pressure during the molding process. If possible, use a mold release agent to avoid sticking.
    Air Bubbles in the Plaster Mask Air trapped during the mixing or pouring process. Too rapid pouring can also lead to air pockets. Ensure thorough mixing of the plaster, incorporating as much air as possible. Pour the plaster slowly and evenly, using gentle, controlled movements. Use a vibration tool (if available) to minimize air bubbles.
    Uneven Texture in the Plaster Mask Uneven application of plaster, variations in plaster consistency, or inconsistencies in the mold. Apply plaster evenly and smoothly. Maintain a consistent plaster consistency by carefully following the mixing ratio. Ensure the mold is smooth and free of imperfections. Use a spatula to smooth the surface of the plaster while it is still wet.
    Mold Distortion or Breakage Excessive pressure during the molding process, use of a weak or improperly prepared mold material, or insufficient support. Reduce pressure during the molding process. Use a strong and properly prepared mold material, following the recommended guidelines. Ensure the mold has adequate support.
    Incomplete Plaster Coverage Insufficient plaster applied to the mold, or improper pouring technique. Ensure the mold is completely covered with plaster. Apply plaster in multiple thin layers, allowing each layer to dry completely before adding the next. Pour the plaster slowly and evenly to ensure thorough coverage.

    Preventative Measures for Successful Plaster Masks

    Following these preventive measures will greatly increase the likelihood of a successful plaster mask.

    • Accurate Measurements: Precisely following the plaster mixing ratio is critical. Variations in the ratio can lead to inconsistencies in the plaster’s properties, increasing the risk of cracks, air bubbles, or uneven texture.
    • Thorough Mixing: Ensure the plaster is thoroughly mixed to eliminate any lumps or uneven distributions. Incomplete mixing can lead to uneven texture and air pockets.
    • Proper Mold Preparation: A well-prepared mold is essential for a successful cast. Ensure the mold is smooth, clean, and adequately supported to avoid distortion or breakage.
    • Controlled Pouring: Pouring plaster slowly and steadily minimizes air entrapment. Rapid pouring can introduce air bubbles that affect the final product’s quality.
    • Appropriate Drying Time: Allowing the plaster to dry completely is vital for achieving a strong and durable mask. Rushing the drying process can lead to cracks and weaken the mask.

    Last Recap

    In conclusion, crafting a plaster mask is a rewarding experience that combines artistry and practical knowledge. By following this comprehensive guide, you’ll be equipped with the knowledge and skills to create a stunning plaster mask. Remember to prioritize safety, precision, and patience throughout the process. From initial molding to final finishing, this guide empowers you to bring your artistic vision to life.

    Happy crafting!